Frelander 2. Manual — part 65
19. NOTE: The inner bearing track will remain on the
drive flange.
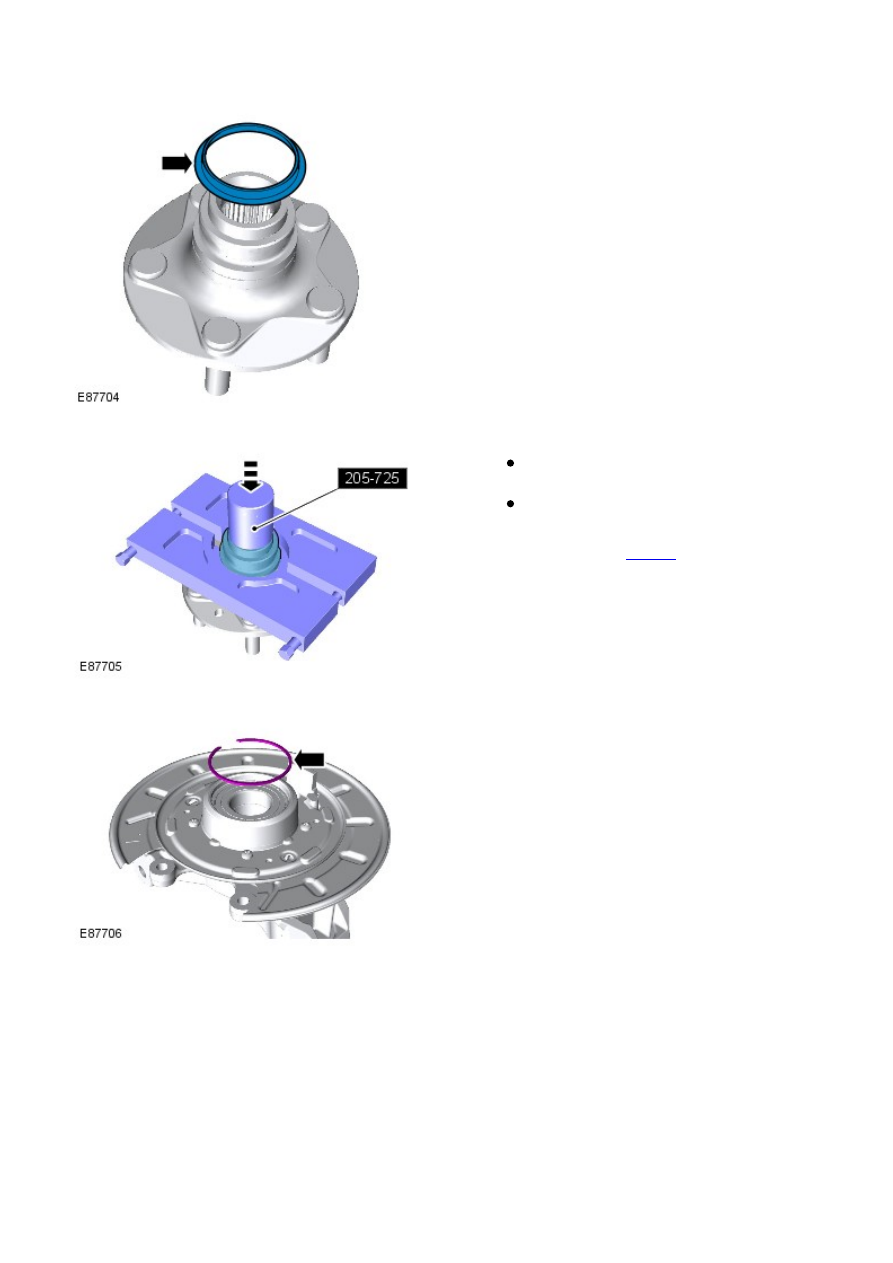
19.
Clamp both halves of a suitable bearing
separator around the inner bearing track and
position the drive flange in a press.
Using the special tool, press the drive flange
from the inner bearing track.
Special Tool(s):
205-725
20.
Remove the circlip from the wheel knuckle assembly.
21.
Position the wheel knuckle assembly in a press
and support on special tools.
Special Tool(s):
205-728
Press the wheel bearing out of the wheel
knuckle assembly using special tool.
Special Tool(s):
205-726
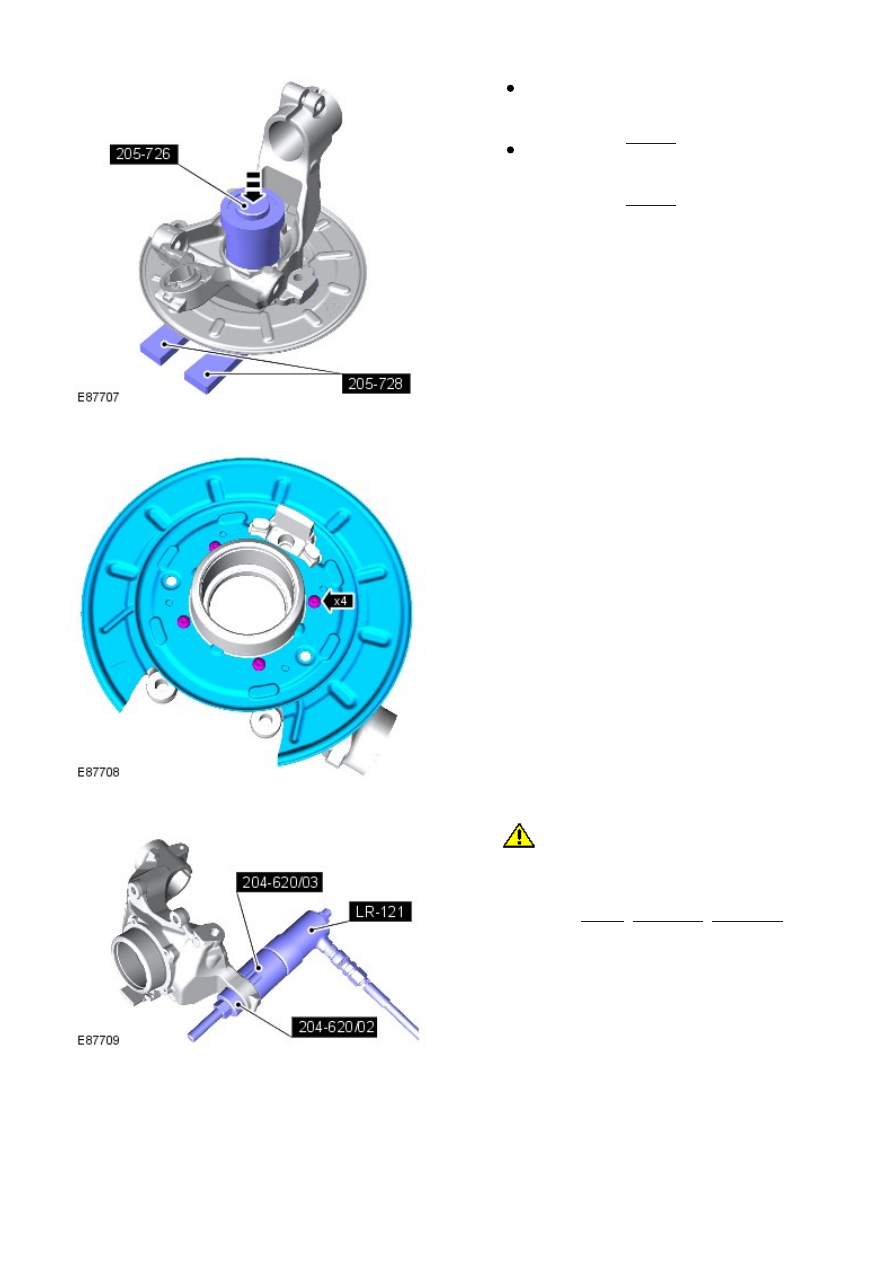
22.
Remove the brake backing plate.
23.
24.
CAUTION: Mark the components to aid
installation.
Remove the wheel knuckle bushing.
Special Tool(s):
LR-121
,
204-620-02
,
204-620-03
24.
Installation
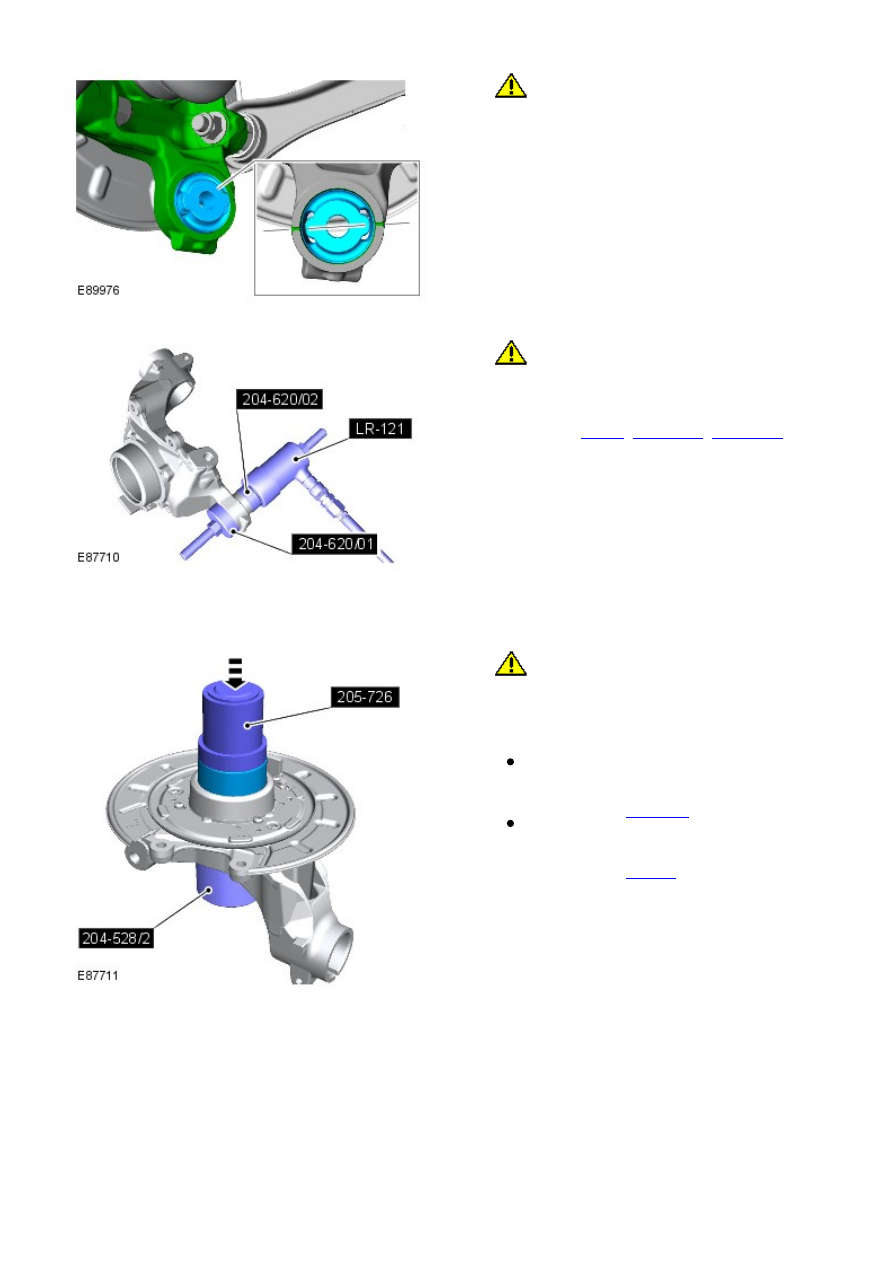
1.
CAUTION: Make sure that the installation
marks are aligned.
1.
2.
CAUTION: Make sure the correct special tool is
used to install the bushings to the correct depth.
Install the wheel knuckle bushing.
Special Tool(s):
LR-121
,
204-620-01
,
204-620-02
2.
Install the brake backing plate.
3.
4.
CAUTION: One side of the bearing is magnetic.
The magnetic side is identifiable by the application of a
matt black finish. The magnetic side must face towards
the inboard side of the vehicle. Before fitting the
bearing, make sure the magnetic face is clean. The
bearing must be handled with extreme care.
Position the wheel knuckle assembly in a press
and support on special tool.
Special Tool(s):
204-528/2
Press the new wheel bearing into the wheel
knuckle assembly using special tool.
Special Tool(s):
205-726
4.
Install the circlip to the wheel knuckle assembly.
5.

Position the wheel knuckle assembly in a press
and support on special tool.
Special Tool(s):
205-726
Press the drive flange into the wheel knuckle
assembly using special tool.
Special Tool(s):
205-725
6.
7.
WARNING: Do not use compressed air to clean brake
components. Dust from friction materials can be harmful if inhaled.
Clean the backing plate and apply grease to the brake shoe
contacts.
7.
Clean the adjuster and set it to its minimum extension.
8.
Install the secondary brake shoe.
Install the hold-down spring and retaining pin.
9.
10.
WARNING: Make sure the return spring and the adjuster
spring are correctly installed to the primary shoe.
CAUTION: Make sure the brake shoe spring is not over
stretched.
Install the spreader plate and the spring.
Install the primary brake shoe.
Install the return spring.
Install the hold-down spring and retaining pin.
10.
11.
CAUTION: Make sure the brake shoe spring is not over
stretched.
Install the brake shoe adjuster.
11.
W ith assistance, install the wheel knuckle assembly.
Special Tool(s):
204-159
12.
Install a new wheel knuckle clamping bolt.
Torque: 110 Nm
13.
Install the rear halfshaft to the drive flange.
14.
15.
CAUTION: Only tighten the nut finger tight at this stage.
15.
Нет комментариевНе стесняйтесь поделиться с нами вашим ценным мнением.
Текст