Discovery 2. Manual — part 600
STEERING
REPAIRS
57-49
Ball joint - drag link
$% 57.55.15
Remove
1. Raise front of vehicle.
WARNING: Do not work on or under a
vehicle supported only by a jack. Always
support the vehicle on safety stands.
2. RHD models: Remove LH front road wheel.
3. LHD models: Remove RH front road wheel.
4. Remove nut securing drag link to steering
knuckle.
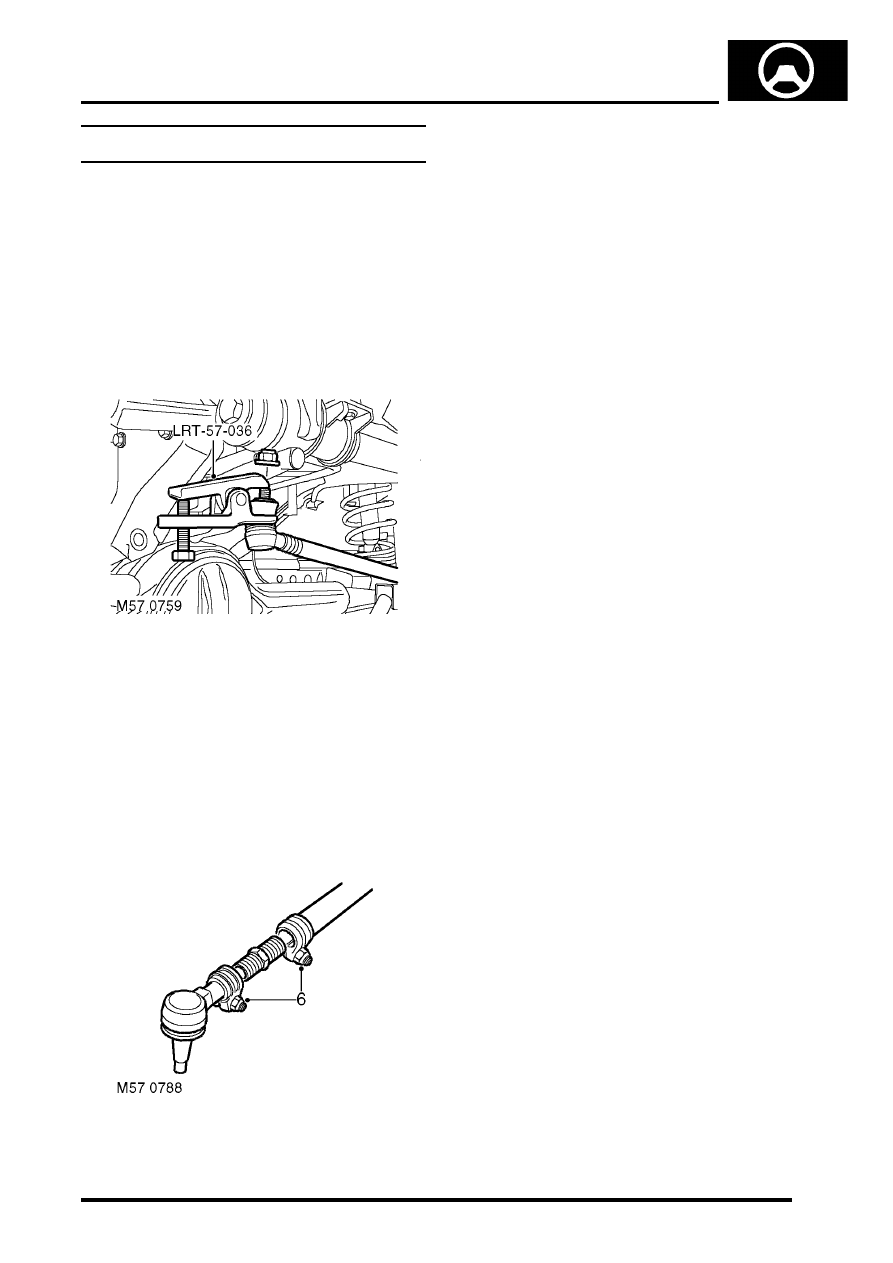
5. Using LRT-57-036, break taper joint and
release drag link.
CAUTION: Before disconnecting any part of
the steering linkage, ensure the road wheels
are positioned straight ahead and the
steering wheel is prevented from turning.
Unrestricted turning of the steering wheel
will damage the SRS rotary coupler.
6. Loosen adjuster clamp bolts and unscrew ball
joint and adjuster.
7. Remove clamps from adjuster and drag link.
Refit
1. Clean adjuster, clamps and drag link.
2. Fit clamps to drag link and adjuster. Screw in
adjuster and ball joint.
3. Clean ball joint taper and taper seat.
4. Adjust length of drag link so that ball joint taper
is centralised in steering knuckle.
5. Fit drag link to steering knuckle and tighten nut
to 80 Nm (59 lbf.ft).
6. Tighten drag link adjuster clamp bolts. Tighten
M8 bolts to 22 Nm (16 lbf.ft) and M10 bolts to
33 Nm (24 lbf.ft).
7. Check steering linkage is centralised.
Steering linkage - centralise.
8. Fit road wheel and tighten nuts to 140 Nm (103
lbf.ft).
9. Remove stand(s) and lower vehicle.
STEERING
57-50
REPAIRS
Drag link
$% 57.55.17
Remove
1. Raise front of vehicle.
WARNING: Do not work on or under a
vehicle supported only by a jack. Always
support the vehicle on safety stands.
2. RHD vehicles: Remove the LH front road
wheel.
3. LHD vehicles: Remove the RH front road
wheel.
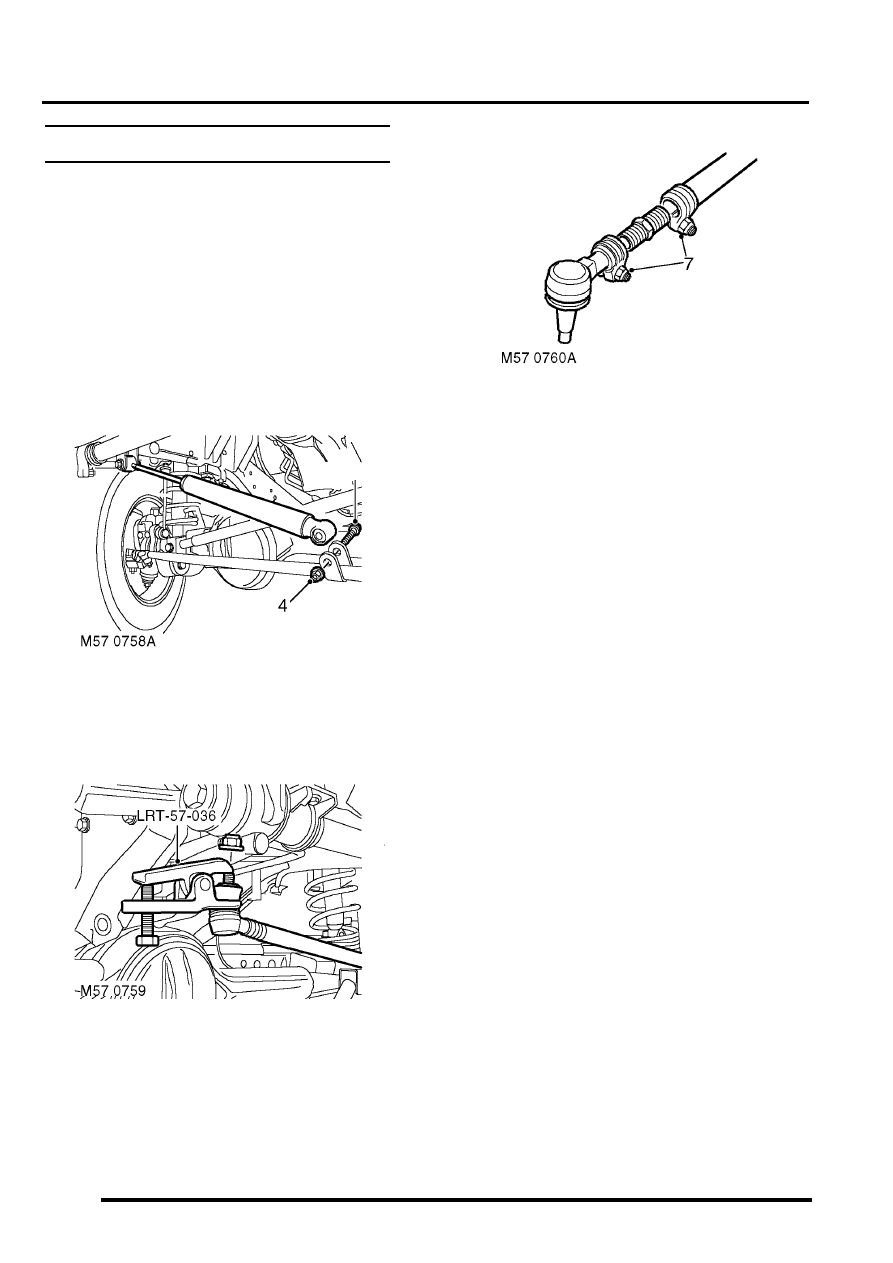
4. Remove nut and bolt securing damper to drag
link and release damper.
5. Remove 2 nuts securing drag link to drop arm
and steering knuckle.
6. Using LRT-57-036 break taper joints and
remove drag link.
CAUTION: Before disconnecting any part of
the steering linkage, ensure the road wheels
are positioned straight ahead and the
steering wheel is prevented from turning.
Unrestricted turning of the steering wheel
will damage the SRS rotary coupler.
7. Loosen adjuster clamp bolts and remove ball
joint and adjuster.
8. Remove clamps from adjuster and drag link.
Refit
1. Clean adjuster, clamps and ball joint.
2. Fit clamps to drag link and adjuster. Screw in
adjuster and ball joint.
3. Clean ball joint tapers and taper seats.
4. Fit drag link to drop arm and tighten nut to 80
Nm (59 lbf.ft).
5. Adjust length of drag link so that ball joint taper
is centralised in steering knuckle.
6. Fit drag link to steering knuckle and tighten nut
to 80 Nm (59 lbf.ft).
7. Tighten drag link adjuster clamp bolts. Tighten
M8 bolts to 22 Nm (16 lbf.ft) and M10 bolts to
33 Nm (24 lbf.ft)
8. Align damper to drag link, fit nut and bolt and
tighten to 125 Nm (92 lbf.ft).
9. Check steering linkage is centralised.
Steering linkage - centralise.
10. Fit road wheel and tighten nuts to 140 Nm (103
lbf.ft).
11. Remove stand(s) and lower vehicle.
STEERING
REPAIRS
57-51
Damper - steering
$% 57.55.21
Remove
1. Raise front of vehicle.
WARNING: Do not work on or under a
vehicle supported only by a jack. Always
support the vehicle on safety stands.
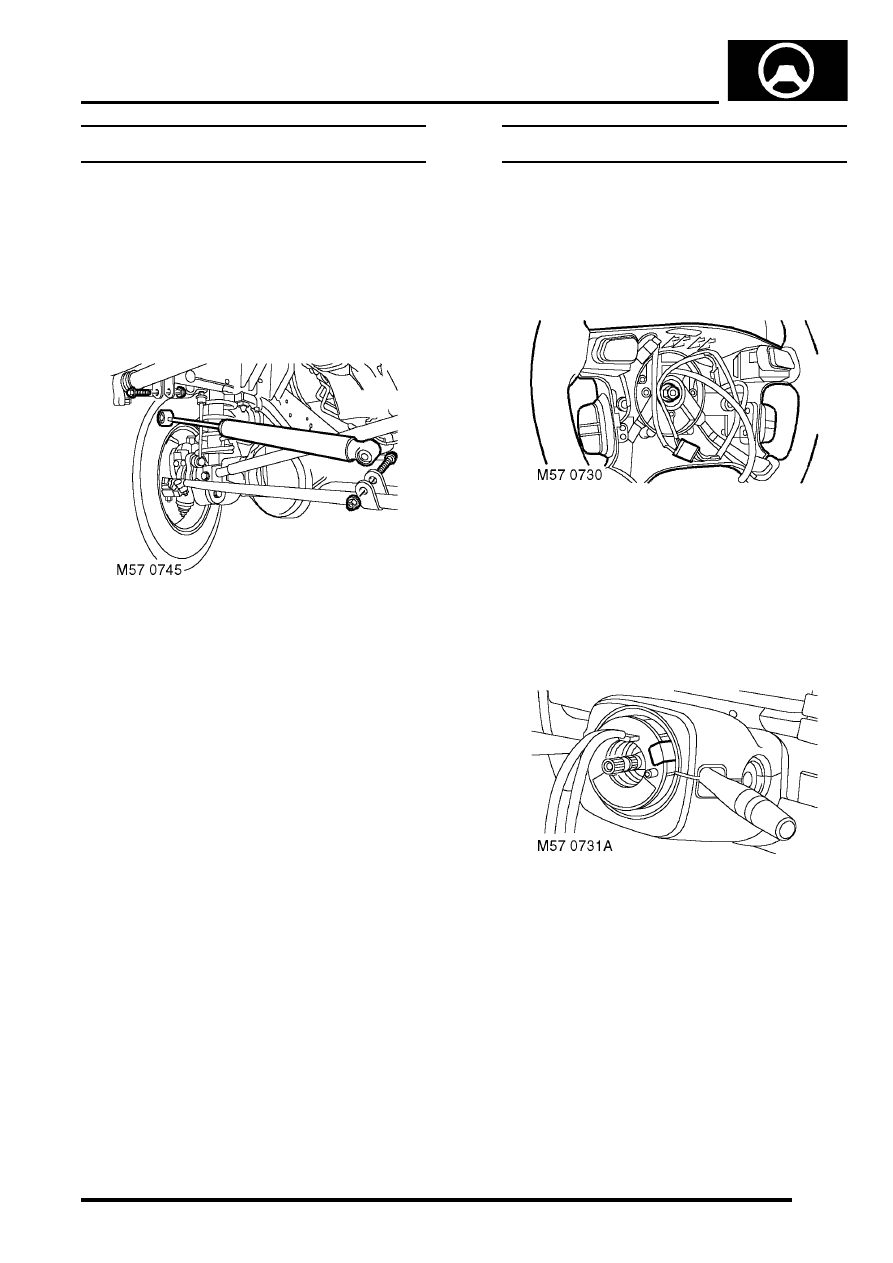
2. Remove 2 nuts and bolts securing steering
damper to drag link and chassis.
3. Compress damper and remove from vehicle.
Refit
1. Position damper to chassis and drag link. Fit
nuts and bolts and tighten to 125 Nm (92 lbf.ft).
2. Remove stand(s) and lower vehicle.
Steering wheel
$% 57.60.01.30
Remove
1. Remove drivers airbag.
2. Disconnect horn multiplug.
3. Centralise steering wheel with road wheels in
straight ahead position.
4. Restrain steering wheel and loosen self locking
nut securing steering wheel to column.
5. Release steering wheel from column.
6. Remove and discard self locking nut.
7. Remove steering wheel.
8. Attach tape across edge of rotary coupler to
retain correct setting.
STEERING
57-52
REPAIRS
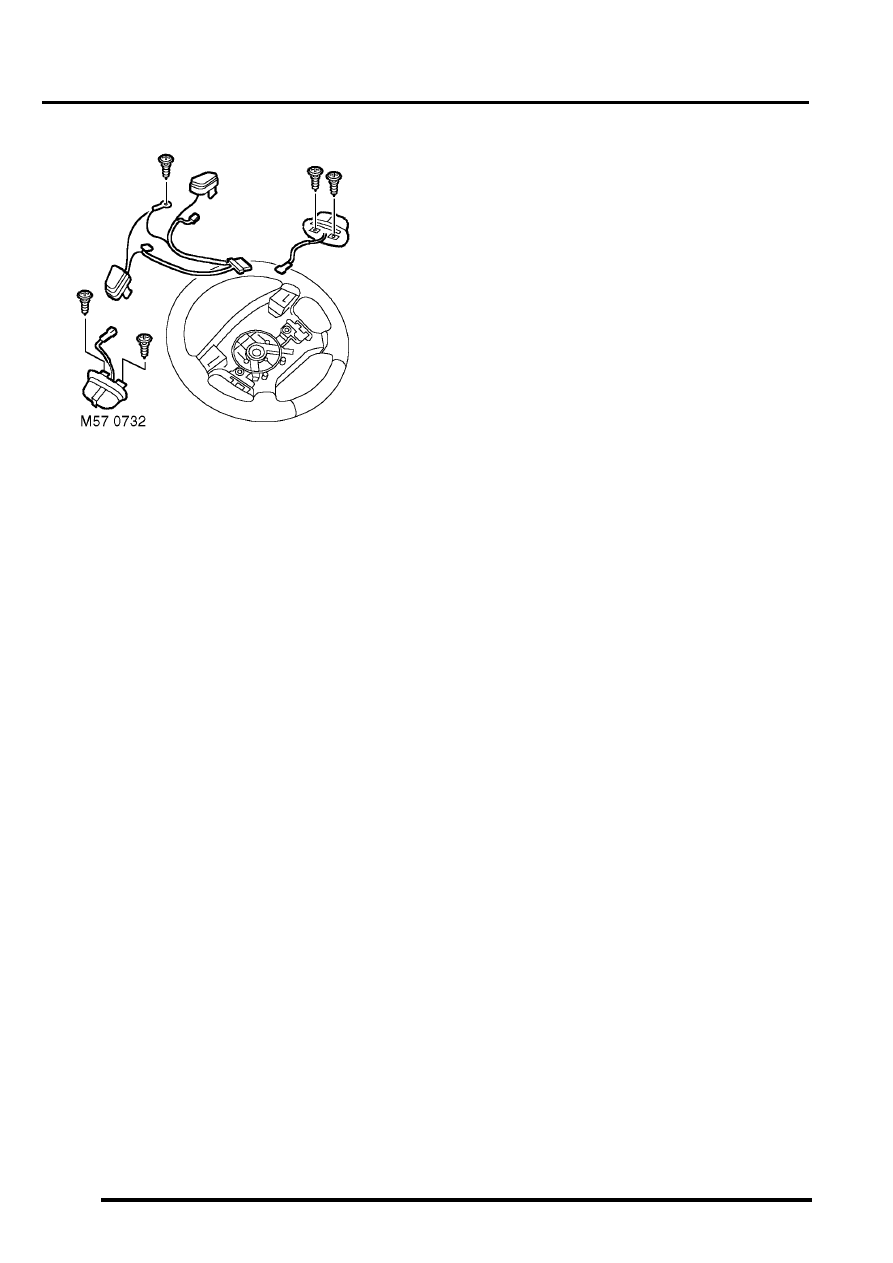
9. Release 2 clips securing each horn button to
steering wheel.
10. Remove screw securing horn earth lead to
steering wheel.
11. Disconnect radio and cruise control multiplugs.
12. Remove 2 screws securing radio switches to
steering wheel.
13. Remove radio switches from steering wheel.
14. Remove 2 screws securing cruise control
switches to steering wheel.
15. Remove cruise control switches from steering
wheel.
16. Remove horns from steering wheel.
Refit
1. Fit horn switches to steering wheel and secure
with clips.
2. Fit and tighten screw securing horn earth lead
to steering wheel.
3. Fit cruise control switches to steering wheel
and secure with screws.
4. Fit radio switches to steering wheel and secure
with screws.
5. Connect radio and cruise control multiplugs.
6. Remove tape from rotary coupler.
7. Ensure road wheels are in straight ahead
position and indicator cancelling cam are
aligned horizontally.
8. Fit steering wheel to column.
9. Connect horn multiplug.
10. Fit and tighten new self locking nut securing
steering wheel to column to 43 Nm (32 lbf.ft).
11. Fit drivers airbag.
Нет комментариевНе стесняйтесь поделиться с нами вашим ценным мнением.
Текст