Discovery 2. Manual — part 648
DOORS
REPAIRS
76-1-5
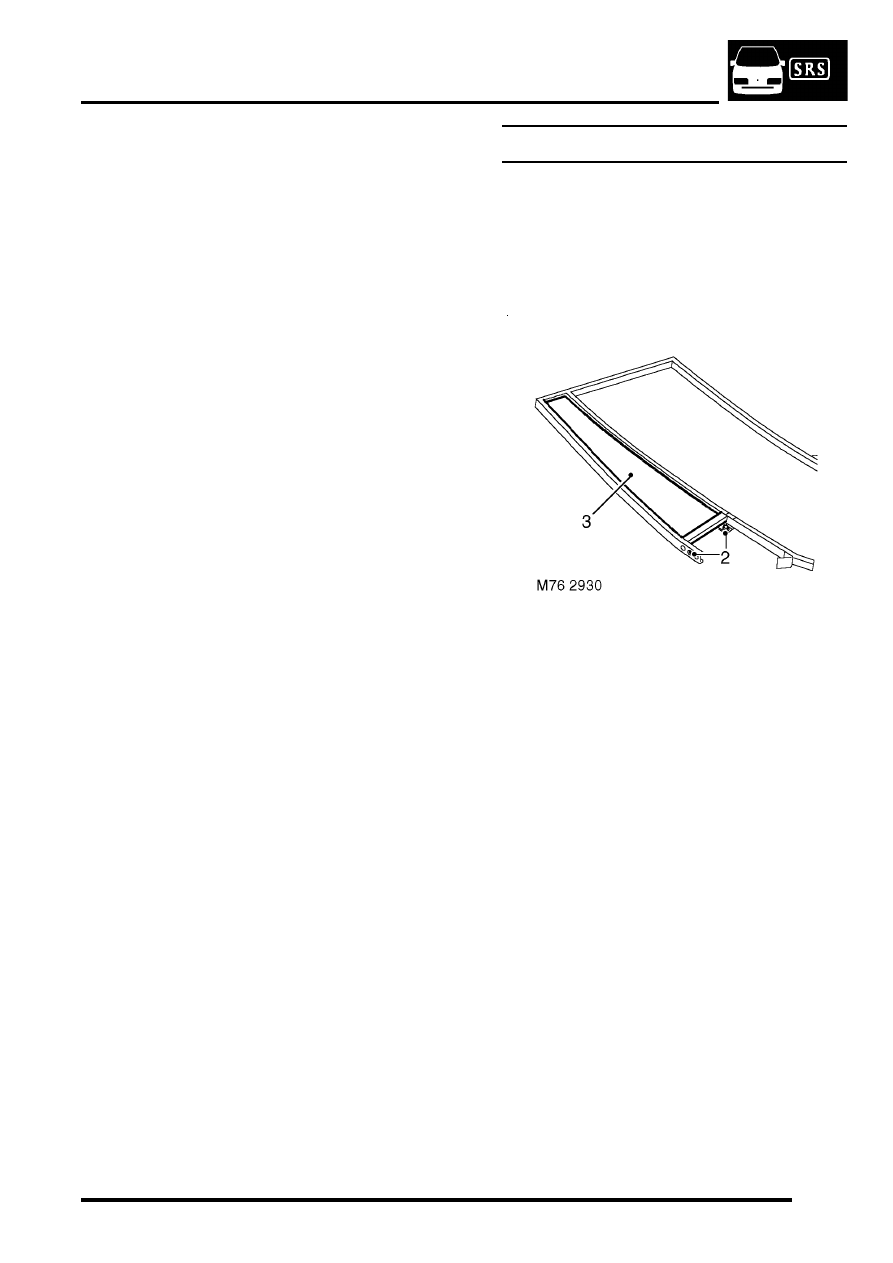
Refit
1. Fit glass to frame.
2. Position frame to door and tighten bolts
securing front door frame to 10 Nm (7 lbf.ft) and
bolts securing rear door frame to 22 Nm (16
lbf.ft).
3. Secure regulator to glass with bolts and tighten
to 6 Nm (4.4 lbf.ft).
4. Fit inner and outer waist seal and secure with
clips.
5. Front door glass only: Fit exterior door mirror.
6. Fit water shedder to door.
7. Fit door trim casing.
Quarter light
$% 76.31.31
Remove
1. Remove rear door glass.
DOORS, REPAIRS, Glass - front or
2. Remove 2 bolts securing quarter light glass to
frame.
3. Remove quarter light glass from frame.
Refit
1. Fit quarter light glass to frame.
2. Fit bolts securing quarter light glass to frame
and tighten to 10 Nm (7 lbf.ft).
3. Fit rear door glass.
DOORS
76-1-6
REPAIRS
Regulator and motor - front and rear
door glass
$% 76.31.45
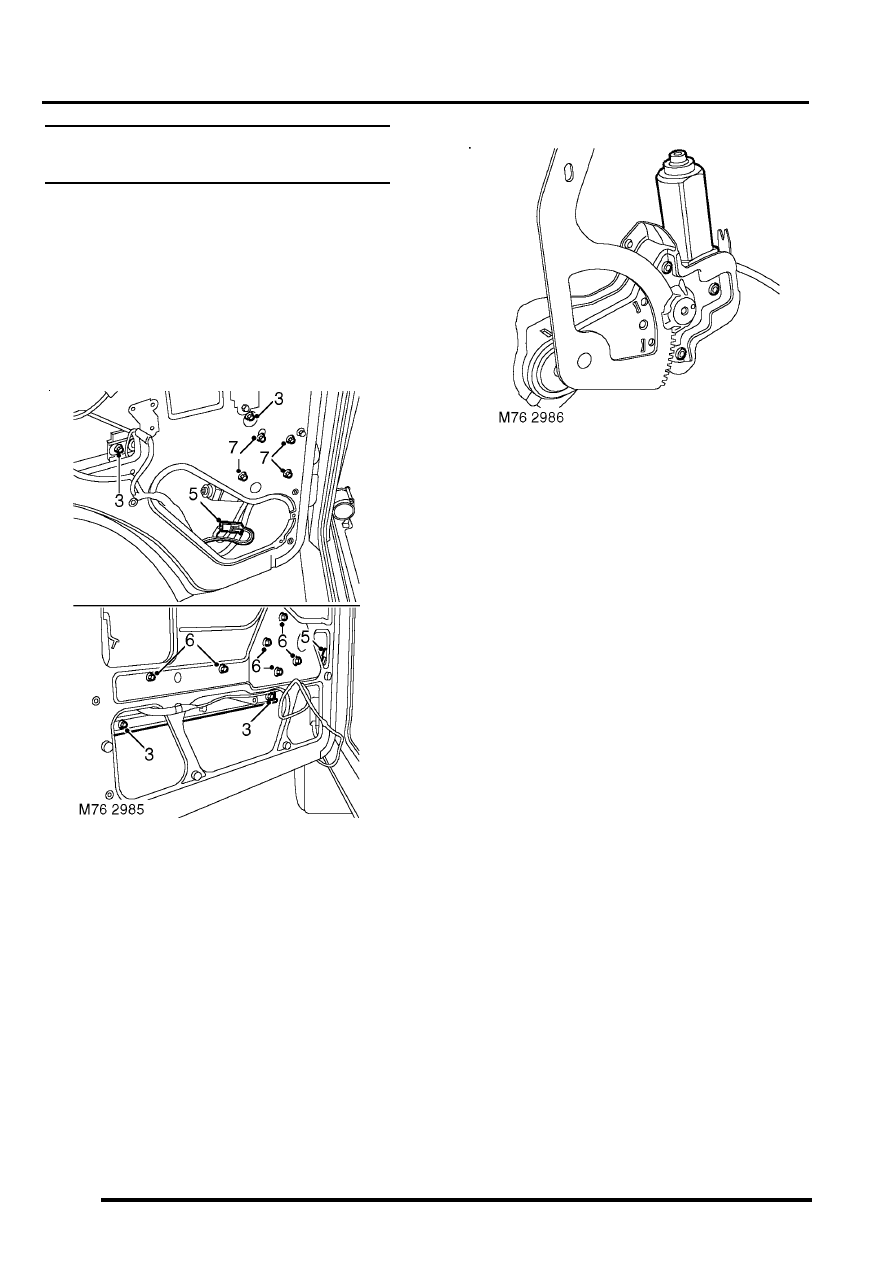
Remove
2. Carefully release water shedder from door.
3. Lower glass and remove 2 bolts securing door
glass to regulator.
4. Raise glass and secure with a suitable wedge.
5. Disconnect multiplug from glass lift motor.
6. Front door: Remove 6 bolts securing glass
regulator assembly to door.
7. Rear door: Remove 4 bolts securing glass
regulator assembly to door.
8. Manoeuvre regulator through access hole at
bottom of the door.
9. Remove 3 Torx screws securing glass lift
motor to regulator and remove motor.
Refit
1. Clean mating faces of regulator and motor.
2. Fit glass lift motor to regulator and tighten 3
Torx screws to 5 Nm (3.7 lbf.ft).
3. Position regulator in door. Fit bolts securing
regulator to door and tighten to 6 Nm (4.4
lbf.ft).
4. Connect multiplug to glass lift motor.
5. Remove wedge holding glass and position
glass to regulator.
6. Secure glass to regulator with bolts and tighten
to 6 Nm (4.4 lbf.ft).
7. Fit water shedder to door.
8. Fit door trim casing.
DOORS
REPAIRS
76-1-7
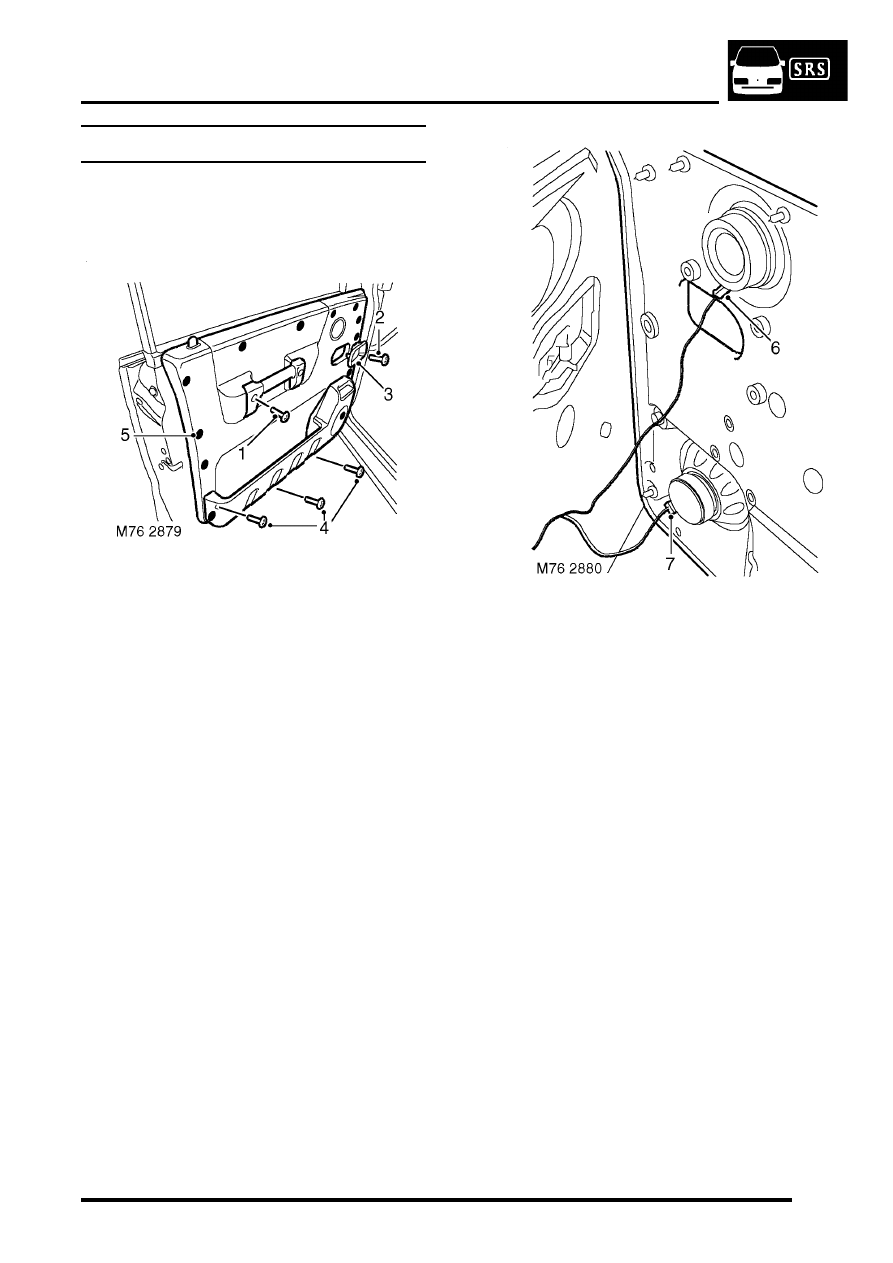
Trim casing - front door
$% 76.34.01.99
Remove
1. Remove 2 screws securing hand rail to door.
2. Remove screw securing door handle
escutcheon to door.
3. Remove escutcheon.
4. Remove 4 screws securing pocket to door.
5. Carefully release 10 clips securing trim casing
to door.
6. If fitted, disconnect multiplug from upper door
speaker.
7. Disconnect multiplug from lower door speaker.
8. Remove trim casing from door.
Refit
1. Position trim casing to door and connect door
speaker multiplug(s).
2. Secure trim casing to door with clips.
3. Fit escutcheon to door handle and secure with
screw.
4. Fit hand rail to door and secure with screws.
5. Fit pocket to door and secure with screws.
DOORS
76-1-8
REPAIRS
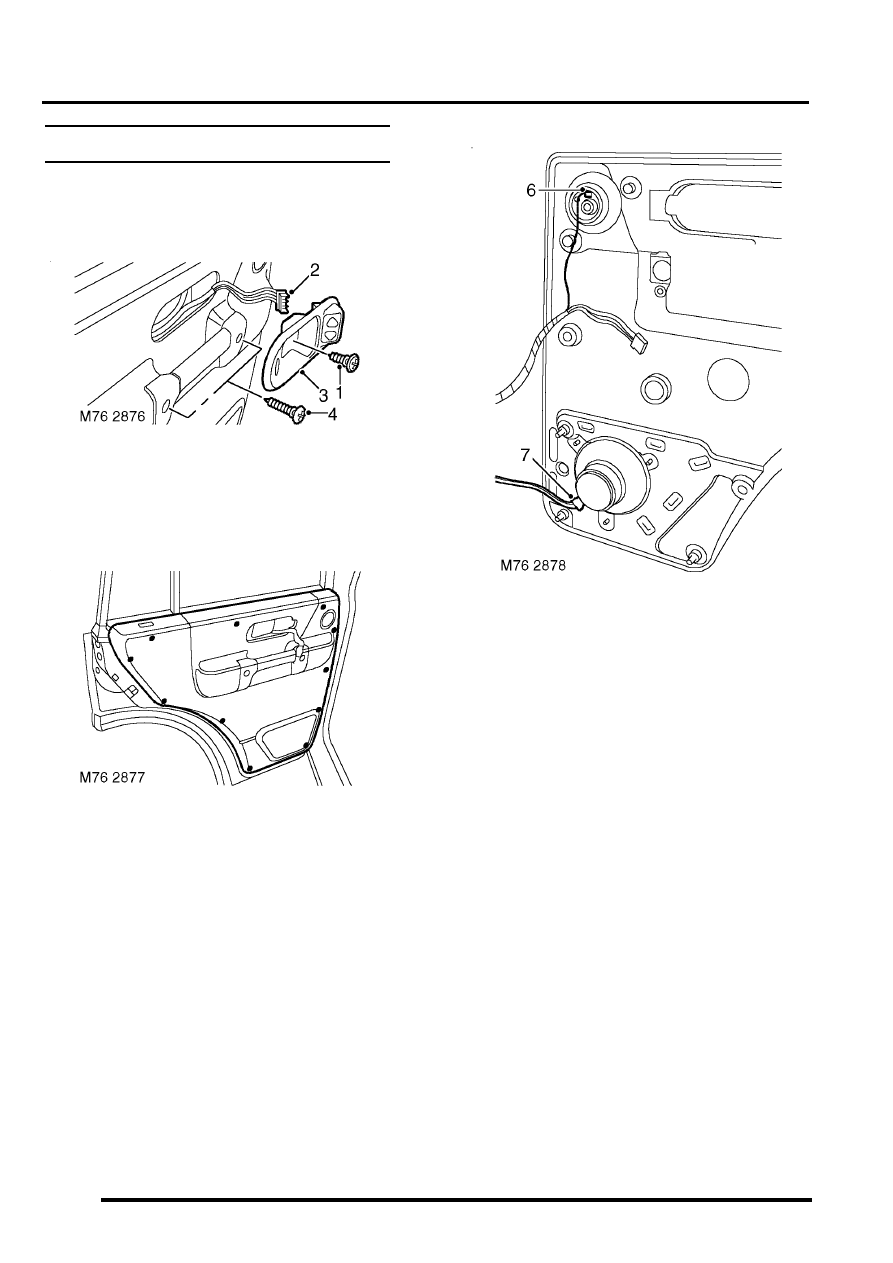
Trim casing - rear door
$% 76.34.04.99
Remove
1. Remove screw securing door handle
escutcheon to door.
2. Disconnect multiplug from window switch.
3. Remove door handle escutcheon.
4. Remove 2 screws securing hand rail to door.
5. Carefully release 11 clips securing trim casing
to door.
6. If fitted, disconnect multiplug from upper door
speaker.
7. Disconnect multiplug from lower door speaker.
8. Remove trim casing from door.
Refit
1. Position trim casing to door and connect door
speaker multiplug(s).
2. Secure trim casing to door with clips.
3. Fit hand rail to door and secure with screws.
4. Connect multiplug to window switch.
5. Fit escutcheon to door handle and secure with
screw.
Нет комментариевНе стесняйтесь поделиться с нами вашим ценным мнением.
Текст