Discovery 2. Manual — part 717
AIR CONDITIONING
REPAIRS
82-31
REPAIRS
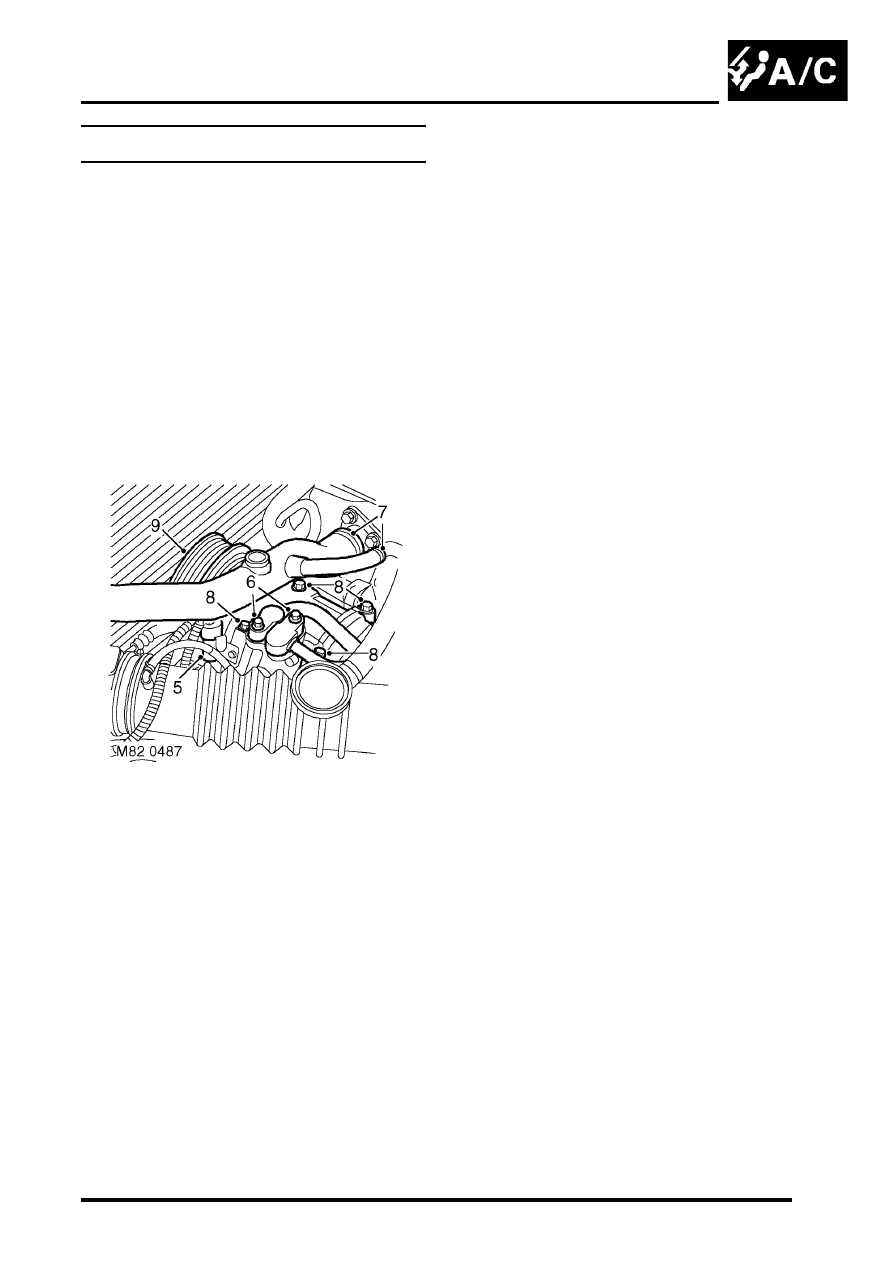
Compressor - diesel
$% 82.10.20
Remove
1. Remove engine acoustic cover.
2. Depressurise air conditioning system.
RECOVERY, RECYCLING AND
RECHARGING, Refrigerant recovery,
recycling and recharging.
3. Remove auxiliary drive belt.
REPAIRS, Belt - auxiliary drive.
4. Drain cooling system.
ADJUSTMENTS, Drain and refill.
5. Disconnect multiplug from compressor.
6. Remove 2 bolts securing air conditioning pipes
to compressor and discard 'O' rings.
CAUTION: Always fit plugs to open
connections to prevent contamination.
7. Release clips and disconnect top hose from
coolant elbow and heater pipe.
8. Remove 4 bolts securing compressor to
mounting bracket.
9. Remove compressor.
Refit
1. Calculate the quantity of refrigerant oil required.
Conditioning Compressor Replacement.
2. Position compressor to mounting bracket and
tighten bolts to 25 Nm (18 lbf.ft).
3. Remove caps from compressor and pipe
connections.
4. Clean compressor and pipe connections.
5. Lubricate new 'O'rings with refrigerant oil and
fit to compressor.
6. Position A/C pipes to compressor and tighten
bolts to 10 Nm (7 lbf.ft) .
7. Connect multiplug to compressor.
8. Position top hose and secure with clips.
9. Refill cooling system.
ADJUSTMENTS, Drain and refill.
10. Fit auxiliary drive belt.
REPAIRS, Belt - auxiliary drive.
11. Recharge air conditioning system.
RECOVERY, RECYCLING AND
RECHARGING, Refrigerant recovery,
recycling and recharging.
12. Fit engine acoustic cover.
AIR CONDITIONING
82-32
REPAIRS
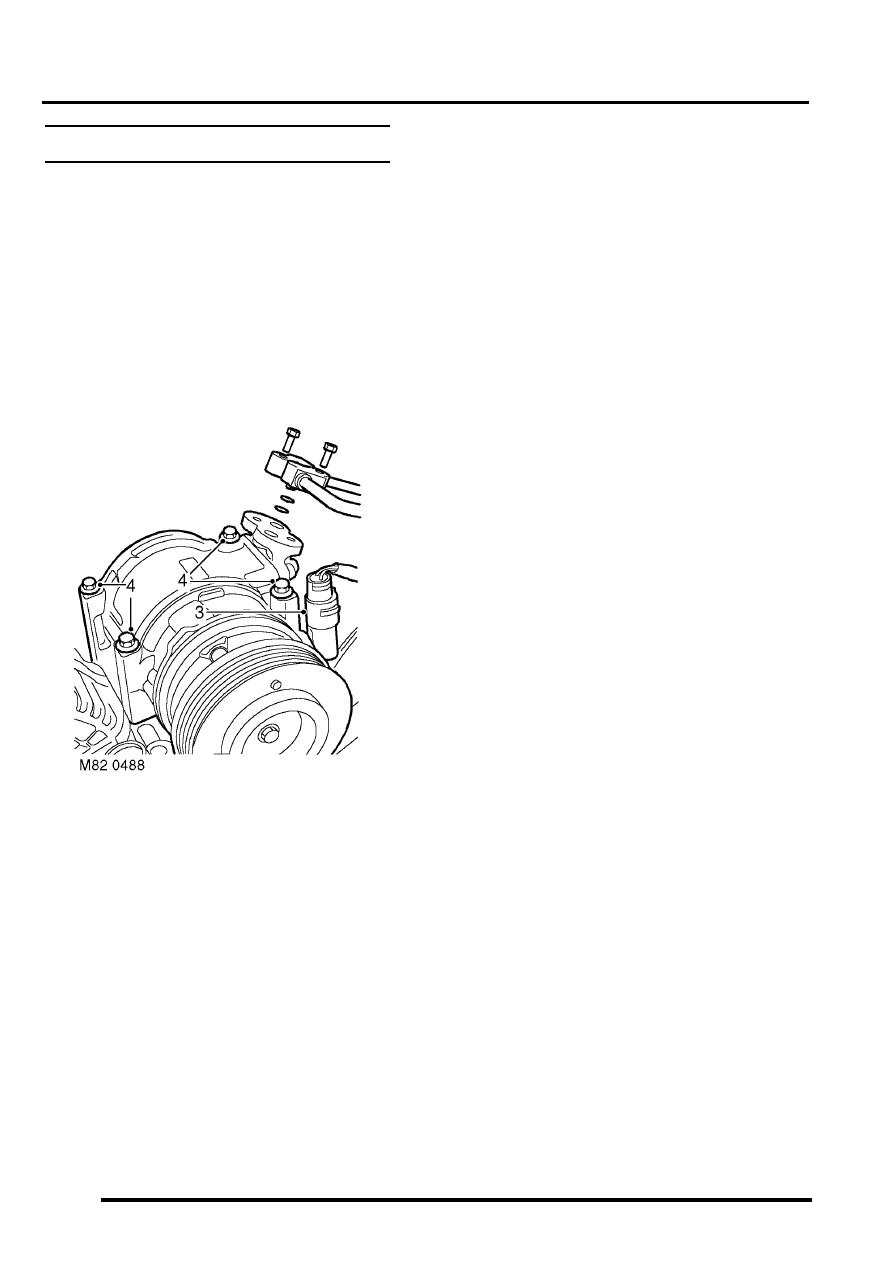
Compressor - V8
$% 82.10.20
Remove
1. Depressurise air conditioning system.
RECOVERY, RECYCLING AND
RECHARGING, Refrigerant recovery,
recycling and recharging.
2. Remove auxiliary drive belt.
REPAIRS, Belt - auxiliary drive.
3. Disconnect multiplug from compressor.
4. Remove 2 bolts securing air conditioning pipes
to compressor and discard 'O' rings.
CAUTION: Always fit plugs to open
connections to prevent contamination.
5. Remove 4 bolts securing compressor to
mounting bracket.
6. Remove compressor.
Refit
1. Calculate the quantity of refrigerant oil required.
Conditioning Compressor Replacement.
2. Clean compressor dowels and dowel holes.
3. Position compressor to mounting bracket and
tighten bolts to 25 Nm (18 lbf.ft).
4. Remove caps from compressor and pipe
connections.
5. Clean compressor and pipe connections.
6. Lubricate new 'O' rings with refrigerant oil and
fit to compressor.
7. Position A/C pipes to compressor and tighten
bolts to 10 Nm (7 lbf.ft).
8. Connect multiplug to compressor.
9. Fit auxiliary drive belt.
REPAIRS, Belt - auxiliary drive.
10. Recharge air conditioning system.
RECOVERY, RECYCLING AND
RECHARGING, Refrigerant recovery,
recycling and recharging.
AIR CONDITIONING
REPAIRS
82-33
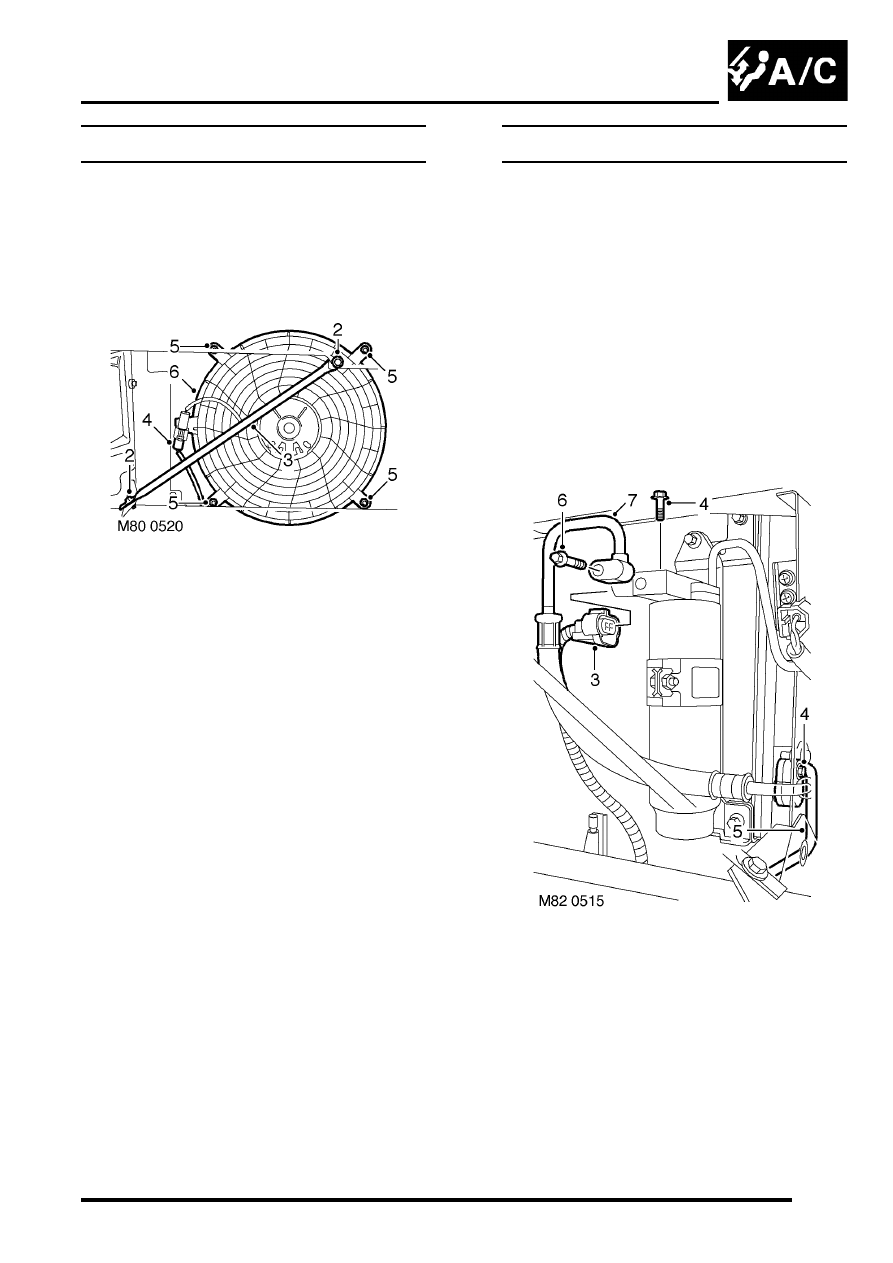
Fan - condenser
$% 82.15.01
Remove
1. Remove front grille.
2. Remove 2 bolts securing bonnet platform RH
support stay.
3. Remove support stay.
4. Disconnect multiplug from condenser cooling
fan motor.
5. Remove 4 screws securing cooling fan cowl to
mounting bracket.
6. Remove cooling fan assembly and collect
spacing washers.
Refit
1. Fit condenser fan.
2. Fit spacing washers between fan cowl and
mounting bracket and secure with screws.
3. Connect multiplug to motor.
4. Fit bonnet platform support stay and secure
with bolts.
5. Fit front grille.
Condenser
$% 82.15.07
Remove
1. Recover refrigerant from A/C system.
RECOVERY, RECYCLING AND
RECHARGING, Refrigerant recovery,
recycling and recharging.
2. Remove radiator.
l
l
3. Disconnect multiplug from dual pressure
switch.
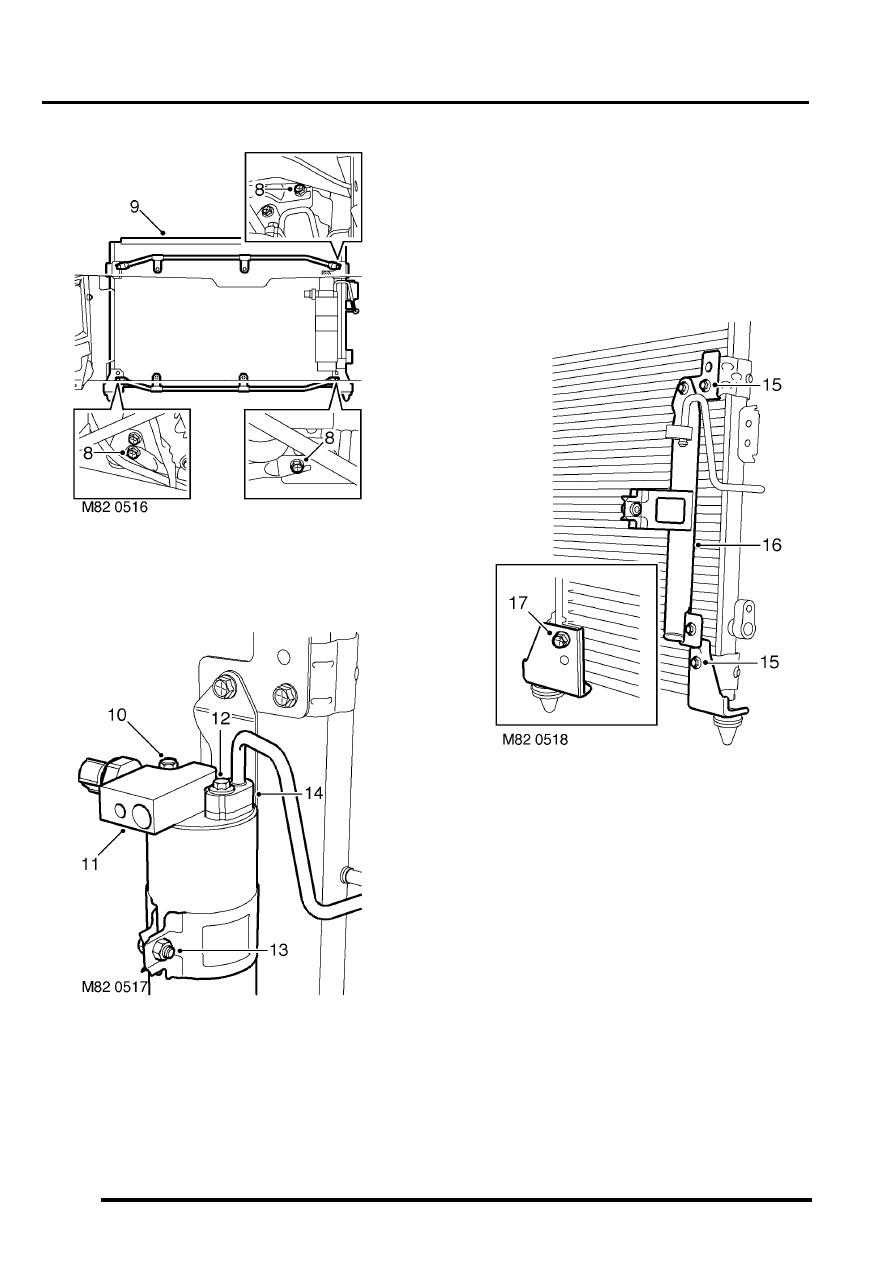
4. Remove bolt securing evaporator pipe to
condenser.
5. Disconnect evaporator pipe from condenser
and discard 'O' ring.
6. Remove bolt securing evaporator pipe to
receiver drier.
7. Disconnect evaporator pipe from receiver drier
and discard 'O' ring.
CAUTION: Always fit plugs to open
connections to prevent contamination.
AIR CONDITIONING
82-34
REPAIRS
8. Remove 3 remaining bolts securing cooling fan
support rails to condenser.
9. Remove condenser.
10. Remove bolt securing adaptor block to receiver
drier.
11. Remove adaptor block from receiver drier and
discard 'O' ring.
CAUTION: Always fit plugs to open
connections to prevent contamination.
12. Remove bolt securing condenser pipe to
receiver drier.
13. Remove clamp bolt receiver drier to bracket
and remove drier from bracket.
14. Remove and discard 'O' ring from condenser
pipe.
CAUTION: Always fit plugs to open
connections to prevent contamination.
15. Remove 2 remaining bolts securing receiver
drier brackets and condenser LH mounting
bracket to condenser.
16. Remove mounting bracket assembly.
17. Remove remaining bolt securing condenser RH
mounting and remove mounting.
Нет комментариевНе стесняйтесь поделиться с нами вашим ценным мнением.
Текст