Discovery 2. Manual — part 718
AIR CONDITIONING
REPAIRS
82-35
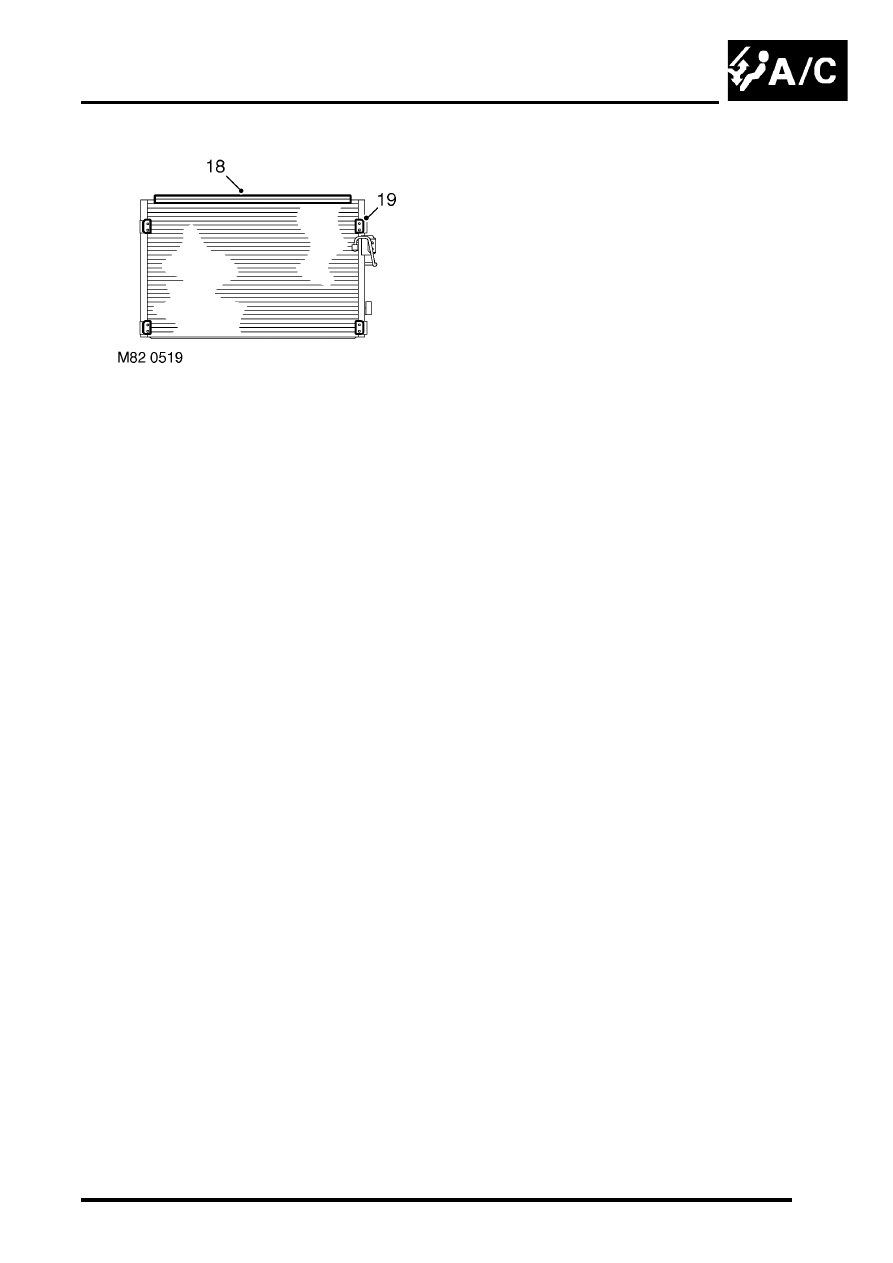
18. Remove sealing strip from outer upper seam of
condenser.
19. Remove captive nut plates from condenser.
Refit
1. Fit captive nut plates to new condenser.
2. Fit seal to condenser.
3. Fit RH mounting bracket to condenser and
secure with bolt.
4. Fit receiver drier bracket assembly and secure
with bolts.
5. Ensure condenser pipe and new receiver drier
connections are clean.
6. Lubricate new 'O' ring with refrigerant oil and fit
to condenser pipe.
7. Fit receiver drier to bracket and condenser
pipe. Tighten bolt securing condenser pipe to 5
Nm (3.7 lbf.ft). Fit clamping bolt securing
receiver drier to bracket and tighten to 5 Nm
(3.7 lbf.ft).
8. Ensure adaptor block and receiver drier
connections are clean.
9. Lubricate new 'O' ring with refrigerant oil and fit
to adaptor block.
10. Fit adaptor block to receiver drier and tighten
bolt to 5 Nm. (3.7 lbf.ft).
11. Fit condenser assembly.
12. Fit cooling fan to condenser and fit bolts to
secure support rails to condenser brackets.
13. Ensure connections of condenser, receiver
drier and evaporator pipes are clean.
14. Lubricate new 'O' ring seals with refrigerant oil
and fit one seal to each evaporator pipe.
15. Connect evaporator pipes and tighten bolts to 5
Nm (3.7 lbf.ft).
16. Connect multiplug to dual pressure switch.
17. Fit radiator.
l
l
18. Recharge A/C system.
RECOVERY, RECYCLING AND
RECHARGING, Refrigerant recovery,
recycling and recharging.
AIR CONDITIONING
82-36
REPAIRS
Receiver drier and dual pressure switch
$% 82.17.03
Remove
1. Recover refrigerant from air conditioning
RECOVERY, RECYCLING AND
RECHARGING, Refrigerant recovery,
recycling and recharging.
2. Remove front grille.
3. Disconnect multiplug from dual pressure
switch.
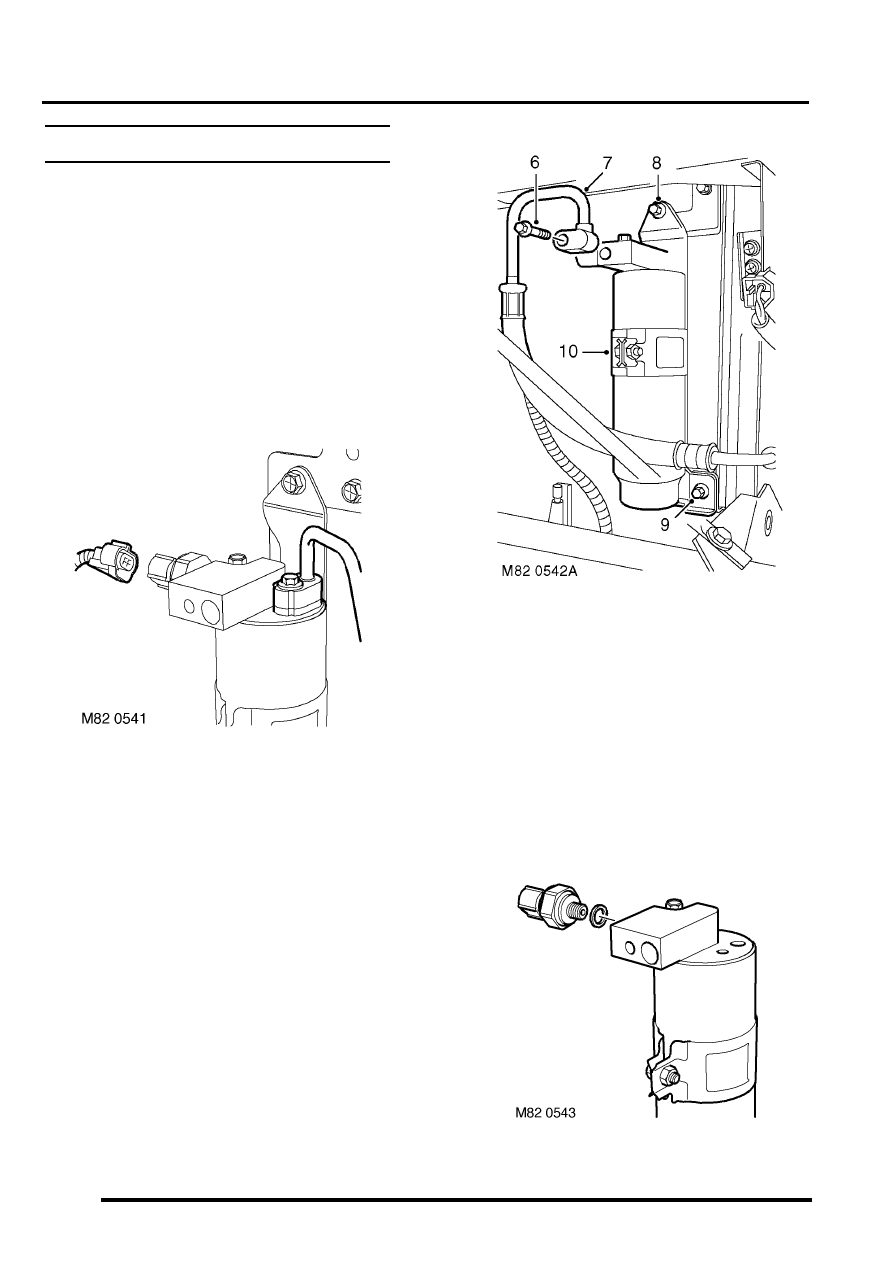
4. Remove bolt securing condenser pipe to
receiver drier.
5. Disconnect condenser pipe from receiver drier.
CAUTION: Always fit plugs to open
connections to prevent contamination.
6. Remove bolt securing evaporator pipe to
receiver drier.
7. Disconnect evaporator pipe from receiver
drier.
CAUTION: Always fit plugs to open
connections to prevent contamination.
8. Remove bolt securing top of receiver drier
mounting bracket to condenser.
9. Remove bolt securing bottom of receiver drier
mounting bracket to condenser.
10. Remove receiver drier assembly.
11. Loosen mounting bracket clamping bolt.
AIR CONDITIONING
REPAIRS
82-37
12. Remove receiver drier from mounting bracket.
13. Remove dual pressure switch from receiver
drier
Refit
1. Fit dual pressure switch to receiver drier and
tighten to 10 Nm (7 lbf.ft).
2. Fit receiver drier to mounting bracket and
tighten clamping bolt.
3. Fit receiver drier assembly to condenser.
4. Fit bolts securing receiver drier mounting
bracket to condenser and tighten to 5 Nm (3.7
lbf.ft).
5. Remove caps from air conditioning pipes and
receiver drier.
6. Remove old 'O' rings from pipes.
7. Fit new 'O' rings to pipes and lubricate with
refrigerant oil.
8. Connect air conditioning pipes to receiver
drier.
9. Fit bolts securing air conditioning pipes to
receiver drier and tighten to 5 Nm (3.7 lbf.ft).
10. Connect multiplug to dual pressure switch.
11. Fit front grille.
12. Recharge air conditioning system.
RECOVERY, RECYCLING AND
RECHARGING, Refrigerant recovery,
recycling and recharging.
ECU - air temperature control
$% 82.20.90
Remove
1. Release radio from fascia.
REPAIRS, Radio cassette player.
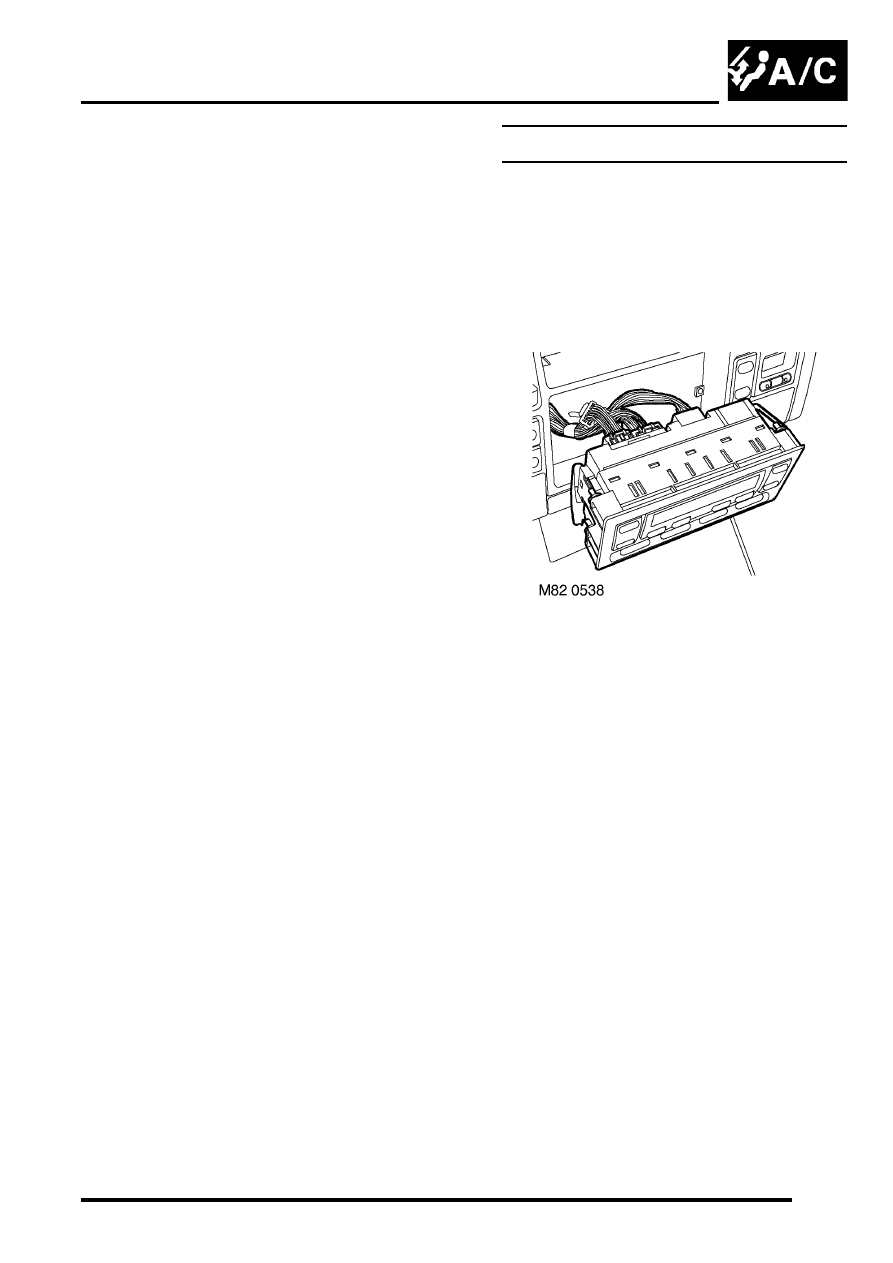
2. Working through radio aperture, release control
unit from fascia.
3. Disconnect 3 multiplugs and remove control
unit.
4. Collect bushes from control unit location pegs.
Refit
1. Fit bushes to new control unit.
2. Position control unit and connect multiplugs.
3. Fit control unit to fascia.
4. Fit radio to fascia.
AIR CONDITIONING
82-38
REPAIRS
Sensor - ambient air temperature
$% 82.20.91
Remove
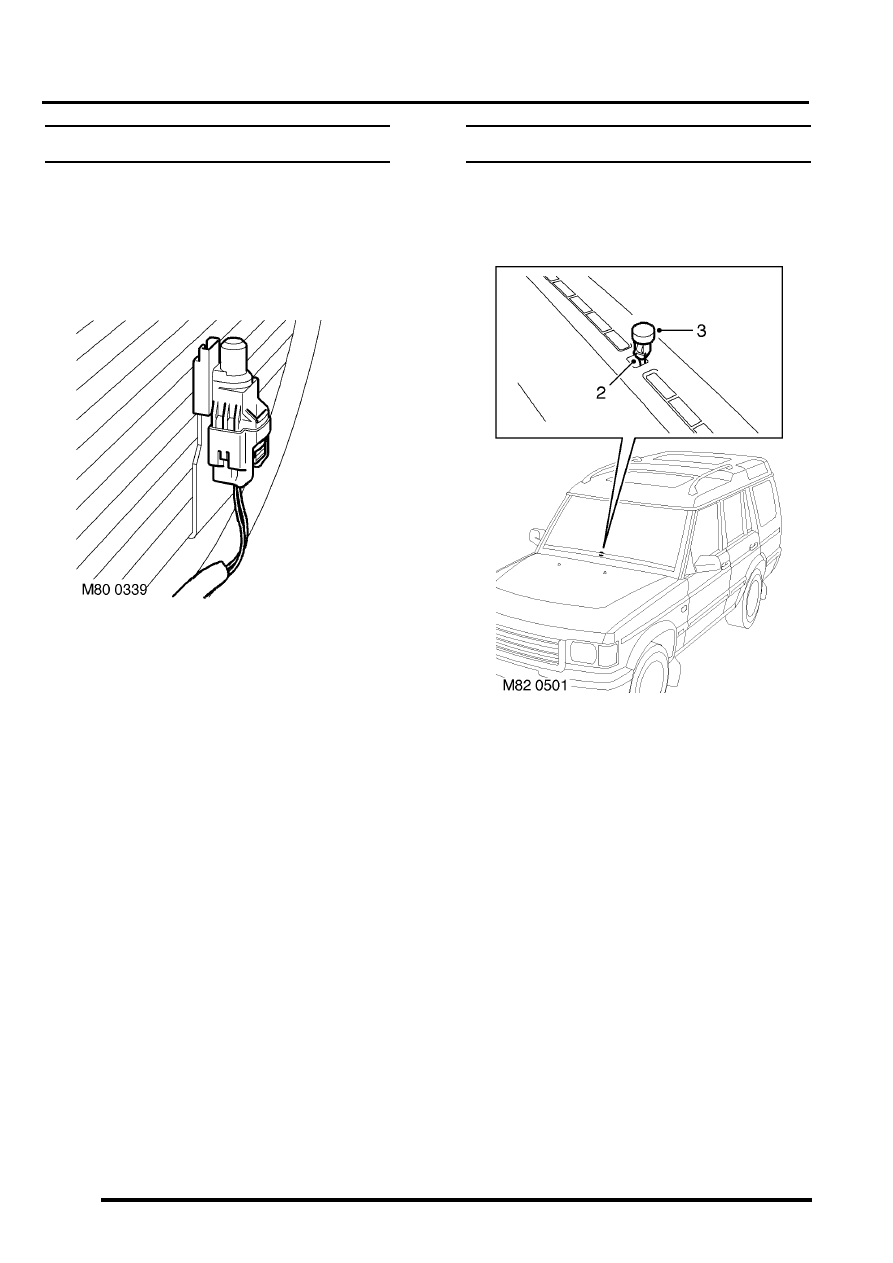
1. Remove front grille.
2. Release ambient air temperature sensor from
support bracket, disconnect multiplug and
remove sensor.
Refit
1. Position sensor, connect multiplug and secure
sensor to support bracket
2. Fit front grille.
Sensor - solar light
$% 82.20.92
Remove
1. Carefully remove solar light sensor from fascia.
2. Disconnect multiplug from solar light sensor.
3. Remove solar light sensor.
Refit
1. Connect multiplug to solar light sensor.
2. Position solar light sensor to fascia and push to
secure.
Нет комментариевНе стесняйтесь поделиться с нами вашим ценным мнением.
Текст