Discovery 2. Manual — part 416
ENGINE - TD5
REPAIRS 12-1-61
Refit
1. Clean sump and mating faces.
2. Apply sealant, Part No. STC 3254 to joint faces
of timing chain cover and crankshaft rear oil
seal housing.
CAUTION: Assembly and bolt tightening
must be completed within 20 minutes of
applying sealant.
3. Position new gasket.
CAUTION: Gasket must be fitted dry.
4. Position sump and, noting the positions of the
longer bolts, fit and lightly tighten bolts.
5. Fit and lightly tighten bolts securing sump to
gearbox bell housing.
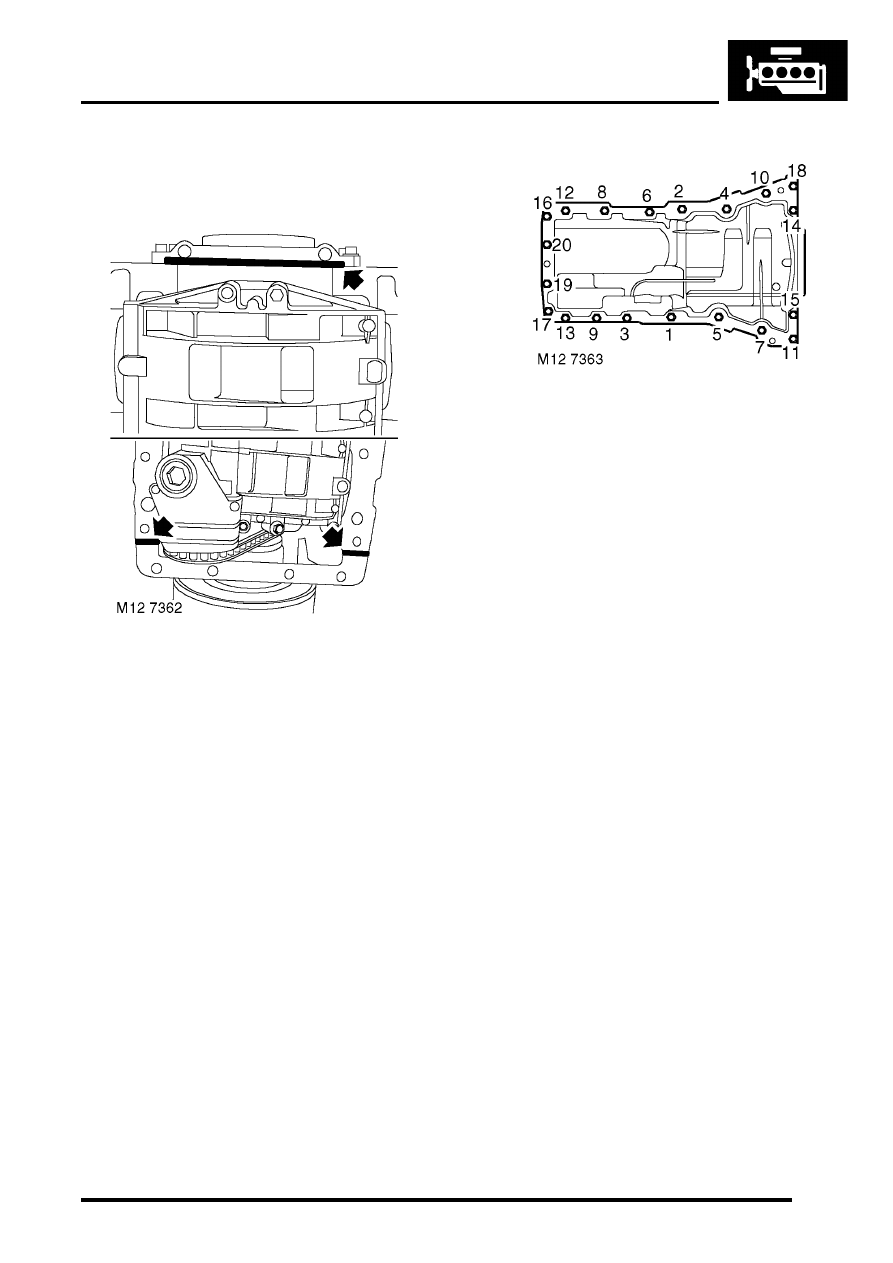
6. Working in the sequence shown, tighten bolts
securing sump to 25 Nm (18 lbf.ft).
7. Tighten – sump to gearbox bell housing bolts
to 13 Nm (10 lbf.ft).
8. Fit new gasket to centrifuge drain pipe, fit to
sump and tighten bolts to 10 Nm (7 lbf.ft ) .
CAUTION: Gasket must be fitted dry.
9. Fit bolts securing oil cooler pipe to sump and
tighten to 9 Nm (7 lbf.ft).
10. Fit and tighten bolt securing coolant pipe to
cross member.
11. Fit and tighten bolts securing ACE pipes to front
cross member.
12. Fit exhaust front pipe.
SYSTEMS - Td5, REPAIRS, Pipe - front.
13. Refill engine with oil.
14. Connect battery earth lead.
15. Refit battery cover and secure fixings.
ENGINE - TD5
12-1-62 REPAIRS
Valve - relief - oil pressure
$% 12.60.56
Remove
1. Remove sump gasket.
ENGINE - Td5, REPAIRS, Gasket -
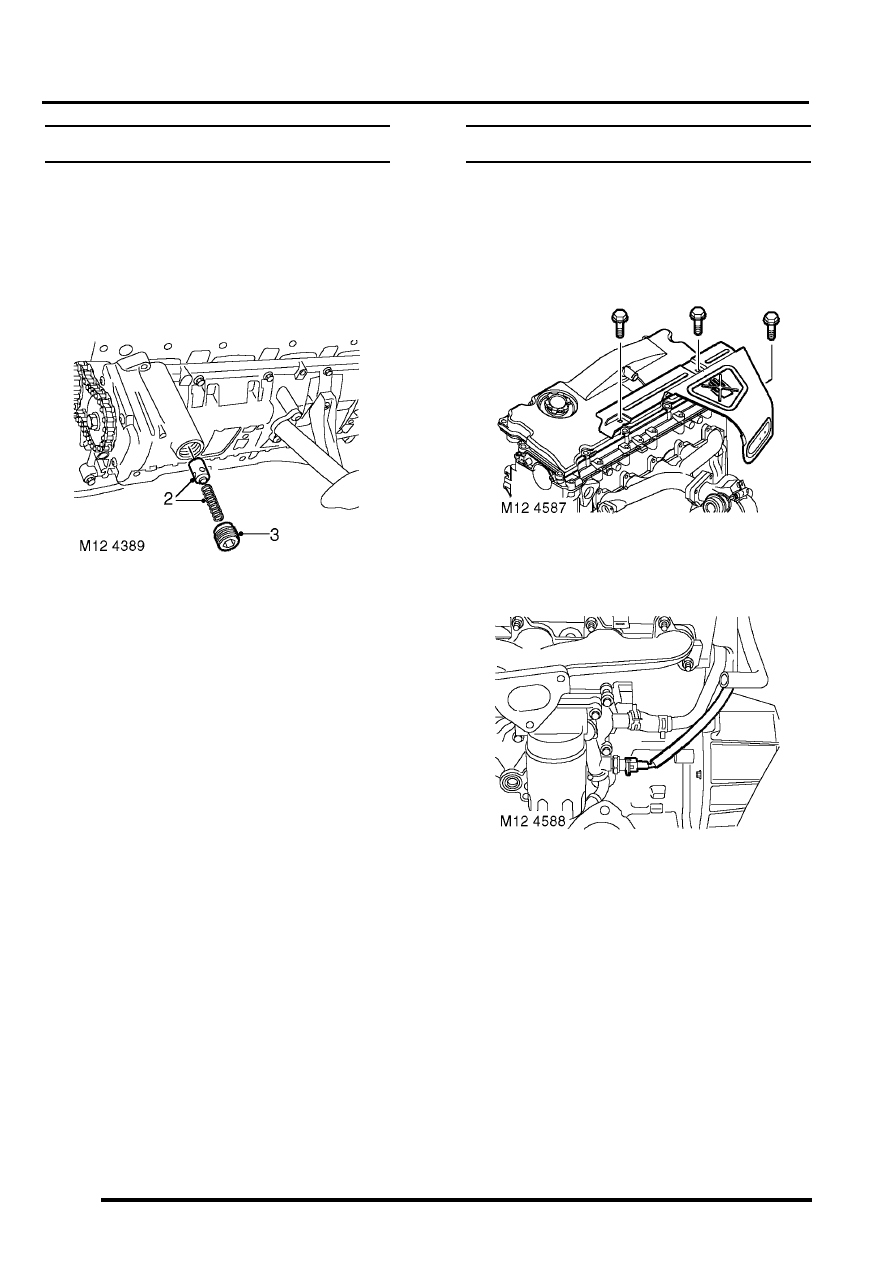
2. Remove and discard plug from oil pump
housing.
3. Remove spring and valve.
Refit
1. Clean valve, spring and plug.
2. Clean valve seating inside oil pump housing.
3. Check valve and bore for scoring and
corrosion. Light scoring may be removed using
grade 600 emery cloth soaked in oil.
4. Check spring for distortion, check free length of
spring: Spring free length = 42.00 mm (1.65 in).
CAUTION: Renew relief valve as an
assembly.
5. Lubricate valve and seating.
6. Fit valve and spring to pump.
7. Apply Loctite 243 sealant to threads of new
plug.
CAUTION: Do not attempt to fit original
plug.
8. Fit oil pump pressure relief valve plug and
tighten to 23 Nm (17 lbf.ft).
9. Fit sump gasket.
ENGINE - Td5, REPAIRS, Gasket -
10. Check engine oil level, top-up if necessary.
Switch - oil pressure
$% 12.60.50
Remove
1. Remove fixings and remove engine acoustic
cover.
2. Remove 3 bolts and remove exhaust manifold
heat shield.
3. Disconnect multiplug from oil pressure switch.
4. Position container below switch to catch oil
spillage.
5. Remove oil pressure switch from oil cooler
housing.
ENGINE - TD5
REPAIRS 12-1-63
Refit
1. Clean oil pressure switch threads.
2. Fit oil pressure switch and tighten to 15 Nm (11
lbf.ft).
3. Connect multiplug to oil pressure switch.
4. Position exhaust manifold heatshield and
tighten M6 bolts to 9 Nm (7 lbf.ft) and M8 bolts
to 25 Nm (18 lbf.ft).
5. Fit and secure engine acoustic cover.
6. Top up engine oil.
Cooler - engine oil
$% 12.60.68
Remove
1. Drain cooling system.
ADJUSTMENTS, Drain and refill.
2. Remove centrifuge assembly.
ENGINE - Td5, REPAIRS, Gasket -
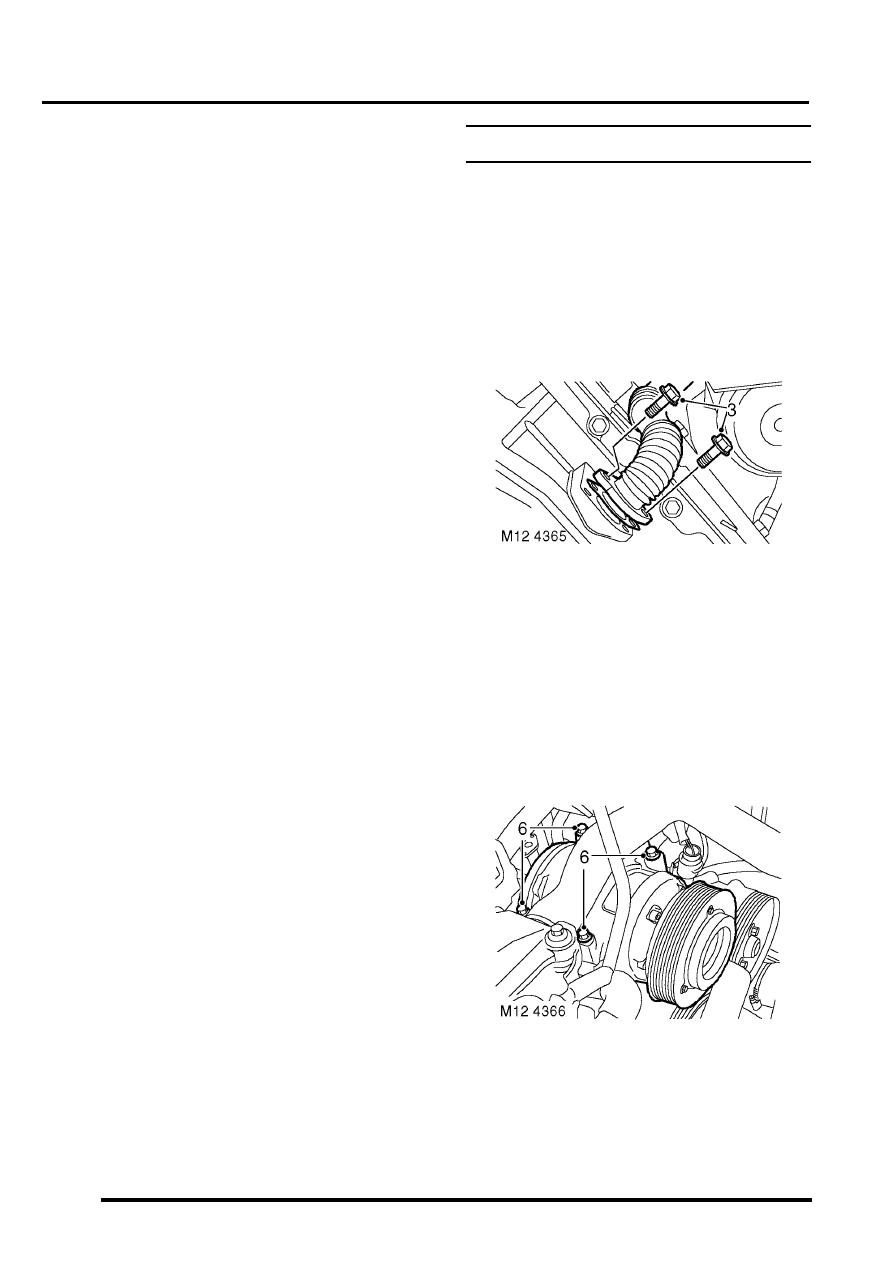
3. Remove clutch housing bolt and release
coolant pipe from rear of engine.
4. Release clip and coolant hose from oil cooler.
5. Disconnect multiplug from oil pressure switch.
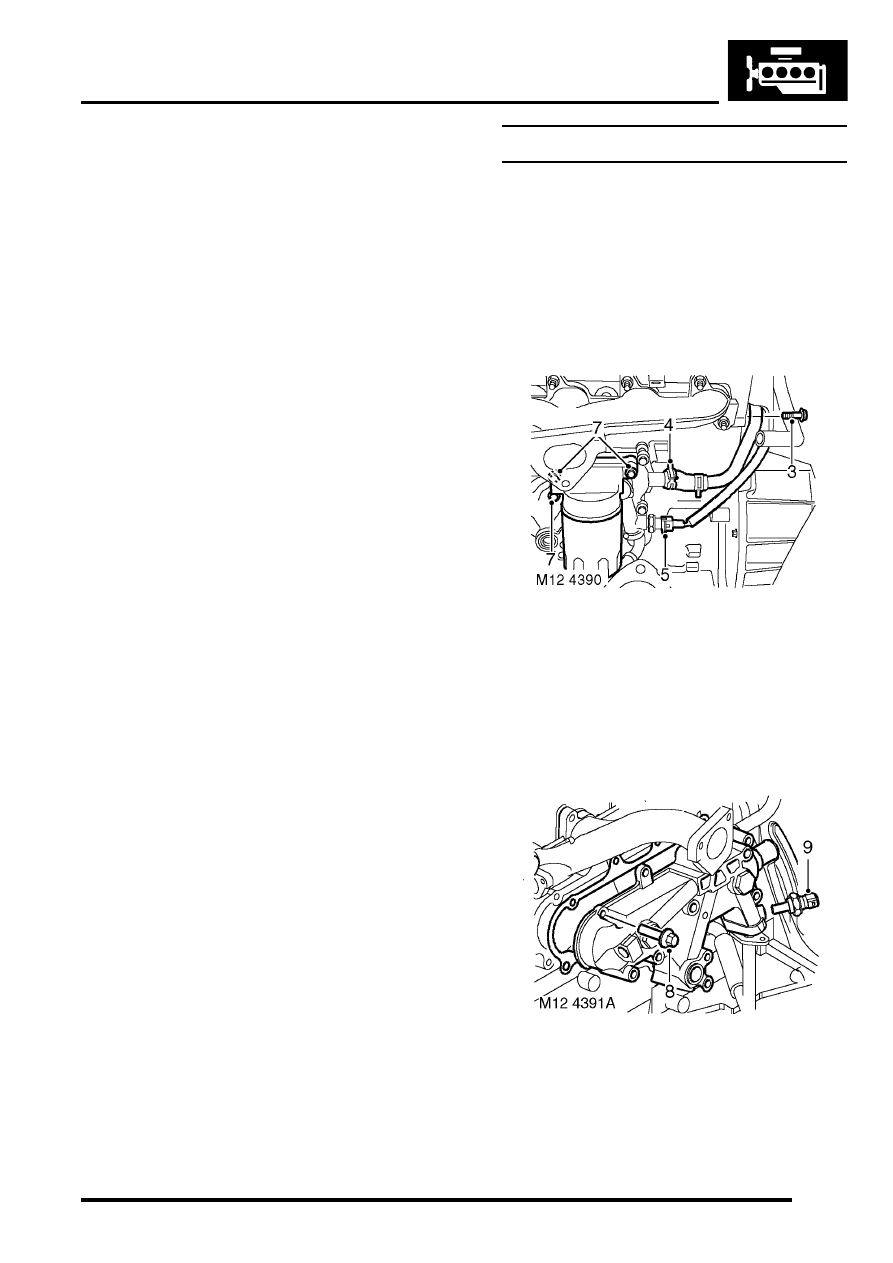
6. Remove full-flow oil filter element using a
suitable strap wrench.
7. Remove 3 bolts, remove oil filter adaptor
housing and discard gasket.
8. Remove 7 bolts, remove oil cooler and discard
gasket.
9. Remove oil pressure switch.
ENGINE - TD5
12-1-64 REPAIRS
Refit
1. Clean oil cooler and mating faces.
2. Fit oil pressure switch and tighten to 9 Nm (7
lbf.ft).
3. Position new gasket and fit oil cooler housing,
tighten bolts to 25 Nm (18 lbf.ft).
4. Position and fit oil filter adaptor housing,
tighten bolts to 25 Nm (18 lbf. ft).
5. Fit oil filter, tighten hand tight then a further half
turn.
6. Position coolant hose to oil cooler and secure
clip.
7. Position coolant pipe bolt and tighten to 50 Nm
(37 lbf.ft) .
8. Connect multiplug to oil pressure switch.
9. Fit centrifuge assembly.
ENGINE - Td5, REPAIRS, Gasket -
10. Refill cooling system.
ADJUSTMENTS, Drain and refill.
Gasket - centrifuge oil drain pipe
$% 12.60.90
Remove
1. Raise front of vehicle.
WARNING: Do not work on or under a
vehicle supported only by a jack. Always
support the vehicle on safety stands.
2. Remove fixings and remove underbelly panel.
3. Remove 2 bolts securing centrifuge drain to
engine sump and discard gasket. (Some
models are fitted with studs and nuts,
others with bolts).
4. Remove turbocharger.
5. Models with air conditioning: Remove
REPAIRS, Belt - auxiliary drive.
6. Models with air conditioning: Remove 4 bolts
securing compressor and move to one side.
Нет комментариевНе стесняйтесь поделиться с нами вашим ценным мнением.
Текст