Discovery 2. Manual — part 191
FRONT SUSPENSION
REPAIRS
60-47
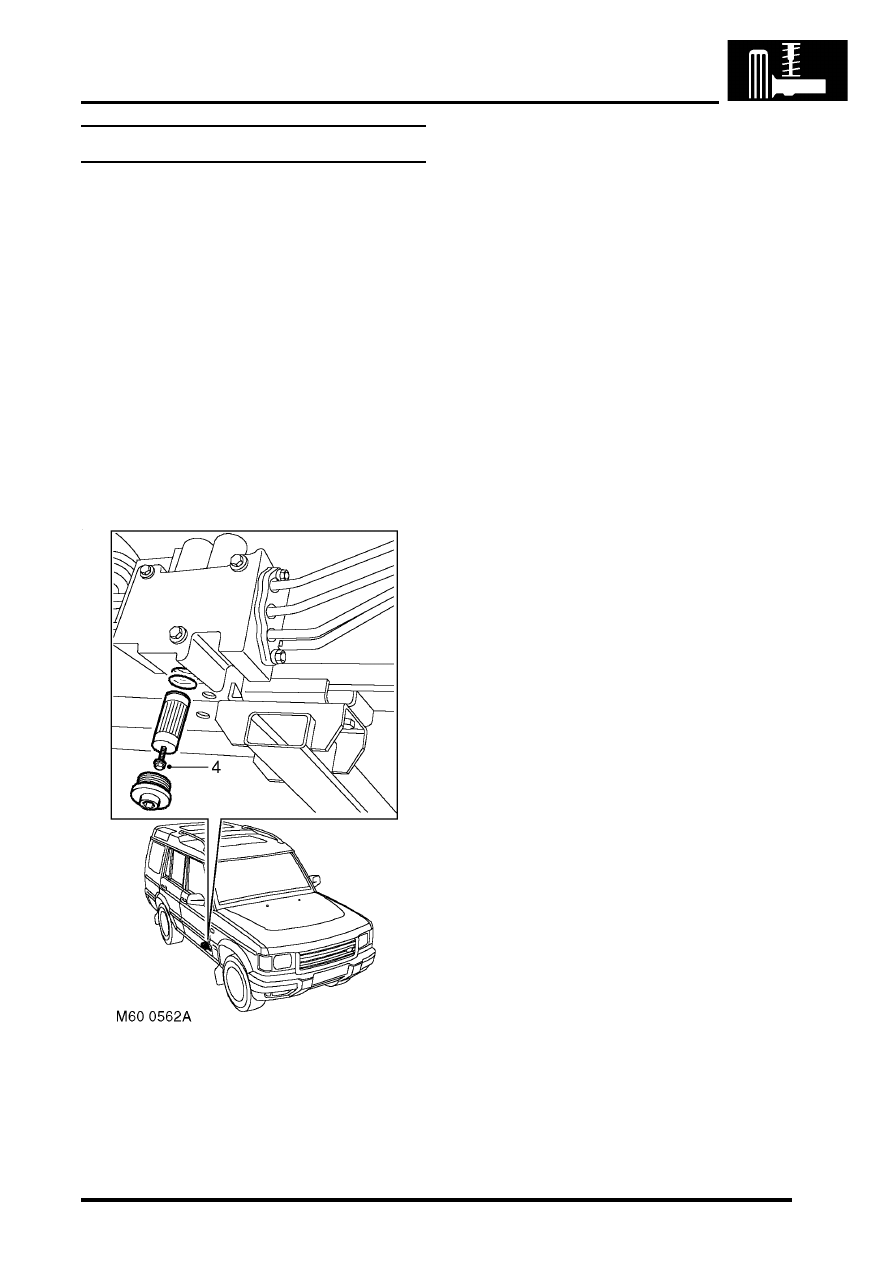
Filter - high pressure - ACE
$% 60.60.21
CAUTION: The ACE hydraulic system is
extremely sensitive to the ingress of dirt or
debris. The smallest amount could render the
system unserviceable. It is imperative that the
following precautions are taken.
l
ACE components are thoroughly cleaned
externally before work commences;
l
all opened pipe and module ports are
capped immediately;
l
all fluid is stored in and administered
through clean containers.
Remove
1. Raise vehicle on a ramp.
2. Position container to collect fluid spillage.
3. Remove filter cap and discard 'O' ring.
4. Fit M6 bolt into base of filter and pull on bolt to
remove filter from valve block. Do not turn
filter in valve block.
CAUTION: Always fit plugs to open
connections to prevent contamination.
Refit
1. Ensure new filter has 'O' ring fitted, then fit filter
to valve block.
2. Fit new 'O' ring to filter cap. Fit cap and tighten
to 35 Nm (26 lbf.ft).
3. Lower vehicle.
4. Check fluid level in ACE/PAS reservoir.
ADJUSTMENTS, Fluid level check - ACE
system.
5. Start and run engine for 2 minutes, then re-
FRONT SUSPENSION
60-48
REPAIRS
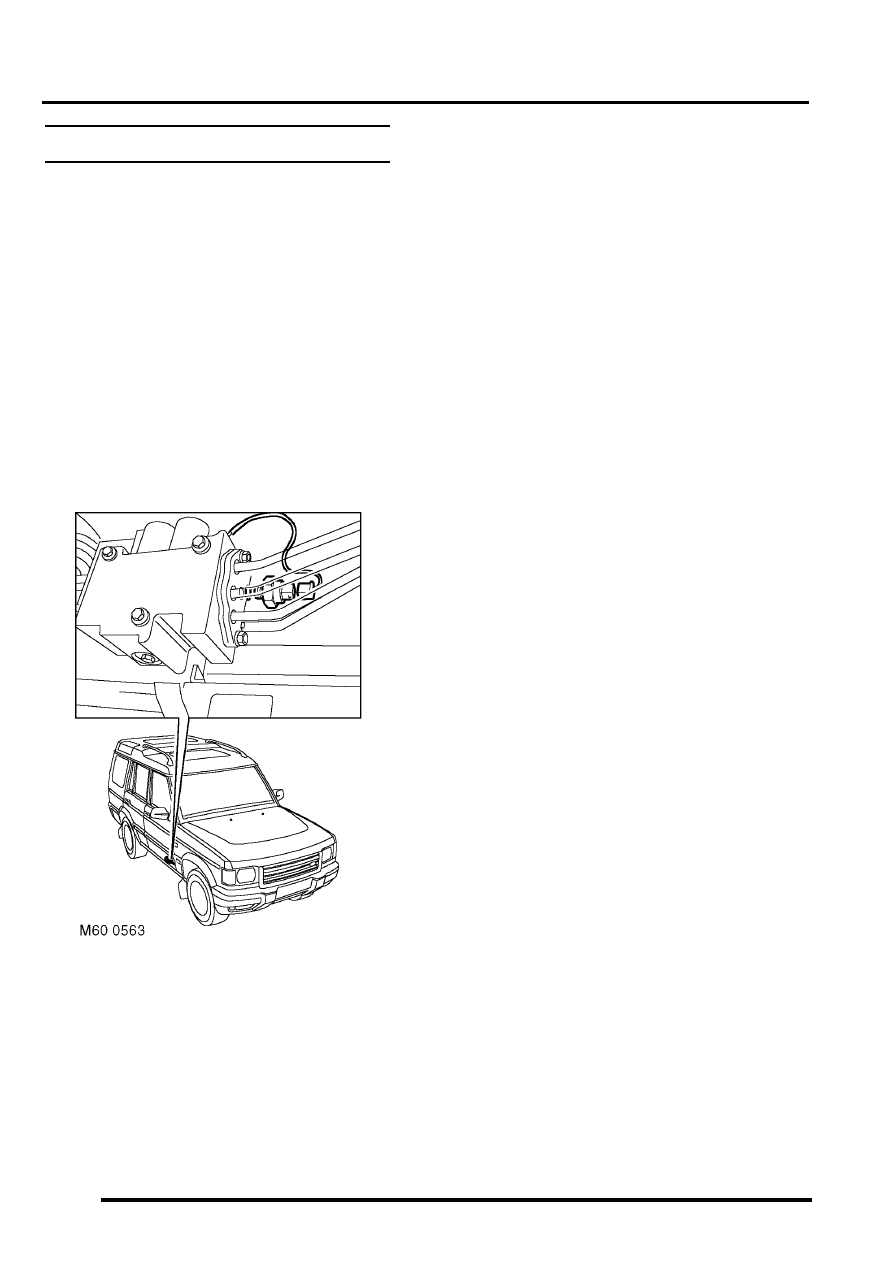
Pressure transducer - ACE
$% 60.60.22
CAUTION: The ACE hydraulic system is
extremely sensitive to the ingress of dirt or
debris. The smallest amount could render the
system unserviceable. It is imperative that the
following precautions are taken.
l
ACE components are thoroughly cleaned
externally before work commences;
l
all opened pipe and module ports are
capped immediately;
l
all fluid is stored in and administered
through clean containers.
Remove
1. Raise vehicle on a ramp.
2. Disconnect multiplug from transducer.
3. Position container to collect fluid spillage.
4. Remove pressure transducer and discard 'O'
ring.
CAUTION: Always fit plugs to open
connections to prevent contamination.
Refit
1. Ensure pressure transducer and port in valve
block is clean.
2. Fit new 'O' ring to pressure transducer. Fit and
tighten pressure transducer to 20 Nm (15
lbf.ft).
3. Connect multiplug to pressure transducer.
4. Renew ACE high pressure filter.
5. Lower vehicle.
FRONT SUSPENSION
REPAIRS
60-49
Solenoid - pressure control valve - ACE
$% 60.60.23
Remove
1. Raise vehicle on a ramp.
2. Disconnect multiplug from solenoid.
3. Remove cap securing solenoid to pressure
control valve and discard 'O' ring.
4. Remove solenoid from pressure control valve
and discard 'O' ring from base of valve.
Refit
1. Ensure solenoid and pressure control valve are
clean.
2. Fit new 'O' ring to base of pressure control
valve.
3. Fit solenoid to pressure control valve, with
arrow on solenoid pointing away from valve
block and connector in correct position.
4. Fit new 'O' ring to solenoid securing cap. Fit cap
and tighten to 11 Nm (8 lbf.ft).
5. Connect multiplug to solenoid.
6. Lower vehicle.
Solenoid - directional control valve - ACE
$% 60.60.24
Remove
1. Raise vehicle on a ramp.
2. Disconnect multiplug from solenoid.
3. Loosen cap securing solenoid to directional
control valve.
4. Remove 3 bolts securing valve block to
chassis, lower block sufficiently only to remove
solenoid.
5. Remove cap securing solenoid to directional
control valve and discard 'O' ring.
6. Remove solenoid from directional control valve
and discard 'O' ring from base of valve.
Refit
1. Ensure solenoid and directional control valve
are clean.
2. Fit new 'O' ring to base of directional control
valve.
3. Fit solenoid to directional control valve, with
arrow on solenoid pointing up and connector in
correct position.
4. Fit new 'O' ring to solenoid securing cap. Fit cap
to solenoid but do not tighten at this stage.
5. Fit 3 bolts securing valve block to chassis and
tighten to 18 Nm (13 lbf.ft) .
6. Tighten solenoid securing cap to 11 Nm (8
lbf.ft) .
7. Connect multiplug to solenoid.
8. Lower vehicle.
FRONT SUSPENSION
60-50
REPAIRS
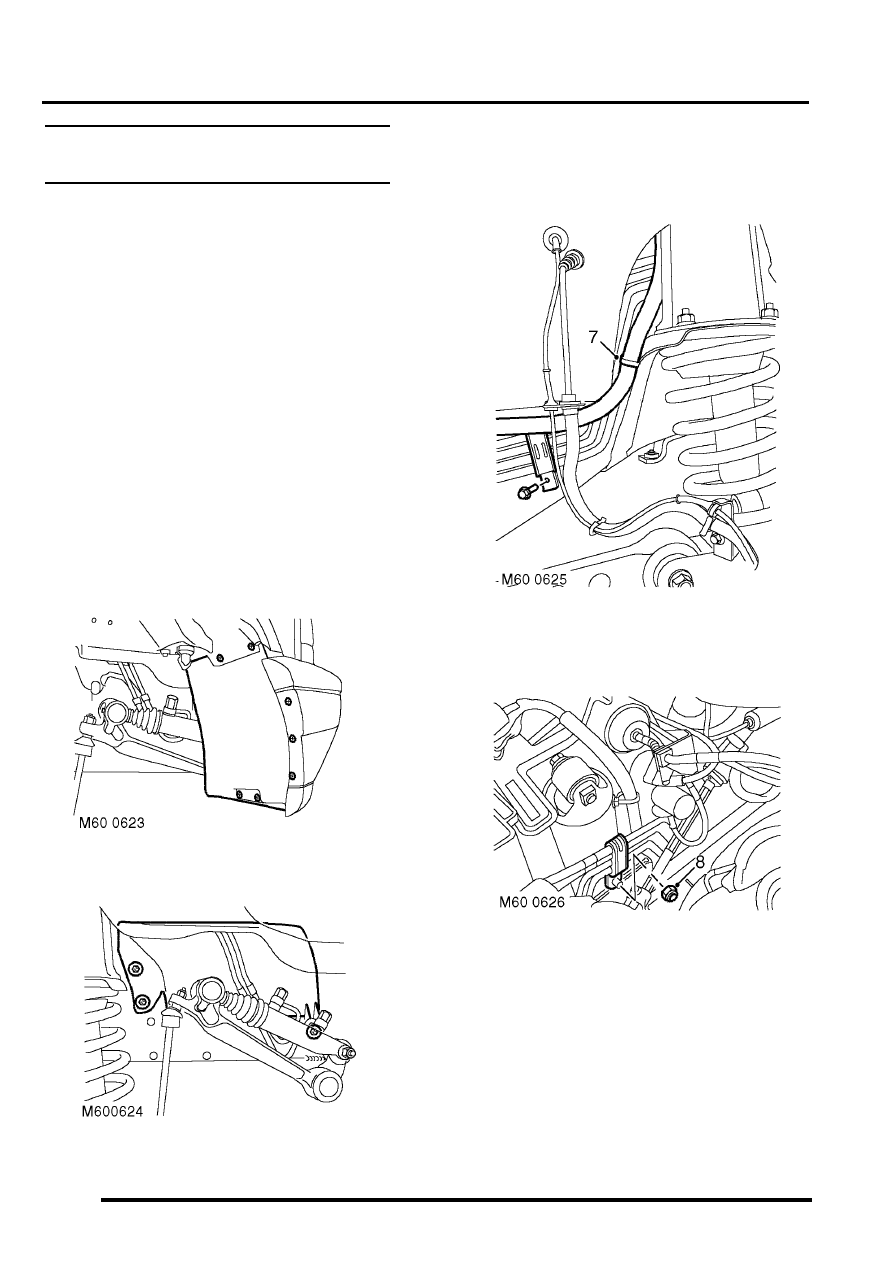
Pipe assembly - valve block to front
actuator - ACE
$% 60.60.31
Introduction
CAUTION: The ACE hydraulic system is
extremely sensitive to the ingress of dirt or
debris. The smallest amount could render the
system unserviceable. It is imperative that the
following precautions are taken.
l
ACE components are thoroughly cleaned
externally before work commences;
l
all opened pipe and module ports are
capped immediately;
l
all fluid is stored in and administered
through clean containers.
Remove
1. Raise front of vehicle.
WARNING: Do not work on or under a
vehicle supported only by a jack. Always
support the vehicle on safety stands.
2. Remove RH front road wheel.
3. Remove 7 screws securing RH front wheel arch
liner extension and remove extension.
4. Remove 3 screws securing splash shield and
remove shield.
5. Position containers under valve block and
actuator to collect fluid spillage.
6. Remove bolt securing pipe clamp to chassis
and remove clamp.
7. Release harness strap from suspension turret
and position harness aside.
8. Remove nut securing pipe clamp to bracket on
suspension turret and remove clamp.
Нет комментариевНе стесняйтесь поделиться с нами вашим ценным мнением.
Текст