Discovery 2. Manual — part 638
BRAKES
REPAIRS
70-43
Refit
1. Clean mating faces of alternator and vacuum
pump.
2. Fit vacuum pump to alternator and tighten
bolts to 8 Nm (6 lbf.ft).
3. Position alternator to engine and connect
multiplug.
4. Connect vacuum hose and oil drain hose to
vacuum pump and secure clips.
5. With assistance align alternator to mounting
bracket and fit but do not tighten bolt.
6. Fit bolt securing support stay to alternator and
tighten to 25 Nm (18 lbf.ft) .
7. Tighten bolt securing alternator to mounting
bracket to 45 Nm (33 lbf.ft).
8. Using new 'O' ring, connect oil supply pipe to
cylinder head and tighten to 10 Nm (7 lbf.ft).
9. Connect lead to alternator and tighten nut to 6
Nm (4.4 lbf.ft).
10. Fit auxiliary drive belt tensioner and tighten bolt
to 50 Nm (37 lbf.ft).
11. Fit auxiliary drive belt.
REPAIRS, Belt - auxiliary drive.
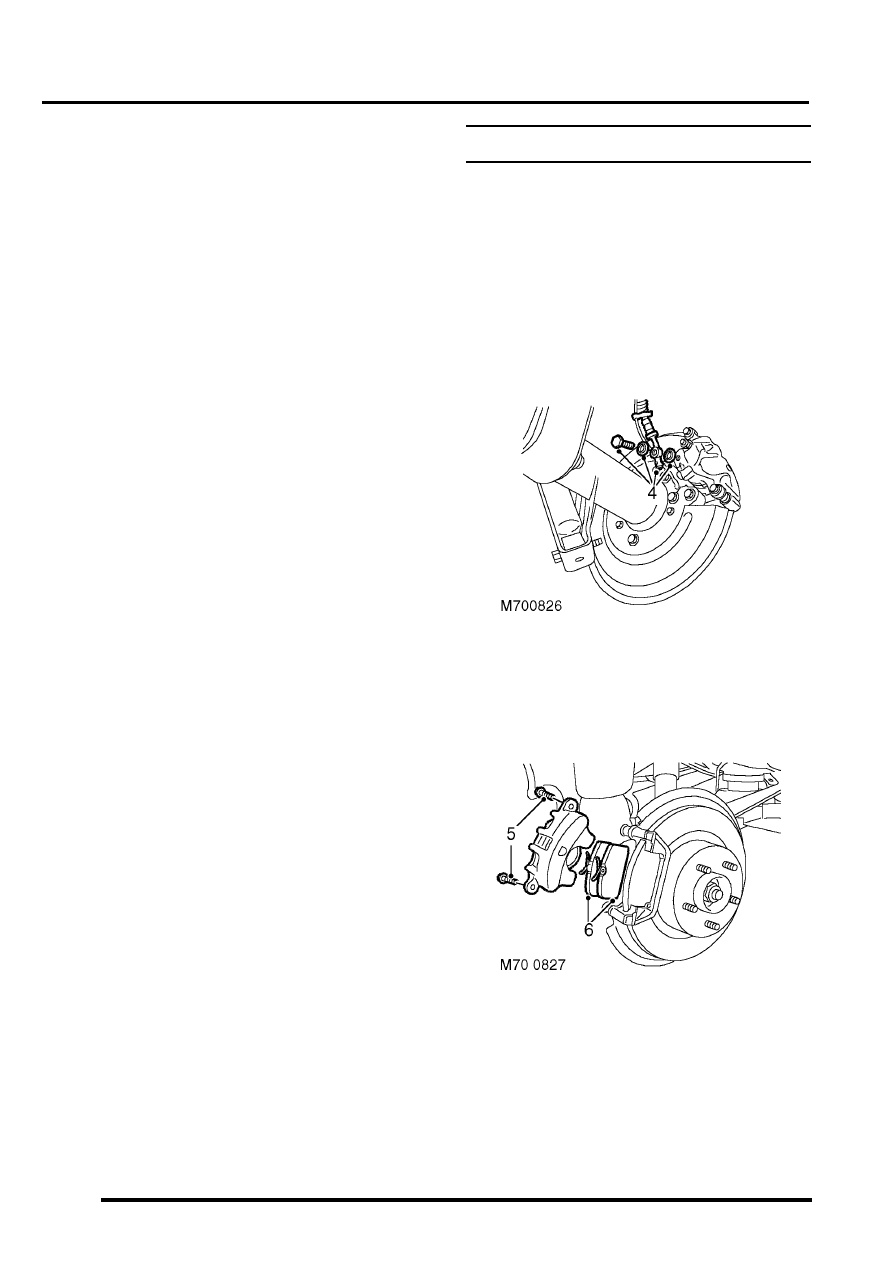
Housing - caliper - front
$% 70.55.24
Remove
1. Raise front of vehicle, one side.
WARNING: Do not work on or under a
vehicle supported only by a jack. Always
support the vehicle on safety stands.
2. Remove road wheel(s).
3. Clamp brake hose to prevent fluid loss.
4. Remove brake hose banjo bolt and discard
sealing washers.
CAUTION: Always fit plugs to open
connections to prevent contamination.
5. Remove 2 guide pin bolts and remove caliper
housing from carrier.
6. Remove 2 brake pads from caliper carrier.
BRAKES
70-44
REPAIRS
Refit
1. Rotate disc by hand and scrape all scale and
rust from around edge of disc. Clean location
surfaces on caliper bracket.
2. Clean dust from brake parts using brake
cleaning fluid.
WARNING: Do not use compressed air to
clean brake components. Dust from friction
materials can be harmful if inhaled.
3. Fit brake pads to caliper carrier.
4. Position caliper housing to carrier, align flats on
guide pins with caliper housing.
5. Fit guide pin bolts and tighten to 30 Nm (22
lbf.ft).
6. Clean banjo bolt and fit new sealing washers.
7. Position hose to caliper and tighten banjo bolt
to 32 Nm (24 lbf.ft).
8. Remove clamp from brake hose.
9. Bleed brake system.
10. Fit road wheel(s) and tighten nuts to 140 Nm
(103 lbf.ft).
11. Remove stand(s) and lower vehicle.
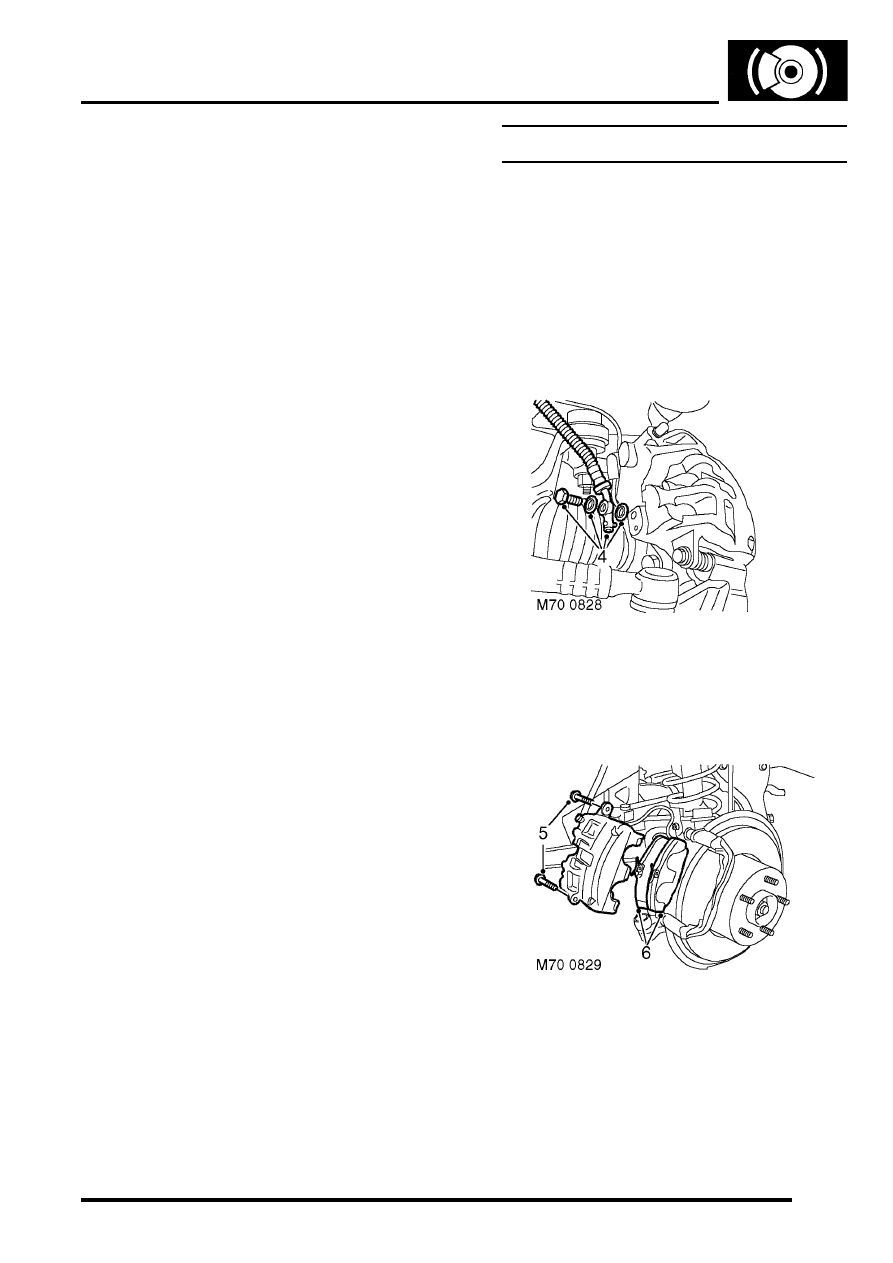
Housing - caliper - rear
$% 70.55.25
Remove
1. Raise rear of vehicle, one side.
WARNING: Do not work on or under a
vehicle supported only by a jack. Always
support the vehicle on safety stands.
2. Remove road wheel(s).
3. Clamp brake hose to prevent fluid loss.
4. Remove brake hose banjo bolt and discard
sealing washers.
CAUTION: Always fit plugs to open
connections to prevent contamination.
5. Remove 2 guide pin bolts and remove caliper
housing from carrier.
6. Remove 2 brake pads from caliper carrier.
BRAKES
REPAIRS
70-45
Refit
1. Rotate disc by hand and scrape all scale and
rust from around edge of disc. Clean location
surfaces on caliper bracket.
2. Clean dust from brake parts using brake
cleaning fluid.
WARNING: Do not use compressed air to
clean brake components. Dust from friction
materials can be harmful if inhaled.
3. Fit brake pads to caliper carrier.
4. Position caliper housing to carrier, align flats on
guide pins with caliper housing.
5. Fit guide pin bolts and tighten to 30 Nm (22
lbf.ft).
6. Clean banjo bolt and fit new sealing washers.
7. Position hose to caliper and tighten banjo bolt
to 32 Nm (24 lbf.ft).
8. Remove clamp from brake hose.
9. Bleed brakes.
10. Fit road wheel(s) and tighten nuts to 140 Nm
(103 lbf.ft).
11. Remove stand(s) and lower vehicle.
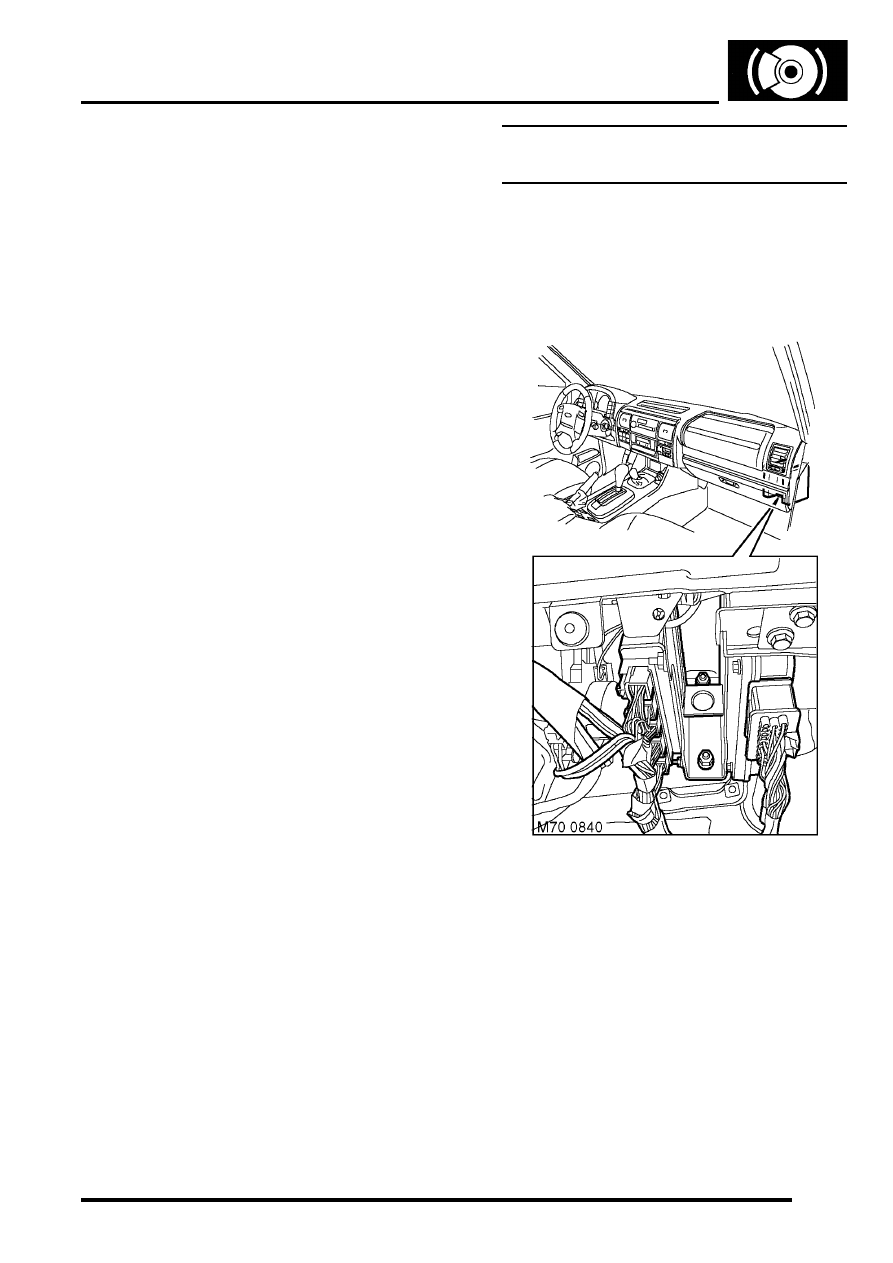
ECU - Self levelling and anti locking
brakes (SLABS)
$% 70.65.01
Remove
1. Remove BCU.
2. Remove 5 multiplugs from SLABS ECU.
3. Remove multiplug from ACE ECU.
4. Remove lower nut and loosen upper nut
securing SLABS and ACE ECU bracket to
body.
5. Remove ECU's and bracket assembly.
BRAKES
70-46
REPAIRS
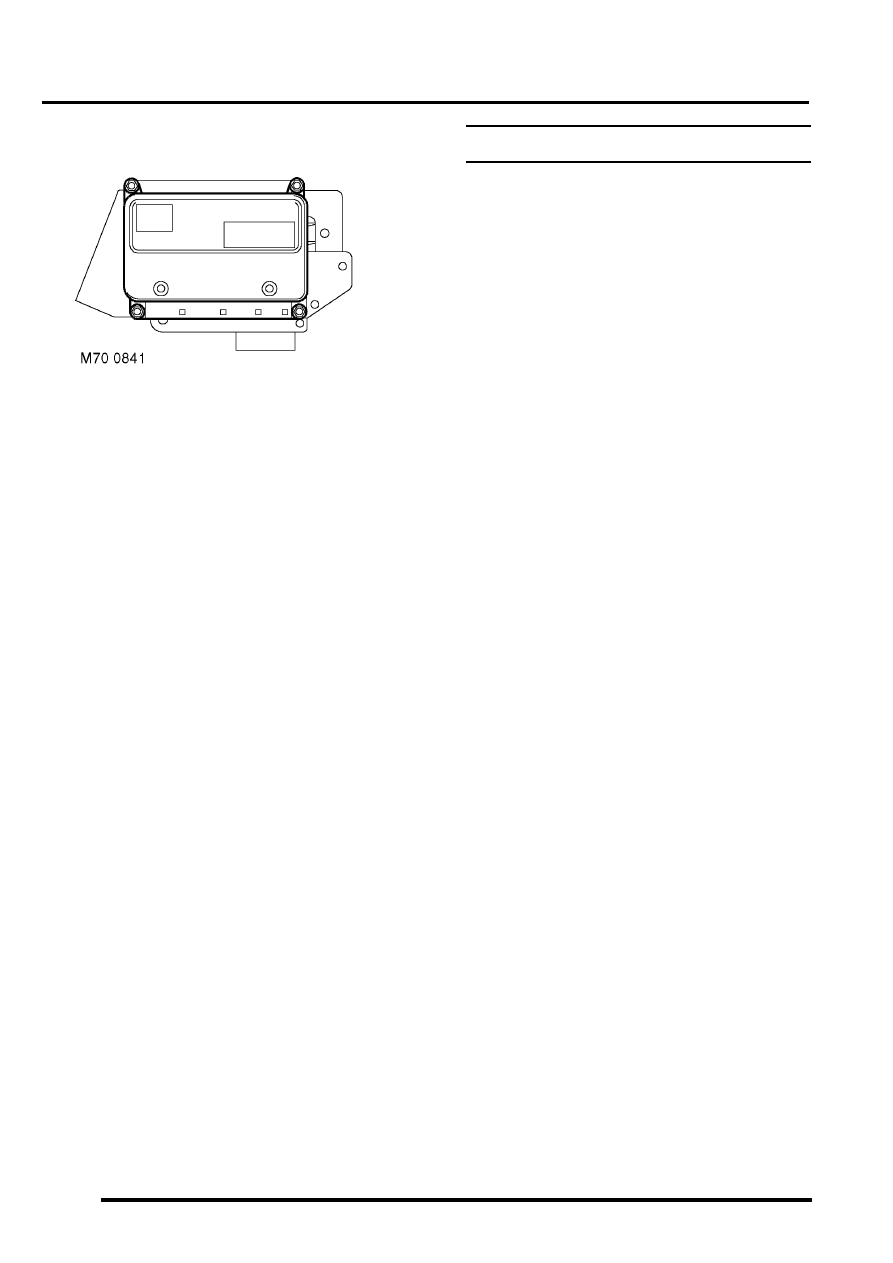
6. Remove 4 nuts securing SLABS ECU and
remove ECU.
Refit
1. Fit new SLABS ECU to bracket and secure with
nuts.
2. Fit ECU's and bracket assembly to body and
secure with nuts.
3. Connect multiplugs to ACE ECU and SLABS
ECU.
4. Fit BCU.
5. Programme the new SLABS ECU using
TestBook.
Sensor – ABS – front
$% 70.65.30
ABS sensor is supplied fitted to wheel hub and
must not be removed.
Remove
1. Remove wheel hub.
Refit
1. Fit wheel hub.
Нет комментариевНе стесняйтесь поделиться с нами вашим ценным мнением.
Текст