Discovery 2. Manual — part 626
REAR SUSPENSION
REPAIRS
64-35
Air valve - SLS
$% 64.50.47
WARNING: Ensure the air suspension system is
made safe before commencing work. Otherwise
the chassis may lower onto the bump stops
during repair.
Remove
1. Using TestBook, depressurise SLS air system.
After depressurisation, approximately 1 bar
(15 lbf.in
2
) air pressure remains in the
system.
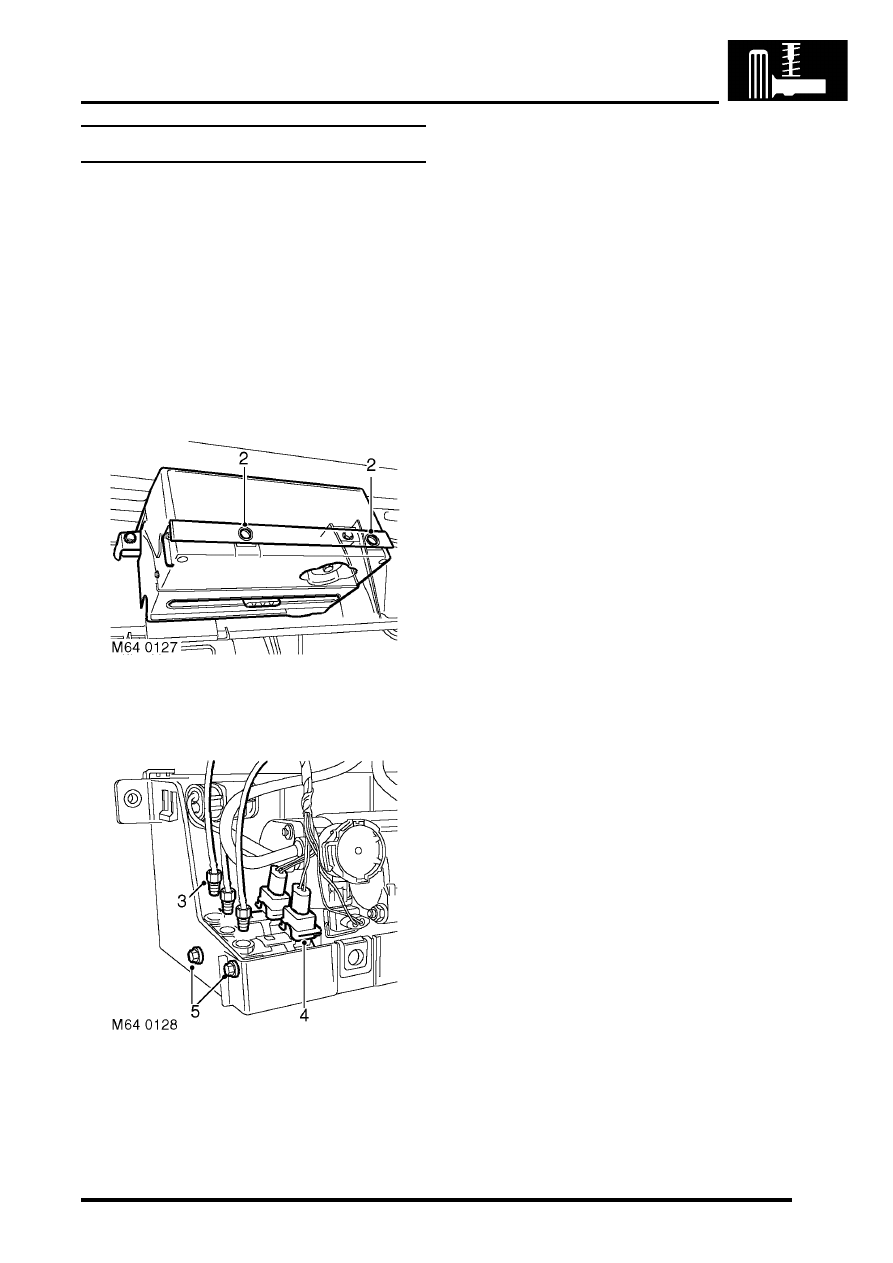
2. Release 2 fasteners and remove air
compressor unit cover.
3. Noting their fitted position, disconnect pipes
from air valves and discard 'O' rings.
4. Disconnect air valve multiplugs.
5. Remove 2 bolts securing air valves and
remove air valves.
Refit
1. Position air valves and fit and tighten bolts.
2. Connect air valve multiplugs.
3. Connect air valve pipes.
4. Ensure pipes are located in cut outs in casing.
5. Position air compressor unit cover and lock
fasteners.
REAR SUSPENSION
64-36
REPAIRS
Actuator - rear - ACE
$% 64.60.40
CAUTION: The ACE hydraulic system is
extremely sensitive to the ingress of dirt or
debris. The smallest amount could render the
system unserviceable. It is imperative that the
following precautions are taken.
l
ACE components are thoroughly cleaned
externally before work commences;
l
all opened pipe and module ports are
capped immediately;
l
all fluid is stored in and administered
through clean containers.
Models with SLS:
WARNING: Ensure the air suspension system is
made safe before commencing work. Otherwise
the chassis may lower onto the bump stops
during repair.
Remove
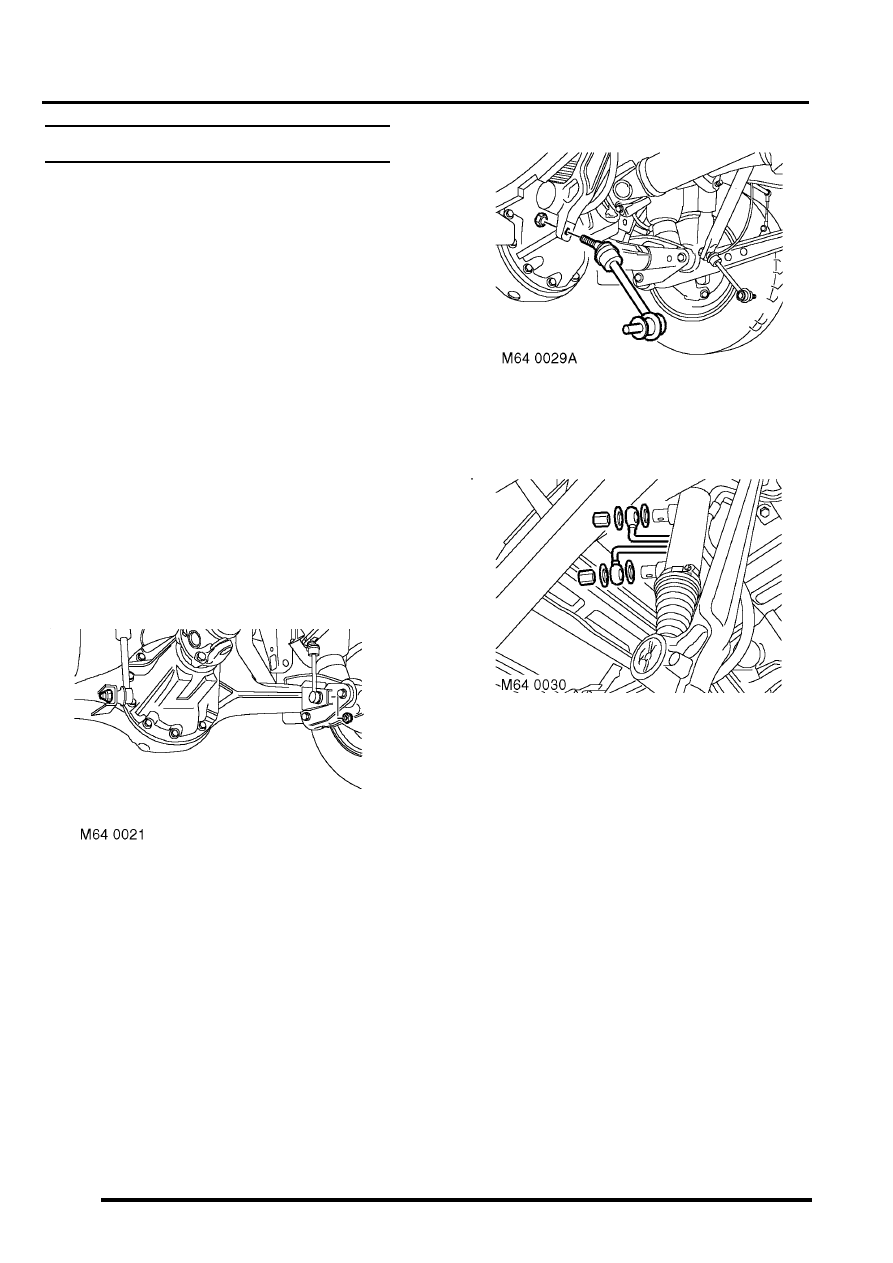
1. Raise vehicle on ramp.
2. Remove nuts securing anti-roll bar links to
axle. Release links from axle.
3. Pull torsion bar down for access to actuator.
4. Remove nut securing anti-roll bar link to long
arm and remove link.
5. Position container to collect fluid spillage.
6. Remove cap nuts securing fluid pipes to
actuator. Disconnect pipes and remove and
discard sealing washers.
CAUTION: Always fit plugs to open
connections to prevent contamination.
REAR SUSPENSION
REPAIRS
64-37
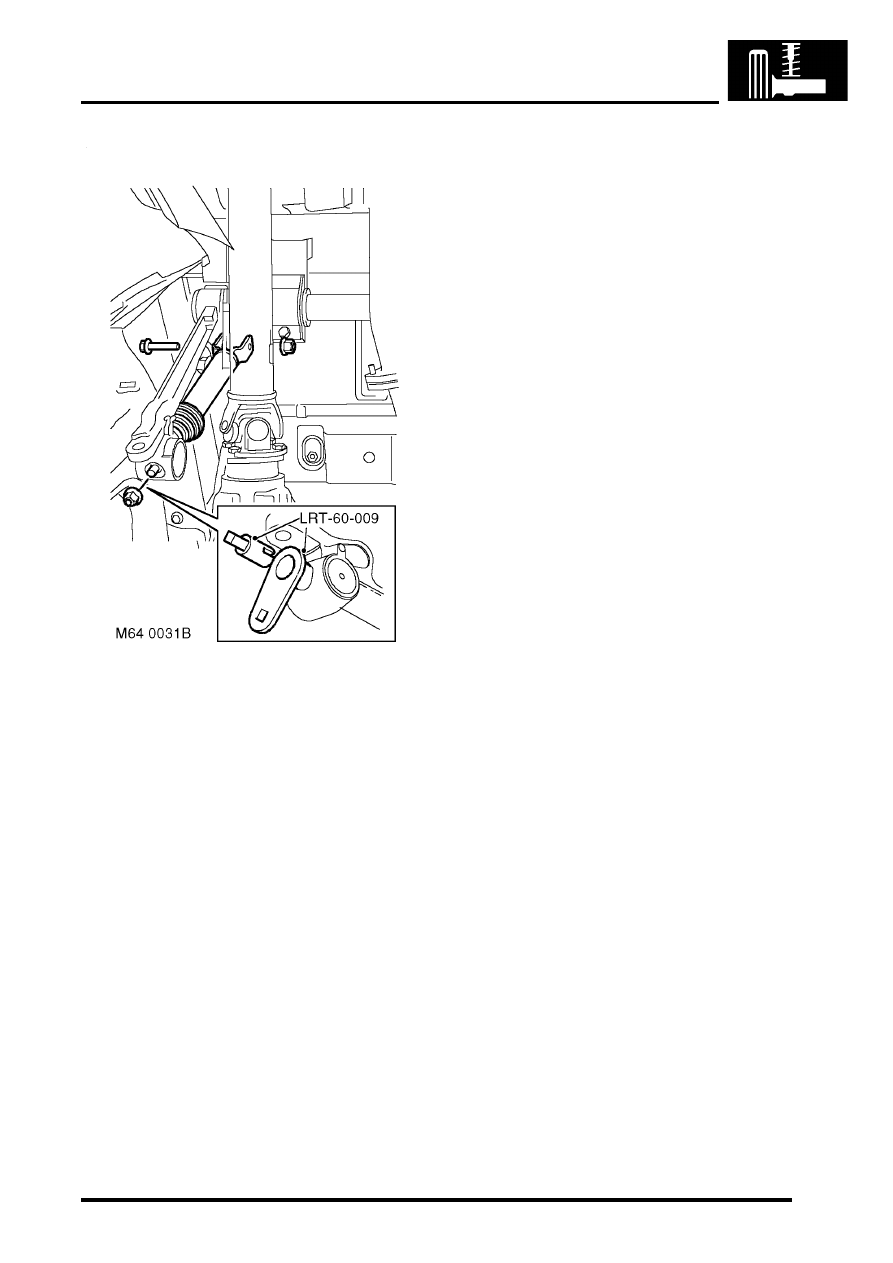
7. Use LRT-60-009 to remove nut securing
actuator push rod to long arm.
8. Remove nut and bolt securing actuator to short
arm and remove actuator.
CAUTION: The short arm and torsion bar
are supplied as an assembly and must not
be separated.
Refit
1. Position actuator and tighten nut and bolt
securing actuator to short arm to 180 Nm (133
lbf.ft).
2. Using LRT-60-009 , fit and tighten nut securing
actuator push rod to long arm to 48 Nm (35
lbf.ft).
3. Connect pipes to actuator with cap nuts and
new sealing washers. Tighten cap nuts to 29
Nm (21 lbf.ft). Ensure pipes are not under
tension or kinked.
4. Connect anti-roll bar link to long arm and
tighten nut to 50 Nm (37 lbf.ft).
5. Ensure washer is in place on lower ball joint of
each anti-roll bar link and connect lower ball
joints to axle. Tighten nuts to 100 Nm (74 lbf.ft).
6. Renew ACE high pressure filter.
7. Lower vehicle.
8. Bleed ACE hydraulic system.
REAR SUSPENSION
64-38
REPAIRS
Bushes - rear long arm - ACE
$% 64.60.46
CAUTION: The ACE hydraulic system is
extremely sensitive to the ingress of dirt or
debris. The smallest amount could render the
system unserviceable. It is imperative that the
following precautions are taken.
l
ACE components are thoroughly cleaned
externally before work commences;
l
all opened pipe and module ports are
capped immediately;
l
all fluid is stored in and administered
through clean containers.
Models with SLS:
WARNING: Ensure the air suspension system is
made safe before commencing work. Otherwise
the chassis may lower onto the bump stops
during repair.
Remove
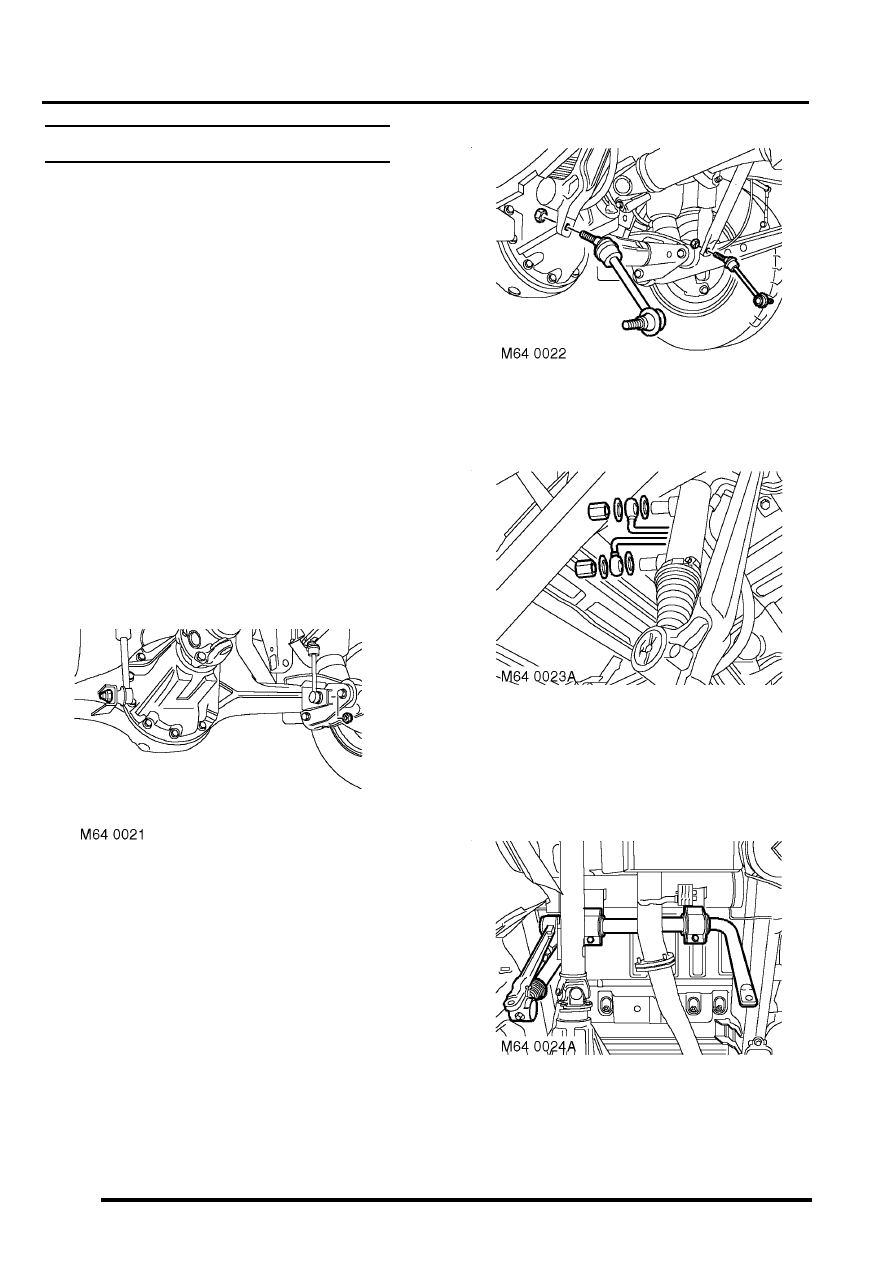
1. Raise vehicle on ramp.
2. Remove nuts securing anti-roll bar links to axle.
Release links from axle.
3. Pull torsion bar down for access to actuator.
4. Remove securing nuts and remove anti-roll bar
links from torsion bar.
5. Position container to collect fluid spillage.
6. Remove cap nuts securing fluid pipes to
actuator. Disconnect pipes and remove and
discard sealing washers.
CAUTION: Always fit plugs to open
connections to prevent contamination.
7. With assistance, remove bolts securing torsion
bar clamps. Remove clamps and remove
torsion bar and actuator.
Нет комментариевНе стесняйтесь поделиться с нами вашим ценным мнением.
Текст