Discovery 2. Manual — part 624
REAR SUSPENSION
REPAIRS
64-27
Road spring - rear
$% 64.20.01
Remove
1. Raise rear of vehicle.
WARNING: Do not work on or under a
vehicle supported only by a jack. Always
support the vehicle on safety stands.
2. Support vehicle under chassis.
3. Remove road wheel.
4. Support weight of axle on a jack.
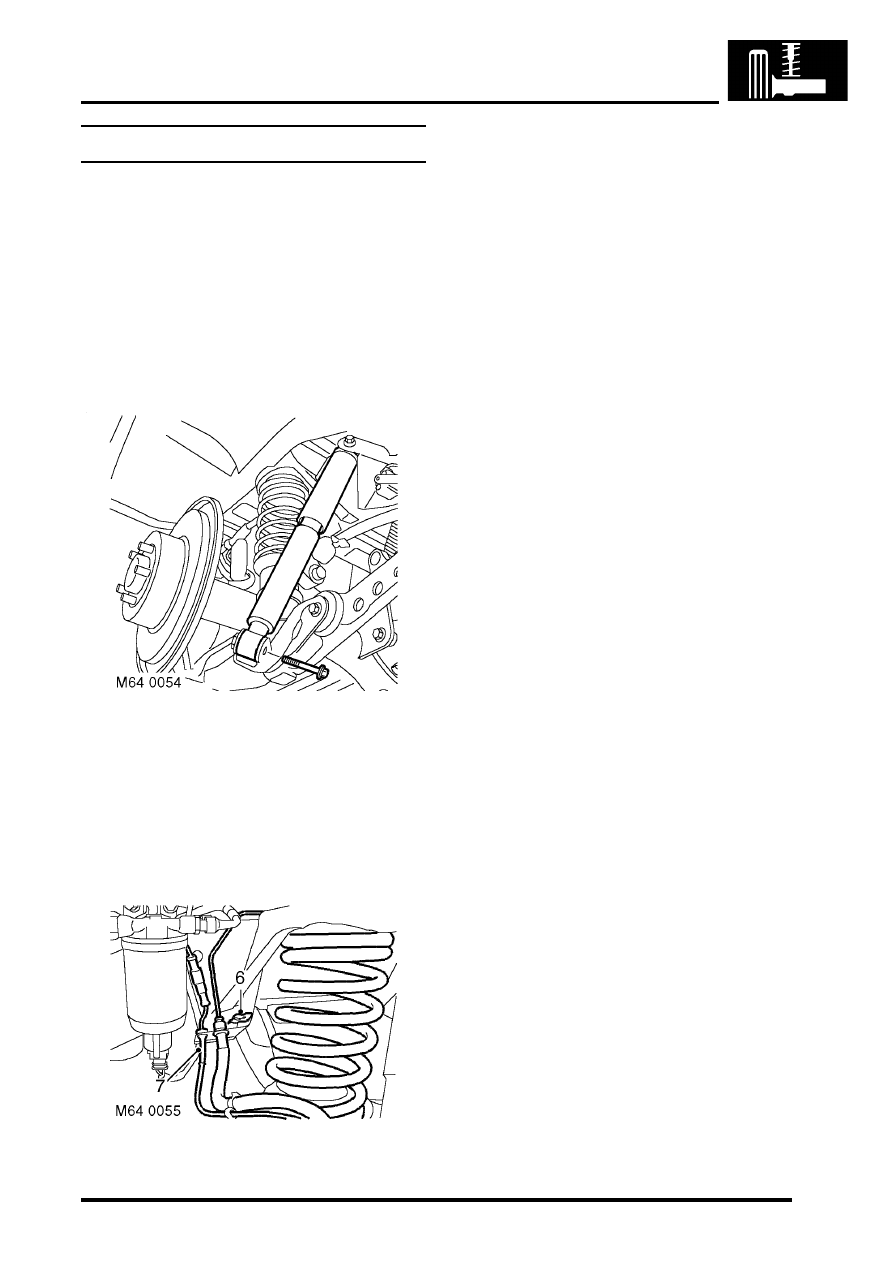
5. Remove bolt securing damper to axle.
WARNING: Make sure the axle cannot move
when the damper is disconnected. The
damper limits the downward movement of
the axle. If the axle is not restrained,
disconnecting the damper will allow
unrestricted movement which may cause
personal injury or damage to equipment.
6. Remove clip securing brake pipe to bracket.
7. Release ABS sensor lead from bracket.
8. Lower axle on jack and remove spring.
Refit
1. Ensure spring seats are clean.
2. Fit spring with close coil uppermost.
3. Ensure spring is correctly located on spring
seats and raise axle. Fit and tighten bolt
securing damper to axle to 124 Nm (91 lbf.ft).
4. Fit clip to secure brake pipe to bracket.
5. Fit ABS sensor lead to bracket.
6. Fit road wheel and tighten nuts to 140 Nm (103
lbf.ft).
7. Remove stand(s) and lower vehicle.
REAR SUSPENSION
64-28
REPAIRS
Air spring - SLS
$% 64.21.01
Remove
1. Using TestBook, depressurise SLS air system.
After depressurisation, approximately 1 bar
(15 lbf.in
2
) air pressure remains in the
system.
2. Raise rear of vehicle and support under
chassis.
WARNING: Do not work on or under a
vehicle supported only by a jack. Always
support the vehicle on safety stands.
3. Remove road wheel.
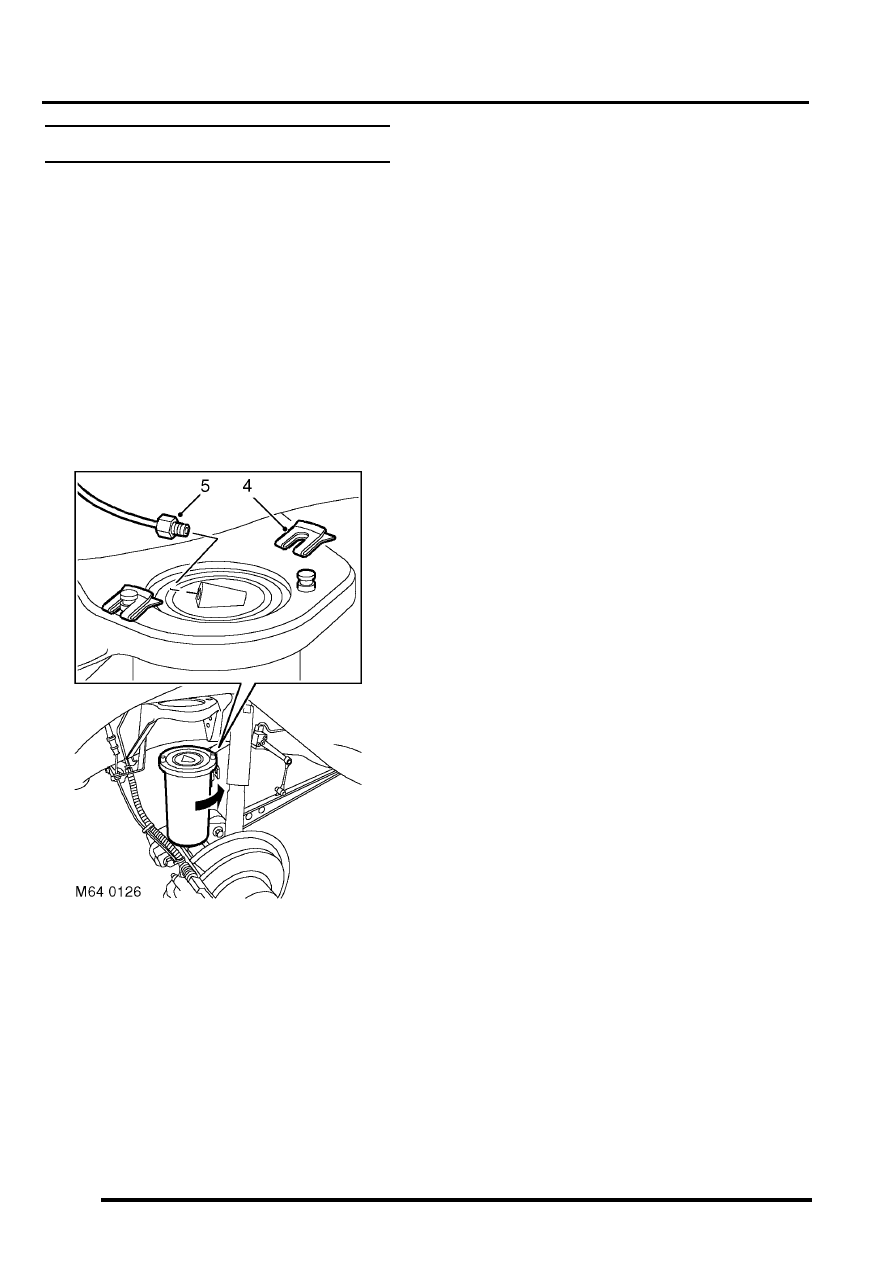
4. Remove 2 clips securing air spring to chassis.
5. Collapse air spring and disconnect pipe from
top of air spring.
CAUTION: Always fit plugs to open
connections to prevent contamination.
6. Rotate air spring, to unlock from axle and
remove from vehicle.
7. Remove connector from pipe.
Refit
1. Clean mating faces of air spring, axle and
chassis.
2. Fit pipe connector to air spring.
3. Locate air spring on axle and rotate 90
°
to fully
engage bayonet fitting.
4. Connect pipe to top of air spring.
5. Engage top locating pins of air spring in chassis
and secure with clips.
6. Fit road wheel and tighten nuts to 140 Nm (103
lbf.ft).
7. Remove stand(s) and lower vehicle.
REAR SUSPENSION
REPAIRS
64-29
Damper - rear
$% 64.30.02
Remove
1. Raise rear of vehicle and support under
chassis.
WARNING: Do not work on or under a
vehicle supported only by a jack. Always
support the vehicle on safety stands.
2. Remove road wheel.
3. Support weight of axle on a jack.
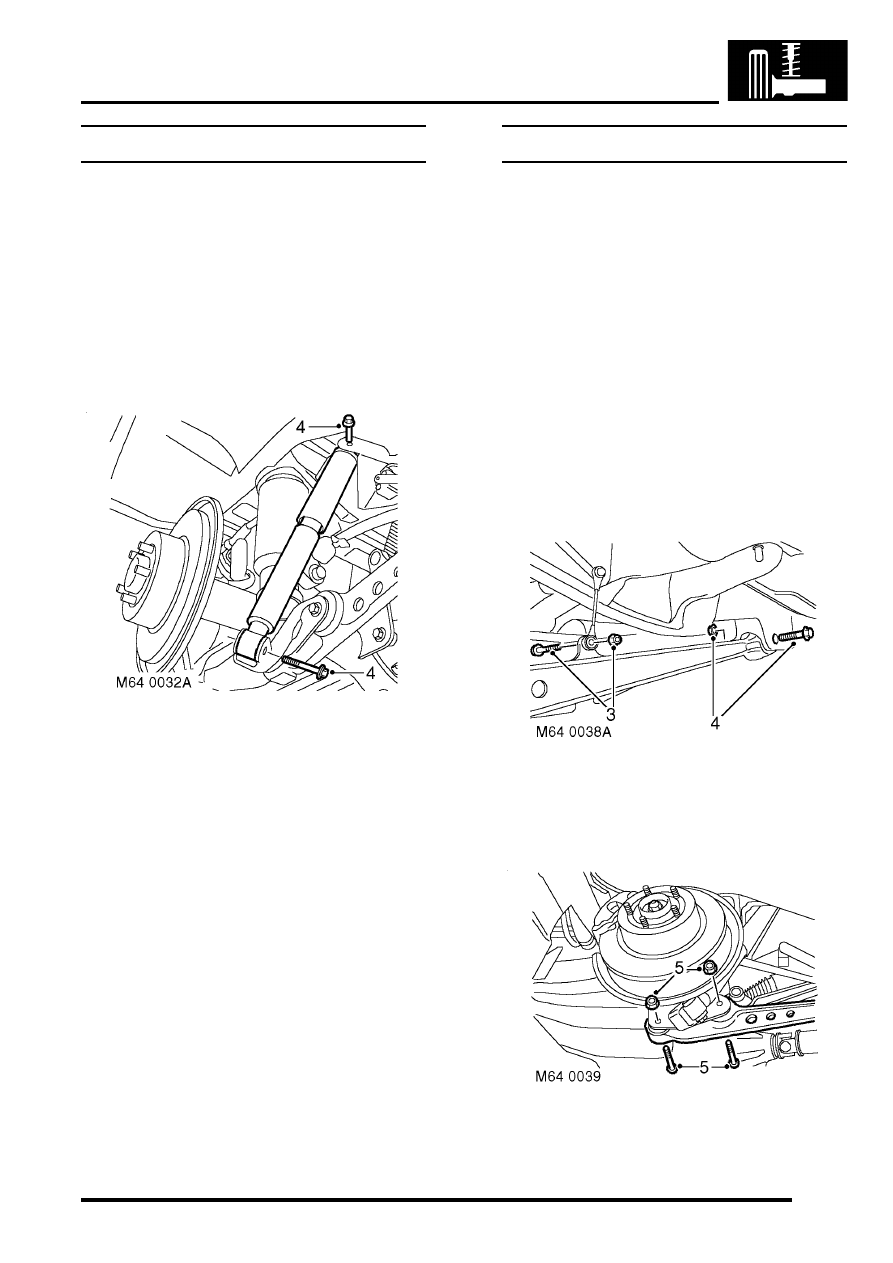
4. Remove 2 bolts securing damper to axle and
chassis.
WARNING: Make sure the axle cannot move
when the damper is disconnected. The
damper limits the downward movement of
the axle. If the axle is not restrained,
disconnecting the damper will allow
unrestricted movement which may cause
personal injury or damage to equipment.
5. Compress damper and remove from vehicle.
Refit
1. Locate damper in axle and fit lower bolt, extend
damper to chassis and fit top bolt.
2. Tighten damper bolts to 125 Nm (92 lbf.ft).
3. Lower axle and remove jack.
4. Fit road wheel and tighten nuts to 140 Nm (103
lbf.ft).
5. Remove stand(s) and lower vehicle.
Bushes - radius arm
$% 64.35.29
Models with SLS:
WARNING: Ensure the air suspension system is
made safe before commencing work. Otherwise
the chassis may lower onto the bump stops
during repair.
Remove
1. Raise rear of vehicle.
WARNING: Do not work on or under a
vehicle supported only by a jack. Always
support the vehicle on safety stands.
2. Remove road wheel(s).
3. Models with SLS: Remove nut and bolt
securing height sensor link to radius arm.
4. Remove nut and bolt securing radius arm to
chassis.
5. Remove nuts securing radius arm to axle.
Remove rear bolt and lower radius arm.
Remove front bolt and remove radius arm.
REAR SUSPENSION
64-30
REPAIRS
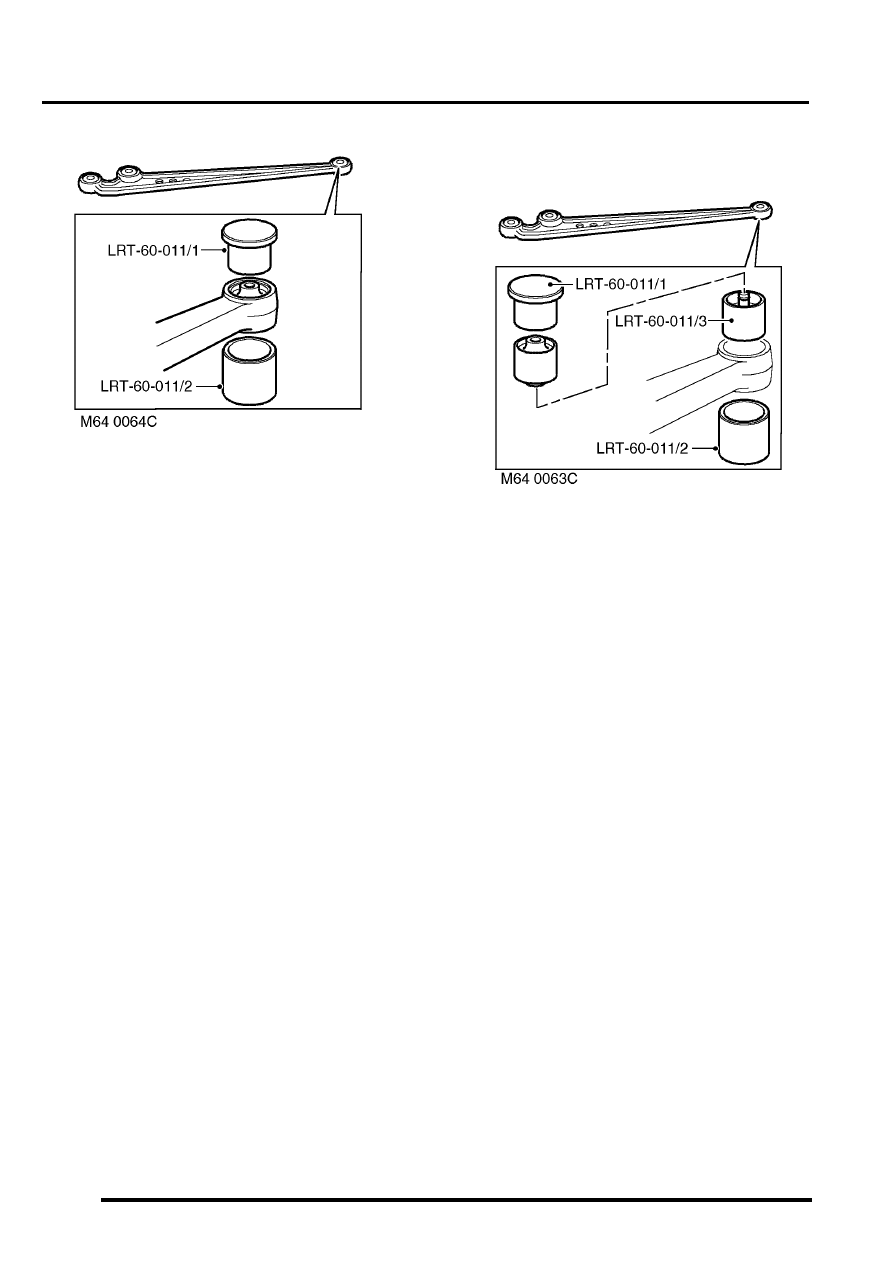
6. Press out bushes from axle end of radius arm
using a length of steel tubing.
7. Press out bush from rear of radius arm:
l
Use LRT-60-011/1 and LRT-60-011/2 to
remove rear bush.
Refit
1. Clean bush locations in radius arms.
2. Press in new bushes:
l
Use LRT-60-011/1, LRT-60-011/2 and
LRT-60-011/3 to fit rear bush.
3. Position radius arm to vehicle. Fit bolts and nuts
but do not tighten at this stage.
4. Models with SLS: Position height sensor link
to radius arm and tighten nut and bolt to 25 Nm
(18 lbf.ft).
5. Fit road wheel(s) and tighten nuts to 140 Nm
(103 lbf.ft).
6. Remove stand(s) and lower vehicle.
7. Tighten radius arm nuts and bolts to 230 Nm
(170 lbf.ft).
CAUTION: Nuts and bolts must be tightened
with weight of vehicle on suspension.
8. Use TestBook to calibrate SLS height sensor.
Нет комментариевНе стесняйтесь поделиться с нами вашим ценным мнением.
Текст