Discovery 2. Manual — part 577
AUTOMATIC GEARBOX - ZF4HP22 - 24
REPAIRS
44-47
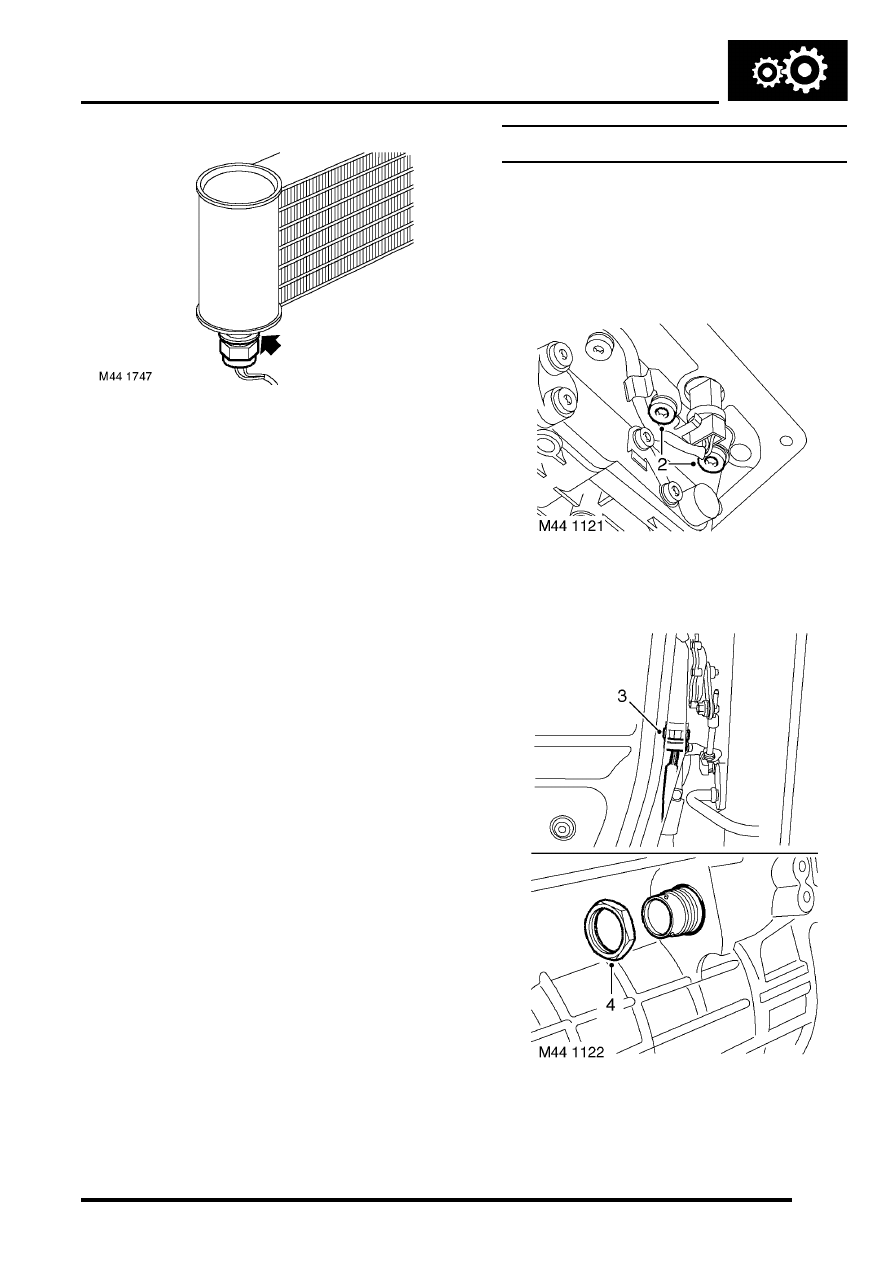
7. Remove temperature sensor and discard
sealing washer.
Refit
1. Use new sealing washer and tighten
temperature sensor to 14 Nm (10 lbf.ft).
2. Fit cooler, engage with radiator and secure with
screw.
3. Connect temperature sensor multiplug.
4. Ensure connections are clean and fit hoses to
cooler.
5. If fitted:Fit engine oil cooler.
ENGINE - V8, REPAIRS, Cooler -
6. Check and if necessary top up gearbox fluid.
Valve body assembly
$% 44.40.01
Remove
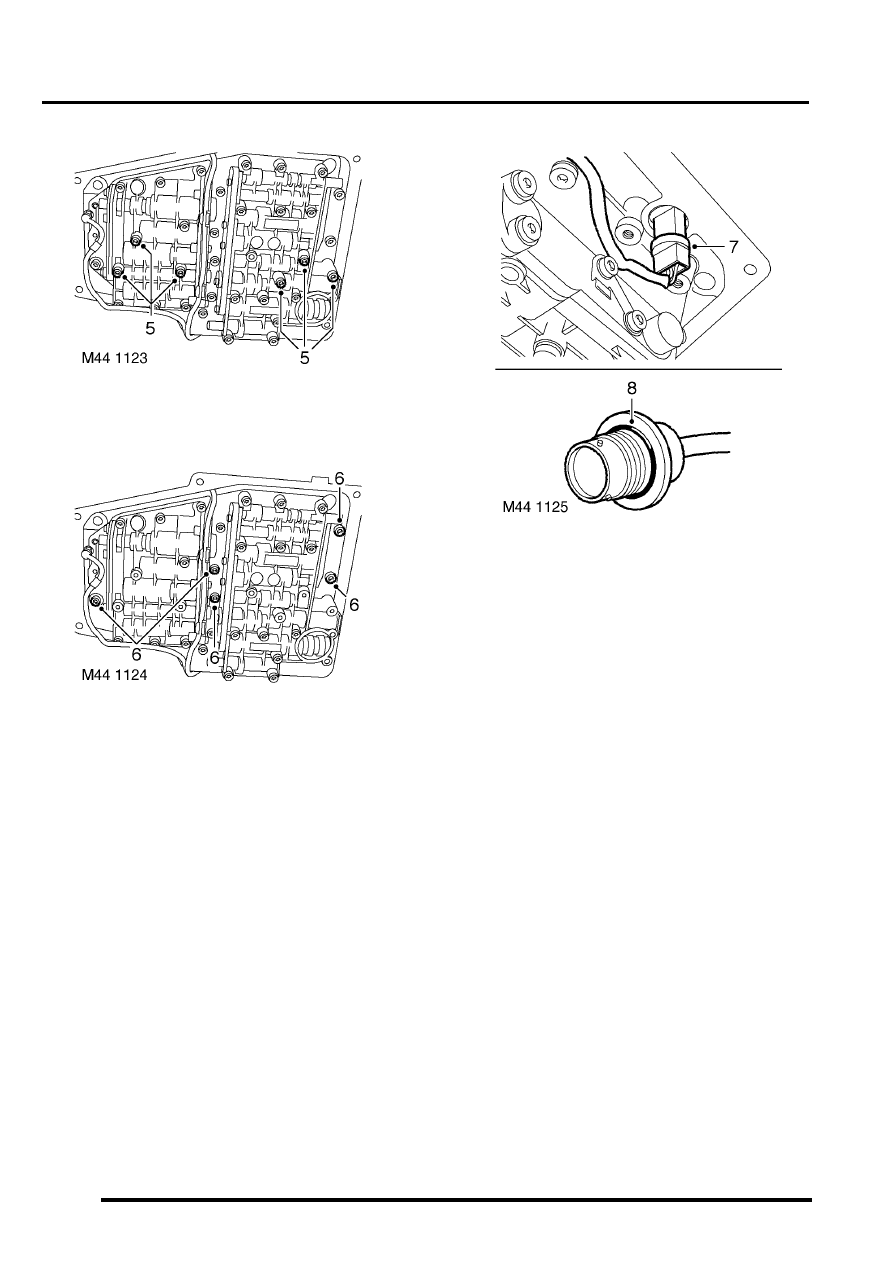
1. Remove gearbox oil filter.
2. Remove 2 bolts securing speed sensor
harness bracket to valve body.
3. Disconnect multiplug from gearbox housing.
4. Using a 30 mm socket, remove nut securing
multiplug connector block to gearbox housing.
AUTOMATIC GEARBOX - ZF4HP22 - 24
44-48
REPAIRS
5. Remove 6 long bolts securing valve body to
gearbox.
6. Remove 5 short bolts securing valve body to
gearbox.
7. Release speed sensor and remove valve body.
8. Remove and discard 'O' ring from multiplug
connector.
Refit
1. Clean valve body and mating faces.
2. Fit new 'O' ring to multiplug connector block.
3. With assistance, position multiplug to gearbox
housing and tighten nut.
4. Align valve body to gearbox, ensure manual
valve is correctly located. Position speed
sensor retaining bracket, and tighten screws
to 8 Nm (6 lbf.ft).
5. Connect multiplug to gearbox connector.
6. Fit gearbox oil filter.
AUTOMATIC GEARBOX - ZF4HP22 - 24
REPAIRS
44-49
Seal - valve body
$% 44.20.13
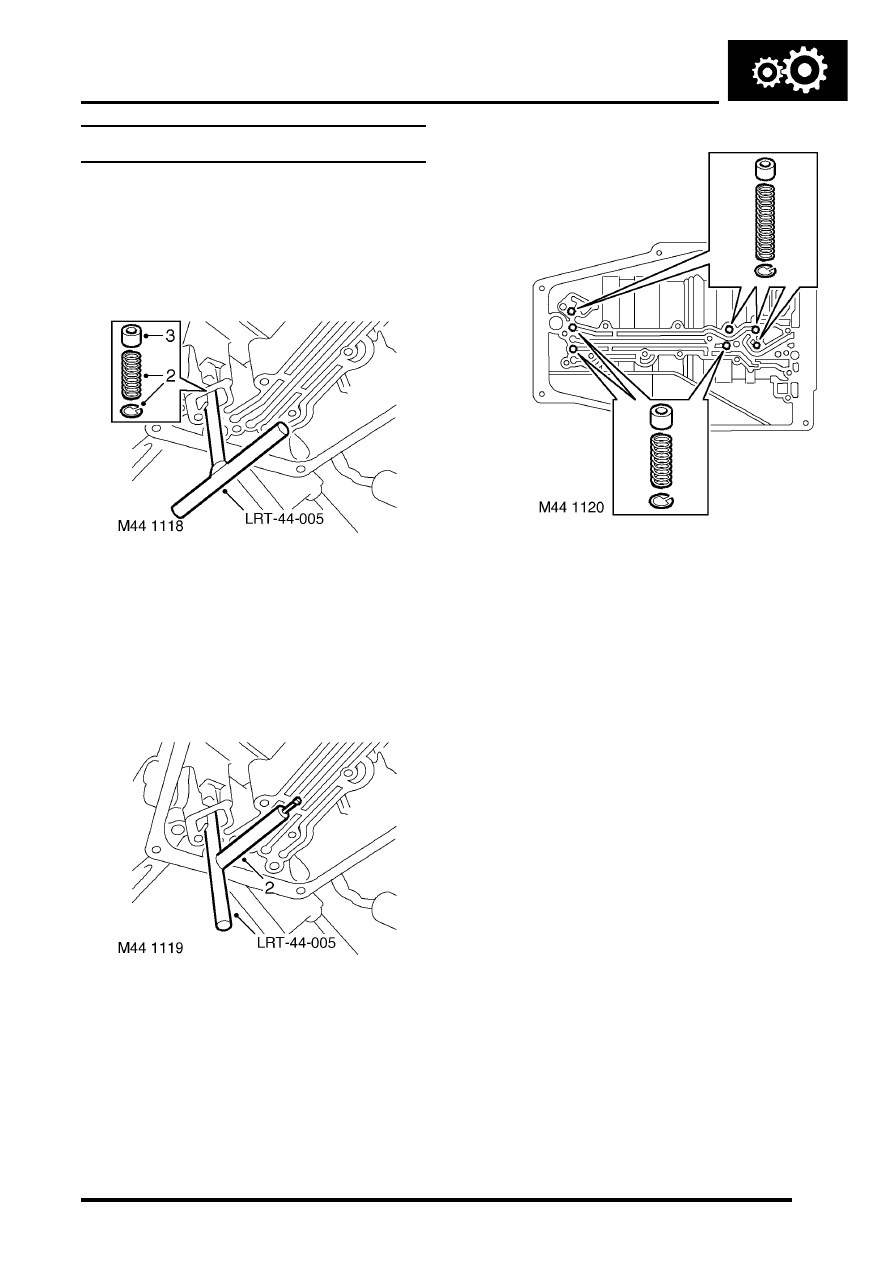
Remove
1. Remove valve body assembly.
- 24, REPAIRS, Valve body assembly.
2. Remove circlips and springs from gearbox
casing noting location of long and short
springs.
3. Using tool LRT-44-005, remove and discard
seals from gearbox casing.
Refit
1. Clean gearbox casing, springs and circlips.
2. Fit new seals using tool LRT-44-005, ensure
seals are fully seated.
3. Position springs in their correct locations and
secure with circlips.
4. Fit valve body assembly.
AUTOMATIC GEARBOX - ZF4HP22 - 24
44-50
REPAIRS
Pressure regulator
$% 44.40.22
Remove
1. Remove valve body assembly.
- 24, REPAIRS, Valve body assembly.
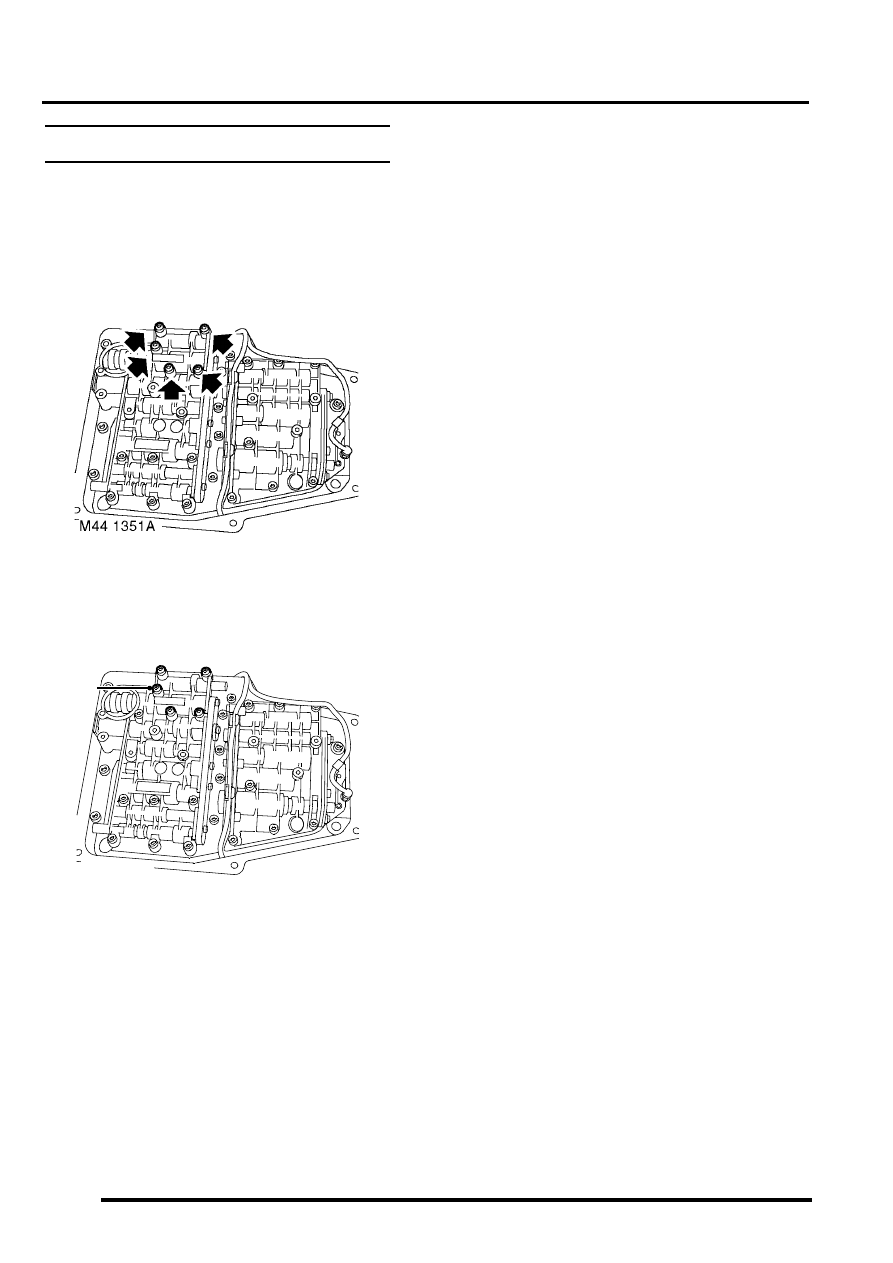
2. Release and remove clip securing pressure
regulator solenoid valve harness to valve body.
3. Disconnect multiplug from pressure regulator
solenoid valve.
4. Remove 5 Torx screws securing pressure
regulator to valve body and remove pressure
regulator.
Refit
1. Clean pressure regulator and mating face with
a lint free cloth.
2. Position pressure regulator to valve body, fit
Torx screws and tighten to 8 Nm (6 lbf.ft).
3. Connect multiplug to pressure regulator
solenoid valve, fit clip and secure harness to
valve body.
4. Fit valve body assembly.
- 24, REPAIRS, Valve body assembly.
M44 1351
3
Нет комментариевНе стесняйтесь поделиться с нами вашим ценным мнением.
Текст