Defender (1993+). Manual — part 56
LT230T
TRANSFER GEARBOX
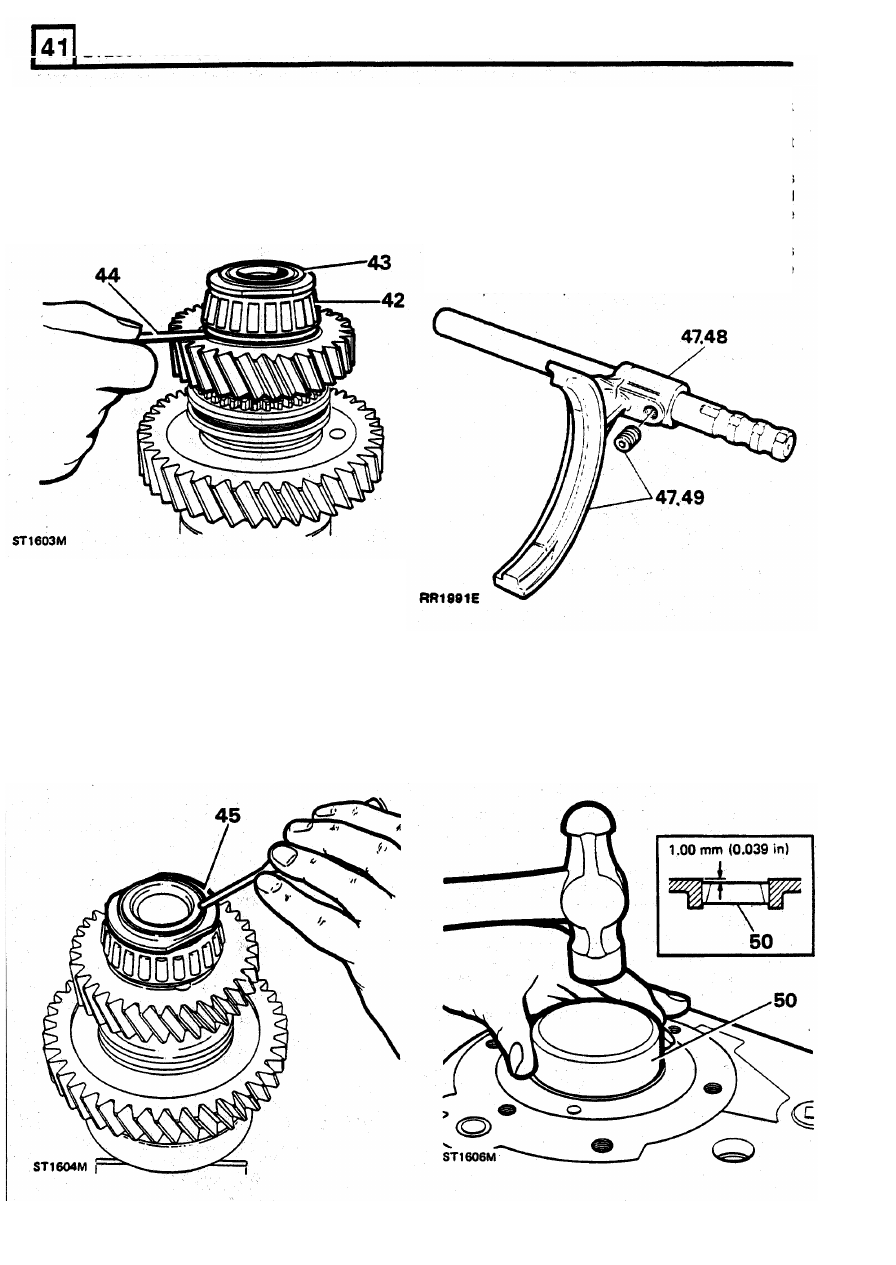
42. Locate the rear differential bearing on
to
the
46. Clean and check high/low selector fork
hub and press
it
into position using the
assembly for wear and renew
if
necessary.
smaller end
of
tool 18G1424, see instruction
47.
To renew the selector fork remove the set
36.
screw and slide the fork from the shaft.
43. Fit the stake nut and tighten
to
the specified
48. Fit the new selector fork with its boss towards
torque using
tool
18G1423.
the three detent grooves. Align the tapped
44.
Check the end float of the high and low range
hole in the fork boss with the indent in the
gears
0,05
to 0,15
mm (0.002
to 0.005
in).
shaft nearest
to
the detent grooves.
49. Apply Loctite
290
to the set screw threads
and
fit
the set screw and tighten
to
the
specified torque.
NOTE: If the clearances vary from those
specified, the assembly must
be rebuilt
using the relevant new
parts.
45. Peen the stake nut collar by carefully forming
the collar
of
the nut into the
slot
as illustrated.
CAUTION:
A round nose tool must be used
for this operation to avoid splitting the
collar of the nut.
Centre differential rear bearing track
50. Fit the differential rear bearing track
1,00
mm
(0.039
in) below the outer face of casing using
a
suitable
tool
as
shown.
20
REISSUED: FEB 1993
LT230T TRANSFER GEARBOX
Rear output housing
-
refit
1.
Grease output housing gasket and position
on
to the rear face of the transfer box casing.
2.
Fit
output housing and ensure clearance of
100
mm (0.039 in) between housing face and
gasket.
3.
Fit
the six output housing bolts with Loctite
290
on the threads, with washers and tighten,
evenly to the correct torque, which will pull the
rear bearing into position.
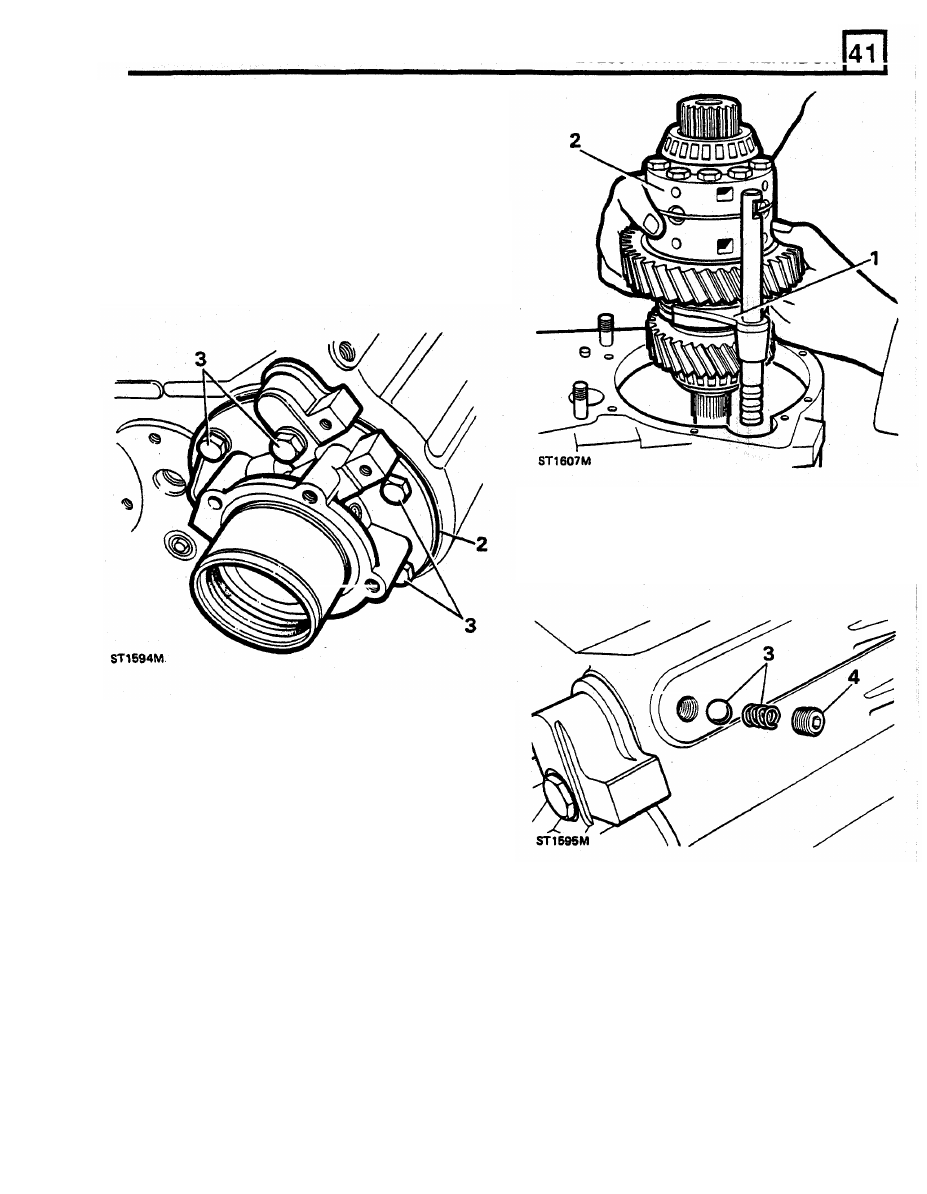
3.
Fit selector shaft ball and spring through the
side
of
the transfer box casing.
4.
Apply Loctite 290 to detent plug; fit and-
locate, by screwing gently fully home and then
unscrewing two turns.
Centre differential unit refit
1.
Fit
the selector fork/shaft assembly to the
high/low selector sleeve
on
the differential
assembly, with detent groove
to
the rear
of
the
differential assembly.
2.
Locate the differential assembly complete with
selector fork into the transfer box casing. It
may be necessary to rotate the output shaft to
ease fitment, and engage selector shaft into
its hole.
LT230T
TRANSFER
GEARBOX
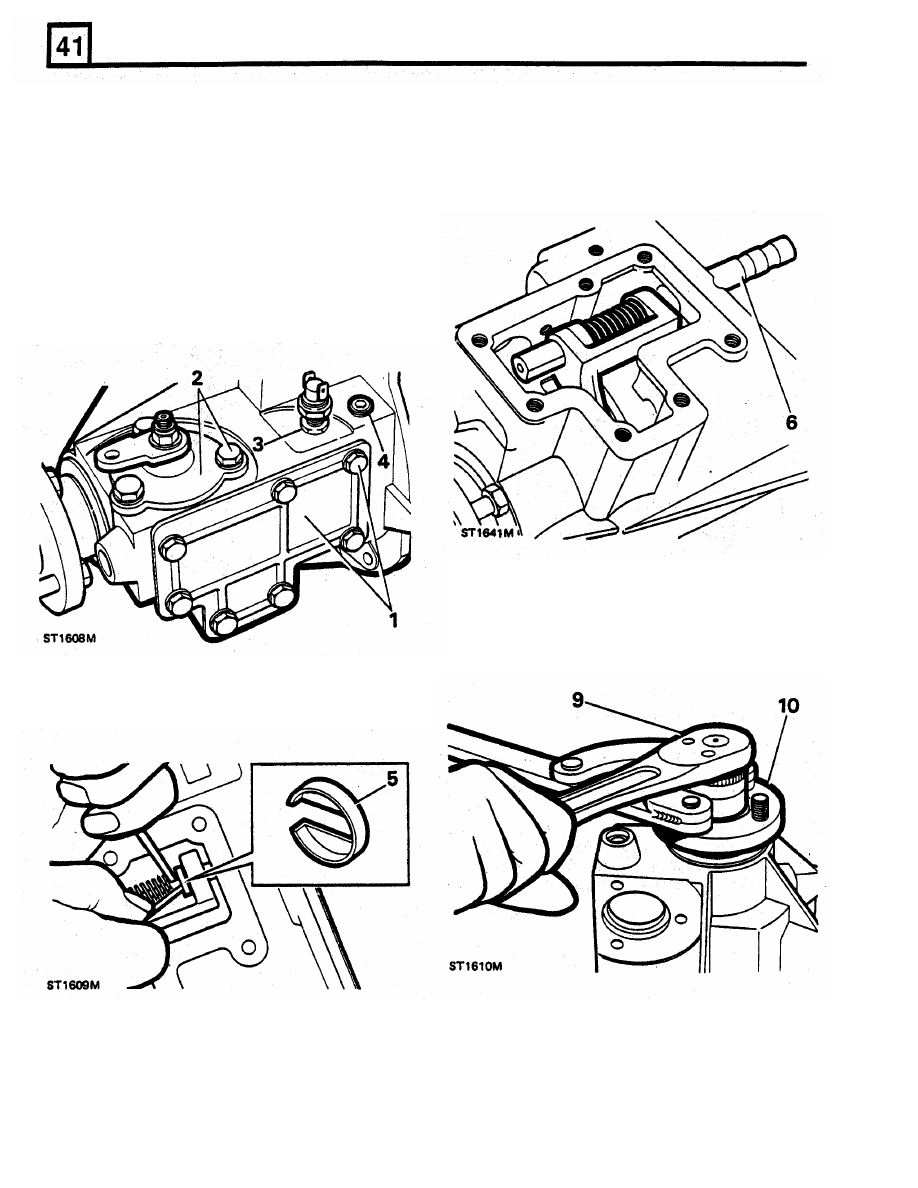
Front output housing dismantle and overhaul
6.
Withdraw the selector shaft from the rear of
the output housing.
1.
Unscrew seven retaining bolts and washers
7.
Remove the selector fork and spring through
the side cover aperture.
8. Remove lock - up sleeve from the rear of the
and remove the differential lock selector side
2.
Unscrew three retaining bolts and washers
output housing.
and lift the differential lock finger housing and
actuator assembly
from
the front output
3. Slacken the locknut
and
unscrew
the
4. Remove slector shaft detent plug, spring and
9.
Using flange wrench
18G1205
and socket
wrench, remove the flange nut,
steel
and felt
washers.
NOTE: Ensure that flange bolts are fully
engaged
in the wrench.
5.
Compress the selector fork spring and remove
the two spring retaining caps.
cover and gasket.
housing.
differential lock warning light switch.
ball using a suitable magnet.
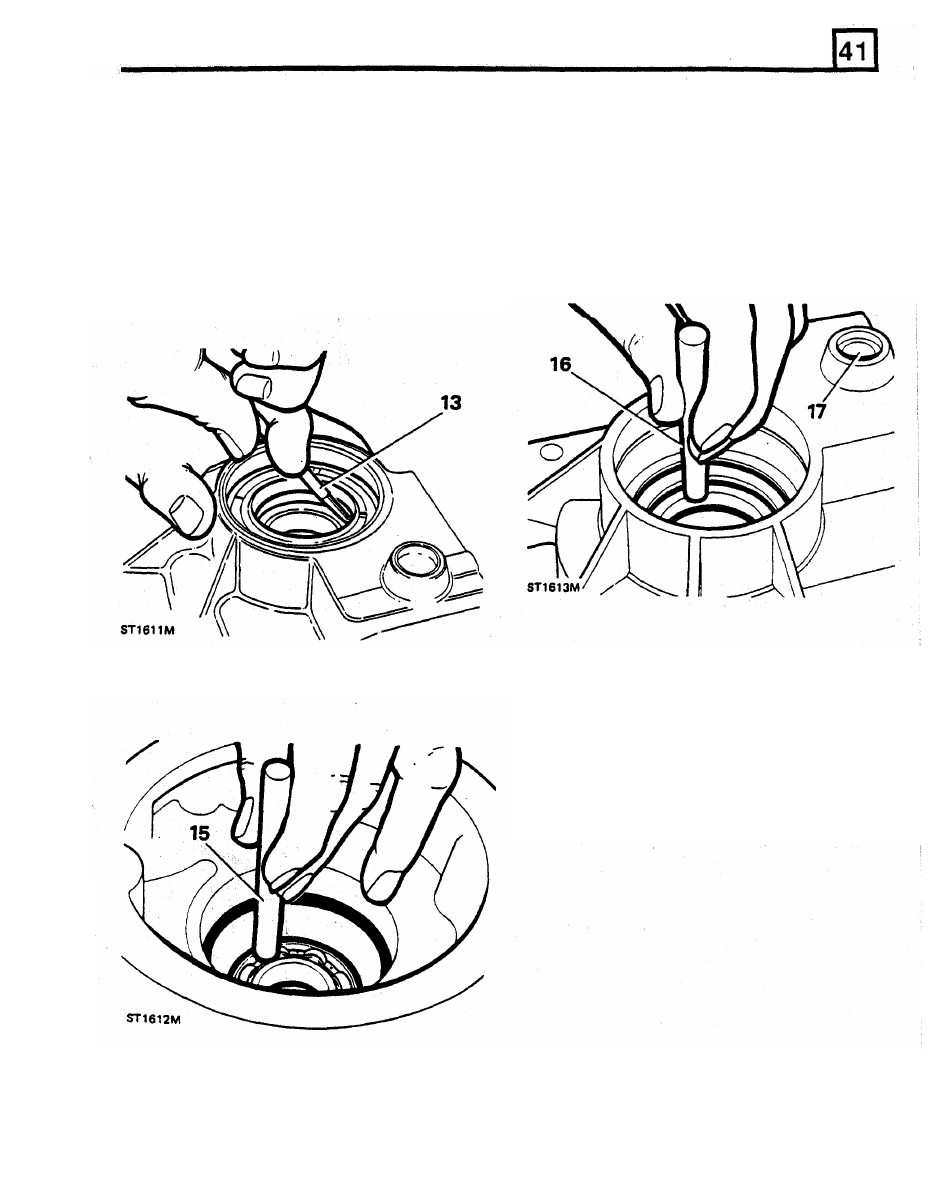
LT230T TRANSFER GEARBOX
10. Remove the output flange with oil seal shield.
16.
Drift out centre differential front taper roller
bearing track and shim.
NOTE: These parts need not be separated
unless the flange bolts are to be renewed.
11. Drift output shaft rearwards from housing
using a soft headed mallet.
12.
Slide
off
the collar from the output shaft.
13.
Remove and discard oil seal from output
housing using service tool 18G1271 to avoid
damaging the housing.
14.
Remove circlip with circlip pliers 18G257.
17.
Drift out selector shaft cup plug from housing.
18.
Clean all components ensuring all traces of
'Loctite' are removed from faces and threads.
19.
Examine components for wear or damage and
renew if necessary.
NOTE: Renew oil seal and felt seal and
flange nut.
15.
Invert housing and drift out bearing from
inside the case as shown.
Re-assembling front output housing
20. Press the bearing into the housing: do not use
excessive force.
To
facilitate fitting the
bearing, heat the front output housing
uniformally
to
a temperature that must not
exceed 100°C (212°F).
21.
Using circlip pliers, fit the bearing retaining
clips.
Нет комментариевНе стесняйтесь поделиться с нами вашим ценным мнением.
Текст