Defender (1993+). Manual — part 117
BODY
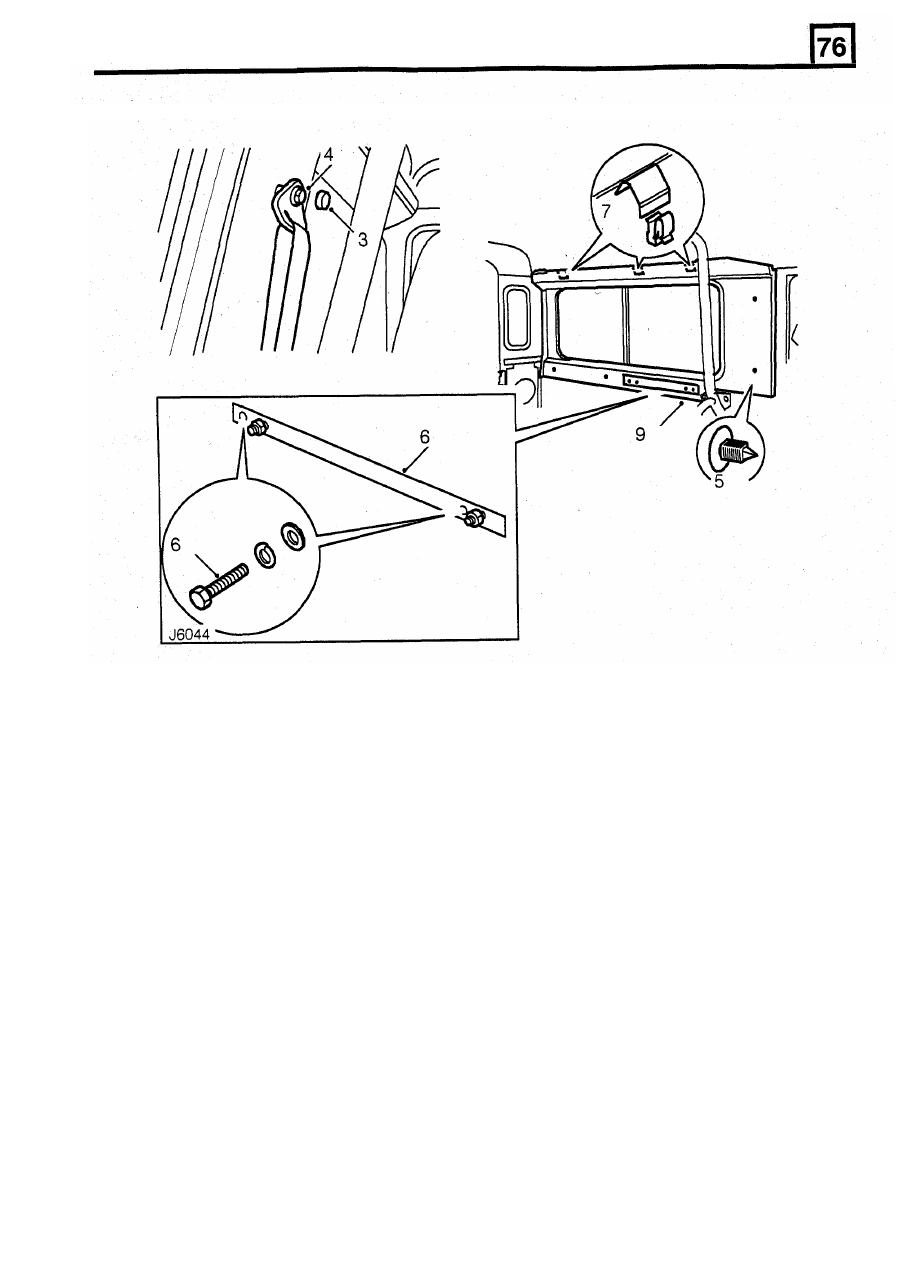
SIDE
TRIM PANEL
Refit
Service repair no - 76.13.70
Remove
10. Fit new spring clips to the three brackets on top
11. Carefully pull trim panel behind interior roll-over
12. Align trim panel, ensuring it is correctly
13. Locate trim panel spring clips on inner cant rail
edge of side trim panel.
bar.
positioned around side window.
and press firmly down to secure top edge of trim
panel.
support bracket with body side fixing holes and
secure with four bolts and washers.
Do not fully
tighten at this stage.
15. Fit trim stud to secure bottom edge
of
trim panel
to 'B/C' post.
16. Secure seat belt guide to ‘B/C' post, tighten bolt
to 32 Nm (24 Ibf.ft) and fit cap.
18. Fit rear seat squab. See this Section
.
1.
Remove rear seat squabs. See this Section.
2. Remove rear end trim panel. See this Section.
3. Prise cap from front seat belt upper guide
retaining bolt.
4. Unscrew retaining bolt and remove seat belt
from 'B/C’ post.
5.
Carefully prise trim stud from 'B/C' post.
6.
Remove four bolts securing side trim panel and
forward seat support bracket to body side.
Collect support bracket.
7. Release top edge of side trim panel by striking
8. Carefully pull trim panel rearwards to clear
9.
Remove side trim panel from vehicle.
14. Align bosses of trim panel and forward seat
upwards with the hand to disengage three spring
17. Fit rear end trim panel. See this Section
clips.
interior roll- over bar.
3

BODY
6.
Remove 2 tom bolts and nuts from both sides
and detach centre section of roll-over bar
assembly
.
7. Remove torx bolt, from both sides, securing
roll-over bar to body side mounting brackets.
8.
Remove 3 bolts and washers, from both sides,
securing lower roll-over bar brackets to front of
wheelarch.
9.
Remove
2 tom bolts and washers, from both
sides, securing roll-over bar upper mountings to
roof fixing brackets and carefully lower complete
assembly to the floor.
remove front seat belt inertia reels and rear seat
belts from roll-over bar mounting.
roll-over bar rearwards to clear wheelarches.
12.
Remove roll-over bar from vehicle.
NOTE: Assistance may be required to remove the
roll-over bar.
INTERIOR
ROLL-OVER
BAR
Service repair
no - 76.11.40
Remove
1. Remove rear seat squabs. See this Section.
2. Remove rear end trim panels. See this Section.
3. Remove side trim panels. See this Section.
4. Release retaining straps and remove tool bag
5.
Remove
4
bolts securing centre section of
from roll-over bar.
roll-over bar and seat belt stalks to floor. On the
of audible warning circuit at belt stalk.
10.
Unscrew retaining bolts, from both sides, and
driver's side, disconnect harness plug Connector
11. Supporting from both sides, raise and tilt
4

BODY
Refit
REAR END TRIM PANEL
13. Supporting from both sides, position roll-over bar
on the floor in front of wheelarches.
14. Secure front seat belt inertia reels and rear seat
belts to roll-over bar mountings. Tighten bolts to
32Nm
(24
Ibf.ft).
15. Raise roll-over bar assembly and secure to roof
mounting brackets. Tighten bolts to 45 Nm (33
Ibf.ft).
16. Secure roll-over bar to wheelarches. Tighten
bolts to 45 Nm (33 Ibf.ft).
17. Secure roll-over bar to body side mounting
brackets, tightening bolts to
45
Nm (33 Ibf.ft).
18. Secure centre section to main roll-over bar, but
do not fully tighten fixing bolts at this stage.
19. Reconnect driver's seat belt audible warning
Service repair no - 76.13.71
Remove
1. Pull edge of rear end trim panel firmly to release
the two spring retaining clips from vertical rail at
door aperture.
2. Remove rear end trim panel.
3. Fit new spring clips to the two brackets on side
Refit
of trim panel.
mounting brackets to chassis. Tighten bolts to 32
21. Fully tighten roll-over bar centre section retaining
24. Fit rear and end trim panels. See this Section.
4.
Position outboard edge of trim panel in corner to
abut side trim panel and locate spring clips on
vertical rail.
position.
5.
Press edge
of trim panel firmly to secure in
5
harness plug.
20. Secure seat belt stalks and roll-over bar floor.
Nm (24 lbf.ft).
bolts to 45 Nm (33 lbf.ft).
22. Position tool bag and secure to roll-over bar.
23. Fit side trim panels. See this Section.
25. Fit rear seat squabs. See this Section.

BODY
CUBBY
BOX
REAR GRAB HANDLE
Service repair
no - 76.25.04
Remove
Remove
Service repair
no -
76.58.35
1. Remove radio/cassette player.
2.
Open cubby box lid and remove two caps
3. Remove fixing bolts and washers.
4. Remove 2 screws and lift cup holder from cubby
box.
5.
Unscrew two bolts securing front of cubby box to
floor mounting.
6.
Lift cubby box and unthread radio/cassette
player leads through cubby box base.
7. Remove cubby box.
1. Carefully prise top and bottom edges of finisher
caps from grab handle and then hinge outwards
to
gain access to fixing screws.
2.
Remove
4
fixing screws and detach grab handle
from rear. end
trim panel.
concealing fixing bolts.
Refit
3. Position grab handle on rear end trim panel and
secure with
4
fixing screws.
4.
Press finisher caps over screws.
Refit
8. Position cubby box to mounting and insert radio/
9. Secure front of cubby box to floor and fit cup
10.
Open cubby box lid, secure in position and
fit
11
.
Fit radio/cassette player.
cassette player leads.
holder.
bolt caps
6
Нет комментариевНе стесняйтесь поделиться с нами вашим ценным мнением.
Текст