Defender (1993+). Manual — part 120
BODY
2.
Remove
4
bolts and spring washers securing
tow bar centre mounting bracket
to chassis.
3. Remove both bolts securing the two tow bar
locating tubes in rear chassis cross member.
4.
Remove 2 bolts securing tow bar top mounting
brackets to chassis.
5.
With assistance, withdraw tow bar assembly
from chassis.
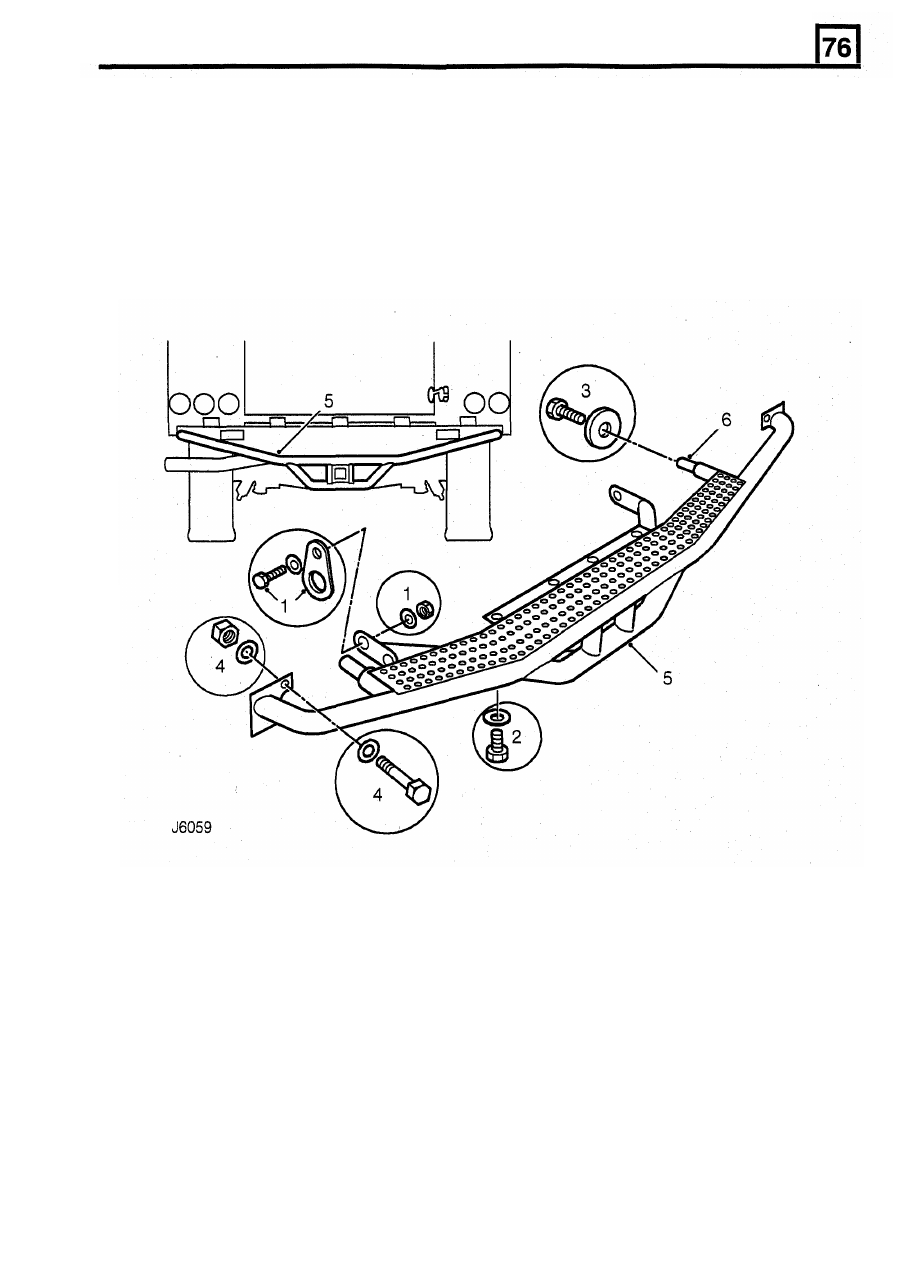
REAR
TOW BAR
Service repair no - 76.11.41
Remove
1.
Remove bolt, washer and nut from both sides,
securing tow bar lower mounting brackets and
towing eyes to chassis.
9.
Secure tow bar centre mounting bracket to
Refit
underside of chassis and tighten bolts to
25
Nm
(18 Ibf.ft).
10. Position towing eyes to lower mounting brackets
and secure to chassis and tighten bolts to 25 Nm
(18 Ibf.ft).
11.
Fully tighten tow bar top mounting bracket bolts
to 25 Nm (18 Ibf.ft).
6.
With assistance, lift the tow bar assembly and
locate both tubes in the chassis crossmember.
7.
Secure top tow bar mounting brackets to chassis
but do not fully tighten fixings.
8. Secure tow bar locating tubes to rear
of chassis
and tighten bolts to 25 Nm (18 Ibf.ft).
15
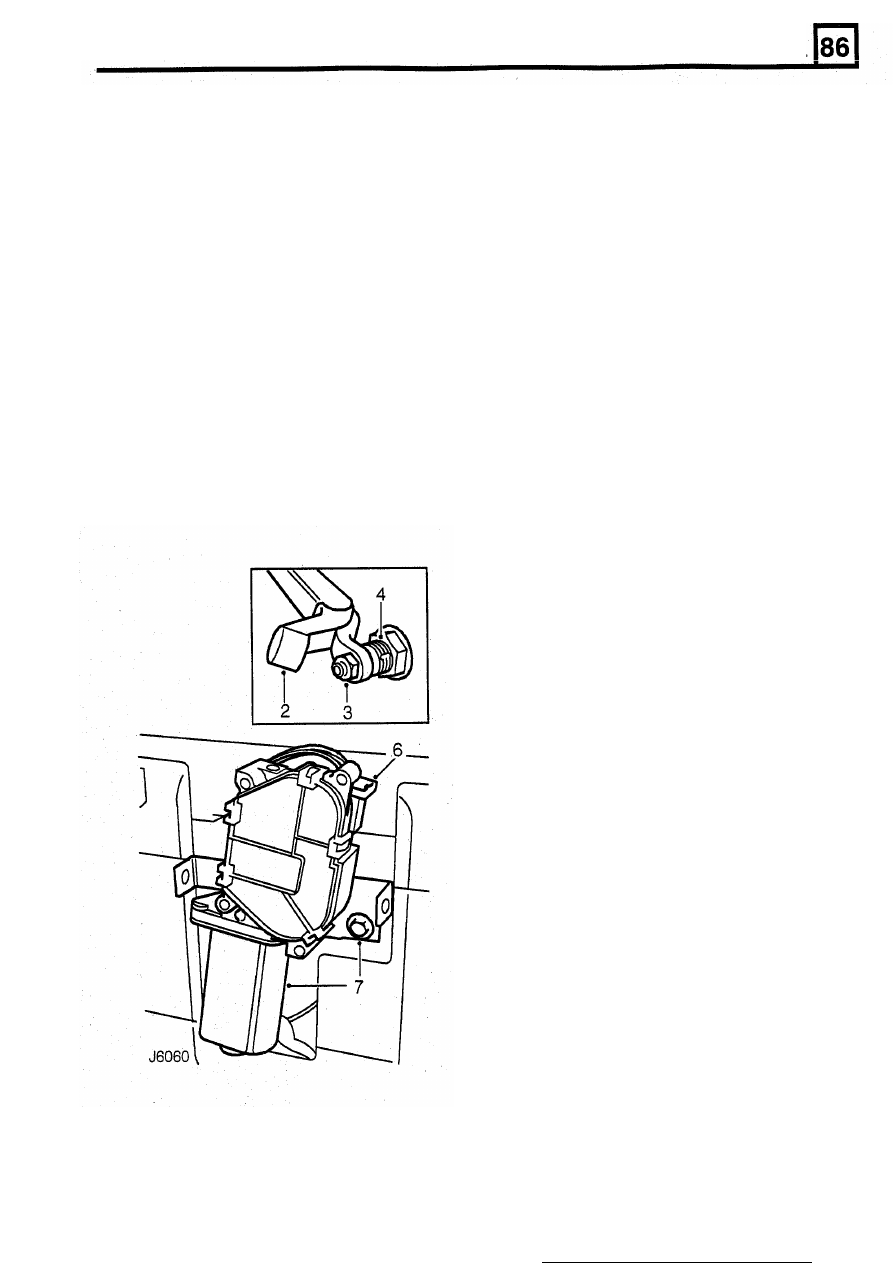
ELECTRICAL
REAR
WIPER MOTOR
Refit
Service repair no - 84.35.12
Remove
8.
Locate wiper motor drive spindle through
9.
Position wiper motor mounting bracket and
aperture in rear door.
secure to rear door. Tighten bolt to
23
Nm
(17
Ibf.ft).
10. Reconnect harness multi-plug.
11. Secure drive spindle to door.
12. Fit wiper motor cover.
13. Fit rear wiper arm.
1. With assistance, unscrew 3 retaining nuts and
remove spare wheel from rear door mounting
studs.
nut.
(96
Ibf.ft).
3.
Remove nut and withdraw wiper arm from drive
spindle.
4.
Remove retaining nut, plain washer and rubber
washer securing wiper motor drive spindle to
door.
5. Remove
two
screws and remove cover from
wiper motor mounting bracket.
6. Disconnect wiper motor harness multi-plug.
7. Remove bolt, with rubber washer, and detach
wiper motor, complete with mounting bracket,
from rear door.
2. Lift wiper arm end cap to gain access to securing
14. Fit spare wheel. Tighten retaining nuts to 130Nm
1
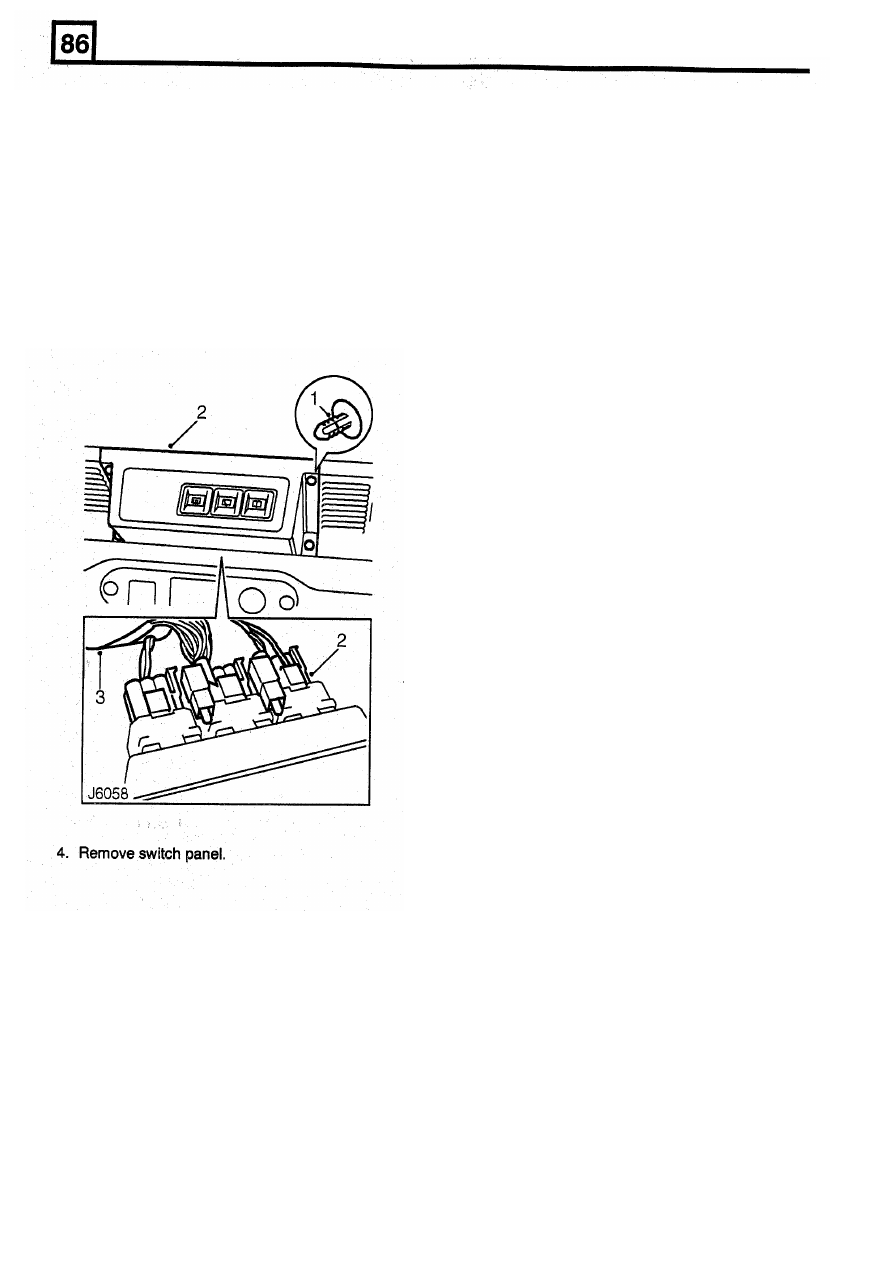
ELECTRICAL
SWITCH PANEL-REAR
DOOR
SERVICES
Refit
Service repair no - 86.65.78
Remove
5.
Feed harness into switch panel and reconnect
6.
Position switch panel on fascia and secure with
switch multi- plugs.
trim studs.
1.
Carefully prise out
4
trim studs securing switch
panel
to
centre of fascia.
2.
Withdraw switch panel and disconnect
multi-plugs from the three switches.
3. Pull harness multi-plugs through aperture in
base of panel.
2
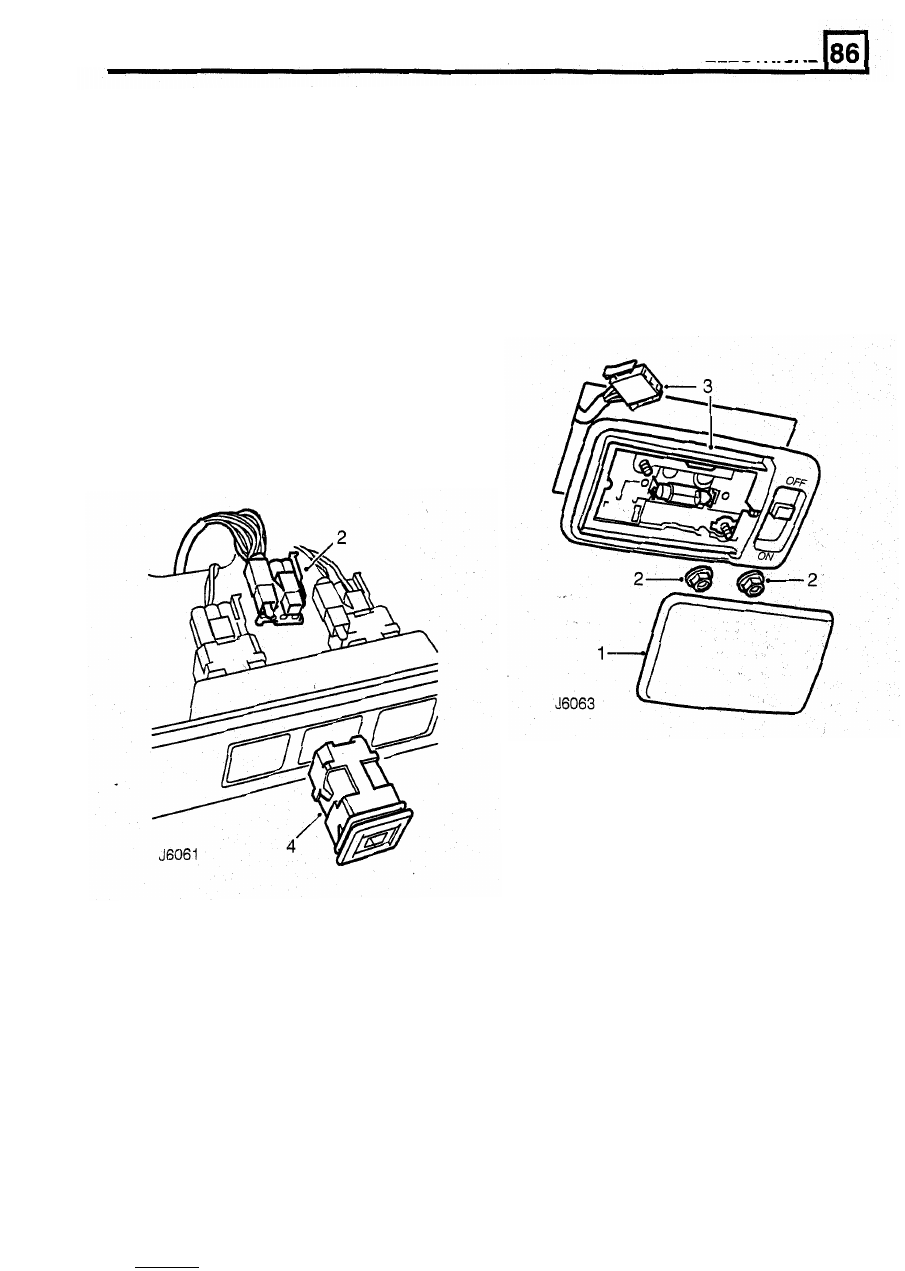
ELECTRICAL
SWITCHES - TAILGATE FUNCTIONS
INTERIOR LAMP
Service repair no - 84.35.33 Rear wiper switch
Service repair no - 84.30.27 Rear wash switch
Service repair no - 86.65.36 Heated rear screen
switch
and roof mounting bracket.
Remove
harness plug.
Service repair no - 86.45.02
Remove
1.
Carefully prise lens cover from lamp unit.
2. Remove 2 nuts securing lamp unit to headlining
3. Release lamp from bracket studs and disconnect
1.
Carefully prise out
4
trim studs securing rear
door services switch panel to centre of fascia.
2.
Withdraw switch panel from fascia and
disconnect multi-plug from rear wiper switch.
3. Press in switch retaining lugs and push switch
through panel aperture.
4.
Remove rear wiper switch.
4.
Remove interior lamp.
5.
Connect harness plug and locate lamp unit.
Ensure lamp switch eyelet is correctly seated on
lamp unit base.
6.
Secure lamp unit to mounting bracket with 2 nuts
and refit lamp lens.
Refit
Refit
5.
Position switch, reconnect multi-plug and refit
rear door services switch panel
3
Нет комментариевНе стесняйтесь поделиться с нами вашим ценным мнением.
Текст