Volvo S90 Recharge Plug-in Hybrid (2021 year). Manual in english — page 26
STARTING AND DRIVING
* Option/accessory.
446
Starting the car
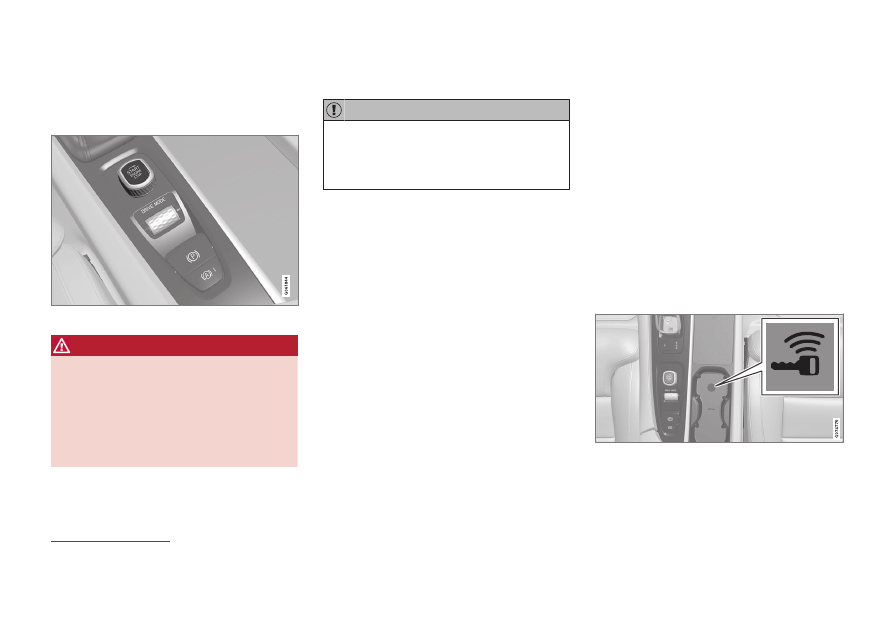
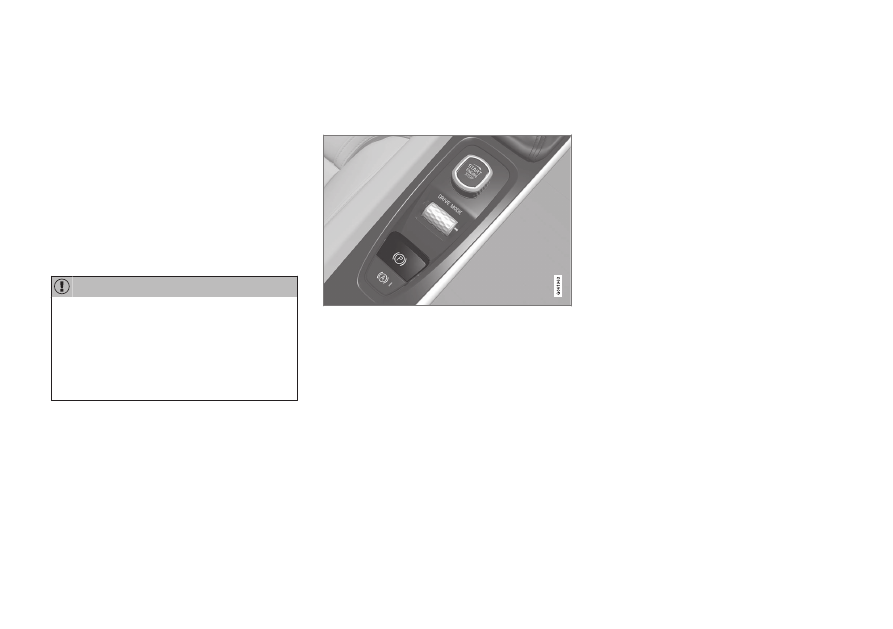
The car is started using the start knob in the
tunnel console when the remote control key
is in the passenger compartment.
Start knob in the tunnel console.
WARNING
Before starting:
•
Fasten the seatbelt.
•
Adjust the seat, steering wheel and
mirrors.
•
Make sure that the brake pedal can be
fully depressed.
The remote control key is not physically used
when starting the car since it is equipped with
support for keyless starting (Passive start).
To start the car:
The car cannot be started if the charging
cable is still engaged. Make sure the
charging cable is removed from the charg-
ing input socket before the starting the car.
1. The remote control key must be inside the
car. For cars with Passive Start, the key
needs to be located in the front part of the
passenger compartment. With the option
for keyless locking/unlocking
*
of the car,
the key can be anywhere in the car.
2. Hold the brake pedal depressed
1
fully. For
cars with automatic gear changing, make
sure that gear position
P
or
N
is selected.
For cars with a manual gearbox, make
sure that the gear lever is in neutral posi-
tion or that the clutch pedal is depressed.
3. Turn the start knob clockwise and then
release it. The control automatically
returns to its starting position.
When the engine is started, the starter motor
works until the engine is started or until its
overheating protection triggers.
When starting in normal conditions, the car's
electric drive motor is prioritised - the petrol
engine remains switched off. This means that
after the start knob has been turned clock-
wise, the electric motor has ”started” and the
car is ready to drive. A started car is indicated
by the driver display's indicator lamps extin-
guishing and its preset theme illuminating.
However there are situations where the petrol
engine is started instead e.g. in the event of
the temperature being too low or if the hybrid
battery needs charging.
Error messages
If the
Car key not found
message is shown in
the driver display when starting, place the
remote control key by the backup reader. Then
try to start the car again.
Backup reader's location in the tunnel console.
1
If the car is moving, the engine can be started by turning the start knob clockwise.
-------------------------------------------------------------------------------------------------------------------------------------------------------------

STARTING AND DRIVING
}}
447
When the remote control key is positioned
by the backup reader, make sure that there
are no car keys, metal objects or electronic
apparatus by the backup reader, (e.g.
mobile phones, tablets, laptops or charg-
ers). Several car keys close to one another
by the backup reader may cause interfer-
ence with each other.
If the message
Car start
System check, wait
is shown in the driver display when starting,
wait until the message disappears and then
try to start the car again.
If the engine fails to start after 3 attempts -
wait for 3 minutes before making a further
attempt. Starting capacity increases if the
battery is allowed to recover.
The car cannot be started if the hybrid bat-
tery is discharged.
WARNING
Never
remove the remote control key from
the car while driving.
WARNING
Always take the remote control key out
from the car when leaving the car and
make sure the car's electrical system is in
ignition position
0
- especially if there are
children in the car.
The idling speed can be noticeably higher
than normal for certain engine types during
cold starting. This is done in order that the
emissions system can reach normal oper-
ating temperature as quickly as possible,
which minimises exhaust emissions and
protects the environment.
Related information
•
Switching off the car (p. 447)
•
•
Adjusting the steering wheel (p. 196)
•
Using jump starting with another battery
(p. 488)
•
Selecting ignition mode (p. 449)
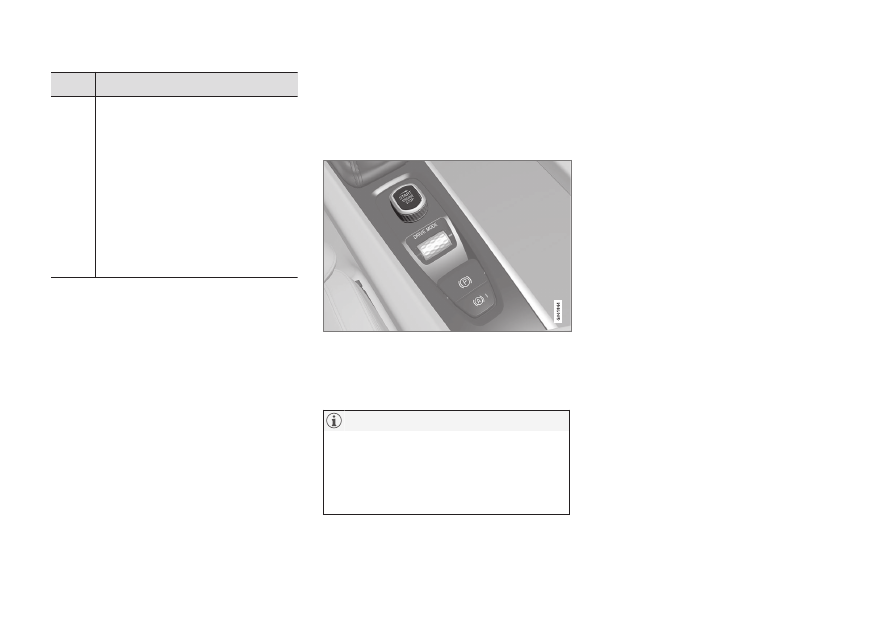
Switching off the car
The car is switched off using the start knob in
the tunnel console.
Start knob in the tunnel console.
To switch off the car:
–
Turn the start knob clockwise and release
it - the car is switched off. The control
automatically returns to its starting posi-
tion.
If the gear selector for cars with an automatic
gearbox is not in position
P
or if the car rolls:
–
Turn the knob clockwise and hold it until
the car is switched off.
Related information
•
•
•
-------------------------------------------------------------------------------------------------------------------------------------------------------------

STARTING AND DRIVING
* Option/accessory.
448
•
Using jump starting with another battery
(p. 488)
•
Selecting ignition mode (p. 449)
Ignition positions
The car's electrical system can be set in dif-
ferent levels/positions and in this way make
the different functions available.
In order to facilitate the use of a limited num-
ber of functions with the engine switched off,
the car's electrical system can be set in three
different levels –
0
,
I
and
II
. These levels are
described with the denomination "ignition
position" throughout the owner's manual.
The following table shows the functions avail-
able in each ignition position/level:
Level Functions
0
•
Odometer, clock and tempera-
ture gauge are illuminated
A
.
•
Power
*
seats can be adjusted.
•
The power windows can be
used.
•
The centre display is started
and can be used
A
.
•
The infotainment system can
be used
A
.
In this mode, the functions are con-
trolled by time and are switched off
automatically after a short while.
I
•
Sunroof, power windows, 12V
power socket in the passenger
compartment, Bluetooth, navi-
gation, phone, ventilation fan
and windscreen wipers can be
used.
•
Power seats can be adjusted.
•
12 V power sockets
*
in the
cargo area can be used.
Power is taken from the battery
in this ignition position.
-------------------------------------------------------------------------------------------------------------------------------------------------------------
STARTING AND DRIVING
449
Level Functions
II
•
The headlamps come on.
•
Warning/indicator lamps illumi-
nate for 5 seconds.
•
Several other systems are acti-
vated. However, heating in seat
cushions and the rear window
can only be activated after the
car has been started.
This ignition position consumes a
lot of current from the battery
and should therefore be avoided!
A
Also activated when the door is opened.
Related information
•
•
Adjusting the steering wheel (p. 196)
•
Using jump starting with another battery
(p. 488)
•
Selecting ignition mode (p. 449)
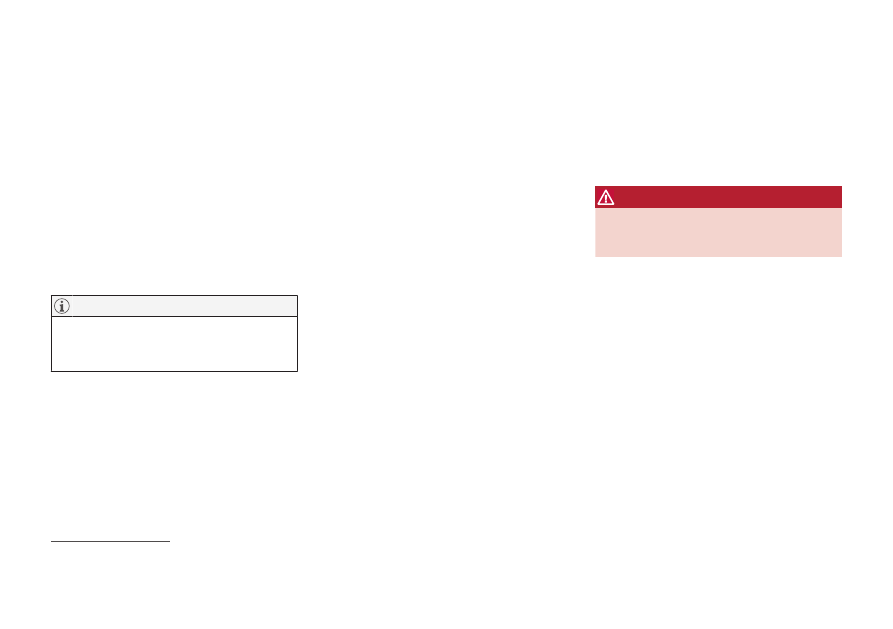
Selecting ignition mode
The car's electrical system can be set in dif-
ferent levels/positions and in this way make
the different functions available.
Selecting ignition position
Start knob in the tunnel console.
•
Ignition position 0
– Unlock the car and
store the remote control key inside the
car.
To reach level
I
or
II
without
starting the
engine - do
not
depress the brake pedal, or
the clutch pedal for cars with manual gear
changing, when these ignition positions
are to be selected.
•
Ignition position I
– Turn the start knob
clockwise and release it. The control auto-
matically returns to its starting position.
•
Ignition position II
– Turn the start knob
clockwise and hold it in position for
approx. 5 seconds. Then release the knob,
which automatically returns to its starting
position.
•
Back to ignition position 0
– To return to
ignition position
0
from position
I
and
II
–
Turn the start knob clockwise and release.
The control automatically returns to its
starting position.
Related information
•
•
Switching off the car (p. 447)
•
•
Adjusting the steering wheel (p. 196)
•
-------------------------------------------------------------------------------------------------------------------------------------------------------------

STARTING AND DRIVING
* Option/accessory.
450
Alcohol lock
*
The function of the alcohol lock is to prevent
the car from being driven by individuals under
the influence of alcohol. Before the engine
can be started the driver must take a breath
test that verifies that he/she is not under the
influence of alcohol. Alcohol lock calibration
takes place in accordance with each market's
limit value in force for driving legally.
The car has an interface for the electrical con-
nection of the different makes and models of
alcohol lock recommended by Volvo. The
interface facilitates alcohol lock connection,
and gives the option of an integrated function
including messages related to the alcohol lock
in the car's main display. For information
about a specific alcohol lock, please refer to
the owner's manual from the respective alco-
hol lock manufacturer.
WARNING
The alcohol lock is an aid and does not
exempt the driver from responsibility. It is
always the responsibility of the driver to be
sober and to drive the car safely.
Related information
•
•
Before starting the engine with the alcohol
lock
•
•
Bypass of the alcohol lock
*
In the event of an emergency situation or if
the alcohol lock is out of order, it is possible
to bypass the alcohol lock in order to drive
the car.
For deactivation via the alcohol lock, see sup-
plier's manual.
Related information
•
•
Before starting the engine with the alcohol
lock
•
•
-------------------------------------------------------------------------------------------------------------------------------------------------------------
STARTING AND DRIVING
}}
* Option/accessory.
451
Before starting the engine with the
alcohol lock
*
The alcohol lock is activated automatically
and is then ready for use when the car is
opened.
To bear in mind
In order to obtain correct function and as
accurate a measurement result as possible:
•
Avoid eating or drinking approx. 5 minutes
before the breath test.
•
Avoid excess windscreen washing - the
alcohol in the washer fluid may result in an
incorrect measurement result.
After a completed period of driving, the
engine can be restarted within 30 minutes
without a new breath test.
Related information
•
•
•
•
Brake functions
The car's brakes are used to reduce the
speed or prevent the car from rolling.
In addition to the foot brake and parking
brake, the car is equipped with several auto-
matic brake assist functions. These can assist
the driver by not needing to keep his/her foot
on the brake pedal when at a traffic light, or
when starting on an uphill gradient.
Depending on the car's equipment, the follow-
ing auto braking functions are available:
•
Automatic brake when stationary (Auto
Hold)
•
Hill start assist (Hill Start Assist)
•
Auto braking after a collision
•
City Safety
Related information
•
•
•
Automatic braking when stationary
(p. 457)
•
Auto braking after a collision (p. 459)
•
Help when starting on a hill (p. 459)
•
Foot brake
The foot brake is part of the brake system.
The car is equipped with two brake circuits. If
a brake circuit is damaged, the brake pedal
may engage deeper. Higher pressure on the
pedal will therefore be needed to produce the
normal braking effect.
WARNING
The brake servo only works when the elec-
tric motor or internal combustion engine is
running.
If the foot brake is used when the car is
switched off, the brake pedal needs to be
depressed passed the normal braking position
using a higher pressure to brake the car.
In very hilly terrain or when driving with a
heavy load the brakes can be relieved by using
engine braking in gearshift mode
B
.
Anti-lock braking system
The car has anti-lock brakes (ABS
2
), which
prevents the wheels from locking while brak-
ing and allows maintained steering control.
Vibration may be felt in the brake pedal when
this is engaged and this is normal.
A short test of the ABS system is made auto-
matically after the car has been started when
the driver releases the brake pedal. A further
2
Anti-lock Braking System
-------------------------------------------------------------------------------------------------------------------------------------------------------------
||
STARTING AND DRIVING
452
automatic test of the system may be made at
low speed. The test may be felt as pulses in
the brake pedal.
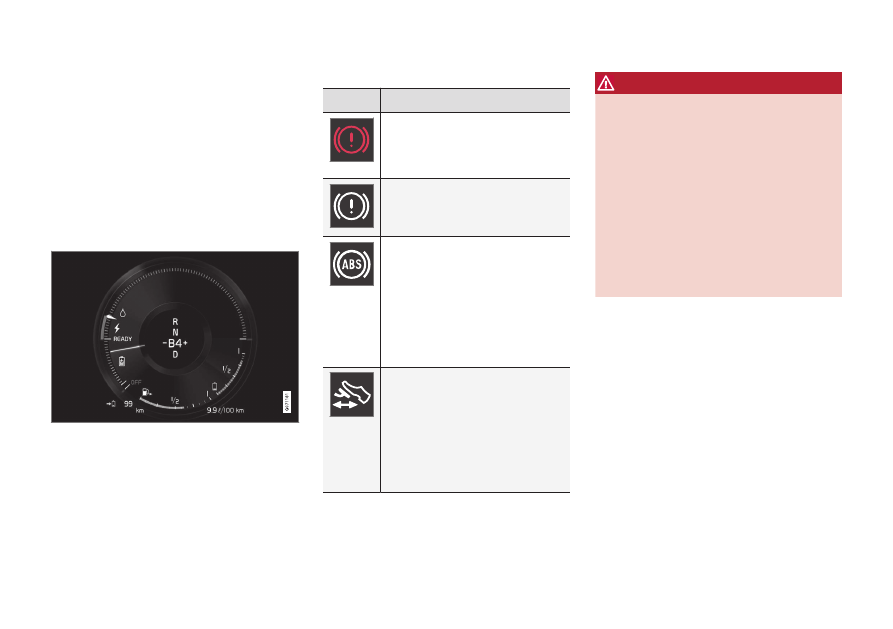
Light braking charges the hybrid
battery
The electric motor's engine brake is used dur-
ing light braking. The car's kinetic energy is
then converted to electrical energy instead,
which is used to charge the hybrid battery.
Battery charging with electric motor braking is
indicated in the driver display.
The driver display indicates charging during electric
motor braking.
This function is active in the speed interval
150-5 km/h (93-3 mph). During heavier brak-
ing, as well as outside the speed interval, brak-
ing is supplemented by the hydraulic brake
system. The driver's display shows this by the
indicator being down in the red zone.
Symbols in the driver display
Symbol Specification
Check the brake fluid level. If the
level is low, fill with brake fluid
and check for the cause of the
brake fluid loss.
Fault in pedal sensor.
Constant glow for 2 seconds
when the engine is started: Auto-
matic function check.
Constant glow for more than 2
seconds: Fault in the ABS sys-
tem. The car's normal brake sys-
tem is still working, but without
the ABS function.
If the message
Brake pedal
Characteristics changed Serv-
ice required
is shown, the sys-
tem for "Brake-by-wire" is disen-
gaged. The brake pedal needs to
be depressed passed the normal
braking position using a higher
pressure to brake the car.
WARNING
If both the warning lamps for brake fault
and ABS fault illuminate at the same time,
a fault has occurred in the brake system.
•
If the level in the brake fluid reservoir is
normal at this stage, drive carefully to
the nearest workshop and have the
brake system checked - an authorised
Volvo workshop is recommended.
•
If the brake fluid is below the
MIN
level
in the brake fluid reservoir, do not drive
further before topping up the brake
fluid. The reason for the loss of brake
fluid must be investigated.
Related information
•
•
Automatic braking when stationary
(p. 457)
•
Help when starting on a hill (p. 459)
•
•
Braking on gritted roads (p. 453)
•
Brake system maintenance (p. 454)
•
-------------------------------------------------------------------------------------------------------------------------------------------------------------

STARTING AND DRIVING
453
Brake assistance
The brake assist system (BAS
3
) helps to
increase brake force during braking, and can
thereby shorten the braking distance.
The system detects the way in which the
driver brakes and increases brake force where
necessary. The brake force can be boosted up
to the level when the ABS system is engaged.
Related information
•
Braking on wet roads
When driving for a prolonged period of time
in heavy rain without braking, the braking
effect may be delayed slightly when next
using the brakes.
This may also be the case after a car wash. It
is then necessary to depress the brake pedal
more forcefully. You should therefore maintain
a greater distance to the vehicles in front.
Brake the car firmly after driving on wet roads
or using a car wash. This warms up the brake
discs, enabling them to dry faster and protect-
ing them against corrosion. Bear in mind the
current traffic situation when braking.
Related information
•
•
Braking on gritted roads (p. 453)
Braking on gritted roads
When driving on salted roads, a layer of salt
may form on the brake discs and brake lin-
ings.
This may extend braking distance. You should
therefore maintain a greater safety distance to
vehicles in front. In addition, make sure you do
the following:
•
Brake now and again to remove any layer
of salt. Make sure that other road users
are not put at risk by the braking.
•
Gently depress the brake pedal after fin-
ishing driving and before starting your next
trip.
Related information
•
•
3
Brake Assist System
-------------------------------------------------------------------------------------------------------------------------------------------------------------
STARTING AND DRIVING
454
Brake system maintenance
Check brake system components regularly
for wear.
To keep the car as safe and reliable as possi-
ble, follow the Volvo service intervals as speci-
fied in the Service and Warranty Booklet. After
replacing brake linings and brake discs, brak-
ing effect is only adapted after they have been
"worn in" for a few hundred kilometres (miles).
Compensate for the reduced braking effect by
depressing the brake pedal harder. Volvo rec-
ommends only fitting brake linings that are
approved for your Volvo.
The wear on the brake system's compo-
nents must be checked regularly.
Contact a workshop for information about
the procedure or engage a workshop to
carry out the inspection - an authorised
Volvo workshop is recommended.
Related information
•
Parking brake
The parking brake prevents the car from roll-
ing away from stationary by means of
mechanically locking/blocking two wheels.
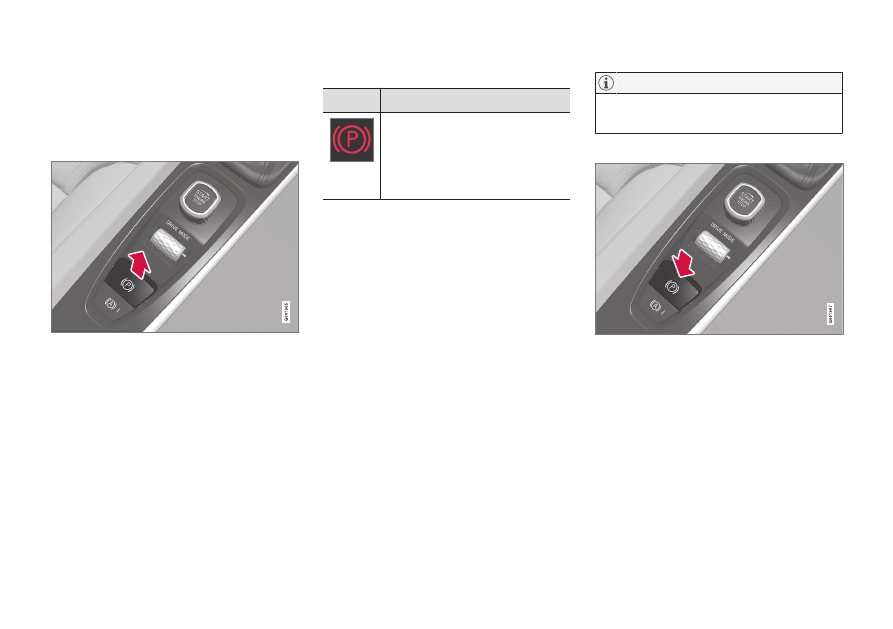
The control for the parking brake is located in the
tunnel console between the seats.
A faint electric motor noise can be heard when
the electrically-operated parking brake is
being applied. The noise can also be heard
during the automatic function checking of the
parking brake.
If the car is stationary when the parking brake
is activated, it only acts on the rear wheels. If
it is activated when the car is moving then the
normal foot brake is used, i.e. the brake acts
on all four wheels. Brake function changes
over to the rear wheels when the car is almost
stationary.
Related information
•
Activating and deactivating the parking
brake (p. 455)
•
•
In the event of a fault in the parking brake
(p. 457)
•
-------------------------------------------------------------------------------------------------------------------------------------------------------------
STARTING AND DRIVING
}}
455
Activating and deactivating the
parking brake
Use the parking brake to prevent the car from
rolling from stationary.
Activating the parking brake
1. Pull the control upward.
> The symbol in the driver display illumi-
nates when the parking brake is acti-
vated.
2. Check that the car is stationary.
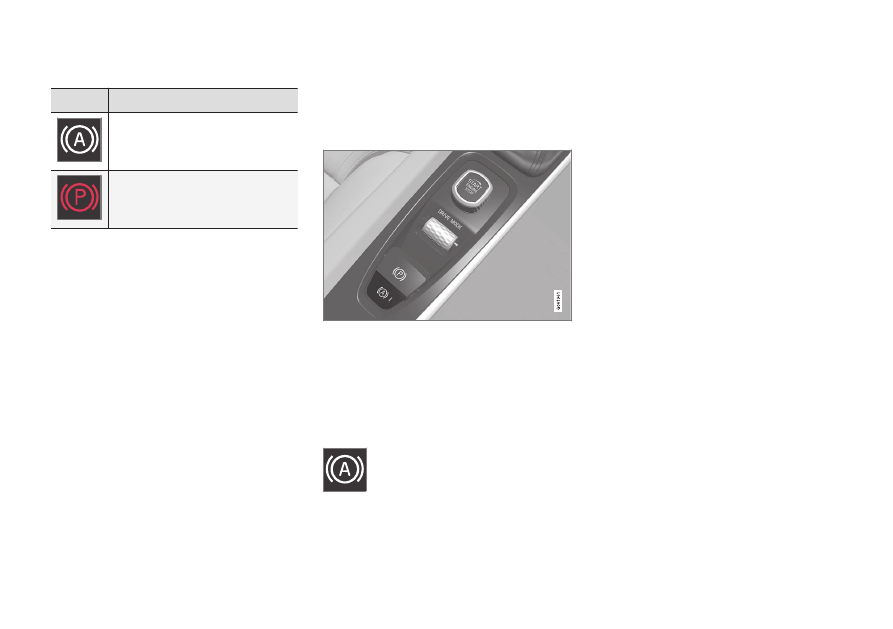
Symbol in the driver display
Symbol Specification
The symbol is illuminated when
the parking brake is activated.
If the symbol flashes, it indicates
a fault has occurred. Read the
message in the driver display.
Automatic activation
The parking brake is activated automatically
•
when the car is switched off and the set-
ting for automatic activation of the parking
brake is activated in the centre display.
•
when gear position
P
is selected on a
steep hill.
•
if the Auto hold (Automatic brake when
stationary) function is activated and
•
the car has been stationary for a long
time (5-10 minutes)
•
the car is switched off
•
the driver leaves the car.
Emergency brake
In an emergency, the parking brake can be
activated when the car is in motion by pulling
and holding up the control. Braking stops
when the control is released, or if the accelera-
tor pedal is depressed.
An acoustic signal sounds while emer-
gency braking is active at high speeds.
Deactivating the parking brake
Deactivate manually
To deactivate the parking brake, the engine
needs to be running.
1. Depress the brake pedal firmly.
2. Press the control down.
> The parking brake releases and the
symbol in the driver display extin-
guishes.
-------------------------------------------------------------------------------------------------------------------------------------------------------------
||
STARTING AND DRIVING
456
Deactivate automatically
1. Start the car.
2. Depress the brake pedal firmly. Select
gear position
D
or
R
and depress the
accelerator pedal.
> The parking brake releases and the
symbol in the driver display extin-
guishes.
For automatic deactivation, either the
driver has to have put on their seatbelt or
the driver door has to be closed.
Related information
•
Automatic parking brake activation setting
(p. 456)
•
In the event of a fault in the parking brake
(p. 457)
•
•
Automatic parking brake activation
setting
Choose whether the parking brake is to be
activated automatically when the car is
switched off.
To change setting:
1. Tap on
Settings
in the centre display's
top view.
2. Press
My Car
Parking Brake and
Suspension
to select or deselect the
function
Auto Activate Parking Brake
.
Related information
•
Activating and deactivating the parking
brake (p. 455)
•
Parking on a hill
Always use the parking brake when parking
on a hill.
WARNING
Always use the parking brake when park-
ing on an inclined surface. Engaging a gear
or the automatic transmission's
P
position
is not sufficient to hold the car stationary in
all situations.
If the car is parked facing uphill:
•
Turn the wheels
away from
the kerb.
If the car is parked facing downhill:
•
Turn the wheels
towards
the kerb.
Heavy load uphill
A heavy load, such as a trailer, can cause the
car to roll backward when the parking brake is
released automatically on a steep incline.
Avoid this by pulling the control upwards
while driving the car away. Release the control
when the engine achieves traction.
Related information
•
-------------------------------------------------------------------------------------------------------------------------------------------------------------
STARTING AND DRIVING
}}
457
In the event of a fault in the
parking brake
Contact an authorised Volvo workshop if it is
not possible to deactivate or activate the
parking brake after several attempts.
An acoustic warning signal sounds when driv-
ing with the parking brake activated.
If the car must be parked before a possible
fault is rectified, then the wheels must be
turned as for parking on a hill and the gear
selector must be in position
P
.
Low battery voltage
If the battery voltage is too low then the park-
ing brake can be neither deactivated nor acti-
vated. Connect a donor battery if the battery
voltage is too low.
Replacing the brake linings
The rear brake linings must be replaced at a
workshop due to the design of the electrically-
operated parking brake - an authorised Volvo
workshop is recommended.
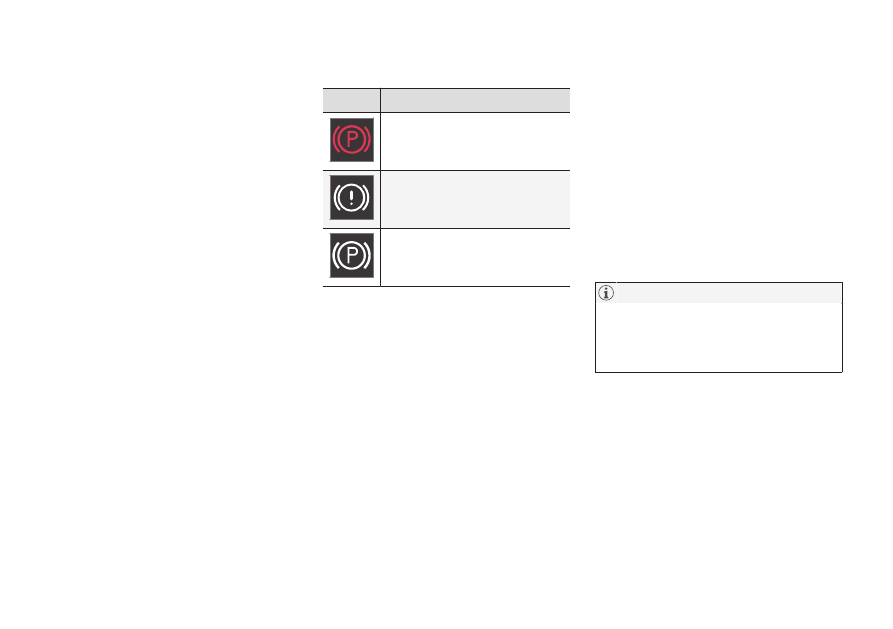
Symbols in the driver display
Symbol Specification
If the symbol flashes, it indicates
a fault has occurred. See the
message in the driver display.
Fault in brake system. See the
message in the driver display.
Information message in driver
display.
Related information
•
Activating and deactivating the parking
brake (p. 455)
•
•
•
Volvo service programme (p. 600)
Automatic braking when stationary
Automatic brake when stationary (Auto hold)
means that the driver can release the brake
pedal while maintaining braking effect when
the car has stopped at traffic lights or a junc-
tion.
When the car has stopped, the brakes are
activated automatically. The function can use
either foot brake or parking brake to hold the
car stationary and it works on all gradients.
When driving off, the brakes are released
automatically if the driver is wearing the seat-
belt and/or the driver's door is closed.
When braking to a standstill on an uphill or
downhill slope, the brake pedal should be
depressed a little harder before being
released to ensure the car does not roll.
The parking brake is activated if
•
the car is switched off
•
the driver's door is opened
•
the driver's seatbelt is unbuckled
•
the car has been stationary for a longer
time (5-10 minutes).
-------------------------------------------------------------------------------------------------------------------------------------------------------------
||
STARTING AND DRIVING
458
Symbols in the driver display
Symbol Specification
The symbol is illuminated when
the function uses the foot brake
to keep the car stationary.
The symbol is illuminated when
the function uses the parking
brake to keep the car stationary.
Related information
•
Activating and deactivating the automatic
brake at a standstill (p. 458)
•
•
•
Help when starting on a hill (p. 459)
Activating and deactivating the
automatic brake at a standstill
The automatic brake function at a standstill is
activated using the button in the tunnel con-
sole.
–
Press the button in the tunnel console to
activate or deactivate the function.
> The indicator in the button illuminates
when the function is activated. Acti-
vated function remains even when the
car is started next time.
Applicable when switching off
If the function is active and holds the
car with the foot brake (A-symbol
illuminated in the driver display), the
brake pedal must be depressed at
the same time as the button is depressed in
order to deactivate.
•
The function remains deactivated until it is
reactivated.
•
When the function is deactivated, hill start
assist (HSA) remains active to prevent the
car from rolling backwards when starting
on an uphill gradient.
Related information
•
-------------------------------------------------------------------------------------------------------------------------------------------------------------

STARTING AND DRIVING
* Option/accessory.
459
Help when starting on a hill
Hill start assist (HSA
4
) prevents the car from
rolling backwards when starting on an uphill
gradient. When reversing uphill, it prevents
the car from rolling forwards.
The function means that the pedal pressure in
the brake system remains for several seconds
while the driver's foot is moved from brake
pedal to accelerator pedal.
The temporary braking effect releases after
several seconds or when the driver starts to
drive away.
The Hill Start Assist is activated when stop-
ping on a sleep slope. The function is available
even when the automatic braking when sta-
tionary (Auto hold) function is deactivated.
Related information
•
Automatic braking when stationary
(p. 457)
•
Auto braking after a collision
In the event of a collision in which the activa-
tion level is reached for the pyrotechnic seat-
belt tensioners or airbags, or if a collision
with a large animal is detected, the car's
brakes are automatically applied. This func-
tion is to prevent or reduce the effects of any
subsequent collision.
After a serious collision there is a risk that it is
no longer possible to control and steer the car.
In order to avoid or mitigate a possible further
collision with a vehicle or an object in the vehi-
cle's path, the auto braking system is acti-
vated automatically and brakes the car in a
safe manner.
Brake lights and hazard warning lights are
activated during braking. When the car has
stopped, the hazard warning lights continue to
flash and the parking brake is applied.
If braking is not appropriate, e.g. if there is a
risk of being hit by following traffic, the sys-
tem can be overridden by the driver depress-
ing the accelerator pedal.
The function assumes that the brake system is
intact after the collision.
Related information
•
•
•
Regenerative braking
*
The car recovers kinetic energy during brak-
ing in order to reduce fuel consumption and
emissions.
The battery symbol is shown in the
driver display when the car is gener-
ating power for the battery.
The function is available in all drive modes
together with gear position
D
or
B
.
Activating brake regeneration
Brake regeneration is activated by gentle pres-
sure on the brake pedal or during engine brak-
ing.
Regeneration increases during engine braking
when manual gearshift mode
B
is selected.
Related information
•
•
Changing gear with automatic gearbox
(p. 461)
4
Hill Start Assist
-------------------------------------------------------------------------------------------------------------------------------------------------------------

STARTING AND DRIVING
* Option/accessory.
460
Gearbox
The gearbox is part of the car's powertrain
(power transmission) between engine and
drive wheels. The function of the gearbox is
to change the gear ratio depending on speed
and power requirements.
The car has an eight-speed automatic gear-
box, and an electric motor for rear-wheel drive.
The number of gear changes means that the
engine's torque and power range can be used
effectively.
Two of the gears are overdrive gears that save
fuel when driving at constant engine speed.
Both the gear lever and the shift paddles can
be used to shift up or down manually. The
driver display shows the selected gear posi-
tion.
Related information
•
•
Automatic gearbox
Gears are selected automatically so that you
can drive as energy-efficiently as possible.
The gearbox also has a manual gearshift
mode.
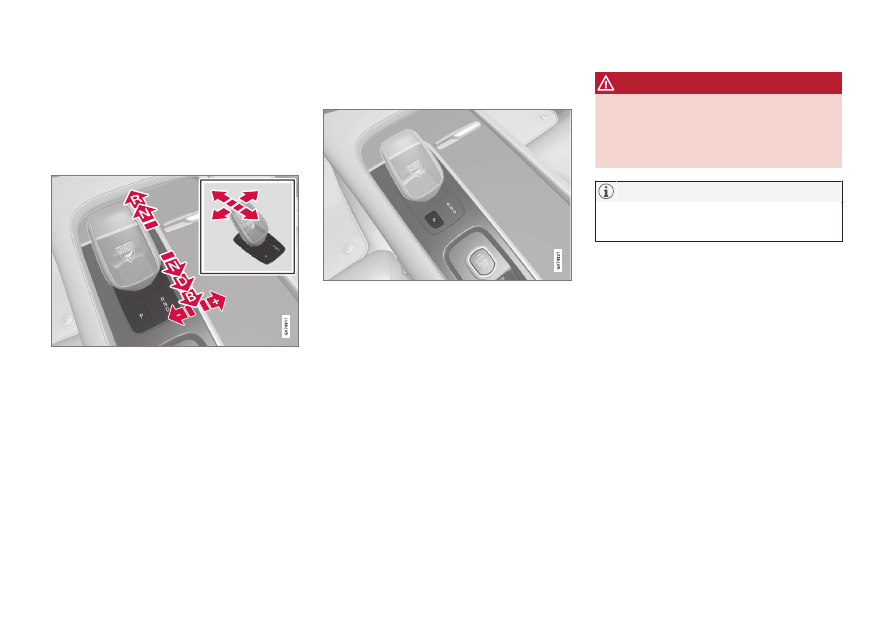
Overview of gear lever and shift pattern in the driver
display.
The driver display shows the selected gear
position:
P
,
R
,
N
,
D
or
B
.
Related information
•
Changing gear with automatic gearbox
(p. 461)
•
Changing gear with steering wheel pad-
dles
•
Gear selector inhibitor (p. 464)
•
•
•
•
-------------------------------------------------------------------------------------------------------------------------------------------------------------
STARTING AND DRIVING
}}
461
Changing gear with automatic
gearbox
Change gear position by pressing the spring-
loaded gear selector forwards or backwards,
or sideways for manual shifting.
Changing gear
Overview of gear lever and gear positions.
Gear positions
Parking – P
Overview of gear lever and position P.
Parking is activated with the
P
button located
next to the gear selector.
The gearbox is mechanically blocked when the
P
position is engaged.
Select position
P
for parking. The car can start
in position
P
. The car must be stationary when
the
P
position is selected.
To park - first apply the parking bake and then
select
P
position.
WARNING
Always use the parking brake when park-
ing on an inclined surface. Engaging a gear
or the automatic transmission's
P
position
is not sufficient to hold the car stationary in
all situations.
To be able to lock the car and arm the
alarm, the gear position must be in
P
.
Help functions
The system will change to the
P
position auto-
matically:
•
if the car is switched off in position
D
or
R
.
•
if the driver unfastens the seatbelt and
opens the driver's door when the car is
running in a mode other than
P
.
To park a car without wearing the seatbelt and
with the door open - exit the
P
position by
selecting
R
or
D
again.
If the car is switched off in
N
position there is
no automatic change-over to
P
position. This
makes it possible to wash the car in an auto-
matic car wash.
Reverse – R
Select position
R
to reverse. The car must be
stationary when the
R
position is selected.
-------------------------------------------------------------------------------------------------------------------------------------------------------------
Нет комментариевНе стесняйтесь поделиться с нами вашим ценным мнением.
Текст