Toyota Sequoia (2005). Manual — part 931
H16780
42 (430, 31)
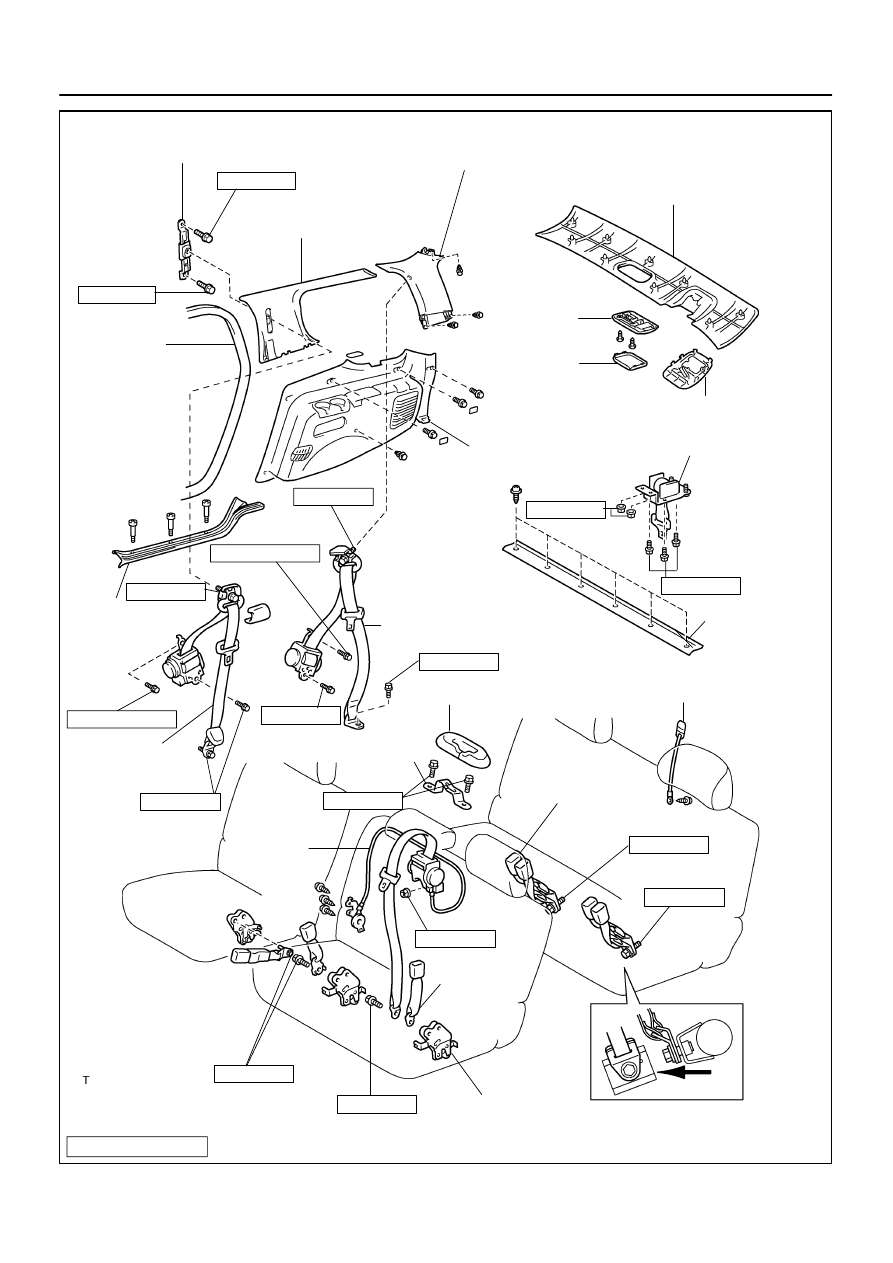
No. 2 Rear Window
Side Garnish
Rear Trim
Rear No. 1 Seat
Outer Belt
Rear Seat Shoulder
Belt Cover
Rear Window
Side Garnish
Adjustable Anchor
Rear Door
Opening Trim
Weatherstrip
Rear Door
Scuff Plate
Rear No. 2 Seat
Outer Belt
Rear Seat
Shoulder
Belt Guide
Rear
Outer Belt
Rear No. 2 Inner Belt
Child Comfort Guide
Rear Seat Lock
Dome Light
Lens
Rear Trim Cover
Rear Floor Mat
Support Plate
Rear No. 2 Seat
Outer Center Belt
Quarter Trim
Panel
Rear No. 1
Inner Belt
42 (430, 31)
42 (430, 31)
42 (430, 31)
42 (430, 31)
8.5 (87, 76 in.·lbf)
8.5 (87, 76 in.·lbf)
N·m (kgf·cm, ft·lbf)
: Specified torque
42 (430, 31)
42 (430, 31)
42 (430, 31)
Front
42 (430, 31)
42 (430, 31)
42 (430, 31)
42 (430, 31)
42 (430, 31)
42 (430, 31)
42 (430, 31)
BO–160
–
BODY
SEAT BELT
3713
BO47P–01
BO0632
BO0633
15
°
45
°
–
BODY
SEAT BELT
BO–161
3714
INSPECTION
CAUTION:
Replace the seat belt assembly (outer belt, inner belt, bolts,
nuts or sill–bar) if it has been used in a severe impact. The
entire assembly should be replaced even if damage is not
obvious.
1.
RUNNING TEST (IN SAFE AREA)
(a)
Fasten the front seat belts.
(b)
Drive the car at 10 mph (16 km/h) and slam on the brakes.
Check that the belt locks and cannot be extended at this
time.
HINT:
Conduct this test in a safe area. If the belt does not lock, remove
the belt mechanism assembly and conduct the following static
check. Also, whenever installing a new belt assembly, verify the
proper operation before installation.
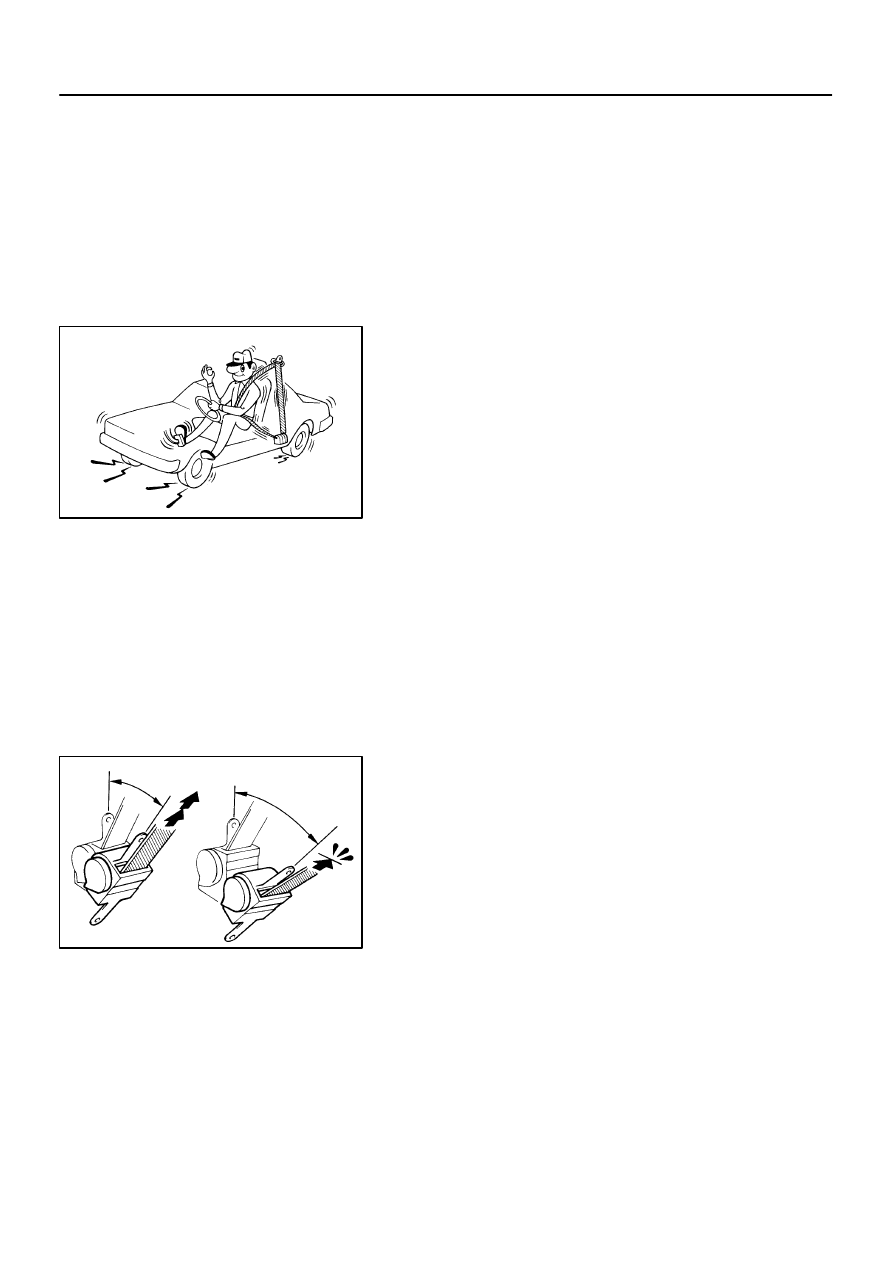
2.
Driver’s seat belt (ELR):
STATIC TEST
(a)
Make sure that the belt locks when pulled out quickly.
(b)
Remove the locking retractor assembly.
HINT:
Before removing the pretensioner connector, be sure to read
the precautionary notice in the RS section.
(c)
Tilt the retractor slowly.
(d)
Make sure that the belt can be pulled out at a tilt of 15 de-
grees or less, and cannot be pulled out over 45 degrees
of tilt.
If a problem is found, replace the assembly.
3.
Except driver’s seat belt (ELR/ALR):
STATIC TEST
(a)
Make sure that the belt locks when pulled out quickly.
(b)
Pull out the whole belt, then retract the belt slightly and
pull it out again
(c)
Make sure that the belt cannot be extended further.
If a problem is found, replace the assembly.
(d)
Remove the locking retractor assembly.
HINT:
Front passenger’s seat belt only:
Before removing the pretensioner connector, be sure to read
the precautionary notice in the RS section.
(e)
Tilt the retractor slowly.
BO0633
15
°
45
°
H05710
40
°
Rear No.1 Seat
Outer Center
Seat Belt
Retractor
H05731
Rear No.1 Seat
Outer Center
Seat Belt
BO–162
–
BODY
SEAT BELT
3715
(f)
Make sure that the belt can be pulled out at a tilt of 15 de-
grees or less, and cannot be pulled out at over 45 degrees
of tilt.
If a problem is found, replace the assembly.
4.
INSPECT REAR NO.1 SEAT CENTER BELT
(a)
After extracting 300 mm (11.81 in.), check that the belt is
locked when suddenly extracted.
(b)
Check that the belt can be extracted 300 mm (11.81 in.)
without being locked when the seat is reclined as shown
in the illustration.
(c)
Check that the belt is locked when the belt is extracted by
a certain amount under (a) condition.
(d)
When folding down the seatback forward and extracting
the seat belt slowly, check that the belt is locked after a
certain length (approx. 500 mm (19.69 in.)) of the belt has
been extracted.
BO47Q–03
H24383
Clip
H16718
Clip
H16719
4 Clips
–
BODY
SEAT BELT PRETENSIONER
BO–163
3716
SEAT BELT PRETENSIONER
REMOVAL
NOTICE:
If the wiring connector of the supplemental restraint
system is disconnected with the ignition switch at ON
or ACC, diagnostic trouble codes will be recorded.
Never use SRS parts from another vehicle. When re-
placing parts, replace them with new parts.
1.
DISCONNECT CABLE FROM NEGATIVE BATTERY
TERMINAL
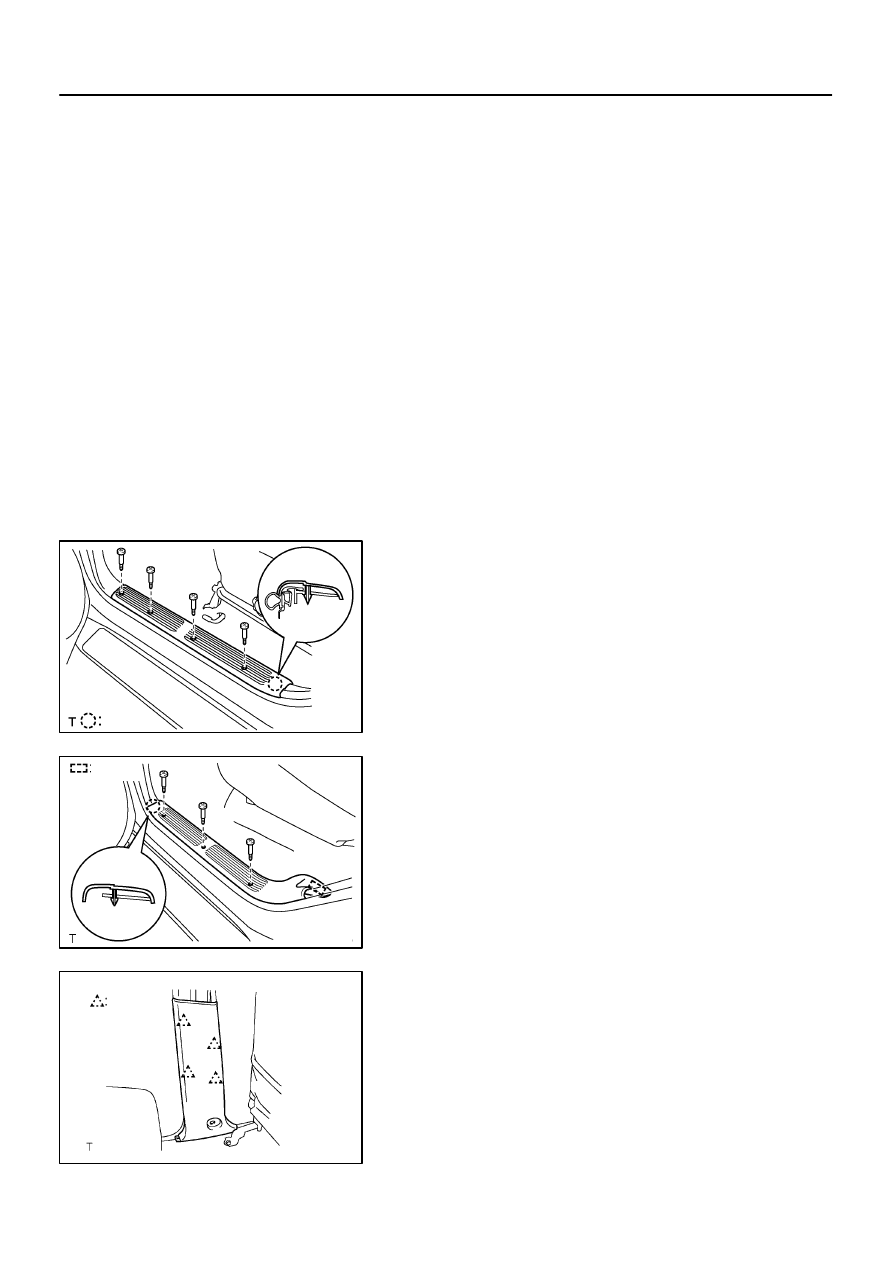
2.
REMOVE FRONT DOOR SCUFF PLATE
Remove the 4 screws and front door scuff plate.
3.
REMOVE FRONT DOOR OPENING TRIM WEATH-
ERSTRIP
4.
REMOVE REAR DOOR SCUFF PLATE
(a)
Remove the 3 screws.
(b)
Using a screwdriver, remove the rear door scuff plate.
HINT:
Tape the screwdriver tip before use.
5.
REMOVE REAR DOOR OPENING TRIM WEATH-
ERSTRIP
6.
REMOVE LOWER CENTER PILLAR GARNISH
(a)
Remove the front seat outer belt floor anchor.
(b)
Using a screwdriver, remove the lower center pillar gar-
nish.
HINT:
Tape the screwdriver tip before use.
Нет комментариевНе стесняйтесь поделиться с нами вашим ценным мнением.
Текст