Toyota Sequoia (2005). Manual — part 932
H18975
BO–164
–
BODY
SEAT BELT PRETENSIONER
3717
7.
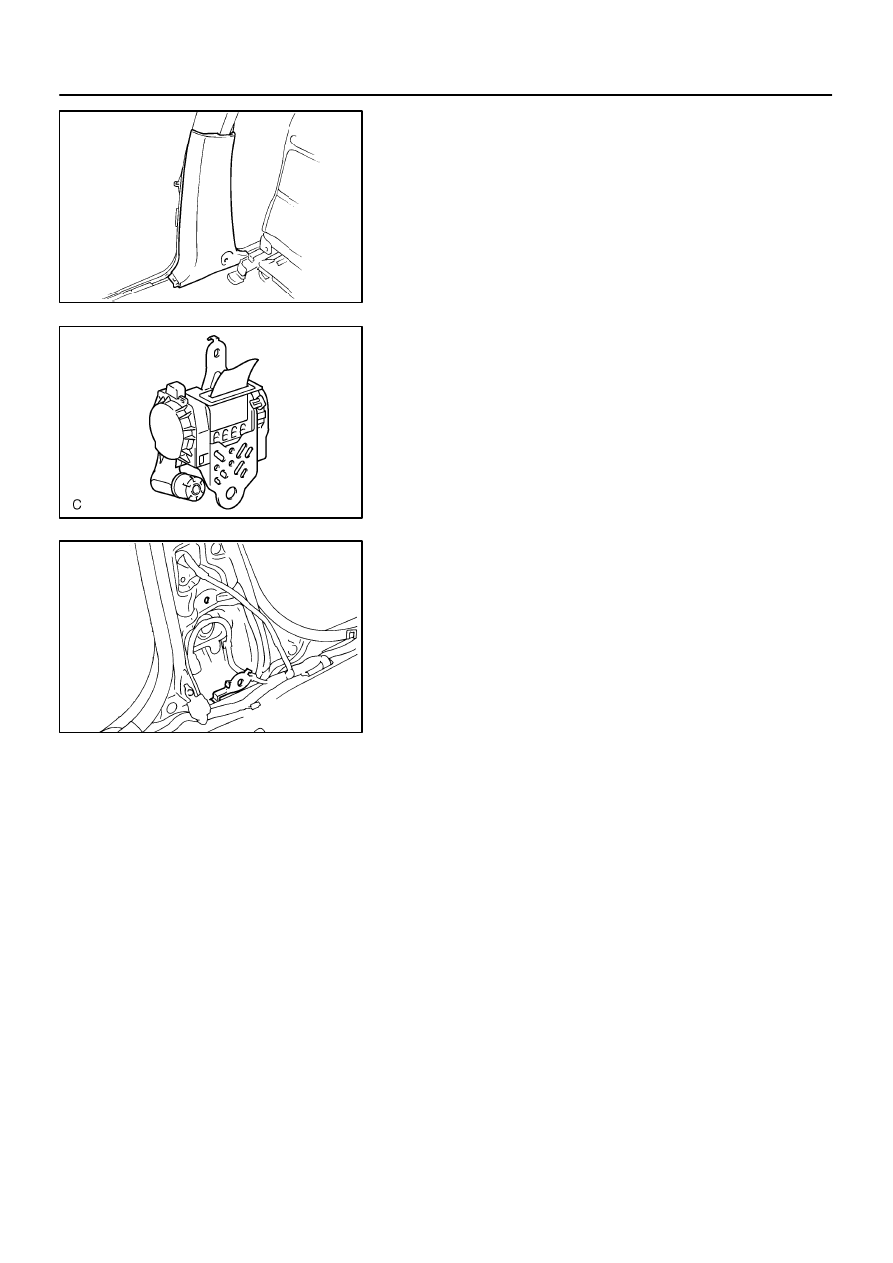
REMOVE RETRACTOR OF FRONT SEAT OUTER
BELT
(a)
Never disassemble the front seat outer belt.
NOTICE:
When removing the retractor of front seat outer belt, take
care not to pull the seat belt pretensioner wire harness.
(b)
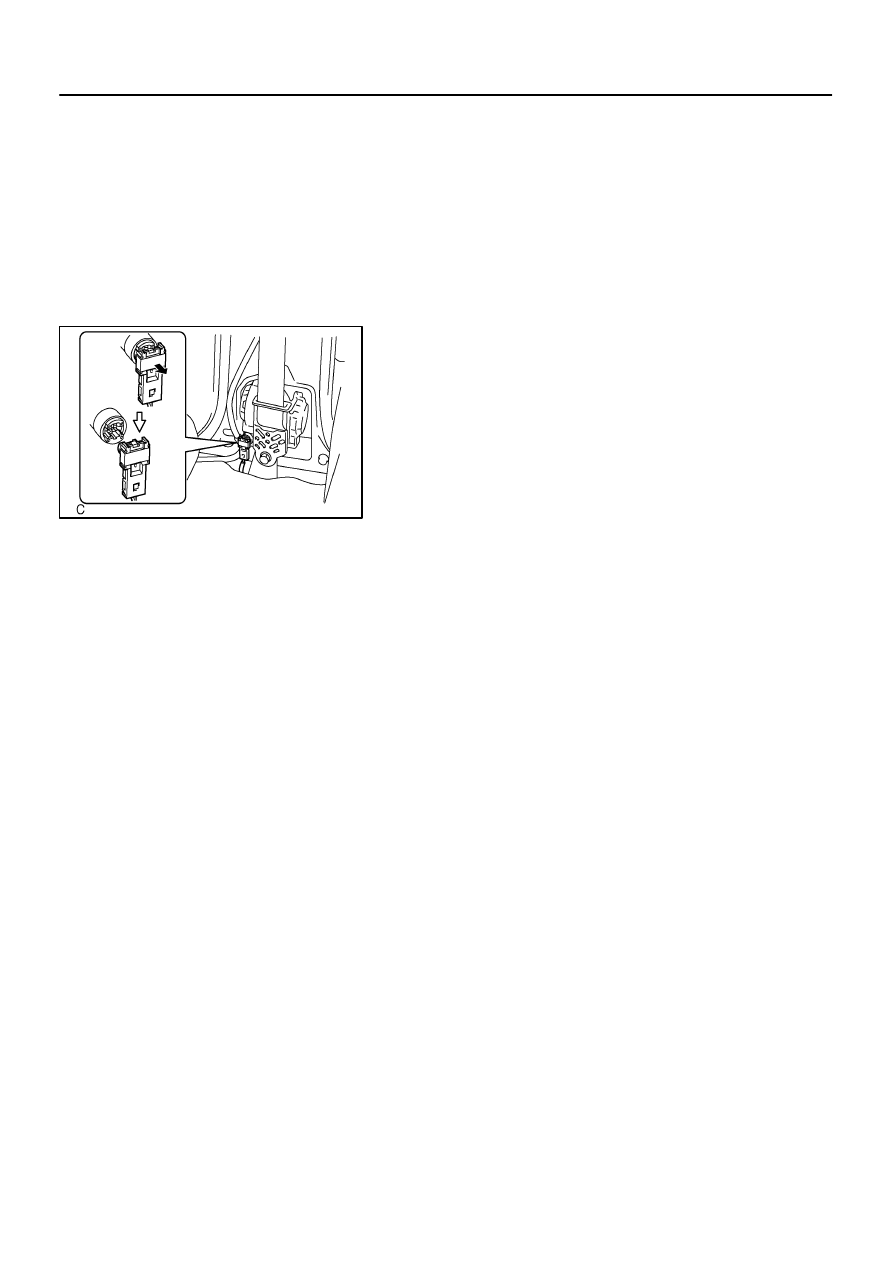
Disconnect the
connector.
Using a screwdriver, pull the locking button of the preten-
sioner connector to your side to release the lock.
HINT:
Tape the screwdriver tip before use.
(c)
Remove the 3 bolts and the front seat outer belt assem-
bly.
H17305
H18976
H04118
BO47R–03
–
BODY
SEAT BELT PRETENSIONER
BO–165
3718
INSPECTION
1.
PRETENSIONER IS NOT ACTIVATED
(a)
Perform a diagnostic system check (See page
(b)
Perform a visual check which includes the following items
with the front seat outer belt removed from the vehicle.
Check for cuts and cracks in, or marked discolor-
ation of the center pillar lower garnish.
Check for cuts and cracks in wire harness, and for
chipping in connectors.
Check for deformation of the center pillar.
CAUTION:
For removal and installation of the front seat outer belt, see
page
Be sure to follow the correct procedure.
2.
PRETENSIONER IS ACTIVATED
(a)
Perform a diagnostic system check (See page
(b)
Perform a visual check which includes the following items
with the front seat outer belt removed from the vehicle.
Check for deformation of the center pillar.
Check for damage on the connector and wire har-
ness.

BO47S–02
AB0152
SST
BO–166
–
BODY
SEAT BELT PRETENSIONER
3719
DISPOSAL
HINT:
When scrapping vehicle equipped with a SRS or disposing of
a front seat outer belt (with seat belt pretensioner), always first
deploy the airbag in accordance with the procedure given in RS
section or activate the seat belt pretensioner. If any abnormality
occurs with the airbag deployment or seat belt pretensioner ac-
tivation, contact the SERVICE DEP. of the TOYOTA MOTOR
SALES, U.S.A. INC. When disposing of a front seat outer belt
(with seat belt pretensioner) activated in a collision, follow the
same procedure given in step 1–(d) in ”DISPOSAL”.
CAUTION:
Never dispose of front seat outer belt which has inac-
tivated pretensioner.
The seat belt pretensioner produces a sizeable ex-
ploding sound when it activates, so perform the op-
eration out–of–door and where it will not create a nui-
sance to nearby residents.
When activating the seat belt pretensioner, always
use the specified SST. (SRS Airbag Deployment Tool)
Perform the operation in a place away from electrical
noise.
SST
09082–00700, 09082–00740
When activating a front seat outer belt (with seat belt
pretensioner), perform the operation at least
10 m (33 ft) away from the front seat outer belt.
Use gloves and safety glasses when handling a front
seat outer belt with activated pretensioner.
Always wash your hands with water after completing
the operation.
Do not apply water, etc. to a front seat outer belt with
activated pretensioner.
AB0158
SST
Battery
AB0152
SST
AB0158
SST
Battery
H01580
SST
–
BODY
SEAT BELT PRETENSIONER
BO–167
3720
1.
SEAT BELT PRETENSIONER ACTIVATION WHEN
SCRAPPING VEHICLE
HINT:
Have a battery ready as the power source to activate the seat
belt pretensioner.
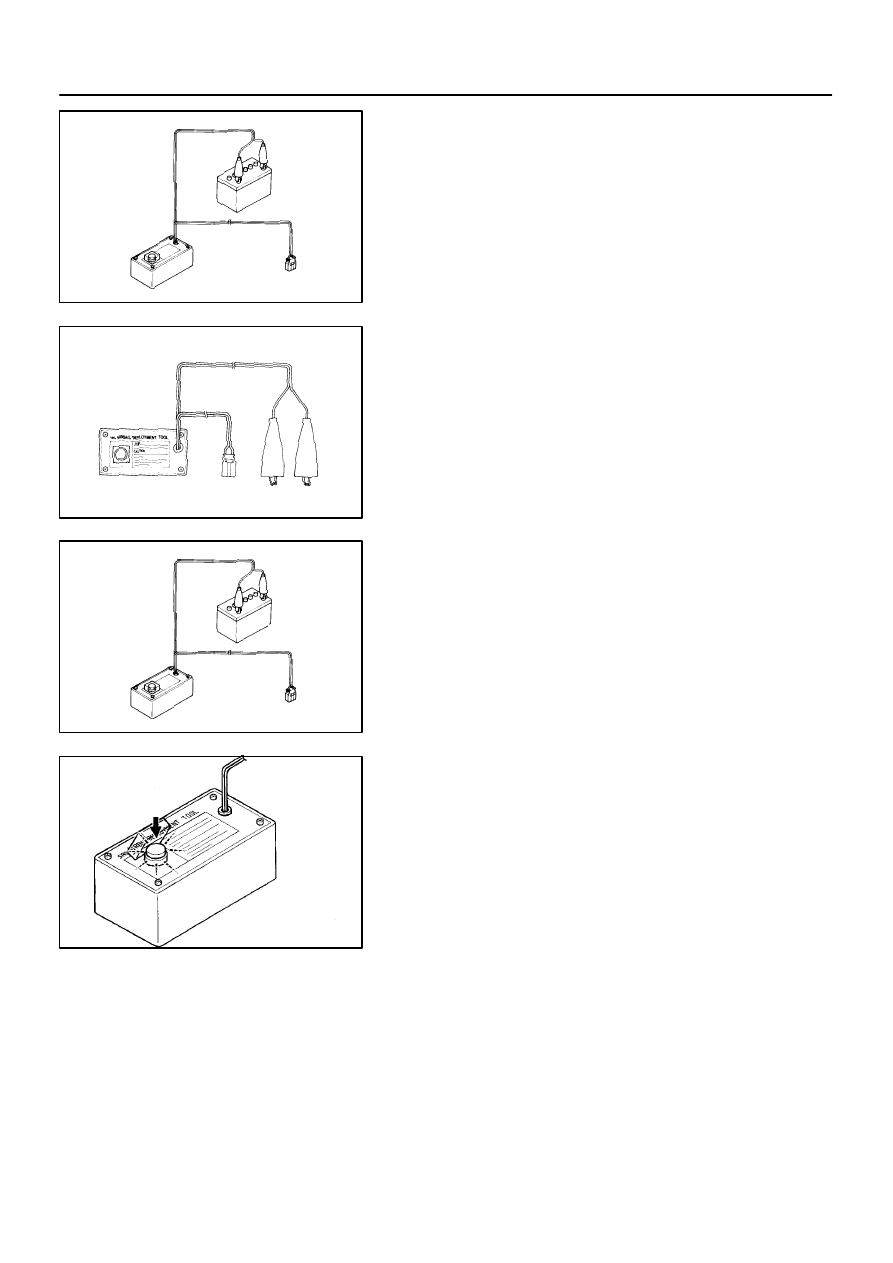
(a)
Check functioning of SST.
CAUTION:
When activating the seat belt pretensioner, always use the
specified SST: SRS Airbag Deployment Tool.
SST
09082–00700, 09082–00740
(1)
Connect the SST to battery.
Connect the red clip of the SST to the battery posi-
tive (+) terminal and the black clip to the battery neg-
ative (–) terminal.
HINT:
Do not connect the yellow connector which will be connected
with the seat belt pretensioner.
(2)
Check functioning of SST.
Press the SST activation switch, and check the LED
of the SST activation switch lights up.
CAUTION:
If the LED lights up when the activation switch is not being
pressed, SST malfunction is probable, so definitely do not
use the SST.
(b)
Front seat outer belt on left side of 4–door vehicle:
Disconnect the pretensioner connector.
(1)
Remove the front door scuff plate.
(2)
Remove the back door scuff plate.
(3)
Remove the rear quarter trim panel.
(4)
Remove the quarter trim panel.
Нет комментариевНе стесняйтесь поделиться с нами вашим ценным мнением.
Текст