Toyota Sequoia (2005). Manual — part 713
B02608
x 10
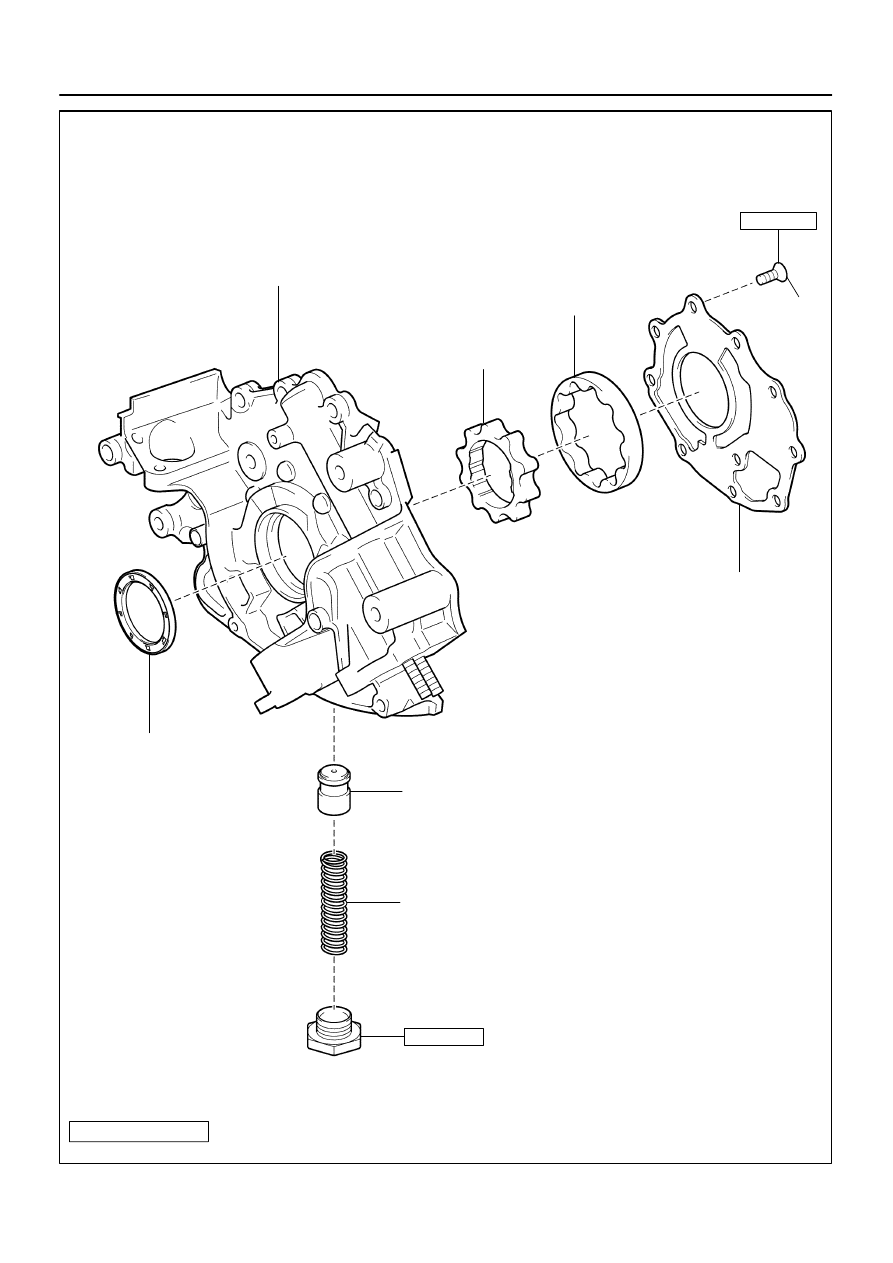
Driven Rotor
Drive Rotor
Oil Pump Body
Compression Spring
Oil Pump Body Cover
Non–reusable part
Relief Valve
Crankshaft
Front Oil Seal
Plug
49 (500, 36)
x 10
N·m (kgf·cm, ft·lbf) : Specified torque
10 (105, 8)
–
LUBRICATION
OIL PUMP
LU–7
2841

LU08Q–10
B05837
Pull
O–Ring
B05838
LU–8
–
LUBRICATION
OIL PUMP
2842
REMOVAL
HINT:
When repairing the oil pump, the oil pan and strainer should be
removed and cleaned.
1.
REMOVE ENGINE FROM VEHICLE
(2WD: See page
(4WD: See page
2.
INSTALL ENGINE TO ENGINE STAND FOR DIS-
ASSEMBLY
3.
REMOVE TIMING BELT (See page
)
4.
REMOVE NO.1 IDLER PULLEY (See page
5.
REMOVE NO.2 IDLER PULLEY (See page
6.
REMOVE CRANKSHAFT TIMING PULLEY
(See page
7.
REMOVE CRANKSHAFT POSITION SENSOR
(See page
)
8.
REMOVE OIL DIPSTICK AND GUIDE
(a)
Remove the bolt holding the oil dipstick to the LH cylinder
head.
(b)
Pull out the dipstick guide together with the dipstick from
the No.1 oil pan.
(c)
Remove the O–ring from the dipstick guide.
9.
REMOVE OIL FILTER, OIL COOLER AND FILTER
BRACKET ASSEMBLY
(a)
Disconnect the oil pressure switch connector.
(b)
Take out the vinyl tape, and disconnect the wire from the
clamp.
(c)
Turn the clamp counterclockwise, and remove the clamp
from the oil filter bracket.
(d)
Disconnect the oil cooler hose from the oil cooler.
(e)
Remove the 2 bolts, nut, the oil filter, oil cooler and filter
bracket assembly.
(f)
Remove the gasket from the filter bracket.
Z02375
SST
SST
B05839
B05840
B05841
Pry
RH Side
LH Side
–
LUBRICATION
OIL PUMP
LU–9
2843
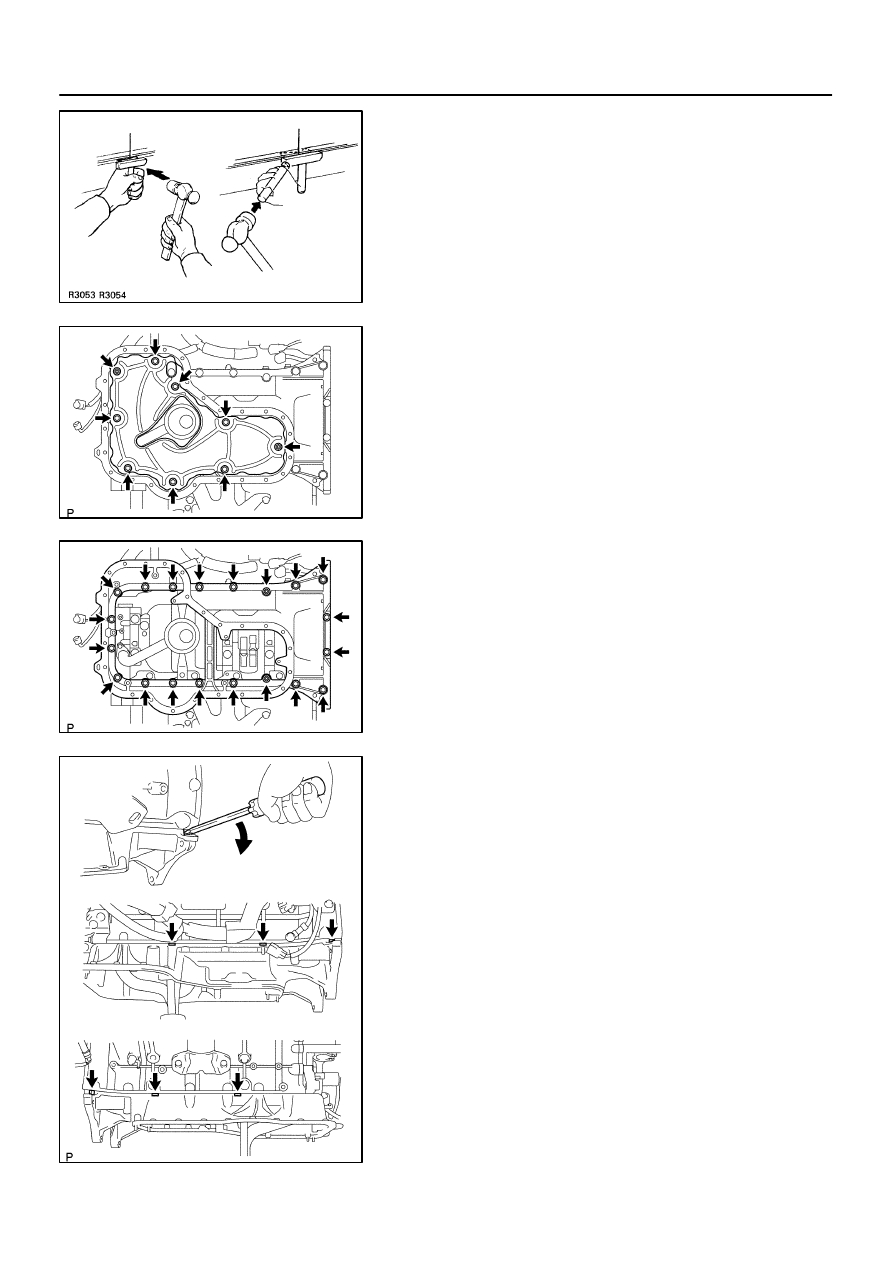
10.
REMOVE NO.2 OIL PAN
(a)
Remove the 24 bolts and 2 nuts.
(b)
Insert the blade of SST between the No.1 and No.2 oil
pans, cut off applied sealer and remove the No.2 oil pan.
SST
09032–00100
NOTICE:
Be careful not to damage the No.2 oil pan contact sur-
face of the No.1 oil pan.
Be careful not to damage the No.2 oil pan flange.
11.
REMOVE OIL PAN BAFFLE PLATE
Remove the 7 bolts, 2 nuts and baffle plate.
12.
REMOVE NO.1 OIL PAN
(a)
Remove the 18 bolts and 2 nuts.
(b)
Using a screwdriver, remove the No.1 oil pan by prying
between the oil pan and cylinder block in the sequence
shown.
NOTICE:
Be careful not to damage the contact surface of the cylin-
der block and No.1 oil pan.
B05842
B01044
B00951
LU–10
–
LUBRICATION
OIL PUMP
2844
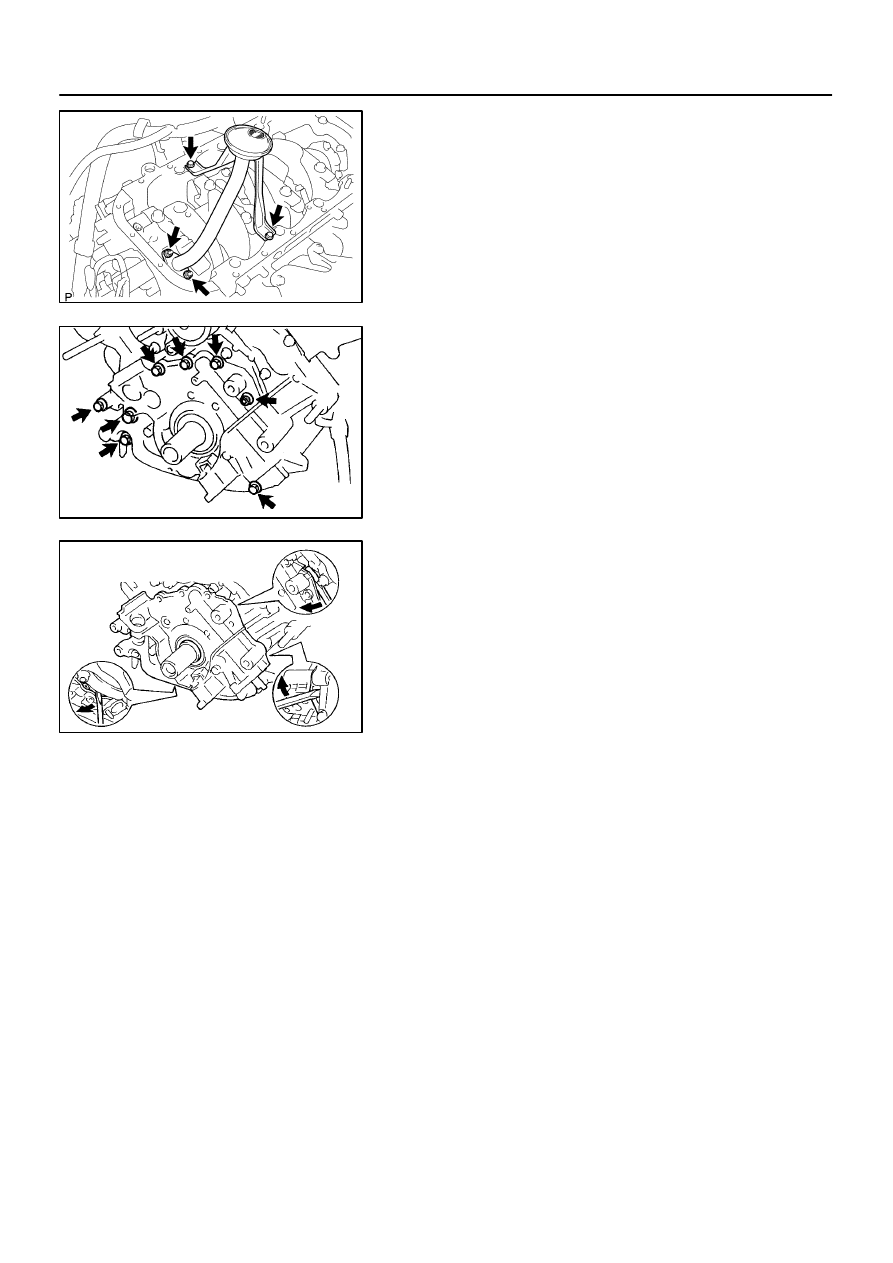
13.
REMOVE OIL STRAINER
Remove the 2 bolt, 2 nuts, oil strainer and gasket.
14.
REMOVE OIL PUMP
(a)
Remove the 8 bolts.
HINT:
Use a 6 mm hexagon wrench for the hexagon head bolt.
(b)
Using a screwdriver, remove the oil pump by prying the
portions between the oil pump and cylinder block.
NOTICE:
Be careful not to damage the contact surface of the cylin-
der block and oil pump.
(c)
Remove the O–ring from the cylinder block.
Нет комментариевНе стесняйтесь поделиться с нами вашим ценным мнением.
Текст