Toyota Sequoia (2005). Manual — part 908
BO46L–01
H16781
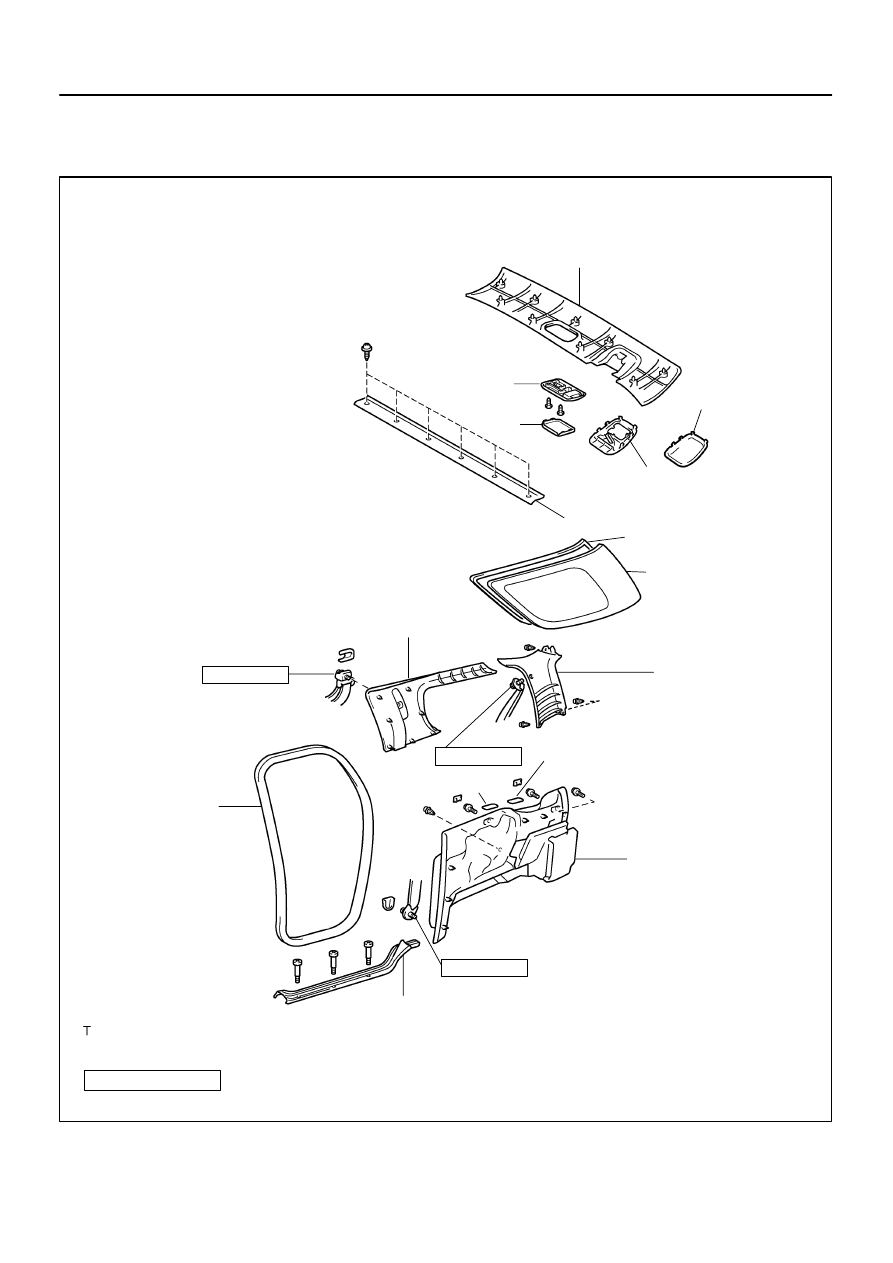
Rear Trim
w/ Rear No.2 seat:
Rear Trim Cover
Dome Light
Lens
Quarter Window Glass
Rear Window Side Garnish
No. 2 Rear Window
Side Garnish
w/ Rear No. 2 seat:
Quarter Trim Upper Belt Hole Cover
Quarter Trim Panel
Rear Door Scuff Plate
Rear Door Opening
Trim Weatherstrip
Rear Floor Mat Support Plate
Non–reusable part
N·m (kgf·cm, ft·lbf) : Specified Torque
w/o Rear No. 2 seat:
Quarter Trim Hole Cover
42 (430, 31)
42 (430, 31)
42 (430, 31)
Dam
w/o Rear No.2 seat:
Rear Trim Cover
BO–68
–
BODY
QUARTER WINDOW GLASS
3621
QUARTER WINDOW GLASS
COMPONENTS
BO46M–02
H16718
Clip
H11151
H17633
w/ Rear No. 2 seat:
w/o Rear No. 2 seat:
–
BODY
QUARTER WINDOW GLASS
BO–69
3622
REMOVAL
1.
w/ Rear No. 2 seat:
REMOVE REAR NO. 2 SEAT
2.
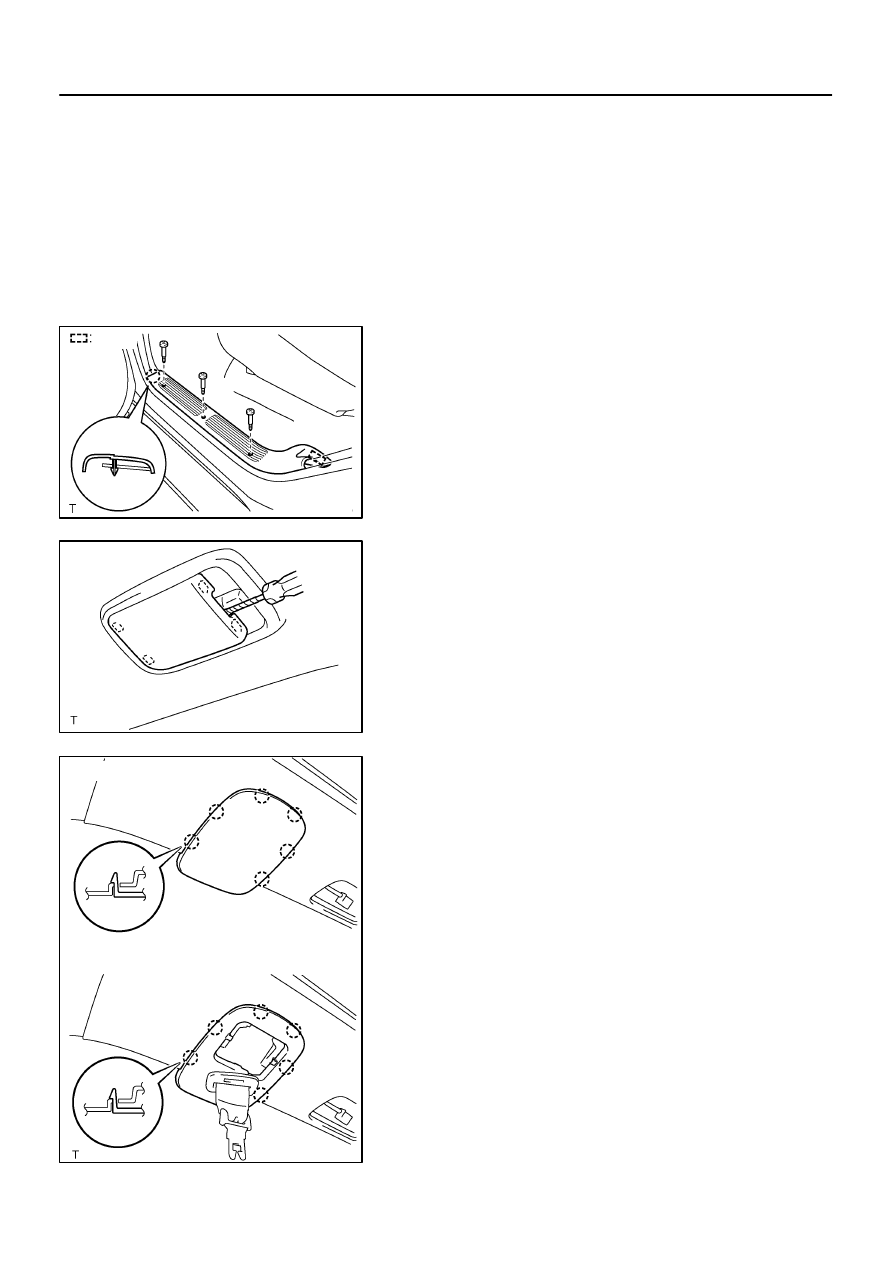
REMOVE REAR DOOR SCUFF PLATE
(a)
Remove the 3 screws.
(b)
Using a screwdriver, remove the rear door scuff plate.
HINT:
Tape the screwdriver tip before use.
3.
REMOVE REAR DOOR OPENING TRIM WEATH-
ERSTRIP
4.
REMOVE DOME LIGHT
(a)
Using a screwdriver, remove the lens.
HINT:
Tape the screwdriver tip before use.
(b)
Remove the 2 screws and dome light, then disconnect the
connector.
5.
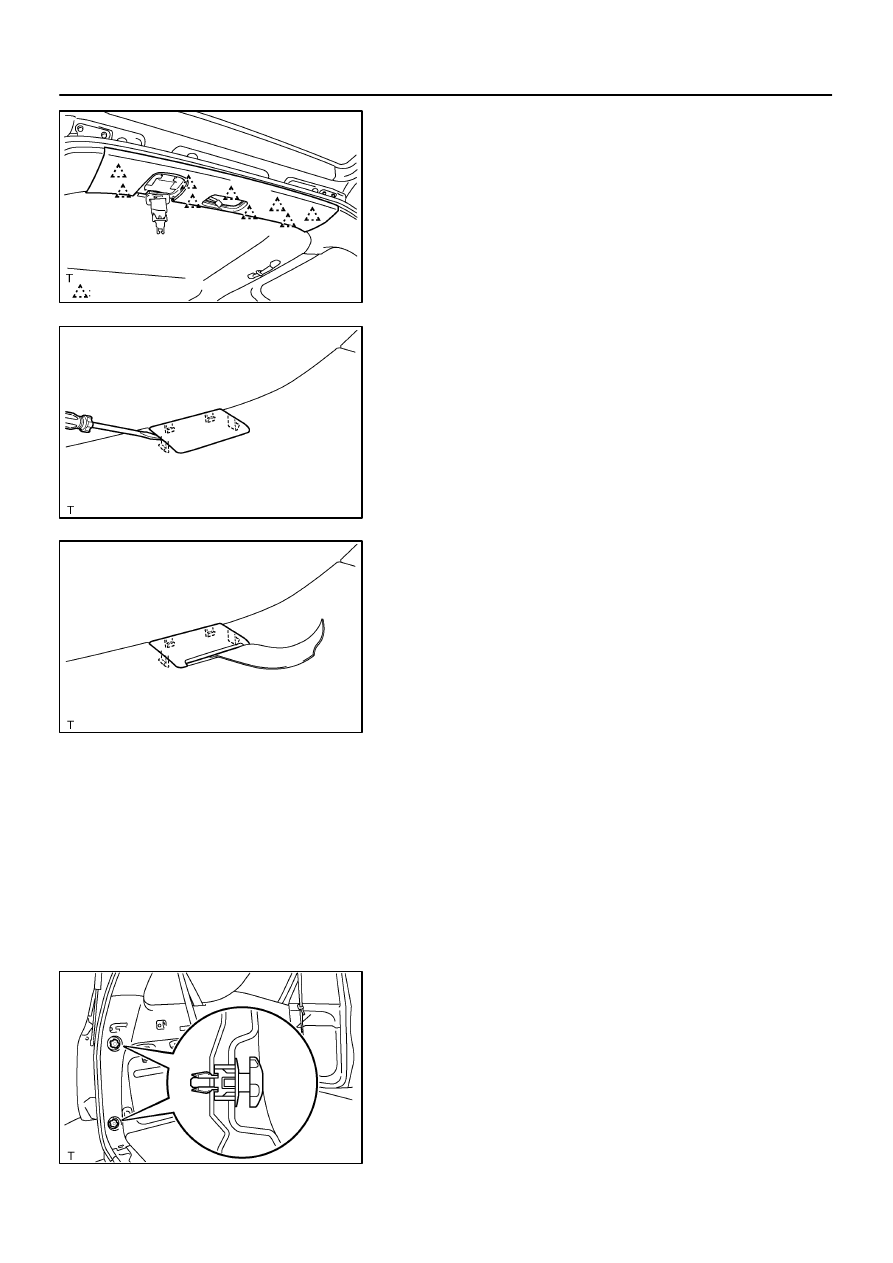
REMOVE REAR TRIM COVER
Using a screwdriver, remove the rear trim cover.
HINT:
Tape the screwdriver tip before use.
H16724
9 Clips
H16725
H16726
H16727
BO–70
–
BODY
QUARTER WINDOW GLASS
3623
6.
REMOVE REAR TRIM
Using a screwdriver, remove the rear trim.
HINT:
Tape the screwdriver tip before use.
7.
REMOVE REAR FLOOR MAT SUPPORT PLATE
8.
w/o Rear No. 2 seat:
REMOVE QUARTER TRIM HOLE COVER
Using a screwdriver, remove the quarter trim hole cover.
HINT:
Tape the screwdriver tip before use.
9.
w/ Rear No. 2 seat:
REMOVE QUARTER TRIM UPPER BELT HOLE COV-
ER
Using a screwdriver, remove the quarter trim upper belt hole
cover.
HINT:
Tape the screwdriver tip before use.
10.
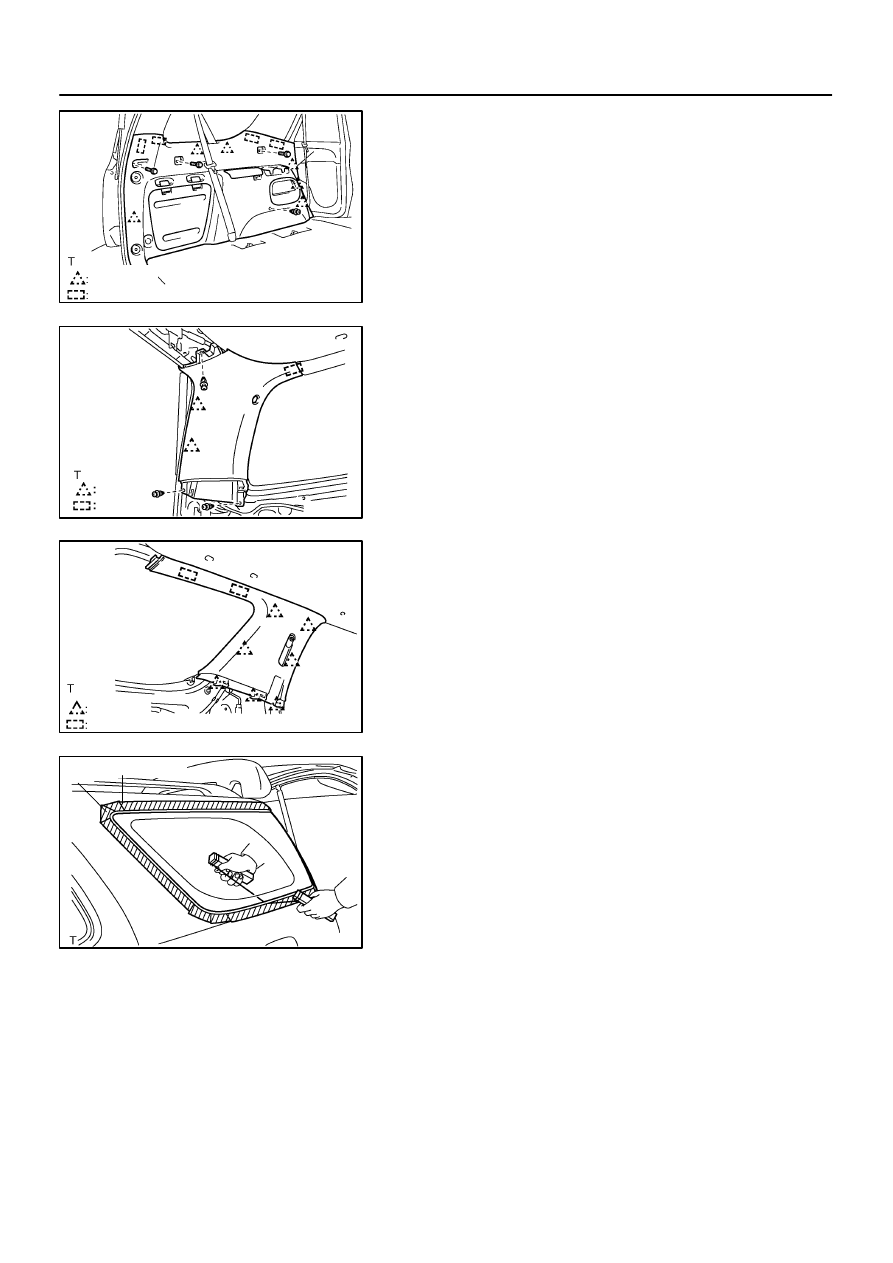
REMOVE QUARTER TRIM PANEL
(a)
w/o Tonneau cover:
Using a screwdriver, remove the 2 No. 1 tonneau cover
holder caps.
HINT:
Tape the screwdriver tip before use.
(b)
Remove the 2 package holder net hooks.
(c)
Remove the rear No. 1 seat outer belt floor anchor.
H16728
5 Clips
4 Clips
H16731
2 Clips
Clip
H16732
7 Clips
2 Clips
H16741
Protective Tape
–
BODY
QUARTER WINDOW GLASS
BO–71
3624
(d)
Remove the 3 bolts, clip and quarter trim panel, then dis-
connect the connector.
11.
w/ Rear No. 2 seat:
REMOVE REAR NO. 2 SEAT OUTER BELT SHOUL-
DER ANCHOR
12.
REMOVE NO. 2 REAR WINDOW SIDE GARNISH
Remove the 2 clips and No. 2 rear window side garnish.
13.
REMOVE REAR NO. 1 SEAT OUTER BELT SHOUL-
DER ANCHOR
(a)
Using a screwdriver, remove the anchor cap.
HINT:
Tape the screwdriver tip before use.
(b)
Remove the rear No. 1 seat outer belt shoulder anchor.
14.
REMOVE REAR WINDOW SIDE GARNISH
Remove the rear window side garnish.
15.
REMOVE QUARTER WINDOW GLASS
(a)
w/ Glass antenna:
Disconnect the connectors from the glass antenna termi-
nals.
(b)
Push a piano wire through from the interior.
(c)
Tie both wire ends to wooden blocks or similar objects.
HINT:
Apply protective tape to the outer surface to keep the surface
from being scratched.
NOTICE:
When separating the glass, take care not to damage the
paint and interior.
Нет комментариевНе стесняйтесь поделиться с нами вашим ценным мнением.
Текст