Toyota Sequoia (2005). Manual — part 863
I24334
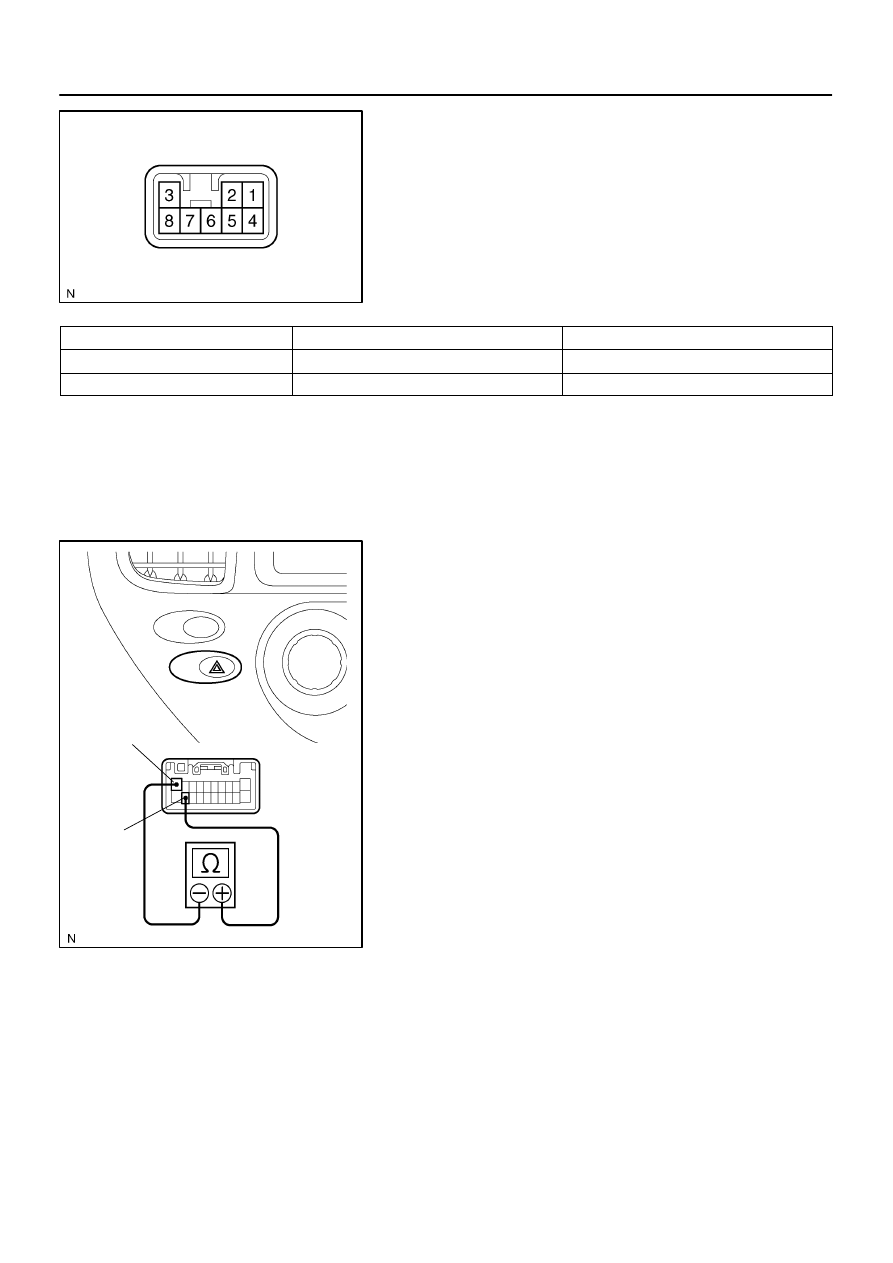
Turn Signal Flasher Relay
Connector Front View:
I28728
10
19
–
BODY ELECTRICAL
TURN SIGNAL AND HAZARD WARNING SYSTEM
BE–37
3441
3.
Connector connected:
INSPECT TURN SIGNAL FLASHER RELAY OPERA-
TION
Connect the wire harness side connector to the turn signal
flasher and inspect the connector from the back side, as shown.
Tester connection
Condition
Specified condition
2 – Ground
Turn signal switch RIGHT
Battery positive voltage
↔
0 V
3 – Ground
Turn signal switch LEFT
Battery positive voltage
↔
0 V
If operation is not as specified, replace the relay.
4.
INSPECT HAZARD WARNING SWITCH CONTINUITY
(a)
Remove the center cluster finish panel.
(b)
Disconnect the connector from the integrated center clus-
ter.
(c)
Check that continuity exists between terminals 19 and 10
with the switch ON.
(d)
Check that no continuity exists between terminals 19 and
10 with the switch OFF.
If continuity is not as specified, replace the switch.
BE175–06
I28405
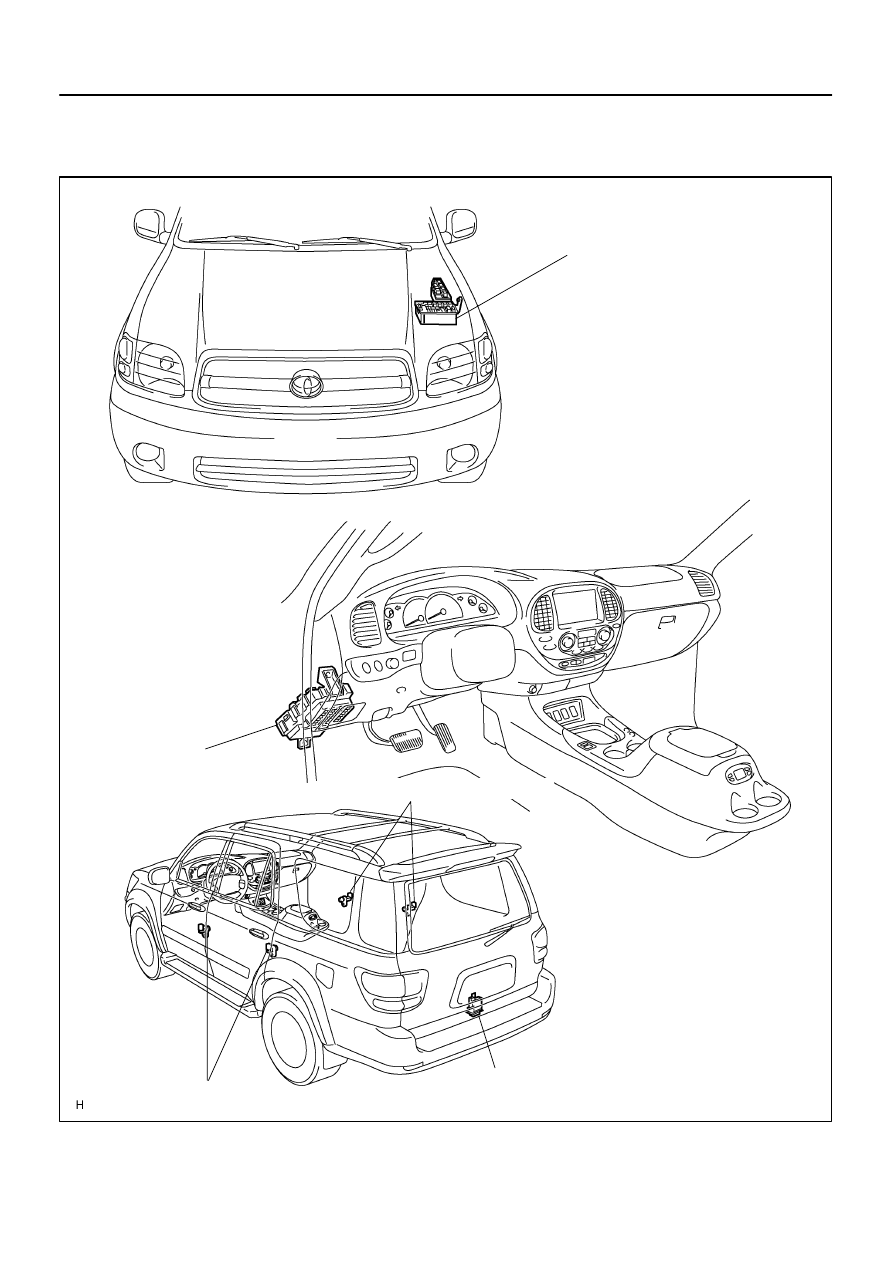
Door Courtesy Light Switch
Back Door Courtesy Light Switch
Engine Room J/B
DOME Fuse
Instrument Panel J/B
Door Courtesy Light Switch
BE–38
–
BODY ELECTRICAL
INTERIOR LIGHT SYSTEM
3442
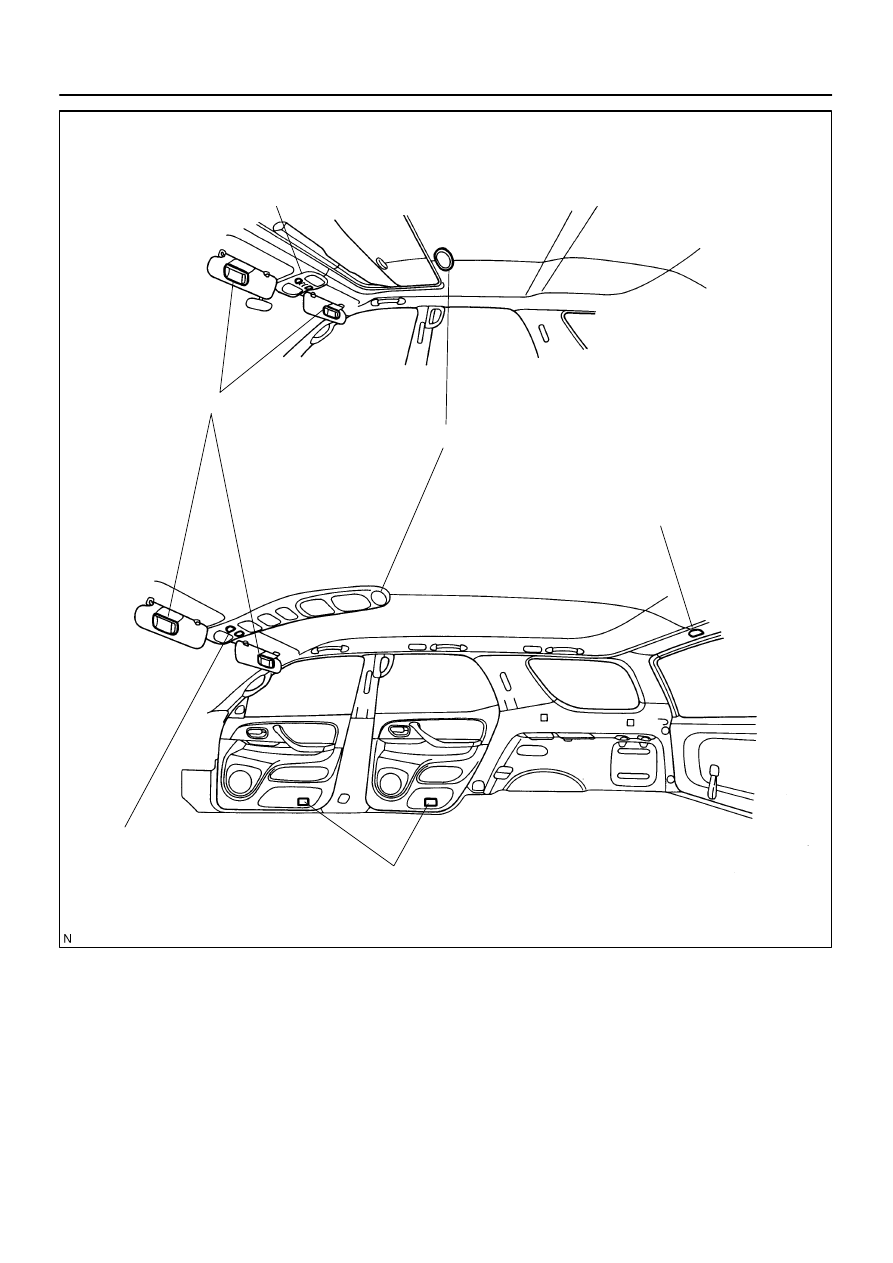
INTERIOR LIGHT SYSTEM
LOCATION
I18593
Front Personal Light
Rear Interior Light
Vanity Light
Door Courtesy Light
Front Personal Light
Luggage Room Light
–
BODY ELECTRICAL
INTERIOR LIGHT SYSTEM
BE–39
3443
BE2MS–01
I18639
3
9
13
Front Personal Light Switch
I18755
1
3
Front Personal
Light Switch
I18563
3
1
Rear Interior Light Switch
I18564
2
3
I28729
3
1
BE–40
–
BODY ELECTRICAL
INTERIOR LIGHT SYSTEM
3444
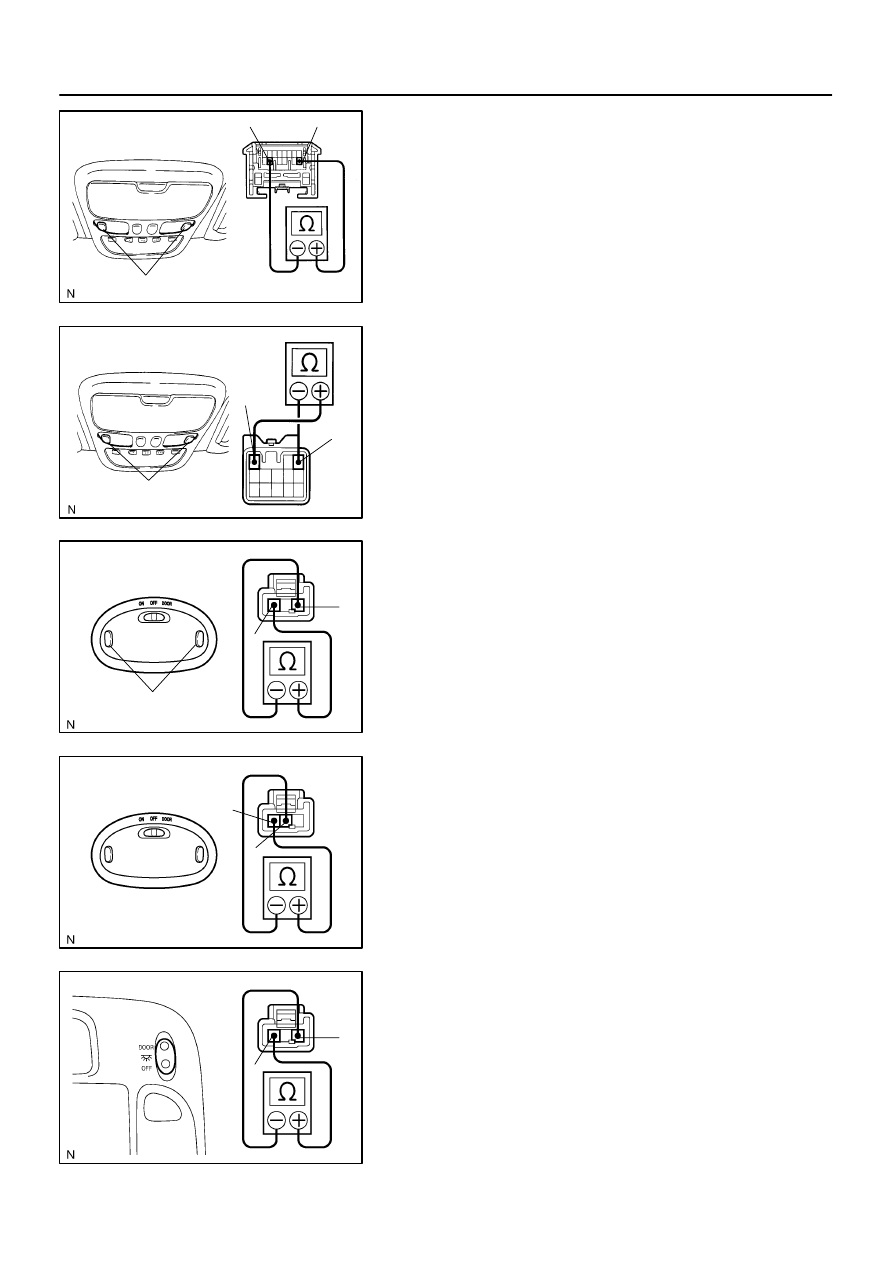
INSPECTION
1.
w/o Sliding Roof:
INSPECT FRONT PERSONAL LIGHT SWITCH CONTI-
NUITY
(a)
Disconnect the connector from the personal light.
(b)
Push the personal light switch ON, check that continuity
exists between terminal 9 and terminal 13.
If continuity is not as specified, replace the light assembly or
bulb.
2.
w/ Sliding Roof:
INSPECT FRONT PERSONAL LIGHT SWITCH CONTI-
NUITY
(a)
Disconnect the connector from the personal light.
(b)
Push the personal light switch ON, check that continuity
exists between terminal 1 and terminal 3.
If continuity is not as specified, replace the light assembly or
bulb.
3.
w/o RSE or RSA:
INSPECT REAR INTERIOR LIGHT SWITCH CONTINU-
ITY
(a)
Disconnect the connector from the doom light.
(b)
Push the rear interior light switch ON, check that continu-
ity exists between terminal 1 and terminal 3.
If continuity is not as specified, replace the light assembly or
bulb.
(c)
Turn the light switch to DOOR, check that continuity exists
between terminals 2 and 3.
If continuity is not as specified, replace the light assembly or
bulb.
4.
w/ RSE or RSA:
INSPECT REAR INTERIOR LIGHT SWITCH CONTINU-
ITY
(a)
Disconnect the connector from the rear interior light.
(b)
Push the rear interior light switch ON, check that continu-
ity exists between terminal 1 and terminal 3.
If continuity is not as specified, replace the light assembly or
bulb.
Нет комментариевНе стесняйтесь поделиться с нами вашим ценным мнением.
Текст