Toyota Sequoia (2005). Manual — part 893
BO45K–01
H04840
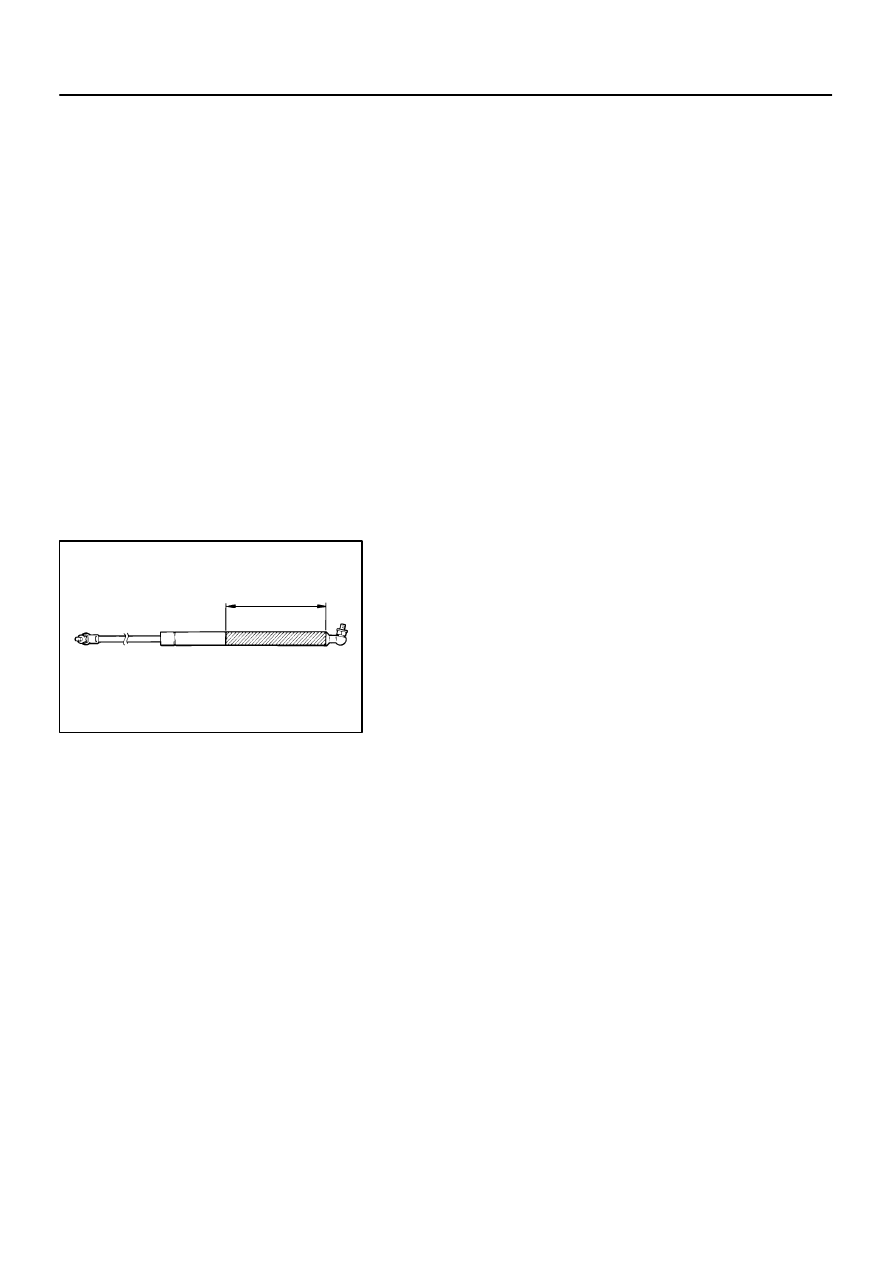
150 mm (5.91 in.)
Hole Here
BO–8
–
BODY
HOOD SUPPORT
3561
HOOD SUPPORT
REPLACEMENT
1.
REMOVE HOOD SUPPORT
(a)
Remove the bolt and hood support from the hood.
HINT:
While supporting the hood by hand, remove the hood support
from the hood.
(b)
Remove the bolt and hood support.
2.
IF NECESSARY, REPLACE HOOD SUPPORT
NOTICE:
Handling the hood support
Do not disassemble the support as the cylinder is
filled with pressurized gas.
If the hood support is to be replaced, drill a 2.0 – 3.0
mm (0.079 – 0.118 in.) hole in the area shown in the il-
lustration to completely release the high pressure
gas before disposing of it.
When drilling, chips may fly out so work carefully.
The gas is colorless, odorless and non – toxic.
When working, handle the hood support carefully.
Never score or scratch the exposed part of the piston
rod, and allow any paint or oil to get on it.
Do not turn the piston rod and cylinder with the hood
support fully extended.
3.
INSTALL HOOD SUPPORT
(a)
Install the bolt and hood support to the body.
Torque: 22 N·m (224 kgf·cm, 16 ft·lbf)
(b)
Install the bolt and hood support to the hood.
Torque: 22 N·m (224 kgf·cm, 16 ft·lbf)
BO45L–02
H16656
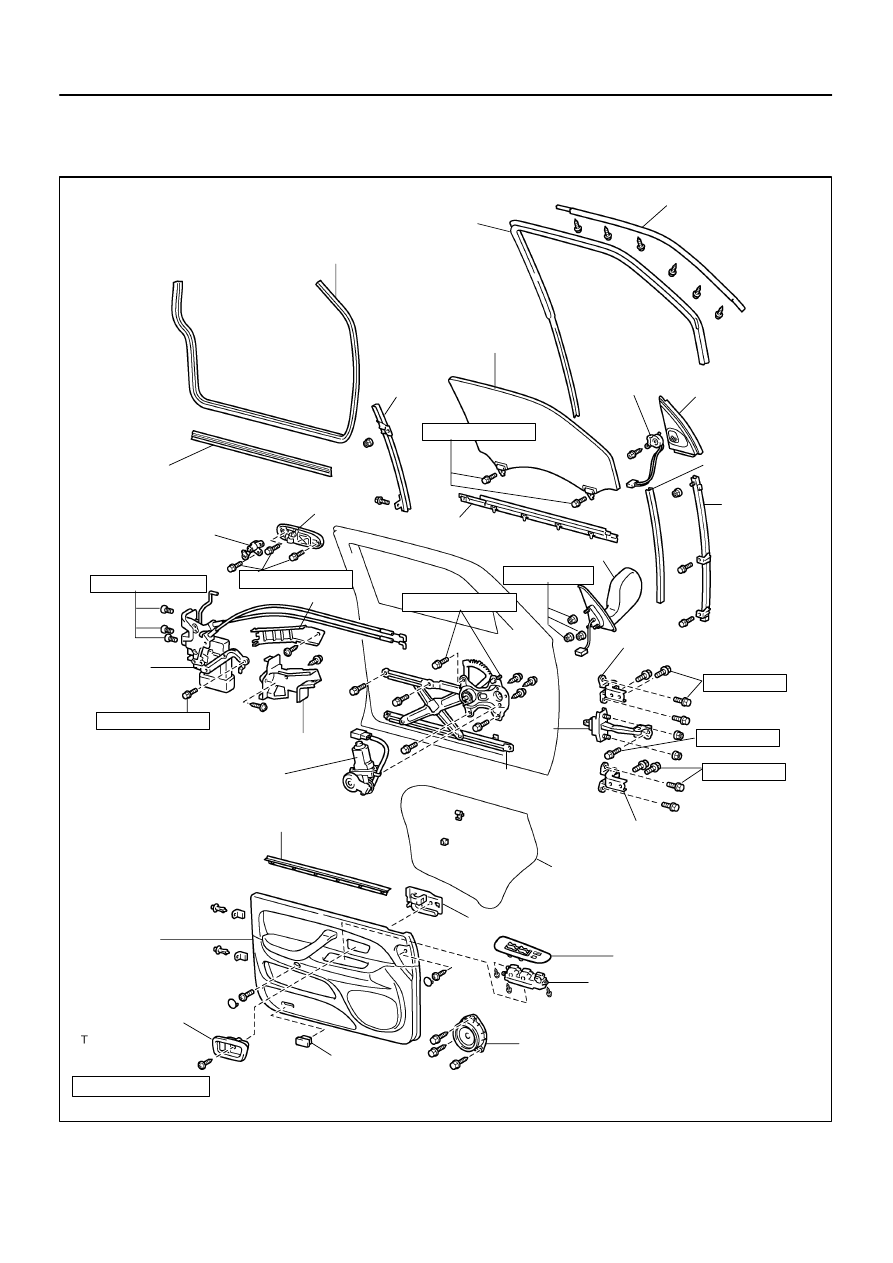
Upper Window Frame Moulding
Door Glass Run
Front Door Weatherstrip
Door Glass
Rear Lower
Frame
Tweeter Speaker
Lower Frame
Bracket Garnish
No. 2 Glass Run
Front Lower
Frame
Door Belt Moulding
Outside Rear View Mirror
No. 2 Front Door
Weatherstrip
Outside Handle
Lock Cylinder
Cable Protector
Door Lock
Door Lock Outer Cover
Window Regular
Motor
Window Regular
Sub–Assembly
Service Hole Cover
Inside Handle
Upper Armrest base panel
Power Window Switch
Speaker
Courtesy Light
Precoated part
Inside Handle Bezel
Door Trim
Inner Weatherstrip
Door Hinge
Door
Check
Door Hinge
5.0 (51, 44 in.·lbf)
5.0 (51, 44 in.·lbf)
5.5 (56, 49 in.·lbf)
8.0 (82, 71 in.·lbf)
8.0 (82, 71 in.·lbf)
8.0 (82, 71 in.·lbf)
23 (235, 17)
23 (235, 17)
30 (306, 22)
: Specified torque
N·m (kgf·cm, ft·lbf)
–
BODY
FRONT DOOR
BO–9
3562
FRONT DOOR
COMPONENTS
BO45M–01
H04751
H16641
H16642
8 Clips
BO–10
–
BODY
FRONT DOOR
3563
DISASSEMBLY
1.
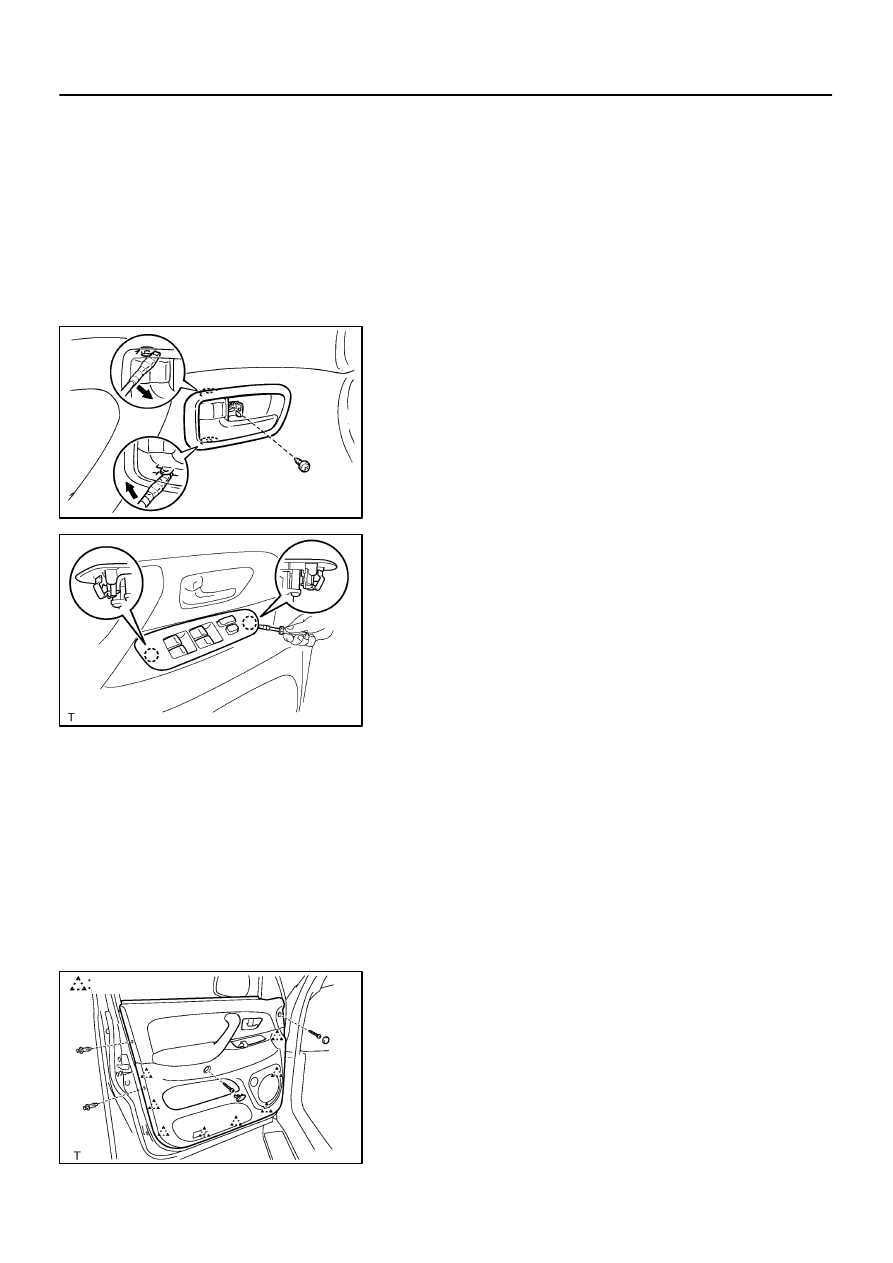
REMOVE INSIDE HANDLE BEZEL
(a)
Using a screwdriver, open the cover.
HINT:
Tape the screwdriver tip before use.
(b)
Remove the screw.
(c)
Using a screwdriver, remove the inside handle bezel as
shown in the illustration.
HINT:
Tape the screwdriver tip before use.
2.
REMOVE COURTESY LIGHT
3.
REMOVE UPPER ARMREST BASE PANEL WITH
POWER WINDOW SWITCH
(a)
Using a screwdriver, remove the upper armrest base pan-
el with power window switch.
HINT:
Tape the screwdriver tip before use.
(b)
Disconnect the connector.
(c)
Remove the 3 screws and power window switch from the
upper armrest base panel.
4.
REMOVE LOWER FRAME BRACKET GARNISH
Using a screwdriver, remove the lower frame bracket garnish.
HINT:
Tape the screwdriver tip before use.
5.
REMOVE DOOR TRIM
(a)
Using a screwdriver, remove the 2 caps.
HINT:
Tape the screwdriver tip before use.
(b)
Remove the 2 screws and 2 clips.
(c)
Insert a screwdriver between the door trim and door panel
to pry the door trim.
HINT:
Tape the screwdriver tip before use.
(d)
Pull the door trim upward to remove the door trim.
H16644
H16643
H16646
–
BODY
FRONT DOOR
BO–11
3564
(e)
Remove the inner weatherstrip from the door trim.
6.
REMOVE TWEETER SPEAKER
7.
REMOVE OUTSIDE REAR VIEW MIRROR
Torque: 8.0 N·m (82 kgf·cm, 71 in.·lbf)
8.
REMOVE SPEAKER
9.
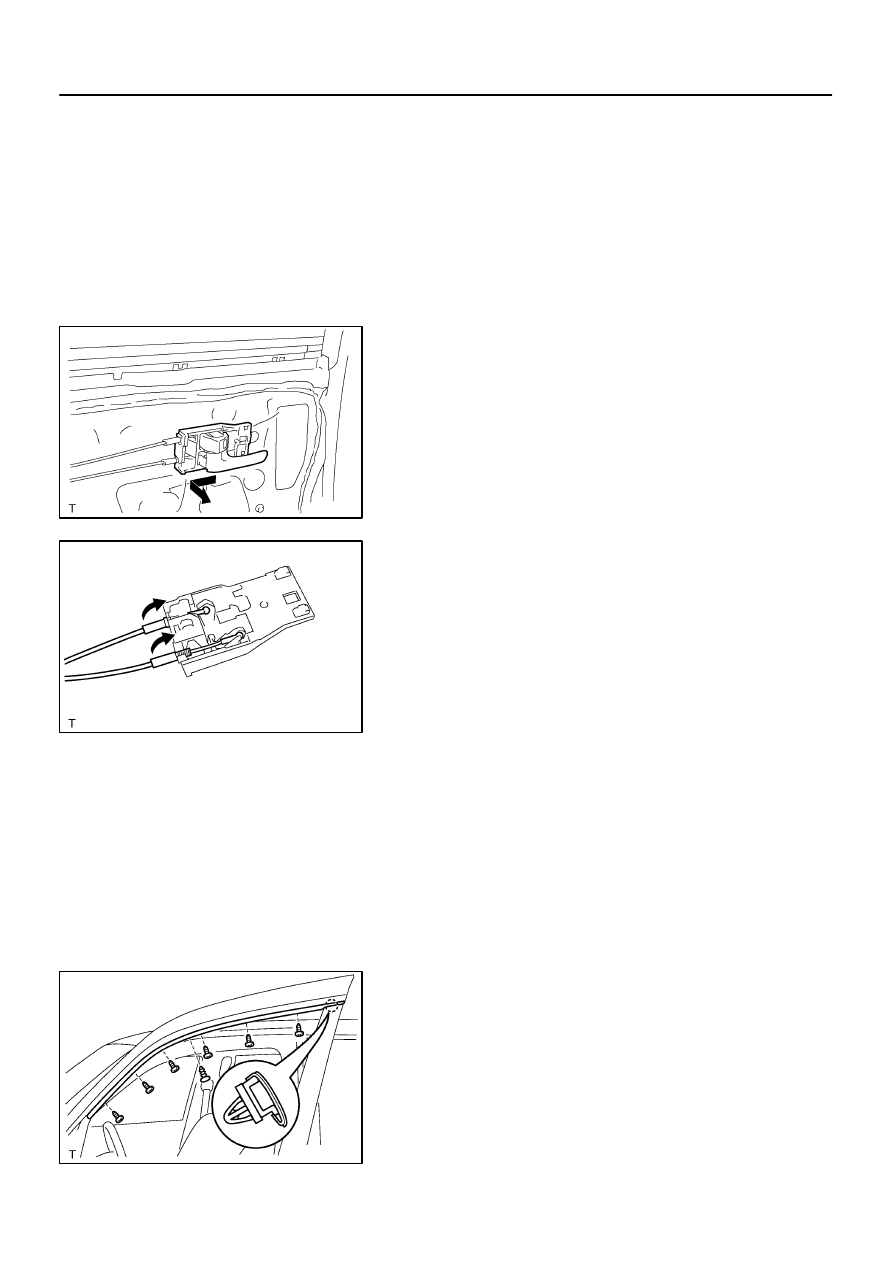
REMOVE INSIDE HANDLE
(a)
Slide the inside handle backward to remove it.
(b)
Disconnect the 2 cables from inside handle as shown in
the illustration.
10.
REMOVE SERVICE HOLE COVER
(a)
Using a clip remover, remove the clamp and grommets.
(b)
Remove the service hole cover.
NOTICE:
Do not tear the cover.
HINT:
At the time of reassembly, please refer to the following item.
Bring out the 2 control cables and wire harness through the ser-
vice hole cover.
11.
REMOVE DOOR GLASS
(a)
Open the door glass until the bolts appear in the service
hole.
(b)
Remove the 2 bolts.
Torque: 8.0 N·m (82 kgf·cm, 71 in.·lbf)
NOTICE:
Be careful not to drop the door glass.
(c)
Pull the door glass upward to remove it.
12.
REMOVE DOOR GLASS RUN
13.
REMOVE UPPER WINDOW FRAME MOULDING
(a)
Remove the 6 screws.
(b)
Using a screwdriver or clip remover, remove the upper
window frame moulding.
HINT:
Tape the screwdriver tip before use.
Нет комментариевНе стесняйтесь поделиться с нами вашим ценным мнением.
Текст