Kia Carnival (2007 year). Manual — part 153
(4) Check for oil seal ring damage or wear.
(5) Check for oil seal damage or wear.
2. Pinion valve
(1) Check for pinion gear tooth face damage or wear.
(2) Check for oil seal contact surface damage.
(3) Check for seal ring damage or wear.
(4) Check for oil seal damage or wear.
3. Bearing
(1) Check for seizure or abnormal noise during abearing rotation.
(2) Check for excessive play.
(3) Check for missing needle bearing rollers.
4. Others
(1) Check for damage of the rack housing cylinder bore.
(2) Check for boot damage, cracking or aging.
REASSEMBLY
1. Apply the specified fluid to the entire surface of the rack oil seal.
Recommended fluid : PSF-3
2. Install the backup washer and oil seal (A) to the specified position in the rack housing.

3. Apply the specified fluid to the entire surface of the rack bushing oil seal.
Recommended fluid : PSF-3
4. Install the oil seal (A) in the rack bushing (B).
5. Apply the specified fluid to the entire surface of the O-ring and install it in the rack bushing.
6. Apply the specified grease to the rack teeth.
Recommended grease
Multipurpose grease SAE J310a NLGI No.2
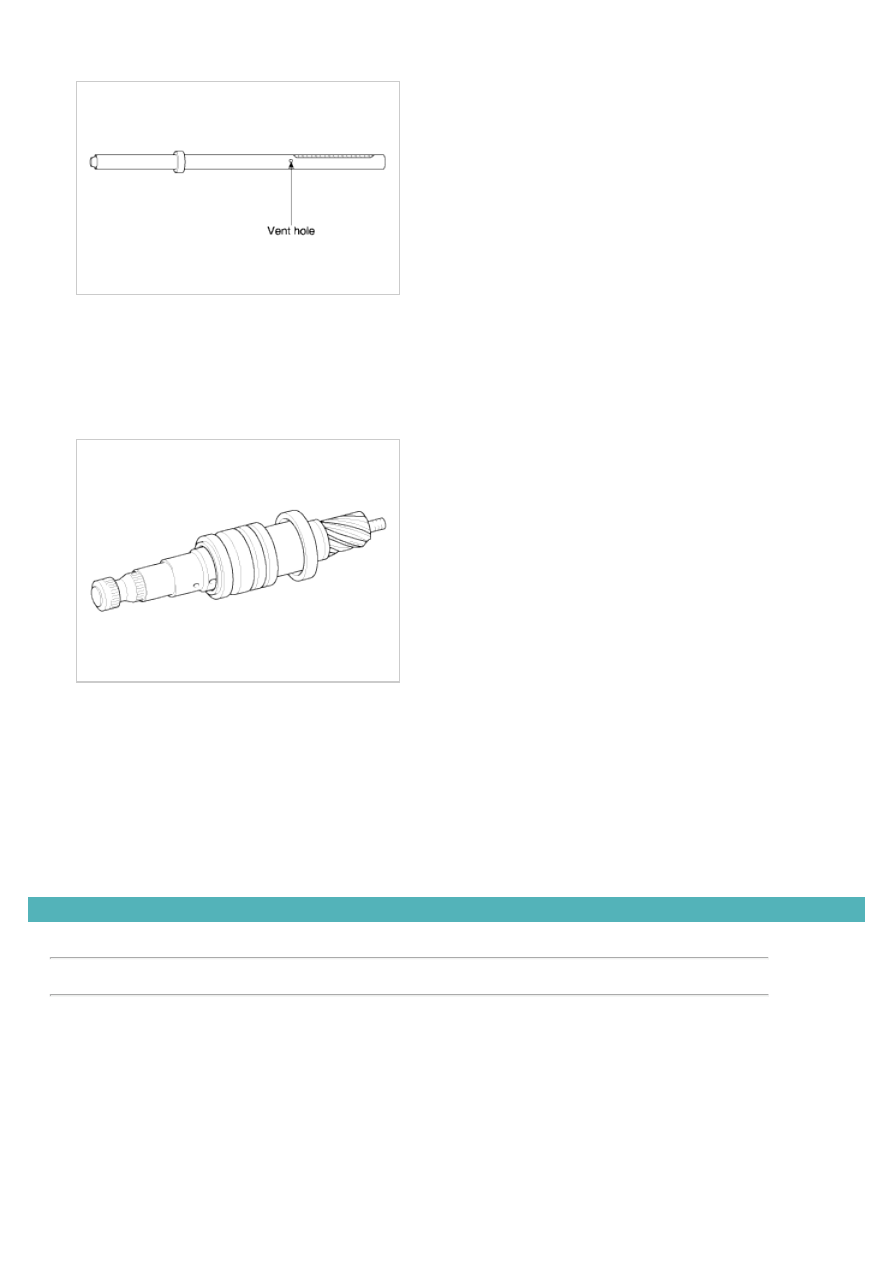
Do not plug the vent hole(A) in the rack with grease.
7. Insert the rack(A) into the rack housing(B) and install the rack bushing(C).
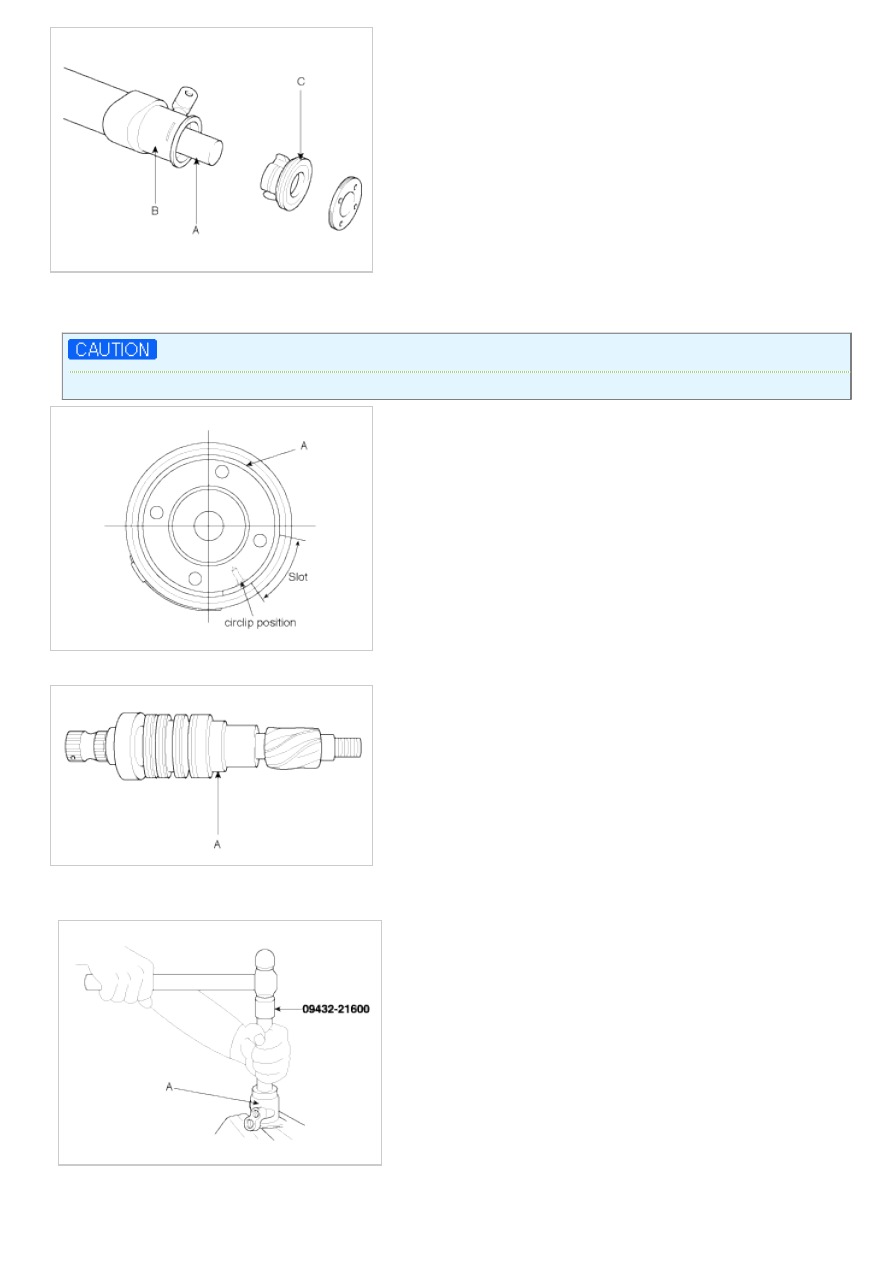
8. Push in the rack stopper (A) until the circlip groove of the rack stopper is aligned with the notched hole of the rack
housing. Then, install the circlip while turning the rack stopper.
The circlip should not be visible through the notched hole of the rack housing.
9. Using special Tool (09432-21600), install the oil seal and the ball bearing in the valve body (A).
10. After applying the specified fluid and grease to the pinion valve assembly (A), install it in the rack housing
assembly.
11. After applying the specified fluid to the oil seal, install it in the rack housing and fix the valve body assembly(A)
and O-ring in the gear box(B).
and O-ring in the gear box(B).
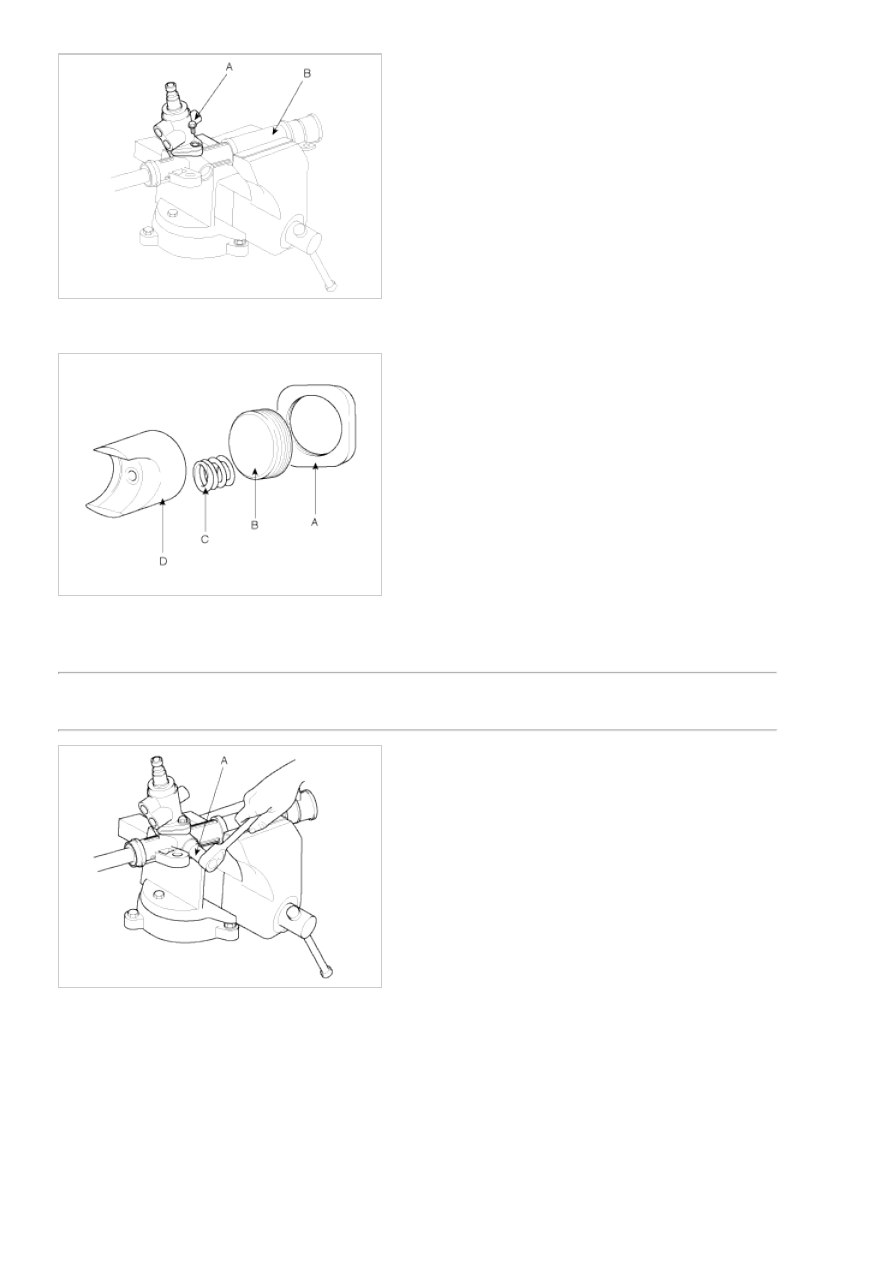
12. Install the rack support yoke (A), rack supportspring (B), yoke plug (C) and lock nut (D) in the ordershown in the
illustration. Apply semi-drying sealantto the threaded section of the yoke plug before installation.
13. With the rack placed in the center position, attach the yoke plug to the rack housing. Tighten the yoke plug to 12
Nm (120 kg
·cm, 8.9 lb·ft), with a 14mm socket (A). Loosen the yoke plug approximately from 30° to 60° and
tighten the yoke nut to the specified torque.
Tightening Torque Nm(kgf
·m, lb-ft) :
50 ~ 70(5 ~ 7, 37 ~ 52)
14. Tighten the feed tube (A) to the specified torque and install the mounting rubber using adhesive.
Нет комментариевНе стесняйтесь поделиться с нами вашим ценным мнением.
Текст