Nissan March K13. Manual — part 107
BACK DOOR LOCK
DLK-139
< REMOVAL AND INSTALLATION >
[WITH INTELLIGENT KEY SYSTEM]
C
D
E
F
G
H
I
J
L
M
A
B
DLK
N
O
P
BACK DOOR LOCK
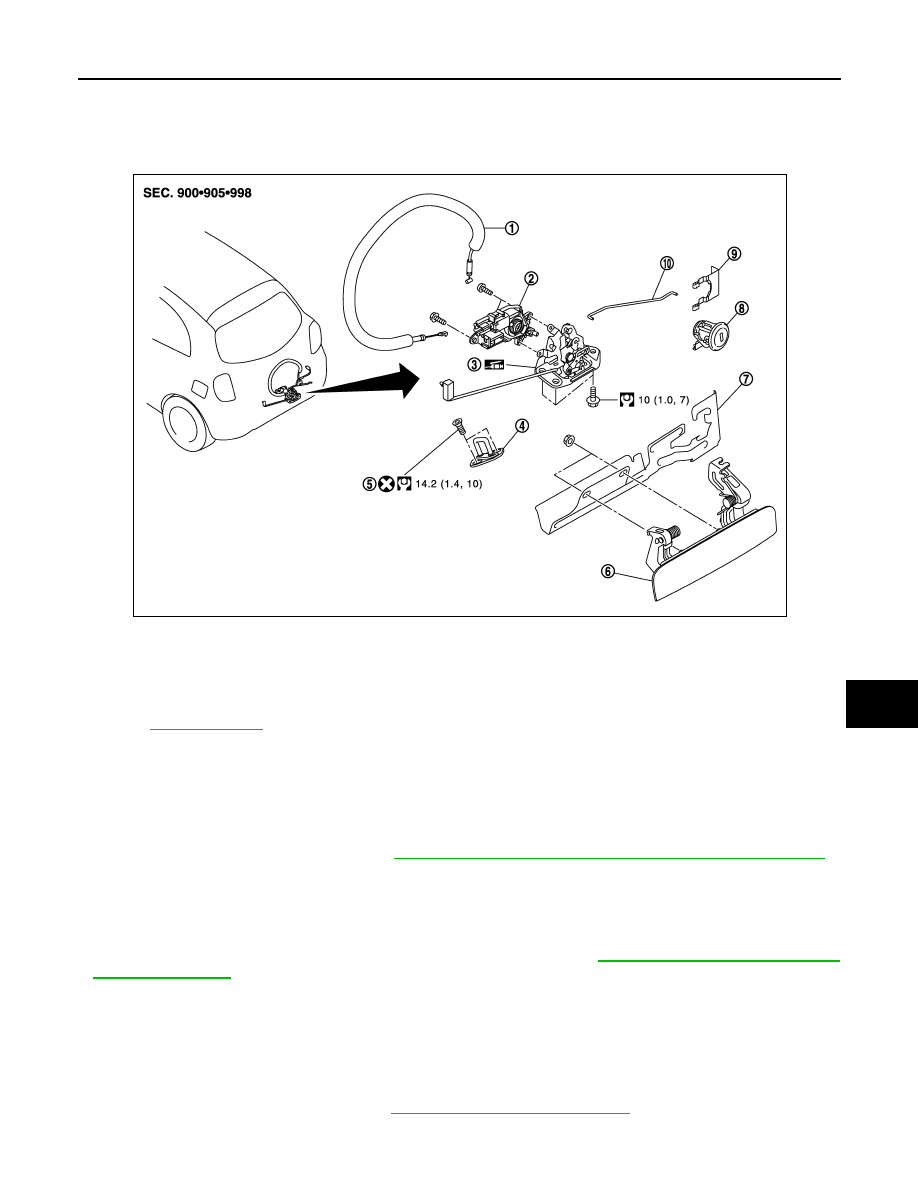
Exploded View
INFOID:0000000006054241
BACK DOOR STRIKER
BACK DOOR STRIKER : Removal and Installation
INFOID:0000000006054242
REMOVAL
1.
Remove the luggage rear plate. Refer to
INT-30, "LUGGAGE REAR PLATE : Removal and Installation"
2.
Remove the back door striker.
INSTALLATION
Note the following items, and install in the reverse order of removal.
CAUTION:
• After installation, perform the back door fitting adjustment. Refer to
• After installation, check back door open/close, and lock/unlock operation.
DOOR LOCK
DOOR LOCK : Removal and Installation
INFOID:0000000006054244
REMOVAL
1.
Remove the back door finisher. Refer to
INT-33, "Removal and Installation"
1.
Back door opener cable
2.
Back door lock actuator
3.
Back door lock assembly
4.
Back door striker
5.
TORX bolt
6.
Outside handle
7.
Back door handle bracket
8.
Back door lock cylinder
9.
Retainer clip
10. Key rod
Refer to
JMKIA5355GB
DLK-140
< REMOVAL AND INSTALLATION >
[WITH INTELLIGENT KEY SYSTEM]
BACK DOOR LOCK
2.
Remove back door lock switch harness connector clip from back door panel, and then disconnect back
door lock switch harness connector.
3.
Disconnect back door lock actuator connector.
4.
Disconnect key rod.
5.
Remove back door lock assembly mounting bolts.
6.
Disconnect back door opener cable, and remove back door lock assembly.
CAUTION:
Never damage the outside handle cable.
INSTALLATION
Note the following item, and install in the reverse order of removal.
CAUTION:
After installation, check back door open/close, and lock/unlock operation.
OUTSIDE HANDLE
OUTSIDE HANDLE : Removal and Installation
INFOID:0000000006054246
REMOVAL
1.
Remove the back door finisher.
INT-33, "Removal and Installation"
.
2.
Remove back door opener cable from outside handle.
CAUTION:
Never damage the outside handle cable.
3.
Remove the mounting nuts, and then remove the outside handle assembly.
INSTALLATION
Note the following items, and install in the reverse order of removal.
CAUTION:
• Check that back door lock cables are normally engaged with outside handle.
• After installation, check back door open/close, and lock/unlock operation.
EMERGENCY LEVER
EMERGENCY LEVER : Unlock procedures
INFOID:0000000006054247
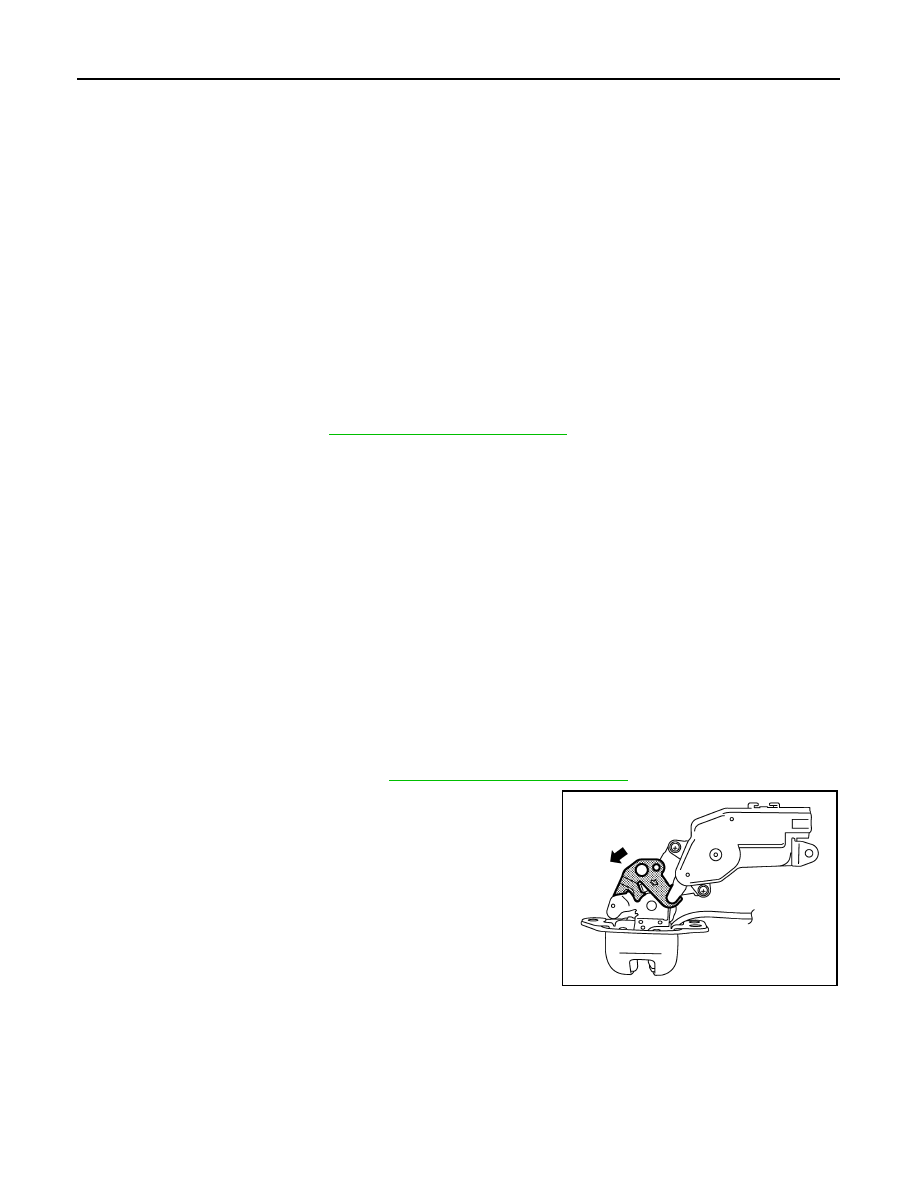
UNLOCK PROCEDURES
NOTE:
If back door lock cannot be unlocked due to a malfunction or battery discharge, follow the procedures to
unlock back door.
1.
Remove the back door finisher. Refer to
INT-33, "Removal and Installation"
2.
From inside the vehicle, rotate emergency lever toward lower
direction and unlock.
JMKIA5356ZZ
FUEL FILLER LID OPENER
DLK-141
< REMOVAL AND INSTALLATION >
[WITH INTELLIGENT KEY SYSTEM]
C
D
E
F
G
H
I
J
L
M
A
B
DLK
N
O
P
FUEL FILLER LID OPENER
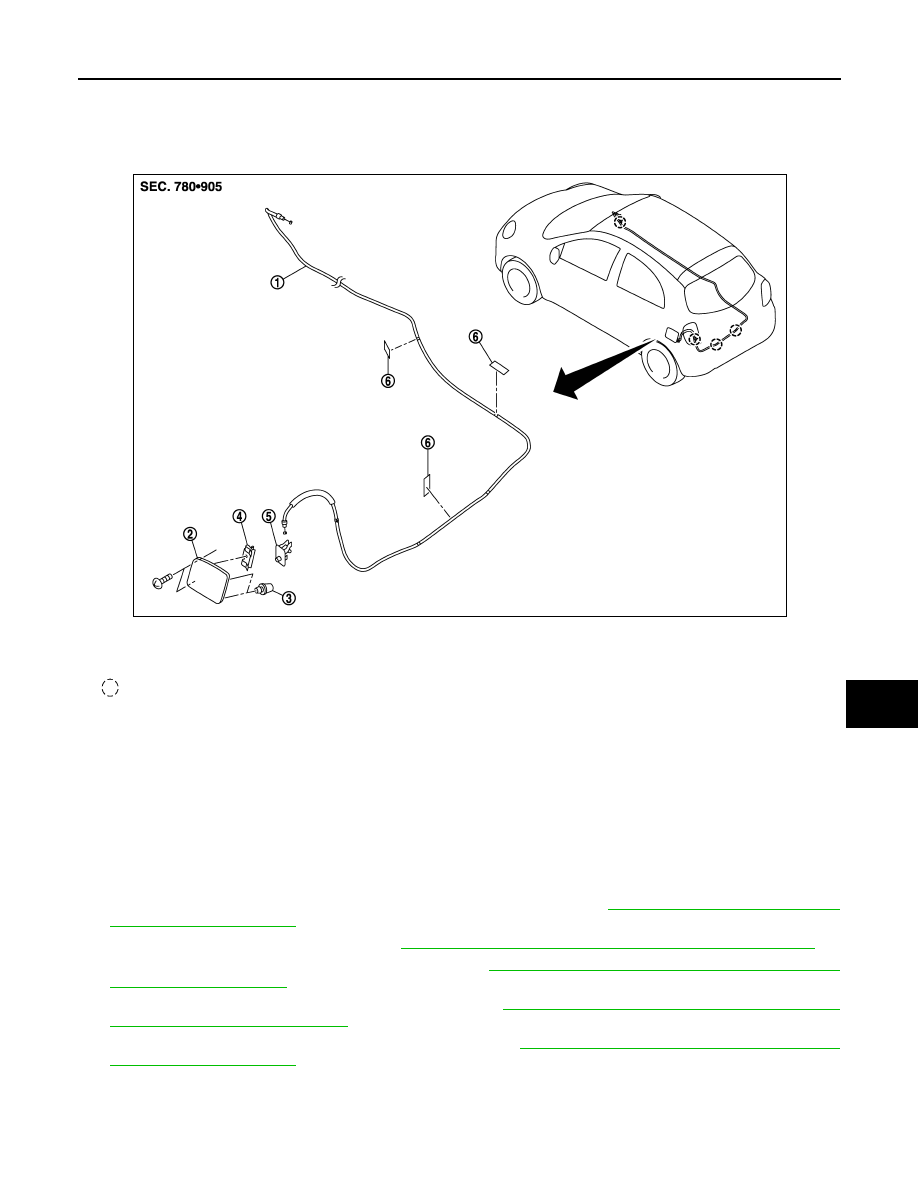
Exploded View
INFOID:0000000005949026
Removal and Installation
INFOID:0000000005949027
REMOVAL
Fuel Filler Lid
1.
Fully open fuel filler lid.
2.
Remove mounting screws, and then remove fuel filler lid.
Fuel Filler Lid Opener Cable
1.
Fully open fuel filler lid.
2.
Remove front kicking plate inner (RH) and rear kicking plate inner (RH).
3.
Remove dash side finisher (RH). Refer to
INT-21, "DASH SIDE FINISHER : Removal and Installation"
.
4.
Remove center pillar lower garnish (RH). Refer to
INT-23, "CENTER PILLAR LOWER GARNISH :
.
5.
Remove luggage side lower front finisher (RH). Refer to
INT-31, "LUGGAGE SIDE LOWER FRONT FIN-
ISHER : Removal and Installation"
.
6.
Remove luggage side lower finisher (LH and RH). Refer to
INT-32, "LUGGAGE SIDE LOWER FINISHER
7.
Remove mounting bolts, and then remove fuel filler lid opener handle.
8.
Remove fuel filler lid opener cable from fuel filler lid opener handle.
1.
Fuel filler lid opener cable
2.
Fuel filler lid assembly
3.
Bumper rubber
4.
Spring
5.
Fuel filler lid lock assembly
6.
Cable protector
: Clip
JMKIA5359ZZ
DLK-142
< REMOVAL AND INSTALLATION >
[WITH INTELLIGENT KEY SYSTEM]
FUEL FILLER LID OPENER
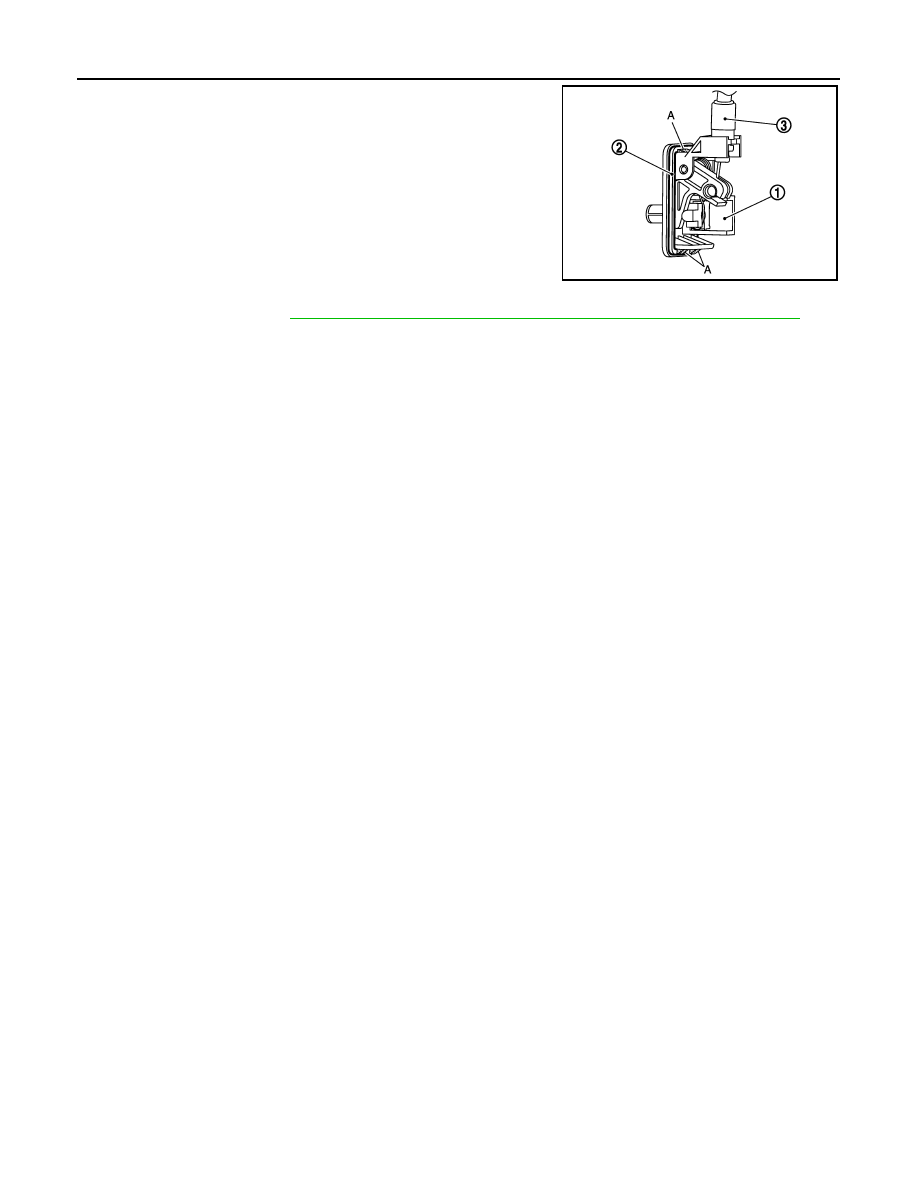
9.
Disengage pawls (A) of fuel filler lid lock assembly (1) and push
out fuel filler lid lock assembly toward the vehicle outside.
CAUTION:
Be careful not to damage packing (2) when removing.
10. Remove fuel filler lid opener cable (3) from fuel filler lid lock
assembly.
11. Pull up floor trim. Refer to
INT-32, "LUGGAGE SIDE LOWER FINISHER : Removal and Installation"
.
12. Remove fuel filler lid opener cable mounting clips.
13. Remove fuel filler lid opener cable.
INSTALLATION
Note the following items, and install in the reverse order of removal.
CAUTION:
After installation, check fuel filler lid assembly open/close, lock/unlock operation.
JMKIA5360ZZ
Нет комментариевНе стесняйтесь поделиться с нами вашим ценным мнением.
Текст