Daewoo Musso. Manual — part 80

OM600 ENGINE MECHANICAL 1B3-27
Inspection Procedure
l
Mark poly V-belt at a clearly visible point with chalk.
l
Rotate the engine and check the belt.
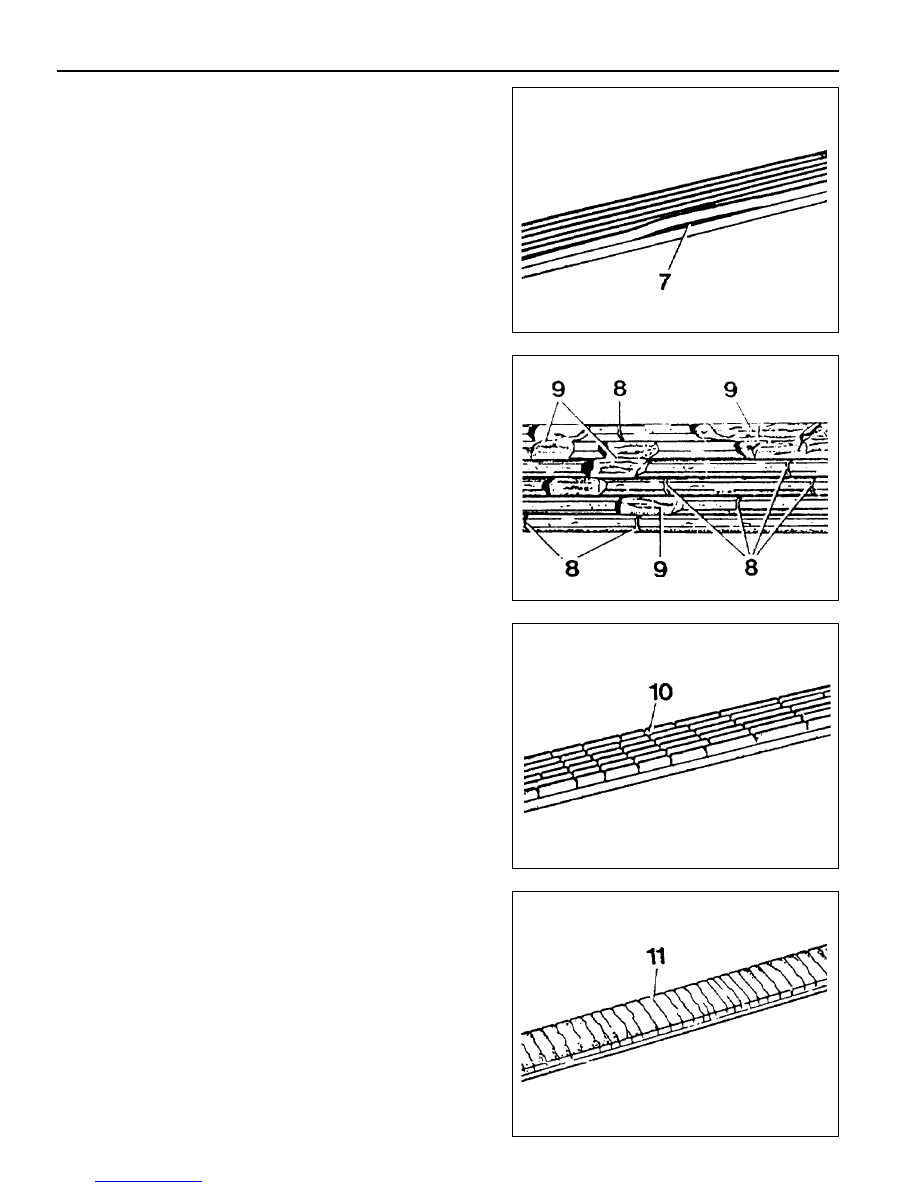
Notice
If one of the following types of damage is found, replace
the belt.
1. Rubber lumps in the base of rips.
2. Dirt or grit ingrained.
5. Cord torn out at the side.
6. Outer cords frayed.
3. Pointed rips.
4. Belt cord visible in the base of rips.
1B3-28 OM600 ENGINE MECHANICAL
7. Belt detached from the base of rip.
8. Splits across the rips.
9. Sections of rip torn out.
10. Splits across several rips.
11. Splits across the back.

OM600 ENGINE MECHANICAL 1B3-29
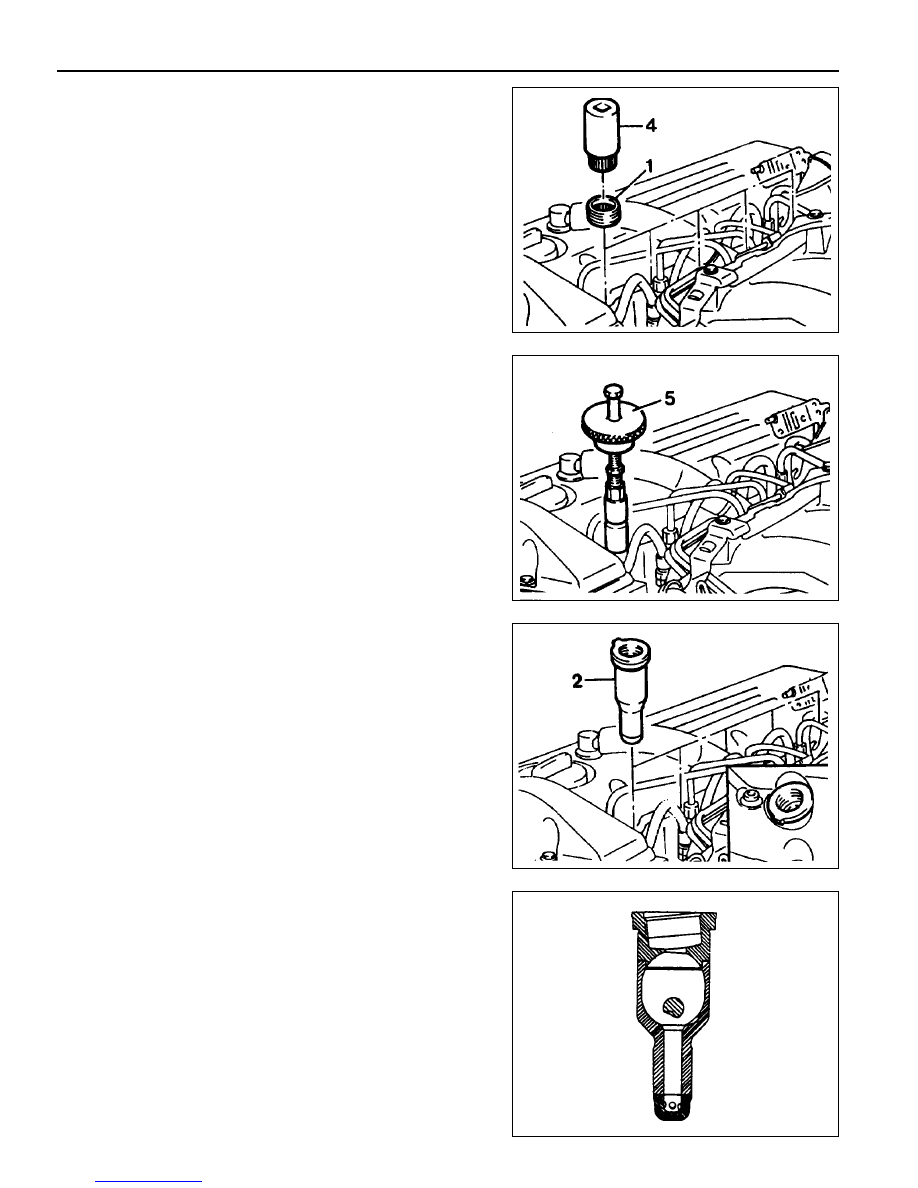
1 Threaded Ring . . . . . . . . . . 130 Nm
2 Prechamber
PRECHAMBER
Preceding Work : Removal of glow plug
Removal of fuel injection nozzle
3 Cylinder Head
1B3-30 OM600 ENGINE MECHANICAL
Tools Required
2. Install the sliding hammer into the prechamber.
Sliding Hammer 667 589 03 63 00
Removal & Installation Procedure
1. Using the serration wrench (4), remove the threaded ring
(1).
Serration Wrench 603 589 00 09 00
3. Remove the perchamber (2).
Notice
After removing the prechamber, cover over the bores with
clean rag.
603 589 00 09 00 Serration Wrench
667 589 03 63 00 Sliding Hammer
4. Inspect the prechamber.
Notice
If the prechamber seats in the cylinder head are leaking or
if the prechambers are replaced, the sealing surfaces in
the cylinder head must be remachined.
Нет комментариевНе стесняйтесь поделиться с нами вашим ценным мнением.
Текст