Chery Tiggo 5 (T21). Service manual — part 112
07–
34
07
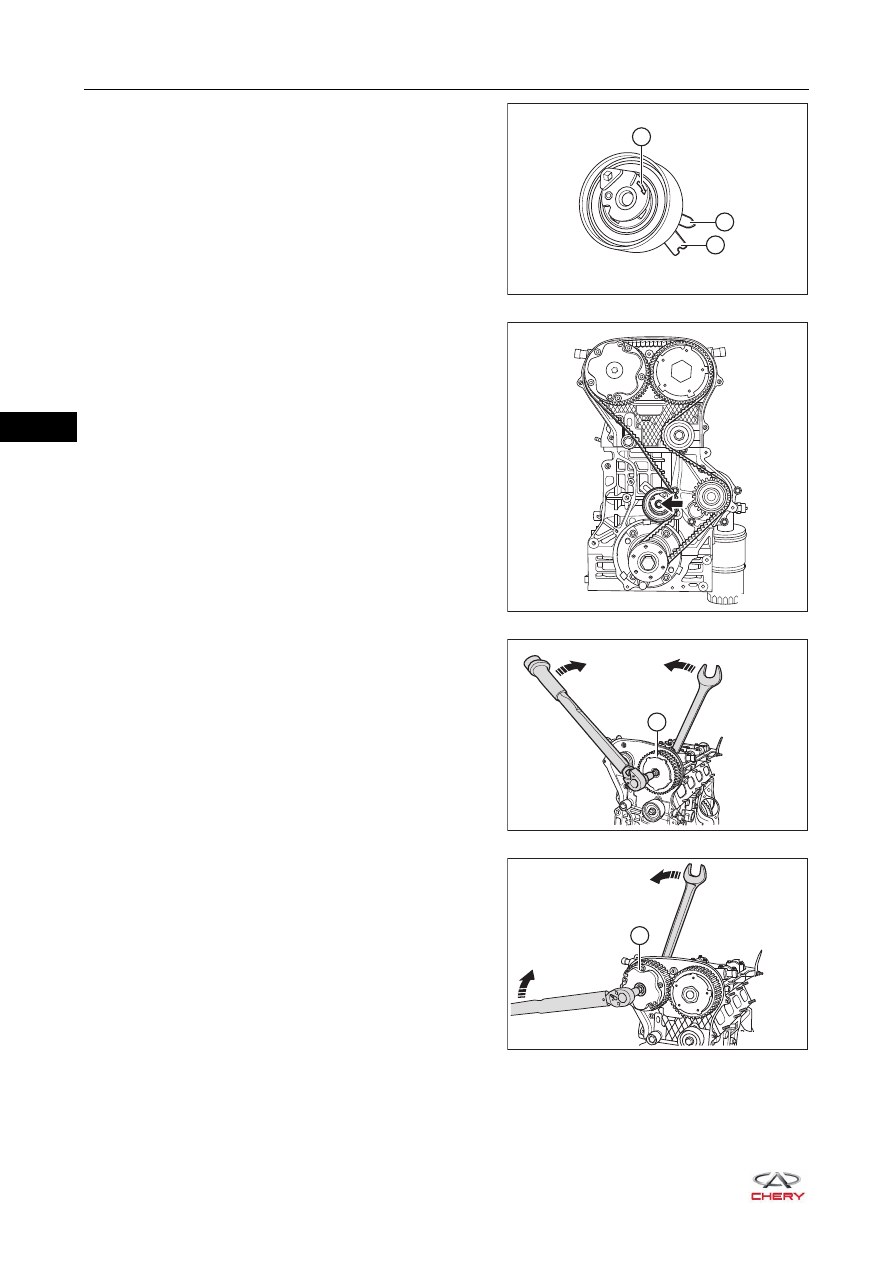
b. Using a suitable inner hexagon wrench, adjust the
tensioner adjuster in the adjustment direction (1) of
timing belt tensioner, and also tighten the fixing bolt
with a wrench until the timing belt tensioner needle (2)
and timing notch mark (3) of base are aligned.
HINT:
After marks of tensioner are aligned, return to an
angle after rotating by 5° - 10°, then align the marks
again.
5. Tighten the timing belt tensioner fixing bolt (arrow).
(Tightening torque: 20 + 5 N·m)
6. Tighten the intake camshaft phaser assembly (1) fixing
bolt.
(Tightening torque: 120 ± 5 N·m)
7. Tighten the exhaust camshaft phaser assembly (1) fixing
bolt.
(Tightening torque: 120 ± 5 N·m)
8. Remove the camshaft locking special tool.
9. Remove the crankshaft timing tool, and install the plug.
(Tightening torque: 40 + 5 N·m)
3159B
5/8
13
2
3
1
RT21070200
RT21070210
RT21070220
1
1
RT21070221

07–
35
07
10.Perform timing belt self-adjustment.
a. Turn the crankshaft to run timing belt several circles smoothly.
b. Install the camshaft locking special tool.
c. Install the crankshaft timing tool.
d. Loosen the fixing bolts of exhaust/intake camshaft phaser assembly, so that the timing belt returns to
natural state.
e. Tighten the exhaust/intake camshaft phaser assembly fixing bolt.
f. Remove the camshaft locking special tool.
g. Remove the crankshaft timing tool.
11.Tighten the intake/exhaust phaser covers.
(Tightening torque: 30 N·m)
12.Other installation procedures are in the reverse order of removal.
CAUTION
Rotate the crankshaft 2 turns, and check the tension of timing belt tensioner. The tension of timing belt is
375 - 483 N. If alignment marks of timing belt tensioner are not aligned, loosen the tensioner fixing bolt,
and adjust the tensioner again.
In order to ensure the usage life of timing belt, it is necessary to perform timing belt self-adjustment
operation.
07–
36
07
Camshaft Oil Seal
Removal
1. Turn off all the electrical equipment and ignition switch.
2. Disconnect the negative battery cable.
3. Remove the engine trim cover assembly (
).
4. Remove the engine lower right protector assembly (
).
5. Remove the accessory drive belt (
).
6. Remove the belt tensioner assembly (
).
7. Use an engine equalizer to hang the engine right lifting eye.
8. Remove the engine right mounting (
9. Remove the engine timing belt (
).
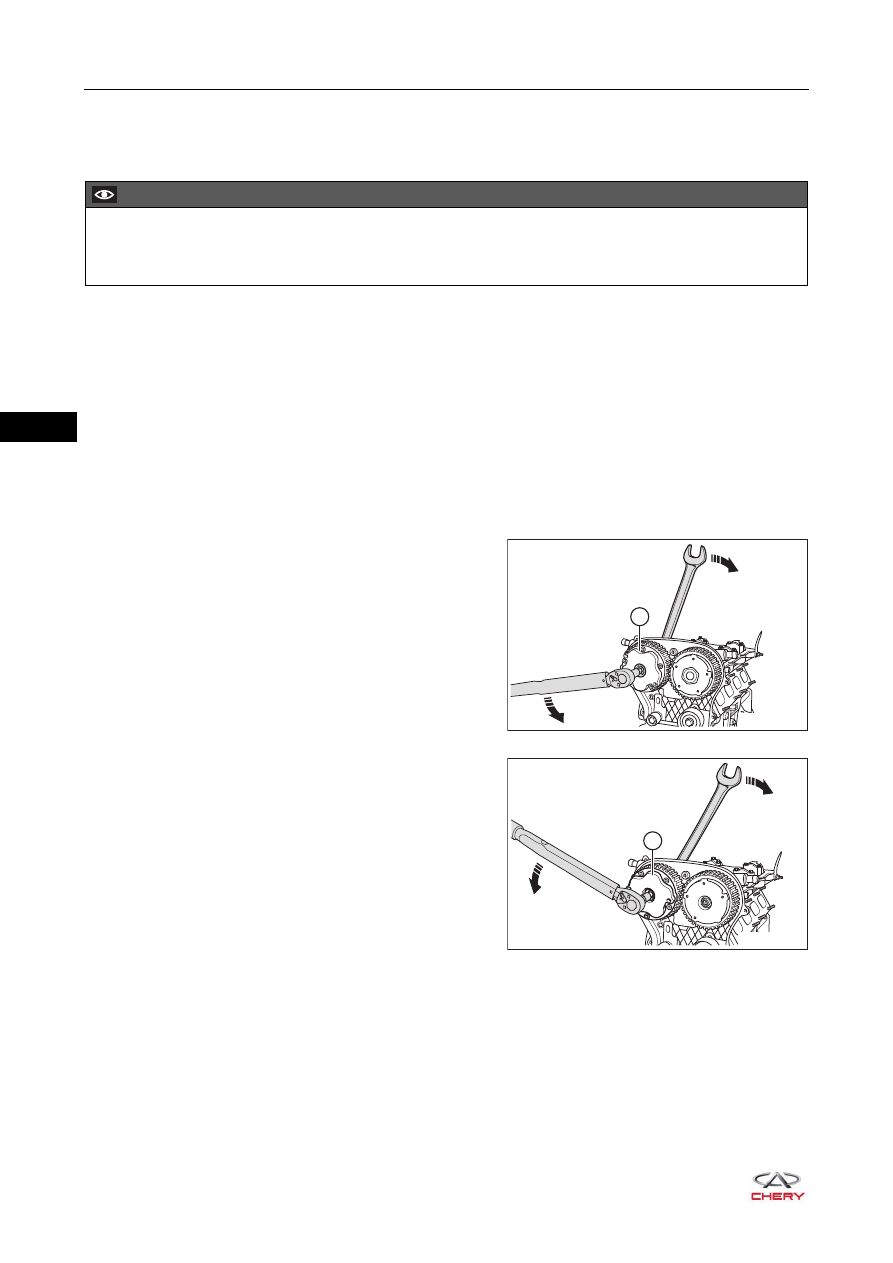
10.Remove the exhaust camshaft phaser assembly.
a. While holding the hexagon surface on exhaust
camshaft with an open wrench, loosen the exhaust
phaser cover (1) with a torque wrench in the direction
of arrow as shown in the illustration, and remove the
exhaust phaser cover.
(Tightening torque: 30 N·m)
b. While holding the hexagon surface on exhaust
camshaft with an open wrench, loosen the fixing bolt
of exhaust camshaft phaser assembly (1) with a
torque wrench in the direction of arrow as shown in
the illustration, and remove the exhaust camshaft
phaser assembly.
(Tightening torque: 120 ± 5 N·m)
CAUTION
Be sure to wear necessary safety equipment to prevent accidents when repairing.
Try to prevent body paint surface from being scratched during removal and installation.
1
RT21070170
RT21070171
1
07–
37
07
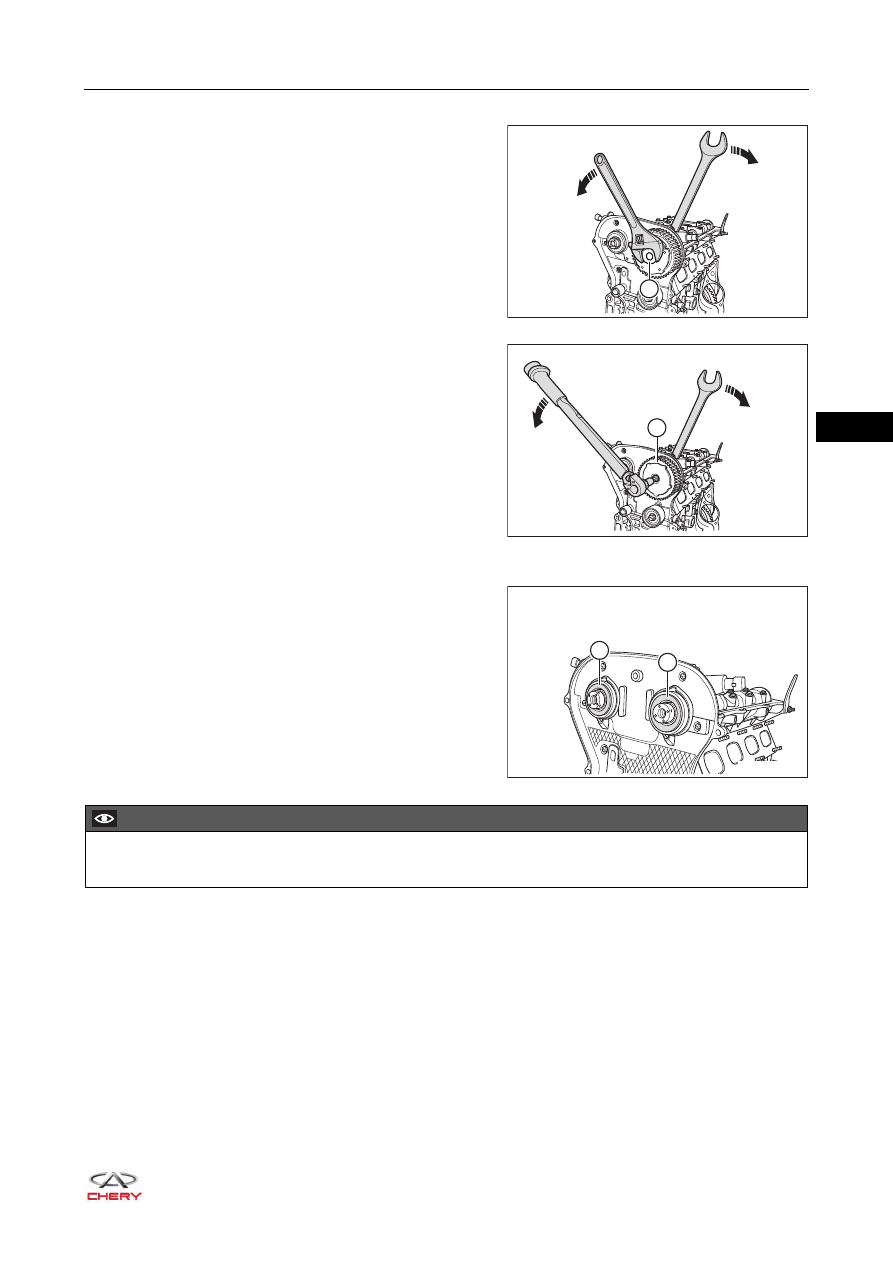
11.Remove the intake camshaft phaser assembly.
a. While holding the hexagon surface on intake camshaft
with an open wrench, loosen the intake phaser cover
(1) with the monkey wrench in the direction of arrow
as shown in the illustration, and remove the intake
phaser cover.
(Tightening torque: 30 N·m)
b. While holding the hexagon surface on intake camshaft
with an open wrench, loosen the fixing bolt of intake
camshaft phaser assembly (1) with a torque wrench in
the direction of arrow as shown in the illustration, and
remove the intake camshaft phaser assembly.
(Tightening torque: 120 ± 5 N·m)
12.Remove the camshaft oil seal.
a. Using a flat tip screwdriver wrapped with tape, pry out
the exhaust camshaft oil seal (1) and intake camshaft
oil seal (2) carefully.
1
RT21070180
RT21070181
1
RT21070230
1
2
CAUTION
Be careful not to damage the oil seal retainer and surface of camshaft when removing camshaft oil seal.
Нет комментариевНе стесняйтесь поделиться с нами вашим ценным мнением.
Текст