Chery Tiggo 5 (T21). Service manual — part 163
13–
23
13
Oil Strainer
Removal
1. Turn off all the electrical equipment and ignition switch.
2. Disconnect the negative battery cable.
3. Drain the engine oil (
4. Remove the oil pan (
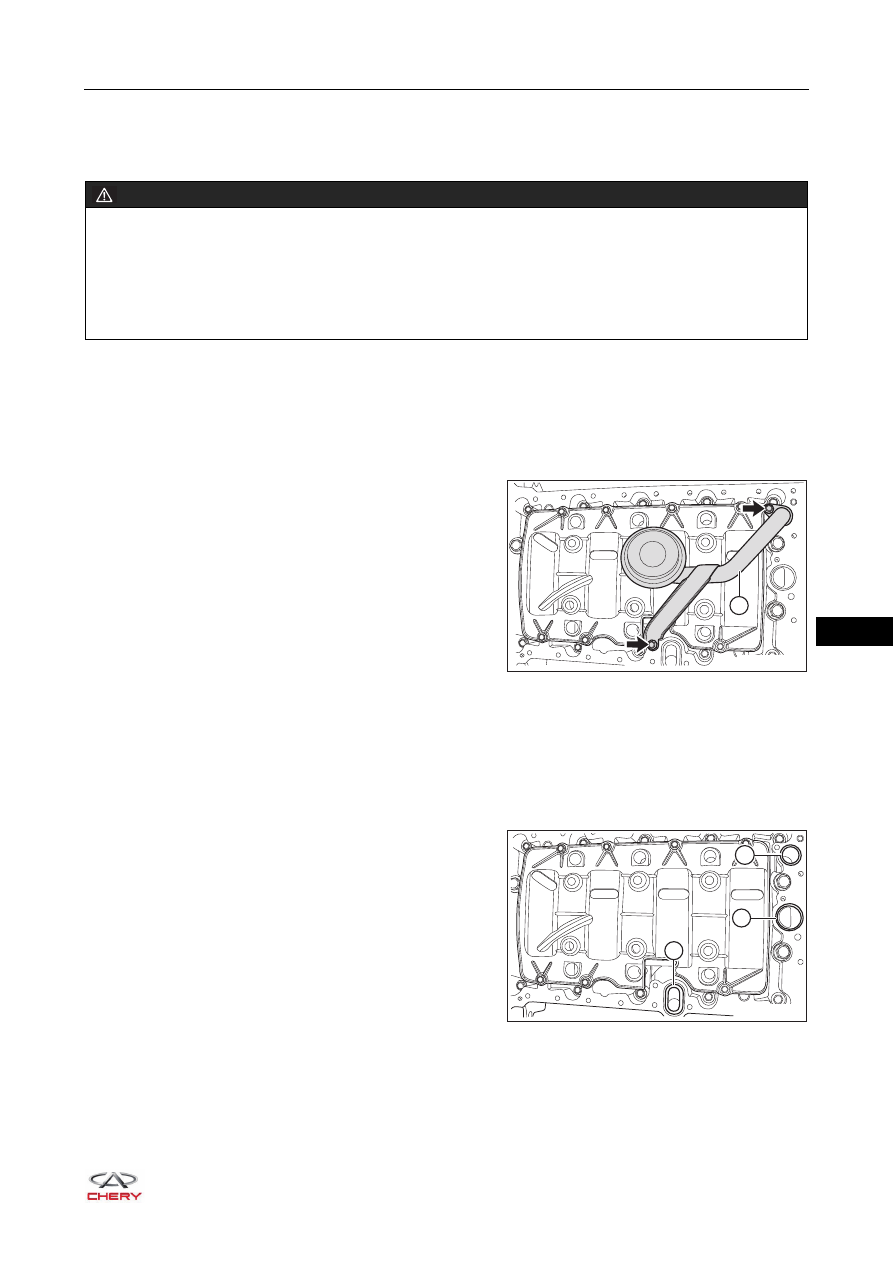
5. Remove the oil strainer.
a. Remove 2 fixing bolts (arrow) from the fuel strainer.
(Tightening torque: 8 + 3 N·m)
b. Remove the oil strainer (1) from the engine block
frame.
c. Remove the oil strainer and its gasket.
Installation
Installation is in the reverse order of removal. Pay attention to the following points during installation:
1. Clean the oil strainer mesh.
2. Replace the grommet.
Oil strainer grommet (1)
Oil pump and oil pan connecting pipe grommet (2)
Oil filter and oil pan connecting pipe grommet (3)
WARNING
DO NOT drain engine oil until engine cools down.
Prolonged and repeated contact with engine oil will be harmful to your skin. If engine oil spills on your
skin, wash it off immediately with water. In addition, the used engine oil contains potentially harmful
contaminants, which may cause skin cancer. Therefore, always take proper skin protection measures
when performing vehicle service. DO NOT remove oil filter until engine cools down.
1
RT21130200
1
2
3
RT21130210
13–
24
13
Oil Pump Assembly
Removal
1. Turn off all the electrical equipment and ignition switch.
2. Disconnect the negative battery cable.
3. Drain the engine oil (
4. Remove the front right wheel (
).
5. Remove the engine accessory drive belt (
6. Remove the engine timing belt (
).
7. Remove the crankshaft front oil seal (
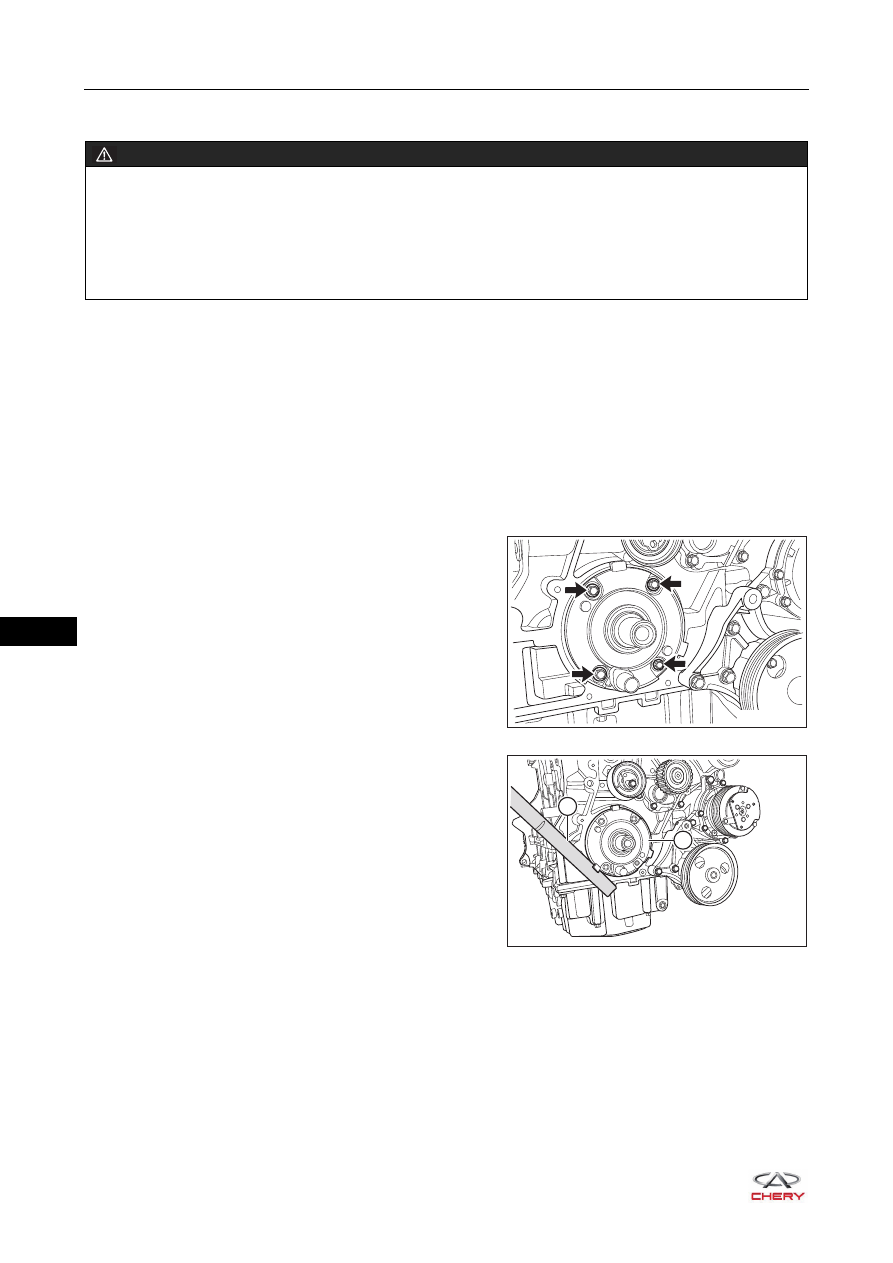
8. Remove the oil pump assembly.
a. Remove 4 fixing bolts (arrow) from the oil pump
assembly.
(Tightening torque: 17 - 23 N·m)
b. Using a proper tool (1), pry out the oil pump assembly
(2).
WARNING
DO NOT remove oil filter until engine cools down.
Prolonged and repeated contact with engine oil will be harmful to your skin. If engine oil spills on your
skin, wash it off immediately with water. In addition, the used engine oil contains potentially harmful
contaminants, which may cause skin cancer. Therefore, always take proper skin protection measures
when performing vehicle service. DO NOT remove oil filter until engine cools down.
RT21130220
1
2
RT21130230
13–
25
13
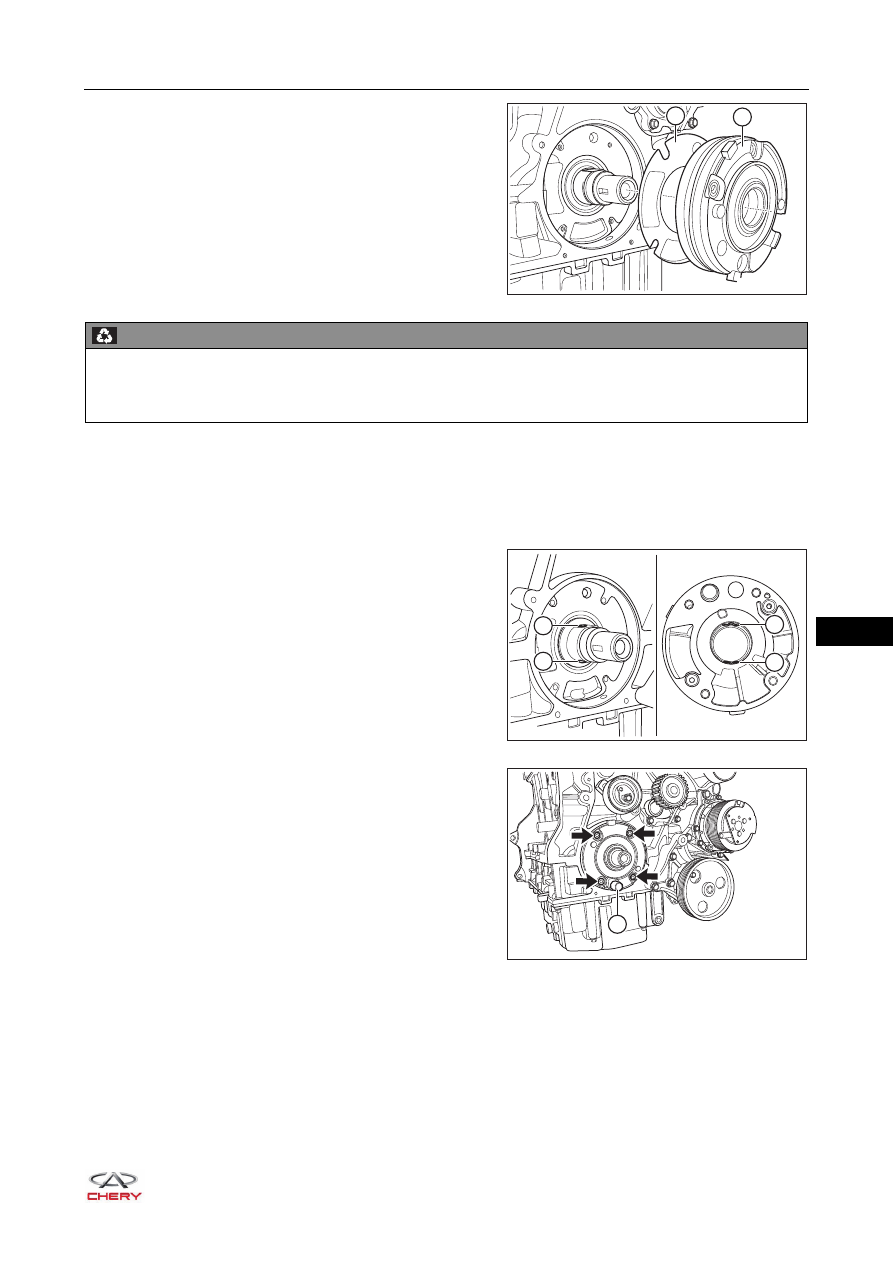
c. Remove the oil pump assembly (2) and oil pump
assembly grommet (1) in order.
Installation
Installation is in the reverse order of removal. Pay attention to the following points during installation:
1. Replace the oil pump gasket and grommet.
2. Installation and alignment of oil pump:
Align the plane (B) of oil pump assembly with plane
(A) of crankshaft as shown in the illustration.
The relief valve (flange on the pump) (1) on oil pump
assembly is facing the outlet direction of cylinder
block frame, and the side with characters should face
upward.
Apply a proper amount of seal gum to the bolt
mounting planes (arrow) before installing the oil pump
assembly fixing bolts.
2
1
RT21130240
ENVIRONMENTAL PROTECTION
Wasted engine oil pump should be handled by specialized department according to local laws and
regulations. Never discard it at will.
A
A
B
B
RT21130250
1
RT21130260
Нет комментариевНе стесняйтесь поделиться с нами вашим ценным мнением.
Текст