Chery Tiggo 5 (T21). Service manual — part 161
13–
15
13
Oil Dipstick Tube
Removal
1. Turn off all the electrical equipment and ignition switch.
2. Disconnect the negative battery cable.
3. Remove the engine trim cover assembly (
).
4. Remove the oil dipstick tube with oil dipstick assembly.
a. Remove 2 oil dipstick tube fixing bolts (arrow).
(Tightening torque: 8 ± 3 N·m)
b. Remove the oil dipstick tube with oil dipstick assembly from the engine block frame.
c. Separate the oil dipstick from the oil dipstick tube.
Installation
Installation is in the reverse order of removal.
CAUTION
Be sure to wear necessary safety equipment to prevent accidents when repairing.
Try to prevent body paint surface from being scratched during removal and installation.
RT21130091
CAUTION
Check oil dipstick tube grommet when installing, if damaged, replace with a new one.
Apply a coat of engine oil to oil dipstick tube grommet when installing.
13–
16
13
Oil Pressure Switch
Removal
1. Turn off all the electrical equipment and ignition switch.
2. Disconnect the negative battery cable.
3. Remove the engine lower right protector assembly (
).
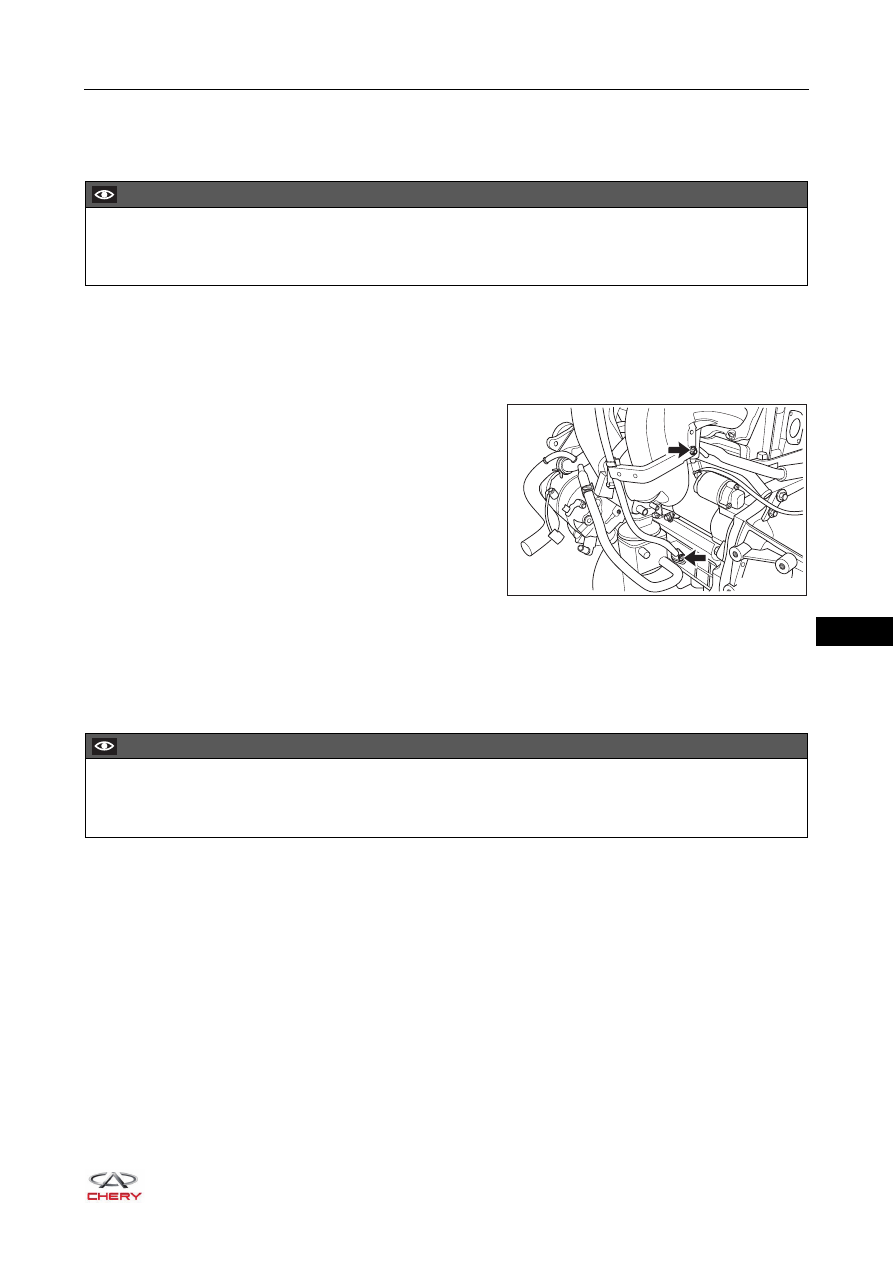
4. Remove the oil pressure switch.
a. Disconnect the oil pressure switch connector (1) and
remove the oil pressure switch (2).
(Tightening torque: 20 ± 2 N·m)
Inspection
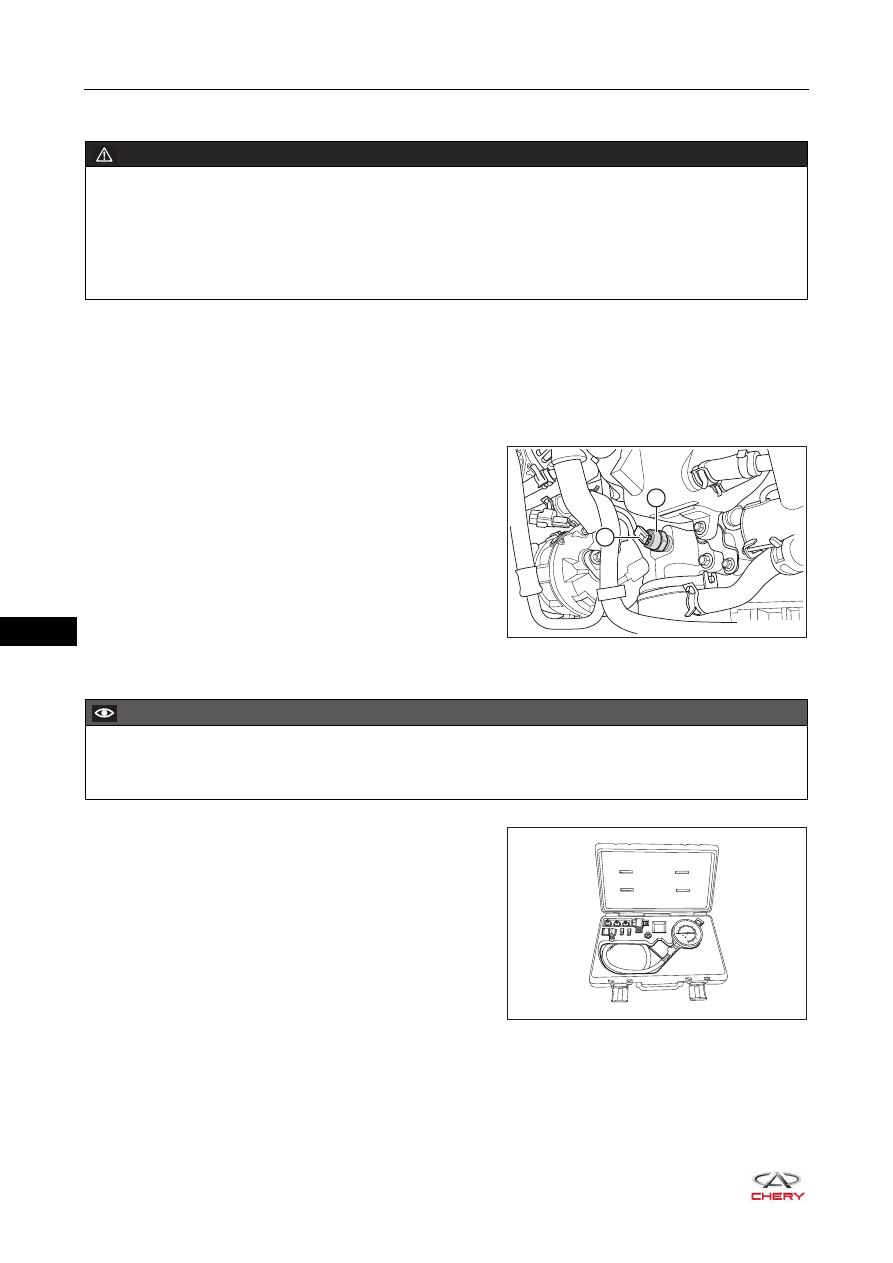
1. Use an oil pressure tester as shown in the illustration.
WARNING
DO NOT remove oil pressure switch until engine cools down.
Prolonged and repeated contact with engine oil will be harmful to your skin. If engine oil spills on your
skin, wash it off immediately with water. In addition, the used engine oil contains potentially harmful
contaminants, which may cause skin cancer. Therefore, always take proper skin protection measures
when performing vehicle service.
1
2
RT21130050
CAUTION
Before inspecting oil pressure switch, please make sure that oil level is proper and coolant temperature
is up to above 90°C, and that oil filter is used within 5000 km and electrical fan stops operating.
RT21130100
13–
17
13
2. Install the oil pressure tester into the thread hole (4) of oil
pressure switch as shown in the illustration.
3. Install the oil pressure switch (2) onto the tester (1) and
connect the oil pressure switch connector.
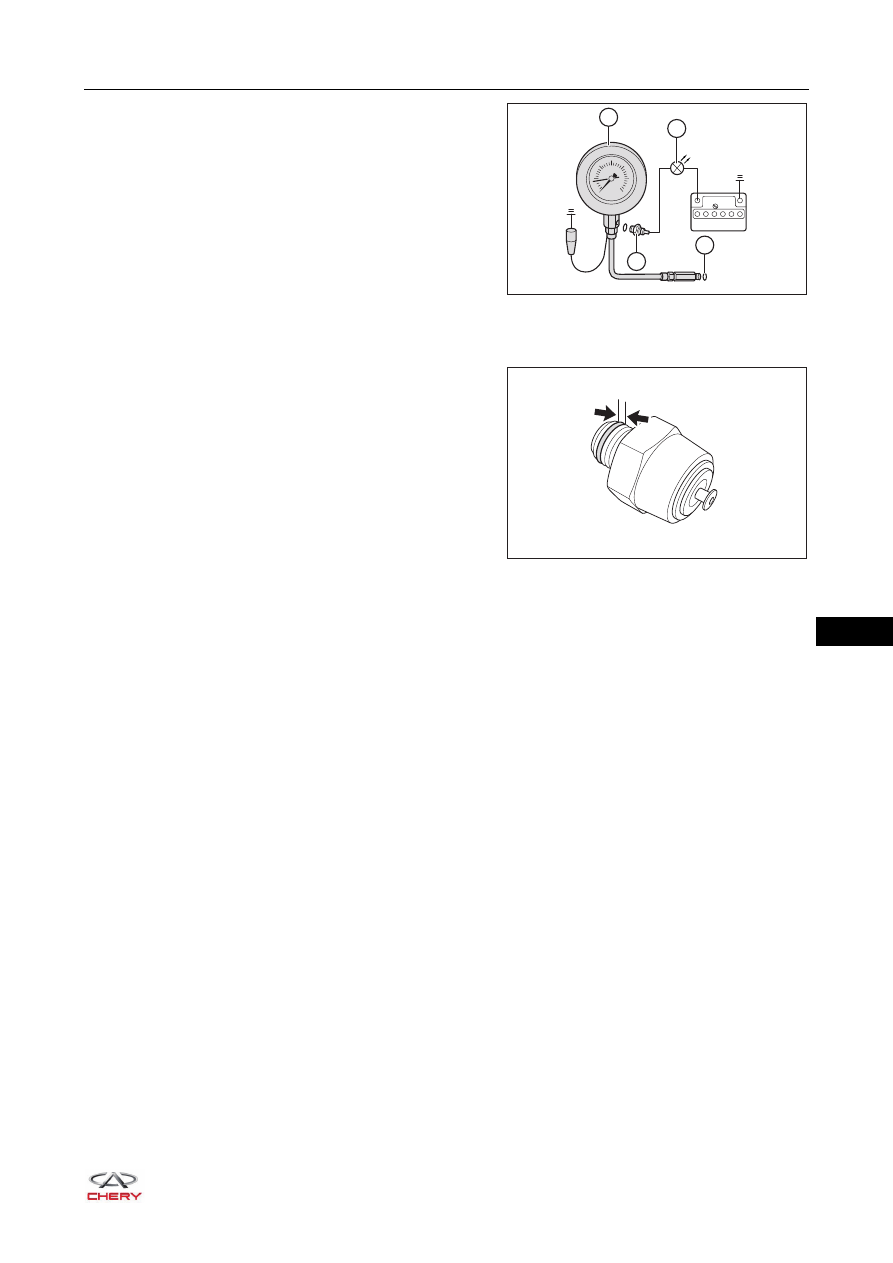
4. Connect the oil pressure switch to the body.
5. Start engine and oil pressure warning light (3) comes on,
then observe the pressure reading on tester. If oil
pressure warning light still comes on when oil pressure is
higher than 75 kPa, replace the oil pressure switch.
Installation
1. Remove the oil and impurities on oil pressure switch and its thread hole.
2. Apply a small amount of seal gum to the threads when
installing the oil pressure switch as shown in the
illustration.
Width of a: 3 mm
3. Other installation procedures are in the reverse order of removal.
RT21130110
+
-
1
4
3
2
RT21130120
a
13–
18
13
Oil Cooler Assembly
Removal
1. Turn off all the electrical equipment and ignition switch.
2. Disconnect the negative battery cable.
3. Remove the engine lower right protector assembly (
).
4. Drain the engine oil (
5. Remove the oil filter (
).
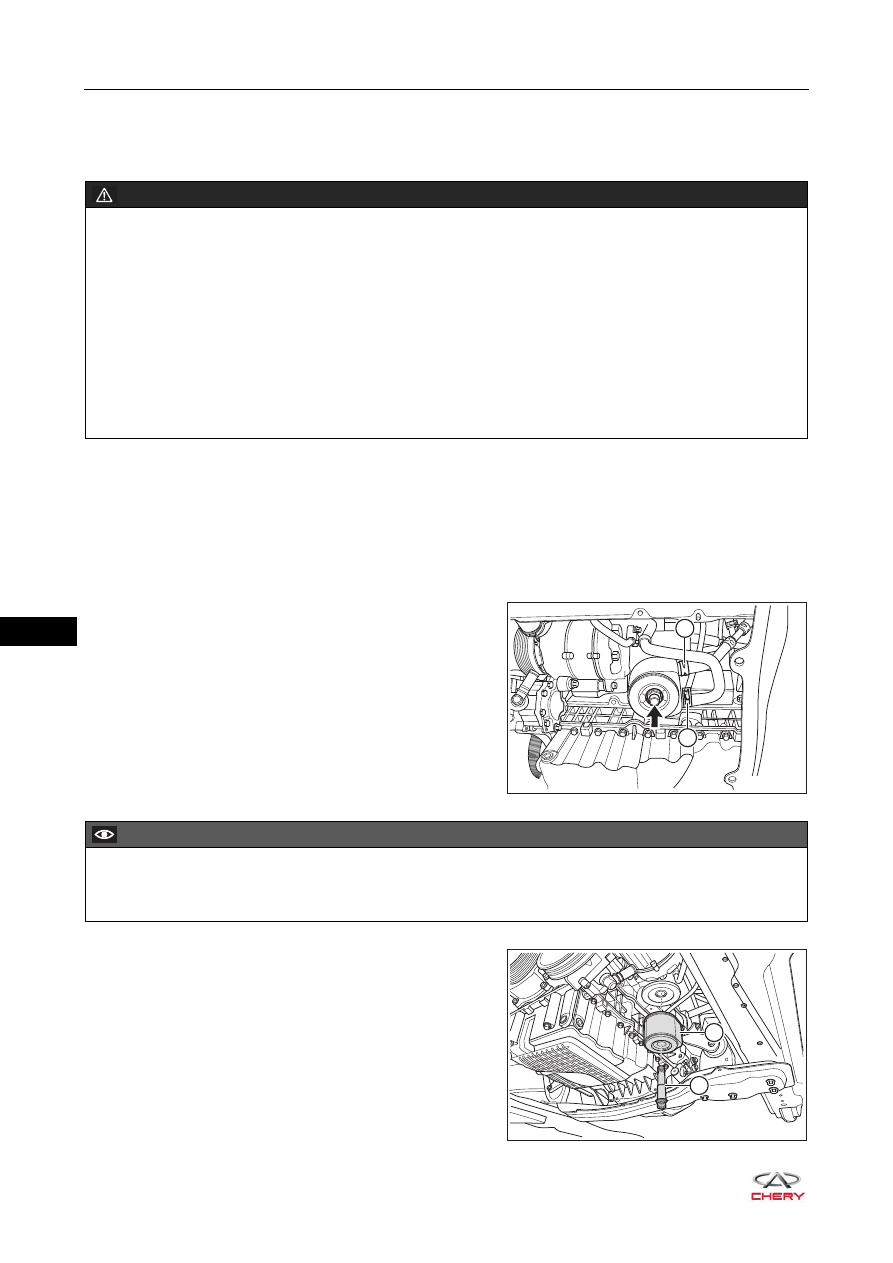
6. Remove the oil cooler assembly.
a. Loosen the elastic clamp (1) and disconnect the
connection between oil cooler outlet hose and oil
cooler assembly.
b. Loosen the elastic clamp (2) and disconnect the
connection between oil cooler inlet hose and oil cooler
assembly.
c. Using an appropriate tool, loosen the oil filter joint
(arrow).
(Tightening torque: 50 ± 5 N·m)
d. Remove the oil filter joint (1) and oil cooler assembly
(2) in order.
WARNING
DO NOT disconnect oil cooler inlet hose and oil cooler outlet hose until engine is in low temperature.
Otherwise, overheated engine coolant and steam with high-pressure may flow out and cause serious
personal injury.
If your body contacts coolant accidentally, clean it with water immediately. If it is serious, please go to
hospital.
DO NOT remove oil filter and oil cooler assembly until engine cools down.
Prolonged and repeated contact with engine oil will be harmful to your skin. If engine oil spills on your
skin, wash it off immediately with water. In addition, the used engine oil contains potentially harmful
contaminants, which may cause skin cancer. Therefore, always take proper skin protection measures
when performing vehicle service.
2
1
RT21130130
CAUTION
After disconnecting oil cooler outlet hose and oil cooler inlet hose, cover the hoses with wooden corks or
equivalent to prevent coolant in hoses from flowing out.
RT21130140
1
2
Нет комментариевНе стесняйтесь поделиться с нами вашим ценным мнением.
Текст