Chery Tiggo 5 (T21). Service manual — part 506
47–
40
47
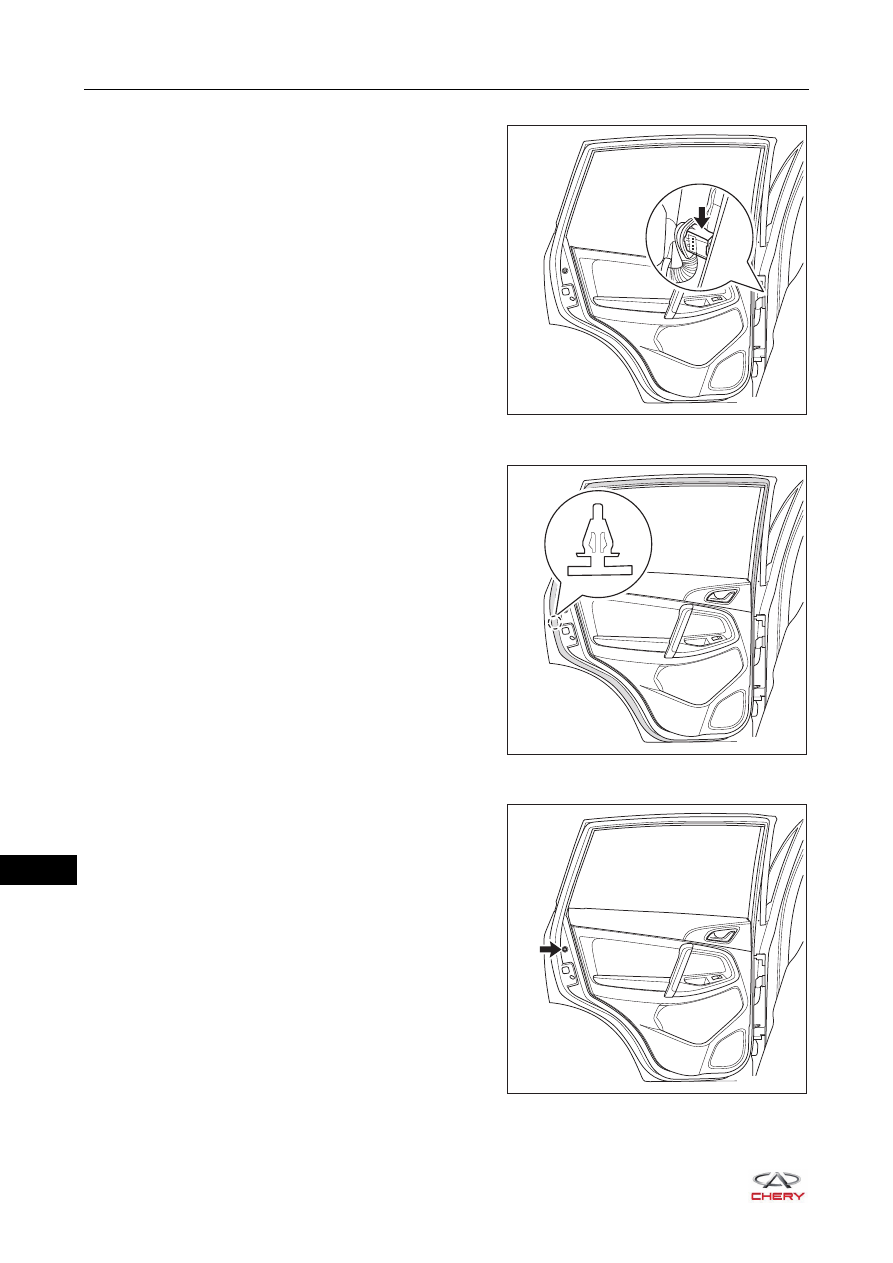
5. Disconnect the rear left door connector.
a. Using a screwdriver wrapped with protective tape,
remove the rear door dust boot.
b. Using a screwdriver wrapped with protective tape, pry
up the claws on connector.
c. Disconnect the rear left door connector (arrow).
6. Remove the rear left door frame weatherstrip.
a. Remove the clip from the rear door frame weatherstrip,
and remove the rear left door frame weatherstrip.
7. Remove the rear left door buffer block.
a. Using a screwdriver wrapped with protective tape,
remove the rear door buffer block (arrow).
8. Remove the rear left door protector assembly (
).
RT21470621
RT21470640
RT21470650
47–
41
47
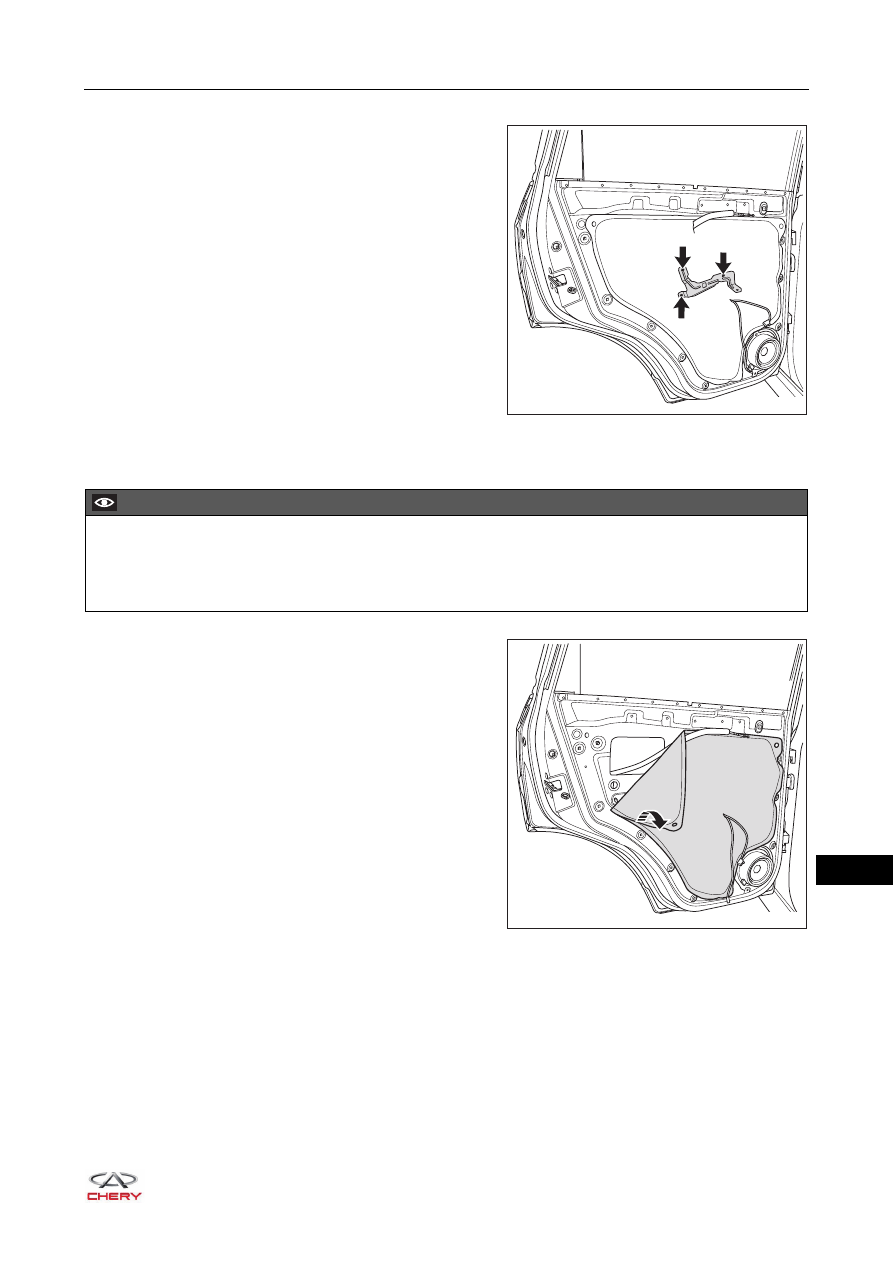
9. Remove the rear left door assist grip mounting bracket assembly.
a. Remove 3 fixing screws (arrow) from the rear door
assist grip mounting bracket assembly.
(Tightening torque: 1.5 ± 0.5 N·m)
b. Remove the rear left door assist grip mounting
bracket assembly.
10.Remove the rear left woofer assembly (
).
11.Remove the rear left door protective film assembly.
a. Remove the rear left door protective film assembly by
gently pulling it along edges from one corner of the
rear left door protective film assembly.
RT21470620
CAUTION
Avoid damage to rear door protective film when removing rear door protective film assembly.
Place rear door protective film assembly properly after removal, and avoid adhesive sticker on rear door
protective film assembly from sticking to other components.
RT21470630
47–
42
47
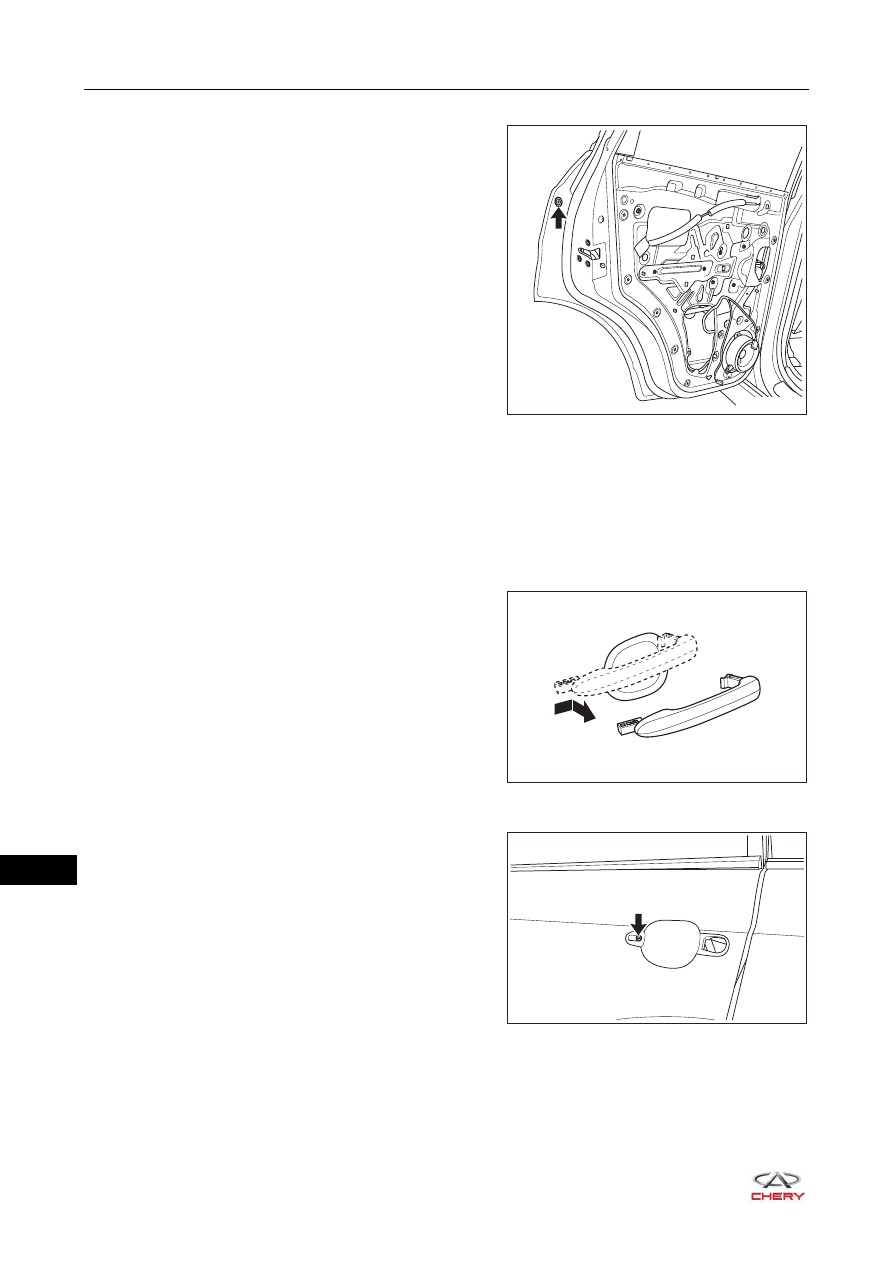
12.Remove the protective cover without key cylinder from the rear left door.
a. Using a screwdriver wrapped with protective tape,
remove the plug of protective cover (arrow) without
key cylinder from the rear left door.
b. Remove the fixing screw from the protective cover without key cylinder, and remove the protective
cover without key cylinder from the rear left door.
(Tightening torque: 5 ± 1 N·m)
HINT:
It is not necessary to remove the fixing screw for protective cover without key cylinder of rear door,
because it is integrated with the protective cover without key cylinder of rear door.
13.Remove the rear left door outside handle.
a. Slide and pull the rear door outside handle in the
direction of arrow as shown in the illustration, and
remove it.
14.Remove the rear left door outside handle base assembly.
a. Remove the fixing screw (arrow) from the rear left
door handle base assembly.
(Tightening torque: 5 ± 1 N·m)
b. Remove the rear left door outside handle base
assembly.
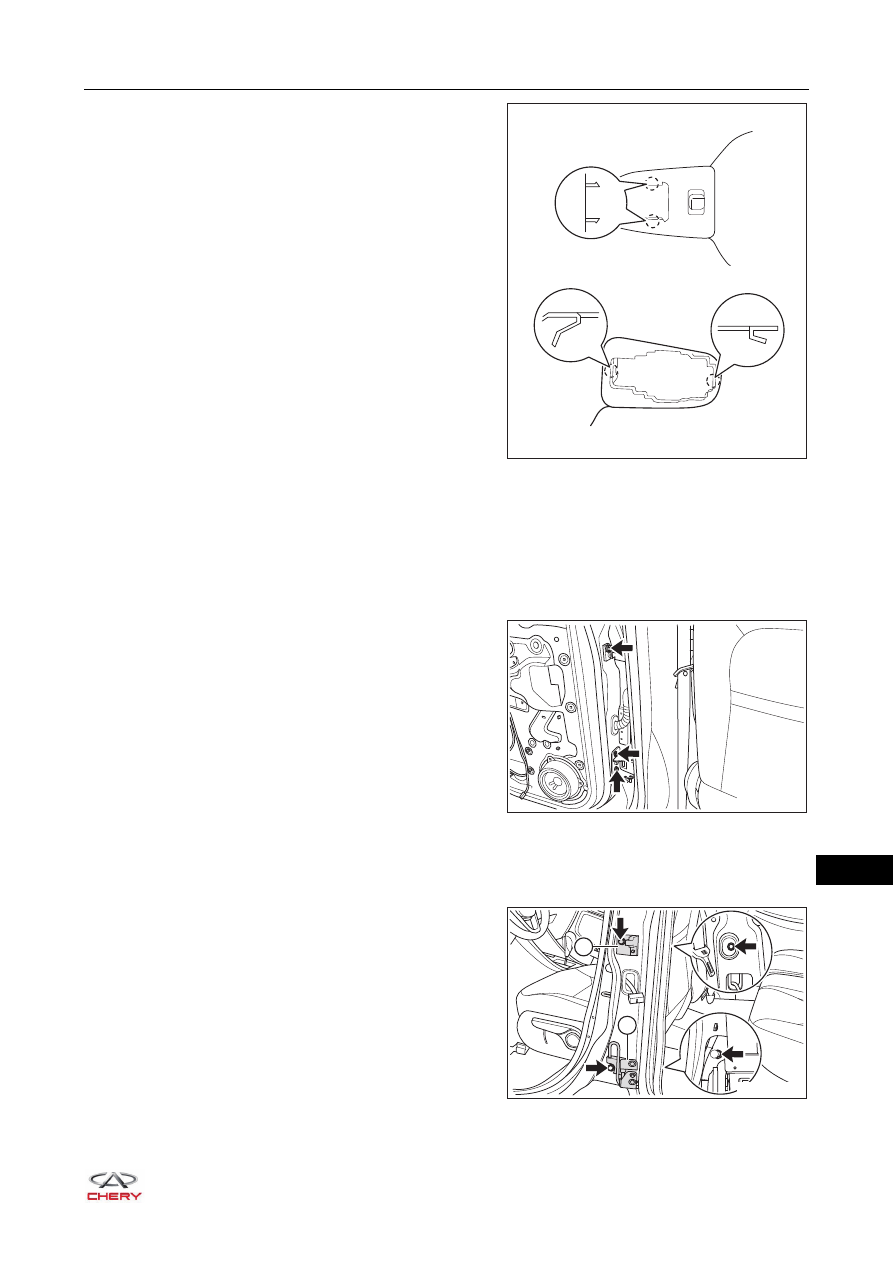
15.Remove the rear left door outside handle front gasket.
a. Disengage the claws from the rear door outside handle front gasket, and remove the rear left door
outside handle front gasket.
16.Remove the rear left door outside handle rear gasket.
RT21470635
RT21470636
RT21470660
47–
43
47
a. Disengage the claws from the rear door outside
handle rear gasket, and remove the rear left door
outside handle rear gasket.
17.Remove the rear left door outer weather bar (
).
18.Remove the rear left door glass assembly (
).
19.Remove the rear left door glass rear guide rail assembly (
).
20.Remove the rear left door power glass regulator assembly (
21.Remove the rear left door lock assembly (
22.Remove the rear left door assembly.
a. Remove 3 fixing bolts (arrow) between rear door
hinge assembly and door.
(Tightening torque: 70 ± 3 N·m)
b. Remove the rear left door assembly.
23.Remove the B-pillar lower protector assembly (
).
24.Remove the rear left door hinge assembly.
a. Remove 4 fixing bolts (arrow) between rear door
hinge assembly and body.
(Tightening torque: 70 ± 3 N·m)
b. Remove the rear door upper hinge assembly (1) and
rear door lower hinge assembly (2).
RT21470410
RT21470670
1
2
RT21470680
Нет комментариевНе стесняйтесь поделиться с нами вашим ценным мнением.
Текст