Chery Tiggo 5 (T21). Service manual — part 109
07–
22
07
7. Test cylinder head gasket.
Cylinder head gasket leakage may be present between adjacent cylinders, between cylinder and adjacent
water jacket or from an oil passage to the external of engine.
Possible indications of cylinder head gasket leakage between adjacent cylinders are as follows:
- Engine power loss
- Engine stall
- Low fuel economy
Possible indications of cylinder head gasket leakage between cylinder and adjacent water jacket are as
follows:
- Engine overheat
- Coolant loss
- Excessive steam (white smoke) emitted from exhaust system
- Coolant foaming
07–
23
07
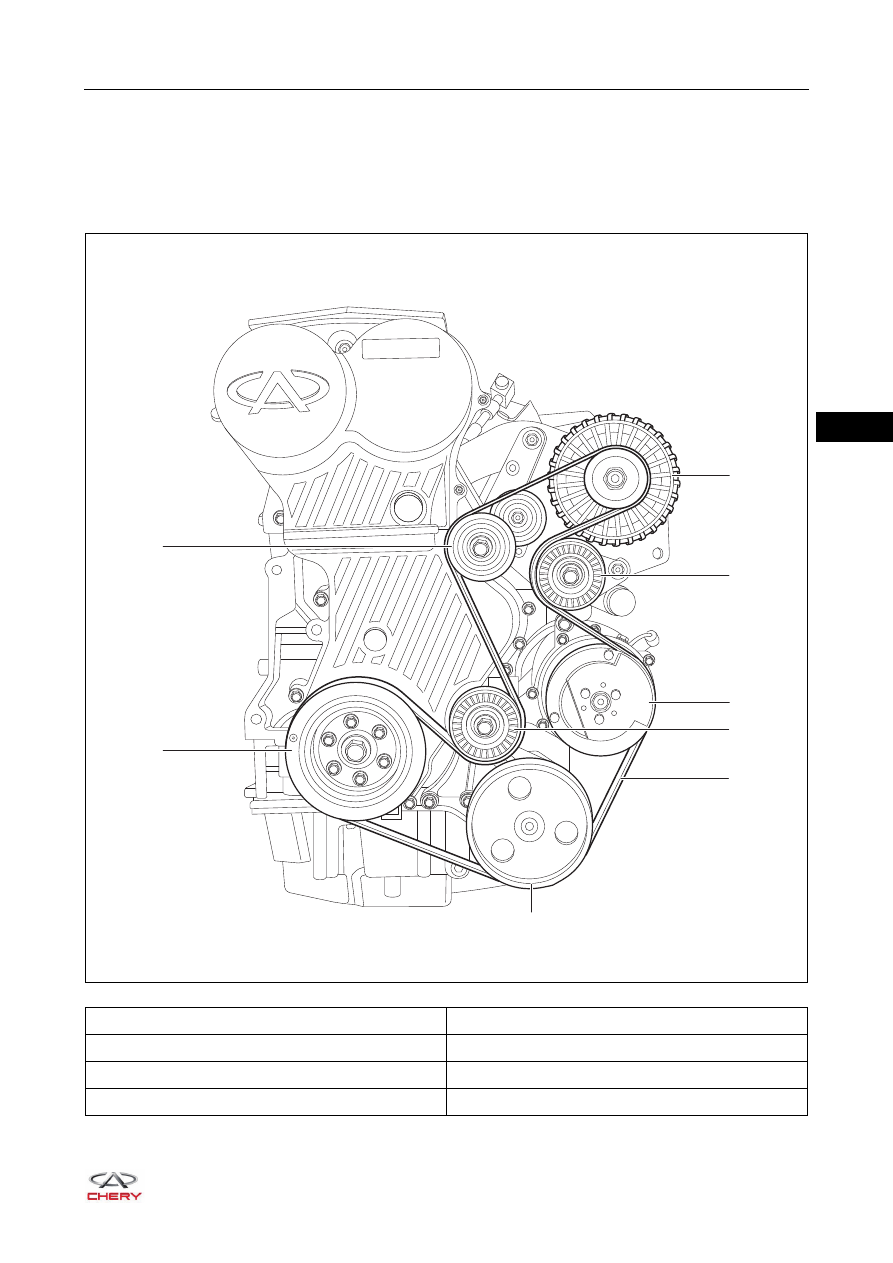
ON-VEHICLE SERVICE
Accessory Drive Belt
Description
1 - Alternator
2 - Upper Idler Pulley
3 - A/C Compressor
4 - Lower Idler Pulley
5 - Accessory Drive Belt
6 - Power Steering Pump Pulley
7 - Crankshaft Pulley
8 - Accessory Drive Belt Tensioner
RT21070020
5
3
1
4
2
7
8
6
07–
24
07
Removal
1. Turn off all the electrical equipment and ignition switch.
2. Disconnect the negative battery cable.
3. Remove the engine trim cover assembly (
).
4. Remove the engine lower right protector assembly (
).
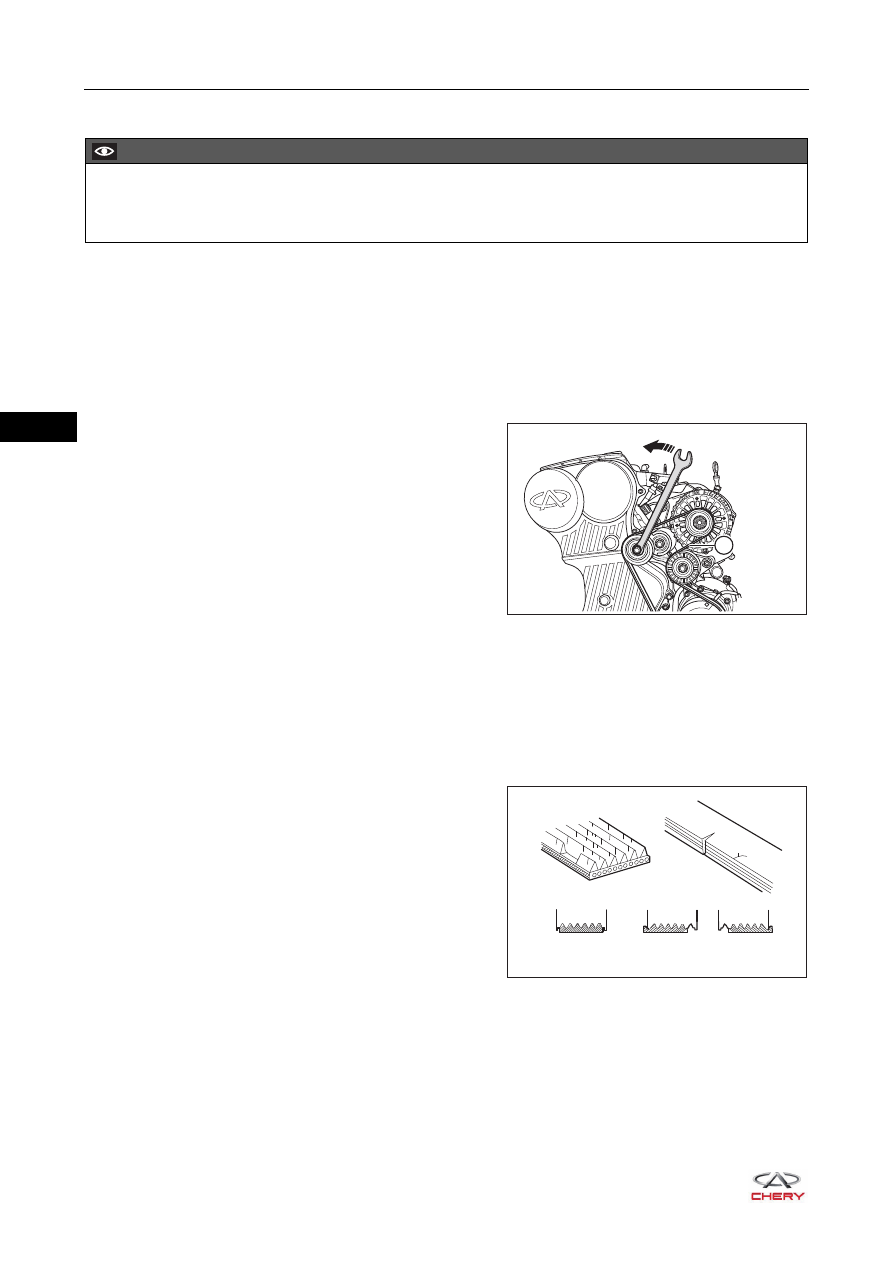
5. Remove the accessory drive belt.
a. Put the 15# open wrench (or socket) through area between engine and right side rail, and clamp the
tensioner pulley bolt.
b. Rotate the open wrench counterclockwise firmly in the
direction of arrow as show in the illustration. Loosen
the accessory drive belt (1) after it is loosened.
c. Carefully remove the accessory drive belt.
Inspection
1. Check belt surface for pilling, oiliness and deterioration, etc. If any of the defects is found, replace the
accessory drive belt.
2. Check the Internal and edge of belt for damage, wear, foreign matter and cracks, etc. If any of the defects
is found, replace the accessory drive belt.
HINT:
Cracks on the rib side of accessory drive belt are
considered acceptable. If the accessory drive belt has
chunks missing from ribs, it should be replaced.
After installing the accessory drive belt, check that it
fits properly in the ribbed grooves. Check that the belt
has not slipped out of grooves on the bottom of the
crankshaft pulley by hand.
CAUTION
Be sure to wear necessary safety equipment to prevent accidents when repairing.
Try to prevent body paint surface from being scratched during removal and installation.
1
RT21160060
RT21070030
Wrong
Wrong
Right
07–
25
07
Installation
Installation is in the reverse order of removal.
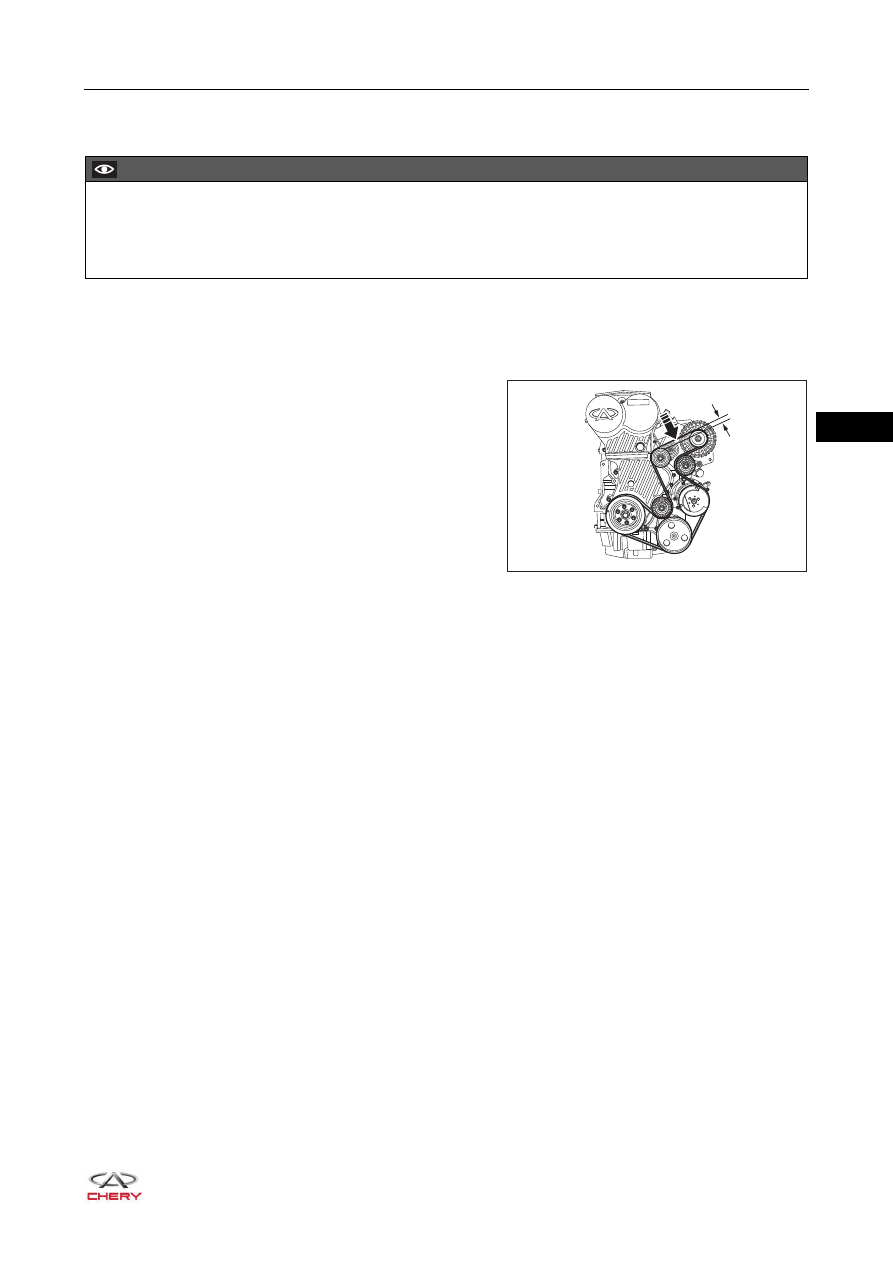
Adjustment
1. Check the tension of accessory drive belt.
a. Turn the crankshaft pulley 2 turns. Distribute the belt tension between each pulley evenly.
b. Apply 100 N of force to center part of the belt between
alternator pulley and tensioner with your thumb.
Check that the displacement of belt should be within
5 - 6 mm. If the displacement is too large or too small,
adjust or repair.
CAUTION
Before installation, Remove oil and foreign matter from accessory drive belt.
After installing accessory drive belt, turn crankshaft 2 turns with a wrench to make sure to install
accessory drive belt in place, and not interfere with other components.
5 ~ 6 mm
100 N
RT21070040
Нет комментариевНе стесняйтесь поделиться с нами вашим ценным мнением.
Текст