Jaguar XJ (X350). Service manual — part 799
Removal and installation
Crankcase Vent Oil Separator
Removal
Right-hand drive vehicles
1 . Remove the secondary bulkhead center panel.
For additional information, refer to Secondary Bulkhead Center Panel
Left-hand drive vehicles
2 . Remove the cowl vent screen.
For additional information, refer to Cowl Vent Screen (76.10.01)
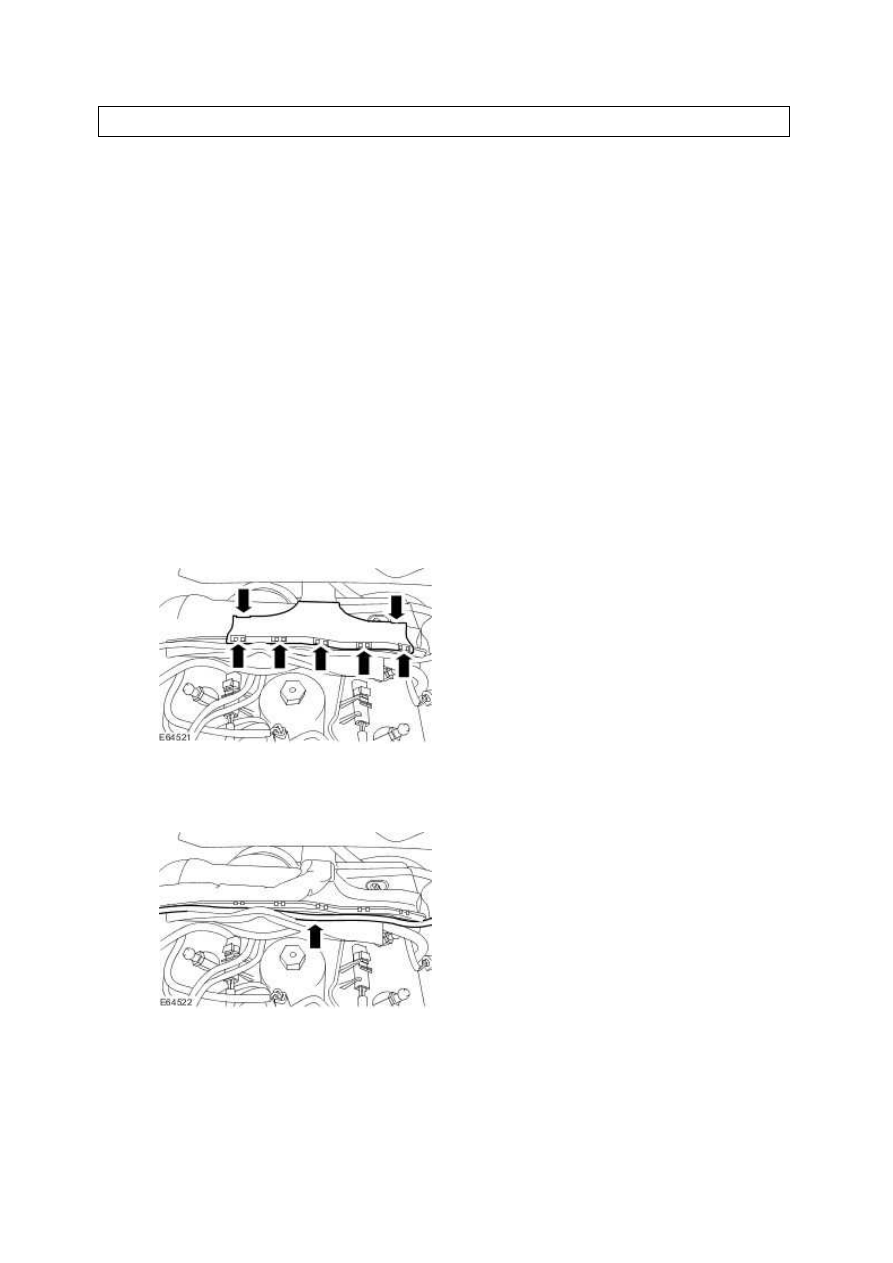
3 . Remove the engine harness cover.
4 . Detach the brake booster vacuum pipe.
5 . Reposition the engine harness from the casing.
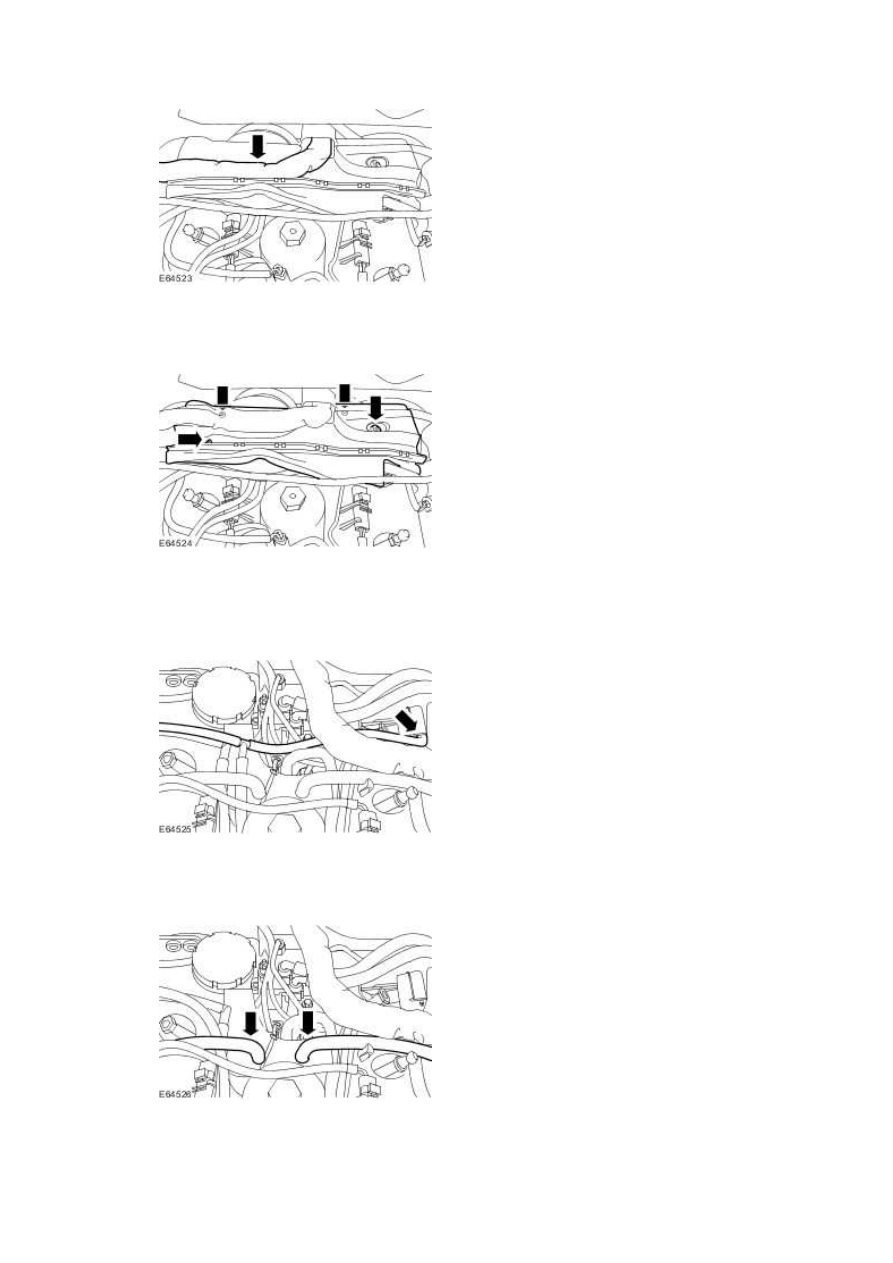
6 . Remove the engine harness casing.
All vehicles
7 . Disconnect the left-hand port deactivation vacuum hose.
8 . Detach the crankcase vent oil separator breather hoses.
www.
Left-hand drive vehicles
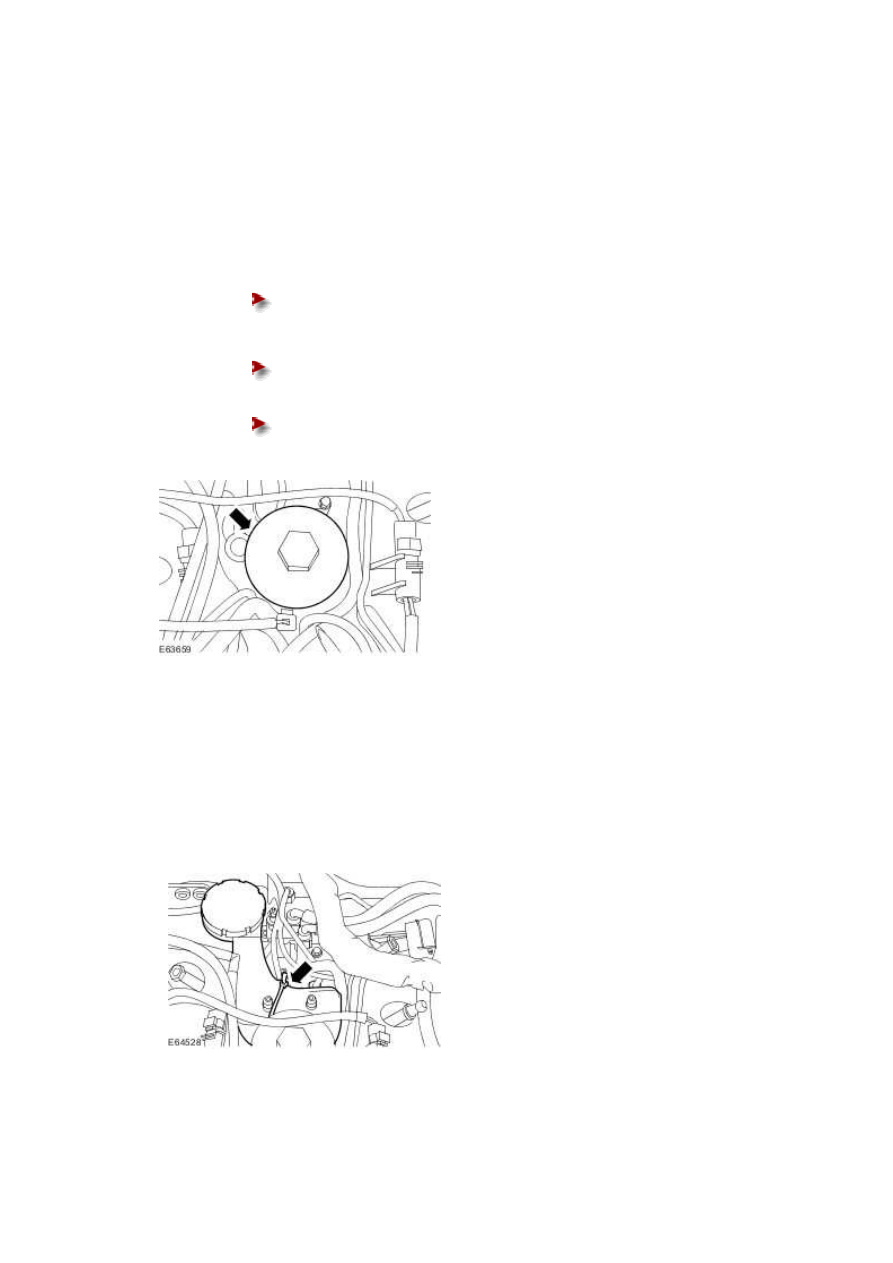
9
.
NOTE:
Remove and discard the O-ring seal.
Remove the oil filter element housing.
Rotate the oil filter element housing five complete turns counter-
clockwise.
Allow the engine oil to drain from the oil filter element housing for two
minutes.
Remove the oil filter element housing.
All vehicles
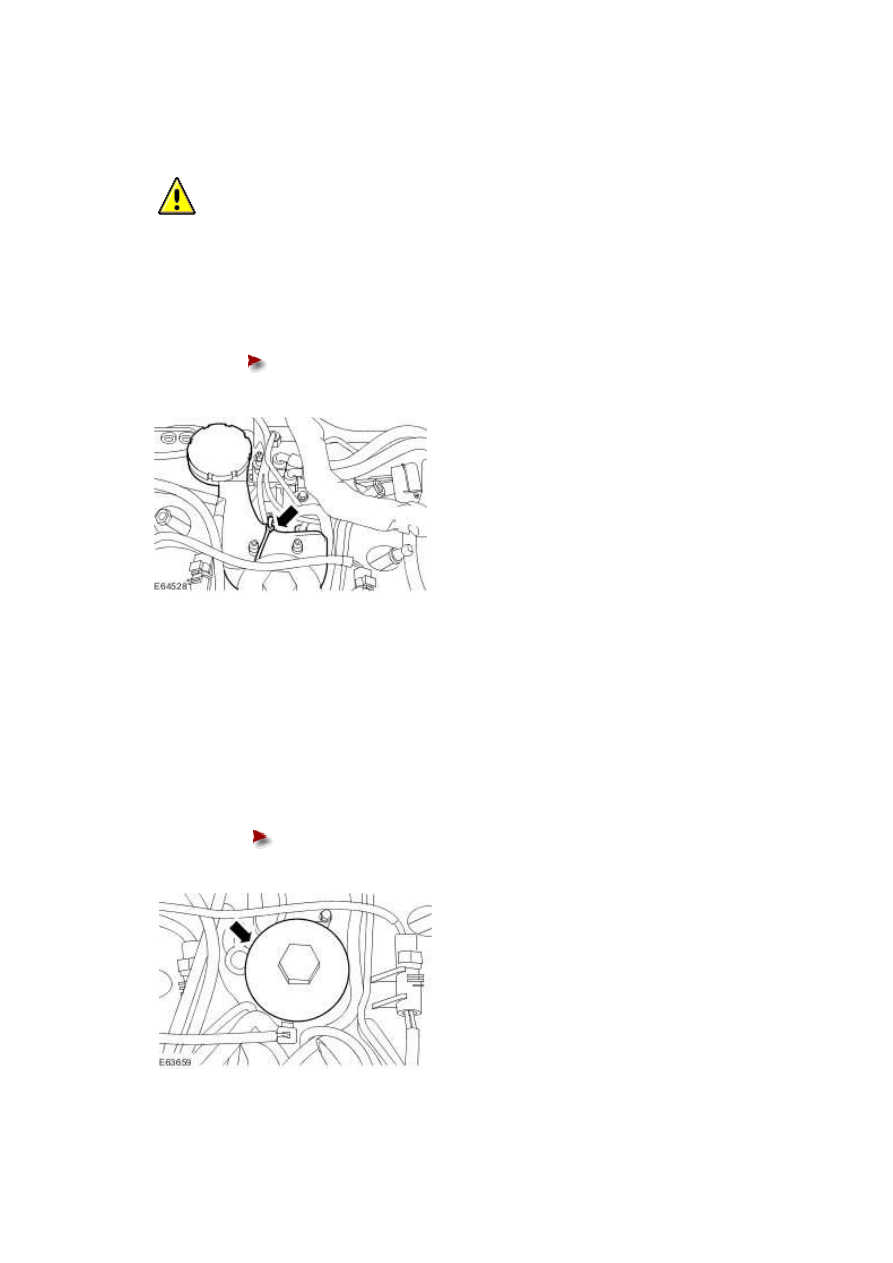
10 . NOTE:
Remove and discard the seals.
Remove the crankcase vent oil separator.
Installation
All vehicles
1
.
CAUTION: Make sure the crankcase vent oil seperator is correctly located on the
alignment dowel before fully seating. Failure to follow this instruction may result in
damage to the component.
Install the crankcase vent oil separator.
Install new seals.
Left-hand drive vehicles
2 . NOTE:
Install a new O-ring seal.
Install the oil filter element housing.
Tighten to 25 Nm.
www.
Нет комментариевНе стесняйтесь поделиться с нами вашим ценным мнением.
Текст