Lexus SC300 / Lexus SC400. Service manual — part 640
PREPARATION
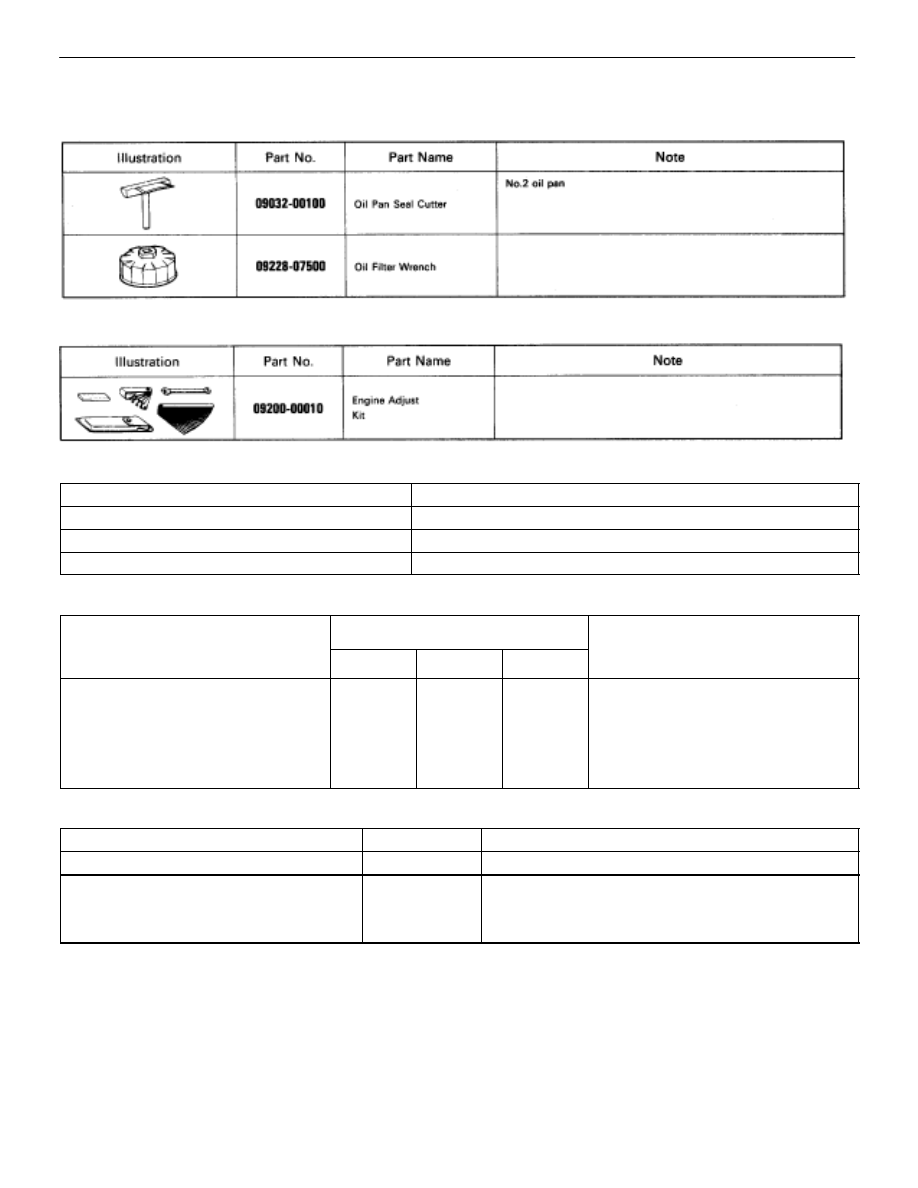
SST (SPECIAL SERVICE TOOLS)
RECOMMENDED TOOLS
EQUIPMENT
Part Name
Note
Oil pressure gauge
Precision straight edge
Oil pump
Torque wrench
LUBRICANT
Item
Capacity
Classification
Item
Liters
US qts
lmp. qts
Classification
Engine oil
API grade SG, Energy–Conserving II
Dry fill
6 0
6 3
5 3
multigrade. Recommended viscosity is
Drain and refill
6.0
6.3
5.3
g
y
as shown, with SAE 5W–30 being the
w/ Oil filter change
4.8
5.1
4.2
preferred engine oil.
w/o Oil filter change
4.5
4.8
5.3
g
SSM (SPECIAL SERVICE MATERIALS)
Part Name
Part No.
Use etc.
Seal packing or equivalent
08826–00080
Oil pump, Oil pan
Adhesive 1344,
Three bond 1344,
08833–00080
Oil pressure switch
Loctite 242 or equivalent
LU–4
–
LUBRICATION SYSTEM
System Circuit, Operation

OIL PRESSURE CHECK
1.
CHECK ENGINE OIL QUALITY
Check the oil for deterioration, entry of water, discoloring or
thinning.
If the quality is poor, replace the oil.
Oil grade: API grade SG, Energy–Conserving II multi-
grade. Recommended viscosity is as shown,
with SAE 5W–30 being the preferred engine
oil.
2.
CHECK ENGINE OIL LEVEL
The oil level should be between the ”L” and ”F” marks on the
dipstick.
If low, check for the leakage and add oil up to ”F” mark.
3.
REMOVE ENGINE UNDER COVER
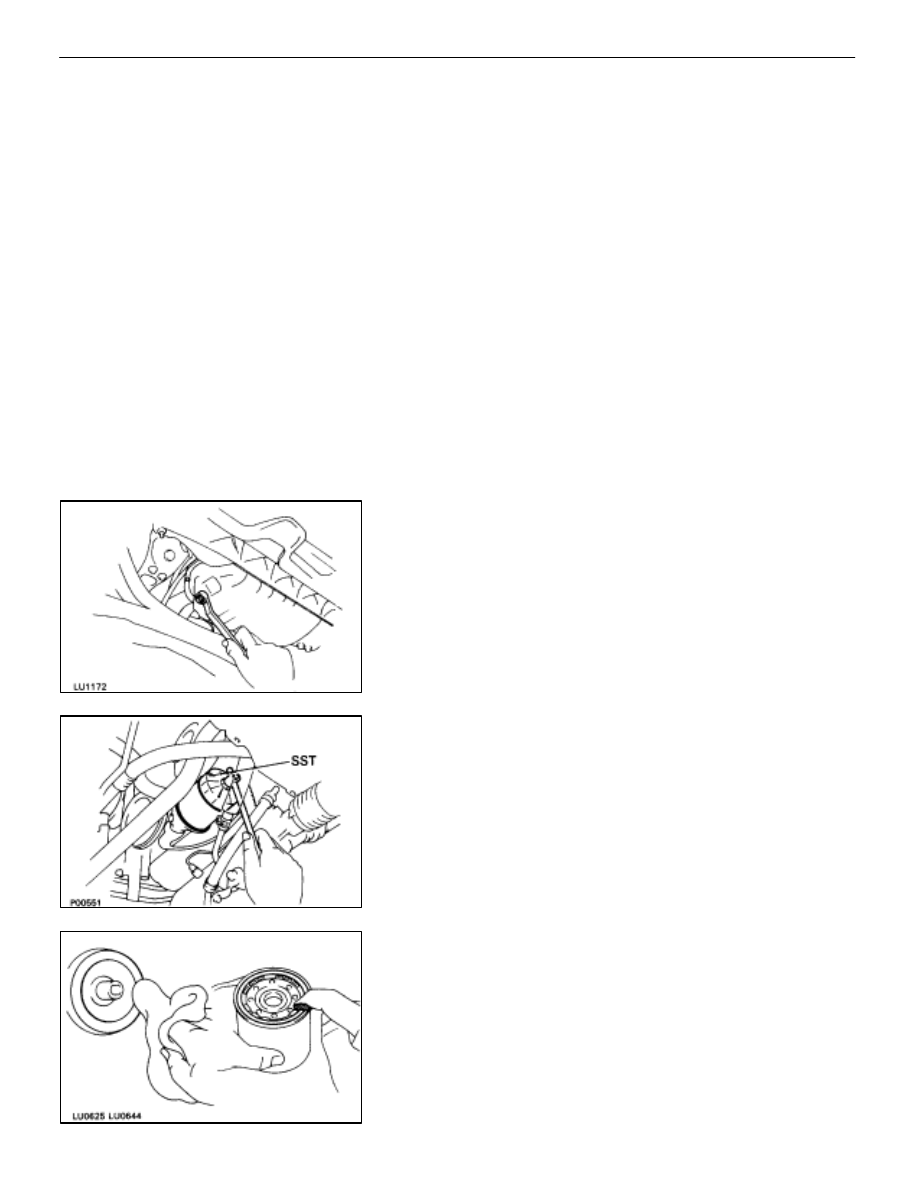
4. REMOVE OIL PRESSURE SWITCH, AND INSTALL OIL
PRESSURE GAUGE
5.
WARM UP ENGINE
Allow the engine to warm up to normal operating tempera-
ture.
6.
CHECK OIL PRESSURE
Oil pressure:
At idling
29 kPa (0.3 kgf/cm
2
, 4.3 psi)
or more
At 3,000 rpm 294–588 kPa
(3.0–6.0 kg/cm
2
, 43–85 psi)
7.
REMOVE OIL PRESSURE GAUGE AND REINSTALL OIL
PRESSURE SWITCH
Apply adhesive to two or three threads of the oil pressure
switch.
Adhesive: Part No. 08833–00080, THREE BOND 1344,
LOCTITE 242 or equivalent
8.
START ENGINE AND CHECK FOR LEAKS
9.
REINSTALL ENGINE UNDER COVER
–
LUBRICATION SYSTEM
Oil Pressure Check
LU–5
REPLACEMENT OF ENGINE OIL
AND OIL FILTER
CAUTION:
•
Prolonged and repeated contact with mineral oil will
result in the removal of natural fats from the skin, leading
to dryness, irritation and dermatitis. In addition, used
engine oil contains potentially harmful contaminants
which may cause skin cancer.
•
Care should be taken, therefore, when changing engine,
oil to minimize the frequency and length of time your skin
is exposed to used engine oil. Protective clothing and
gloves, that cannot be penetrated by oil, should be worn.
The skin should be thoroughly washed with soap and
water, or use waterless hand cleaner, to remove any used
engine oil. Do not use gasoline, thinners, or solvents.
•
In order to preserve the environment, used oil and used
oil filter must be disposed of only at designated disposal
sites.
1.
DRAIN ENGINE OIL
(a) Remove the oil filler cap.
(b) Remove the oil drain plug, and drain the oil into a
container.
2.
REPLACE OIL FILTER
(a) Using SST, remove the oil filter.
SST 09228–07500
(b) Clean the filter contact surface on the oil filter mounting.
(c) Lubricate the filter rubber gasket with clean engine oil.
LU–6
–
LUBRICATION SYSTEM
Replacement of Engine Oil and Oil Filter

(d) Tighten the oil filter by hand until the rubber gasket
contacts the seat of the filter mounting. Then using SST,
give it an additional 3/4 turn to seat the oil filter.
SST 09228–07500
3.
FILL WITH ENGINE OIL
(a) Clean and install the oil drain plug with a new gasket.
Torque: 25 N
⋅
m (250 kgf
⋅
cm, 18 ft
⋅
lbf)
(b) Fill with new engine oil.
Capacity:
Drain and refill
w/ Oil filter change
4.8 liters (5.1 US qts, 4.2 lmp. qts)
w/o Oil filter change
4.5 liters (4.8 US qts, 4.0 lmp.qts)
Dry fill
6.0 liters (6.3 US qts, 5.3 lmp. qts)
(c) Reinstall the oil filler cap.
4.
START ENGINE AND CHECK FOR LEAKS
5.
RECHECK ENGINE OIL LEVEL (See page
–
LUBRICATION SYSTEM
Replacement of Engine Oil and Oil Filter
LU–7
Нет комментариевНе стесняйтесь поделиться с нами вашим ценным мнением.
Текст