Nissan Murano Z51. Instruction — part 776
EXT-38
< REMOVAL AND INSTALLATION >
DOOR PARTING SEAL
DOOR PARTING SEAL
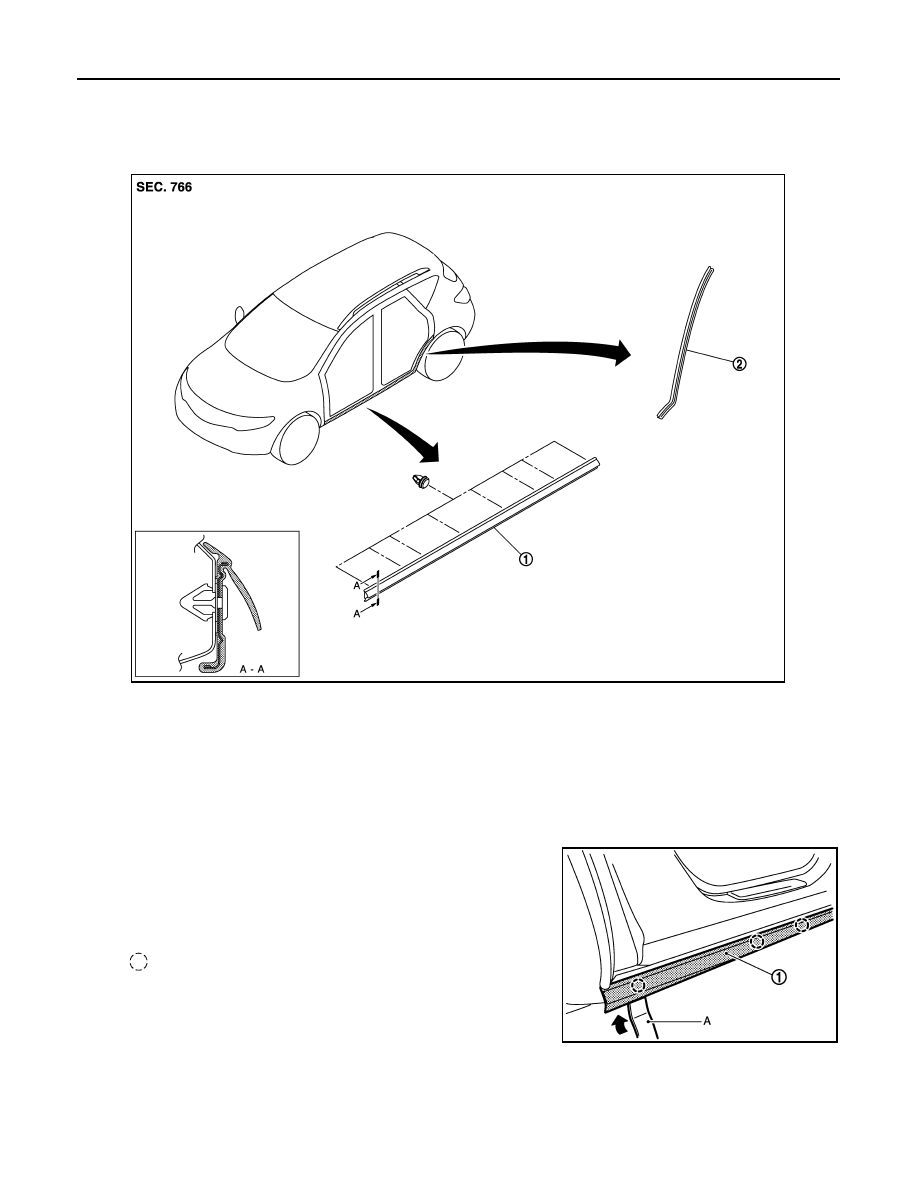
Exploded View
INFOID:0000000005516294
Removal and Installation
INFOID:0000000005516295
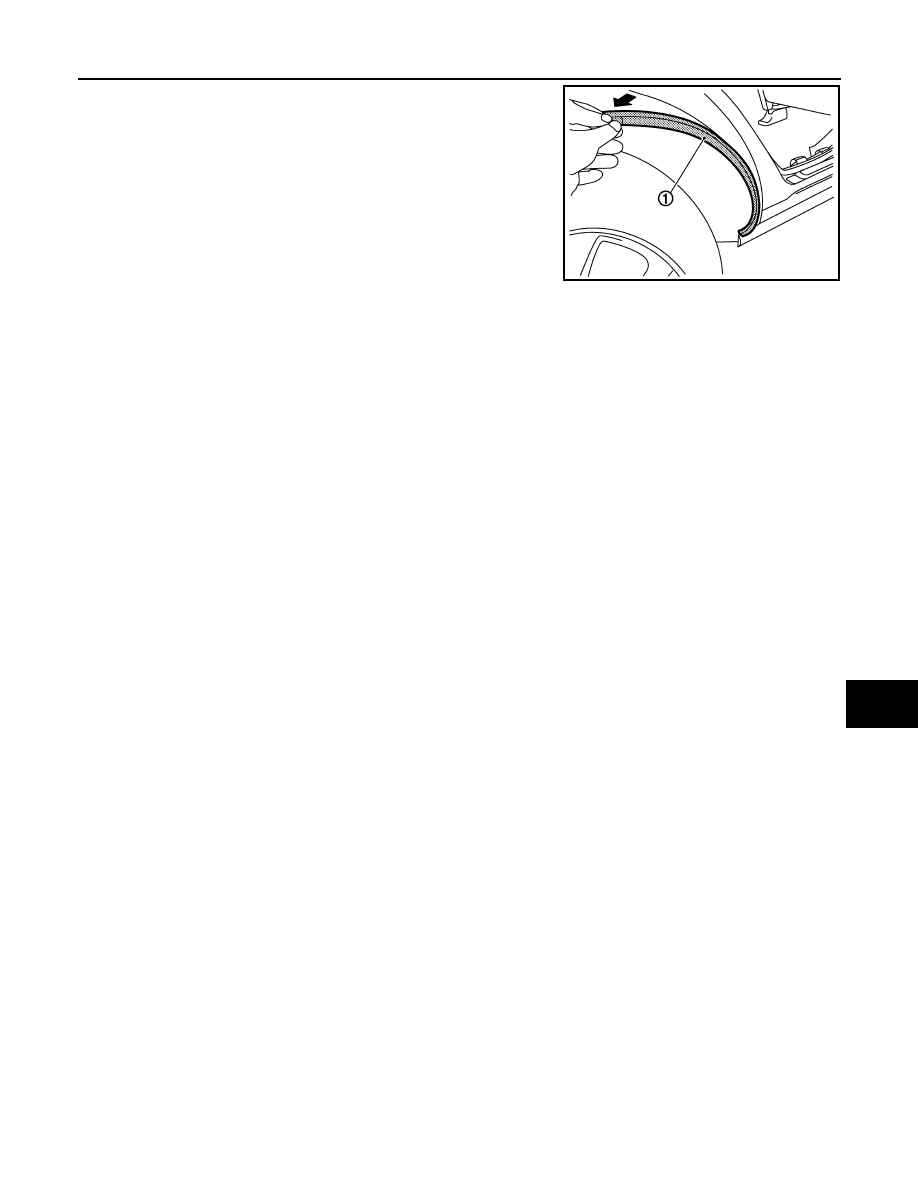
REMOVAL
DOOR PARTING SEAL
1.
Fully open front door.
2.
Using a remover tool (A), disengage the clips from the door part-
ing seal (1).
CAUTION:
• Disengage the clips slowly and carefully.
• Never pull the door parting seal strongly.
3.
Remove front door parting seal.
REAR DOOR PARTING SEAL
1.
Fully open rear door.
1.
Door parting seal
2.
Rear door parting seal
JMKIA2028ZZ
: Clip
JMKIA2029ZZ
DOOR PARTING SEAL
EXT-39
< REMOVAL AND INSTALLATION >
C
D
E
F
G
H
I
J
L
M
A
B
EXT
N
O
P
2.
Remove rear door parting seal.
Pull back rear door parting seal (1).
INSTALLATION
Install in the reverse order of removal.
CAUTION:
• When installing, check visually the fillet molding and the clips, then replace them with new parts if
they have been damaged.
• When installing door parting seal, check that blind clips are securely fitted in panel holes on body,
and then press them in.
JMKIA2030ZZ
EXT-40
< REMOVAL AND INSTALLATION >
DOOR SASH COVER
DOOR SASH COVER
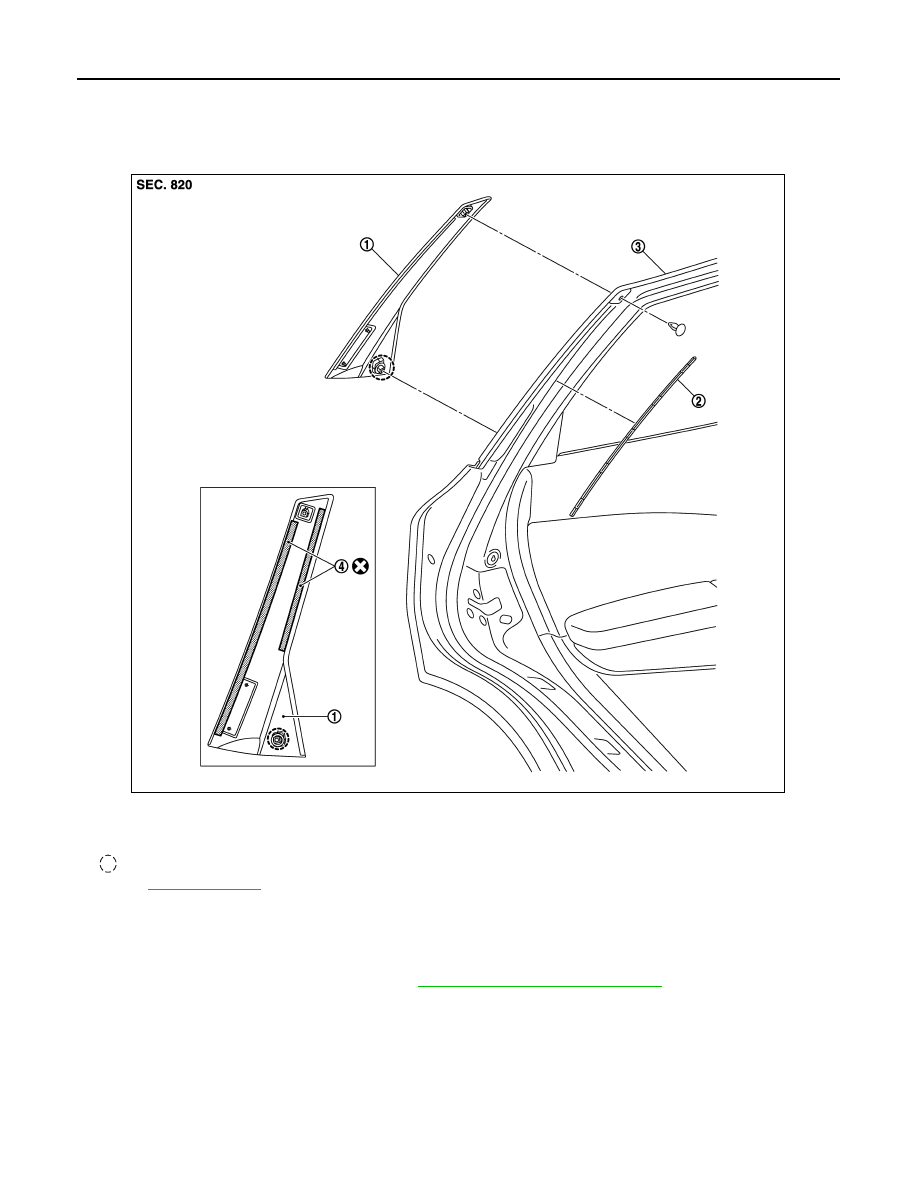
Exploded View
INFOID:0000000005516296
Removal and Installation
INFOID:0000000005516297
REMOVAL
1.
Remove rear door outside molding. Refer to
EXT-34, "Removal and Installation"
1.
Rear door sash cover
2.
Rear door sash molding
3.
Rear door assembly
4.
Double-faced adhesive tape
: Clip
Refer to
for symbols in the figure.
JMKIA2031ZZ
DOOR SASH COVER
EXT-41
< REMOVAL AND INSTALLATION >
C
D
E
F
G
H
I
J
L
M
A
B
EXT
N
O
P
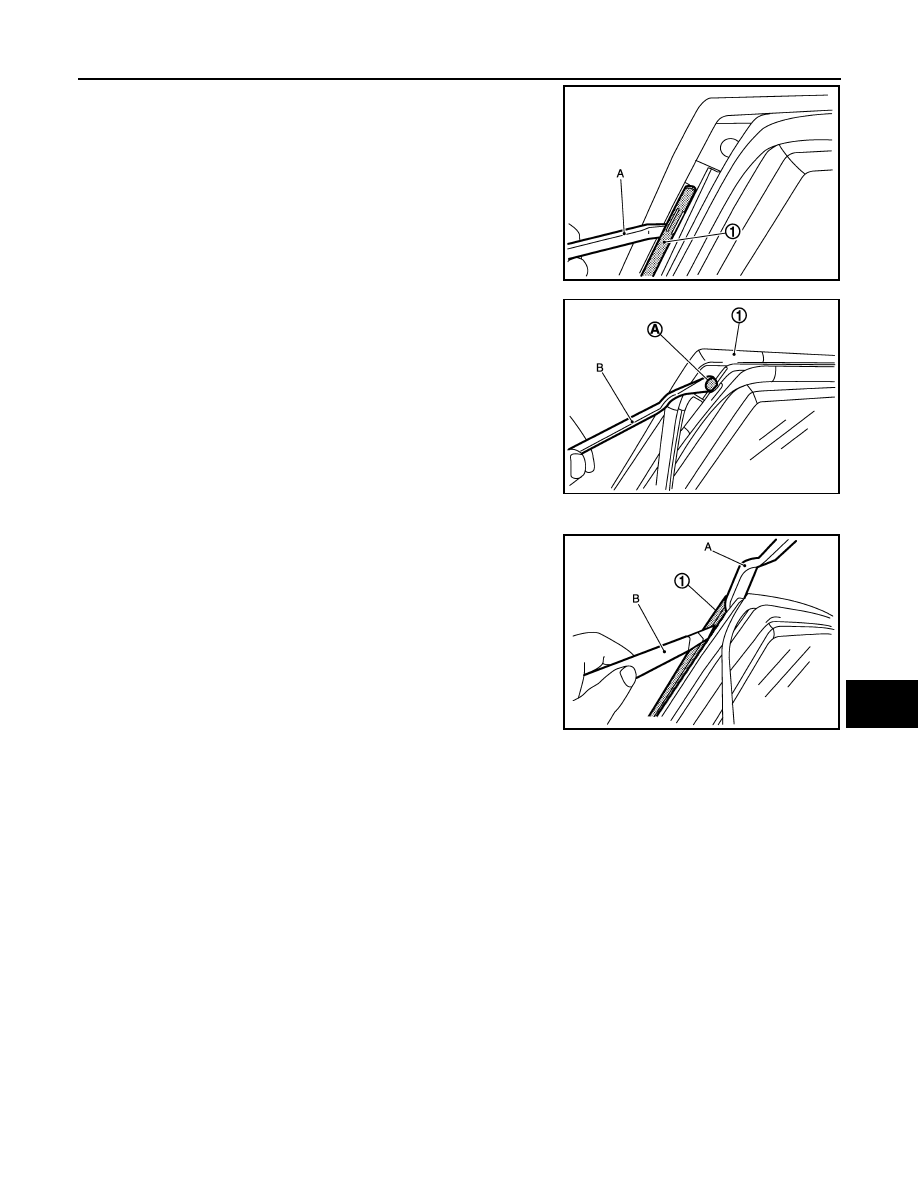
2.
Remove rear door sash molding (1) with remover tool (A).
3.
Remove rear door weather-strip (1) fixing clip (A) with remover
tool (B).
4.
Release roof portion of rear door weather-strip.
5.
Release roof portion of glass run.
6.
Release rear door sash cover connection between rear door
panel and cover (1), using a remover tool (A) and cutter knife
(B), and take off double-faced adhesive tape.
CAUTION:
Never use a material for remover tool (A) which could dam-
age door panel.
7.
Remove rear door sash cover fixing clips, and then remove rear door sash cover.
INSTALLATION
Install in the reverse order of removal.
CAUTION:
• Replace double-faced adhesive tape on back of cover with a new tape if rear door sash cover is
reused.
• Never let air between contact surfaces when installing.
• Remove double-faced adhesive tape remaining on body and back of cover using double-faced adhe-
sive tape remover when removing rear door sash cover.
• Install after cleaning adhesive parts of door side and back of rear door sash cover.
• To secure contact, do not wash vehicle within 24 hours after installation.
JMKIA2032ZZ
JMKIA2033ZZ
JMKIA2034ZZ
Нет комментариевНе стесняйтесь поделиться с нами вашим ценным мнением.
Текст