Nissan Sentra. Instruction — part 267
DLK-184
< REMOVAL AND INSTALLATION >
[WITH INTELLIGENT KEY SYSTEM]
TRUNK LID
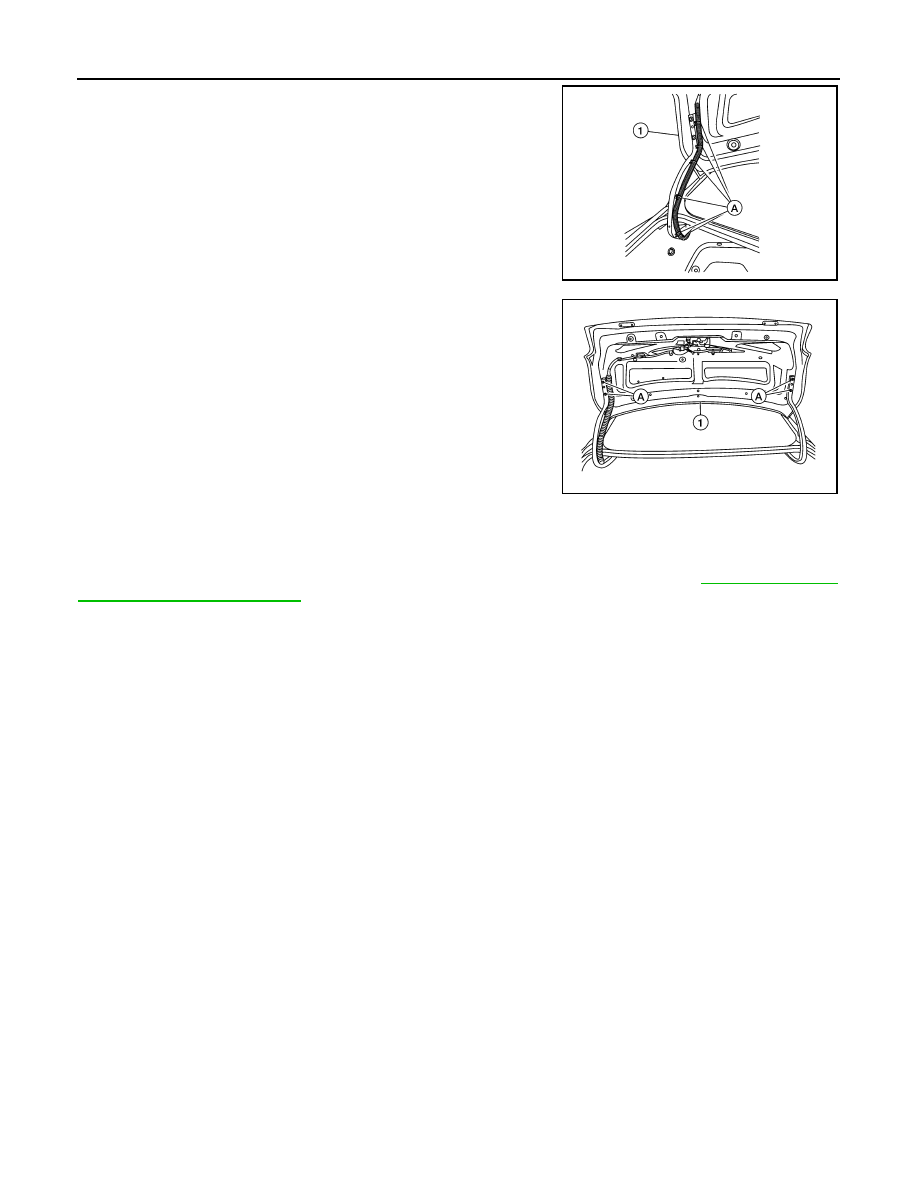
2. Disconnect the harness connectors in the trunk lid assembly (1)
and remove the harness clips (A) then pull out harness from the
trunk lid assembly (1).
3. Remove the bolts (A) and remove the trunk lid assembly (1).
INSTALLATION
Installation is in the reverse order of removal.
CAUTION:
After installation, perform the trunk lid assembly adjustment procedure. Refer to
.
ALKIA2733ZZ
ALKIA2734ZZ
TRUNK LID
DLK-185
< REMOVAL AND INSTALLATION >
[WITH INTELLIGENT KEY SYSTEM]
C
D
E
F
G
H
I
J
L
M
A
B
DLK
N
O
P
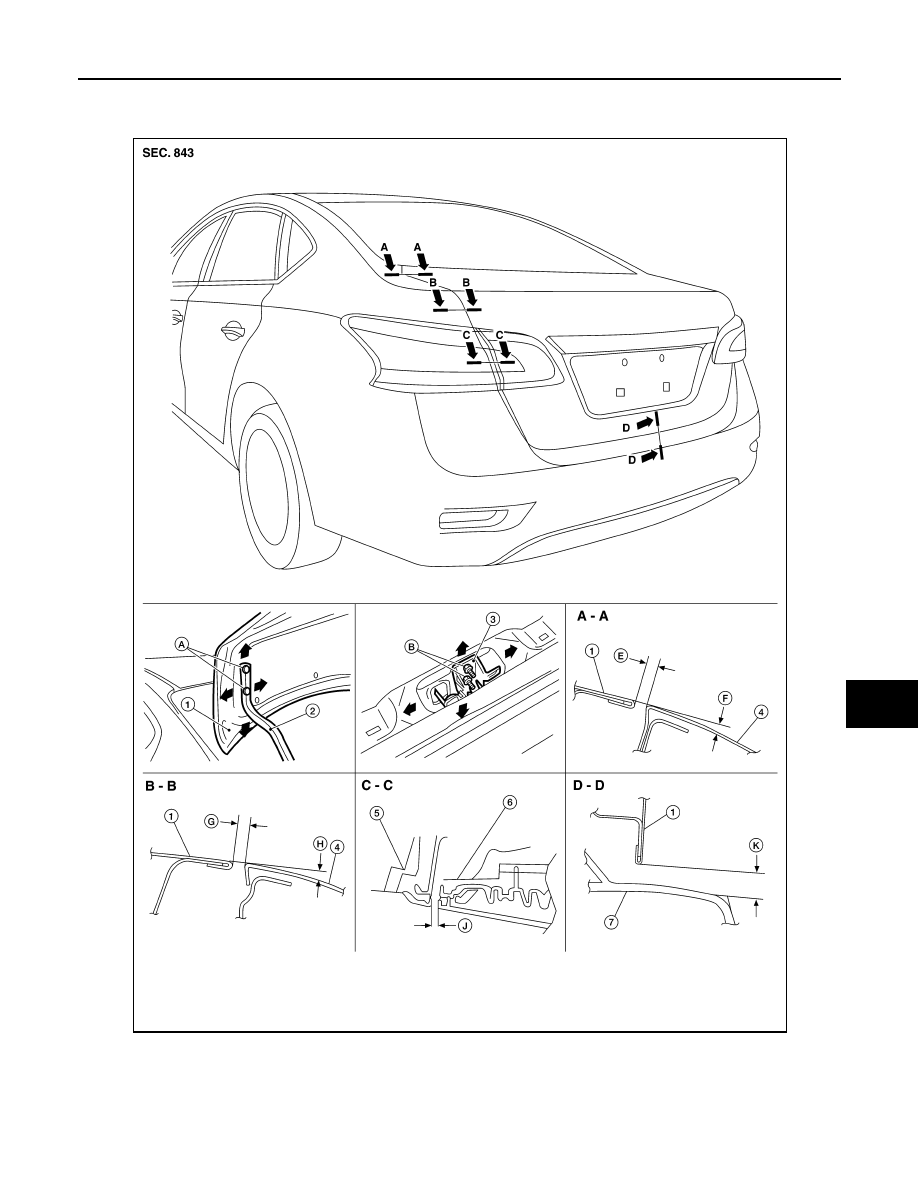
TRUNK LID ASSEMBLY : Adjustment
INFOID:0000000009756496
1.
Trunk lid assembly
2.
Trunk lid hinge
3.
Trunk lid striker
4.
Body side outer
5.
Rear combination lamp
6.
Reflector
7.
Rear bumper fascia
A. Trunk lid bolts
B. Striker bolts
ALKIA2916ZZ
DLK-186
< REMOVAL AND INSTALLATION >
[WITH INTELLIGENT KEY SYSTEM]
TRUNK LID
Check the clearance and the surface height between trunk lid and each part by visual inspection and tactile
feel.
If the clearance and the surface height are out of specification, adjust them according to the adjustment proce-
dures.
Unit: mm (in)
LONGITUDINAL CLEARANCE
Trunk Lid Removed From Hinge
1. Loosen the trunk lid to hinge bolts.
2. Move the trunk lid so that the clearance measurements are within specifications provided.
3. Tighten the trunk lid to hinge bolts.
Trunk Lid Hinge Removed From Vehicle
1. Remove the rear parcel shelf finisher. Refer to
INT-33, "Removal and Installation"
.
2. Loosen the hinge to parcel shelf bolts.
3. Move the trunk lid so that the clearance measurements are within specifications provided.
4. Tighten the hinge to parcel shelf bolts.
5. Install the rear parcel shelf finisher. Refer to
INT-33, "Removal and Installation"
.
SURFACE HEIGHT ADJUSTMENT
1. Loosen the bumper rubber.
2. Loosen the striker bolts.
3. Lift up the trunk lid approx. 100 - 150 mm (3.94 - 5.91 in) height then close it lightly. Make sure it engages
firmly with the trunk lid closed.
4. Tighten the trunk lid striker.
TRUNK LID HINGE
TRUNK LID HINGE : Removal and Installation
INFOID:0000000009756497
REMOVAL
1. Remove trunk lid assembly. Refer to
DLK-183, "TRUNK LID ASSEMBLY : Removal and Installation"
2. Remove torsion bar. Refer to
DLK-187, "TORSION BAR : Removal and Installation"
3. Remove rear parcel shelf finisher. Refer to
INT-33, "Removal and Installation"
4. Remove trunk lid hinge bolts (body side) and remove.
INSTALLATION
Installation is in the reverse order of removal.
CAUTION:
• Check trunk lid open/close, lock/unlock operation after installation.
• After installation, perform the trunk lid assembly adjustment procedure. Refer to
.
Section
Item
Measurement
Standard
Parallelism (MAX)
Right/Left
Difference (MAX)
A – A
E
Clearance
3.5
±1.0 (0.14 ±0.04)
1.5 (0.06)
1.5 (0.06)
F
Surface height
1.0
±1.0 (0.04 ±0.04)
1.5 (0.06)
1.5 (0.06)
B – B
G
Clearance
3.5
±1.0 (0.14 ±0.04)
1.5 (0.06)
1.5 (0.06)
H
Surface height
1.0
±1.0 (0.04 ±0.04)
1.5 (0.06)
1.5 (0.06)
C – C
J
Clearance
4.3
±1.9 (0.17 ±0.07)
—
2.0 (0.08)
D – D
K
Clearance
7.0
±2.0 (0.28 ±0.08)
—
—
TRUNK LID
DLK-187
< REMOVAL AND INSTALLATION >
[WITH INTELLIGENT KEY SYSTEM]
C
D
E
F
G
H
I
J
L
M
A
B
DLK
N
O
P
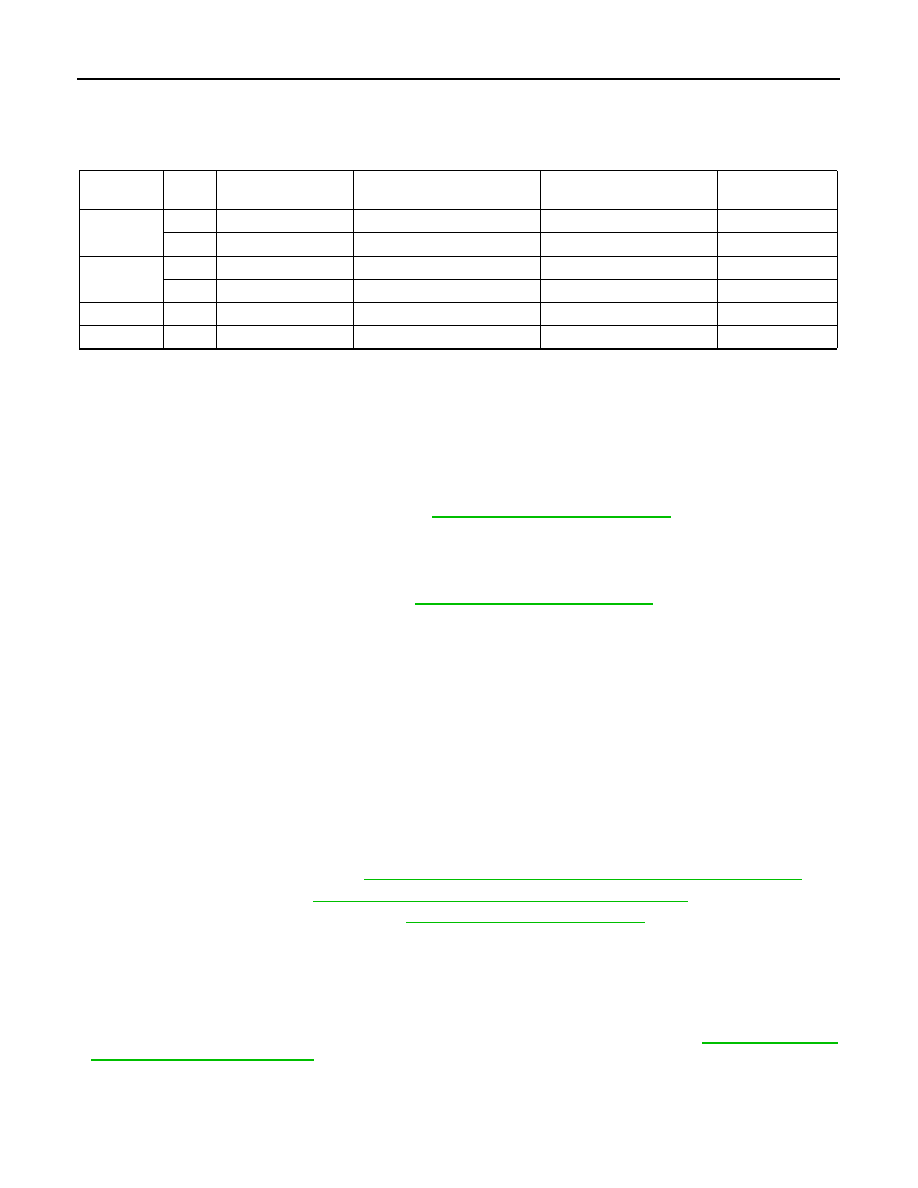
• Check trunk lid hinge rotating point for poor lubrication. If
necessary, apply a suitable multi-purpose grease.
TORSION BAR
TORSION BAR : Removal and Installation
INFOID:0000000009756498
REMOVAL
1. Remove torsion bar clips.
2. Support the trunk lid assembly using a suitable tool.
WARNING:
Bodily injury may occur if hood assembly is not supported properly when removing hood assem-
bly.
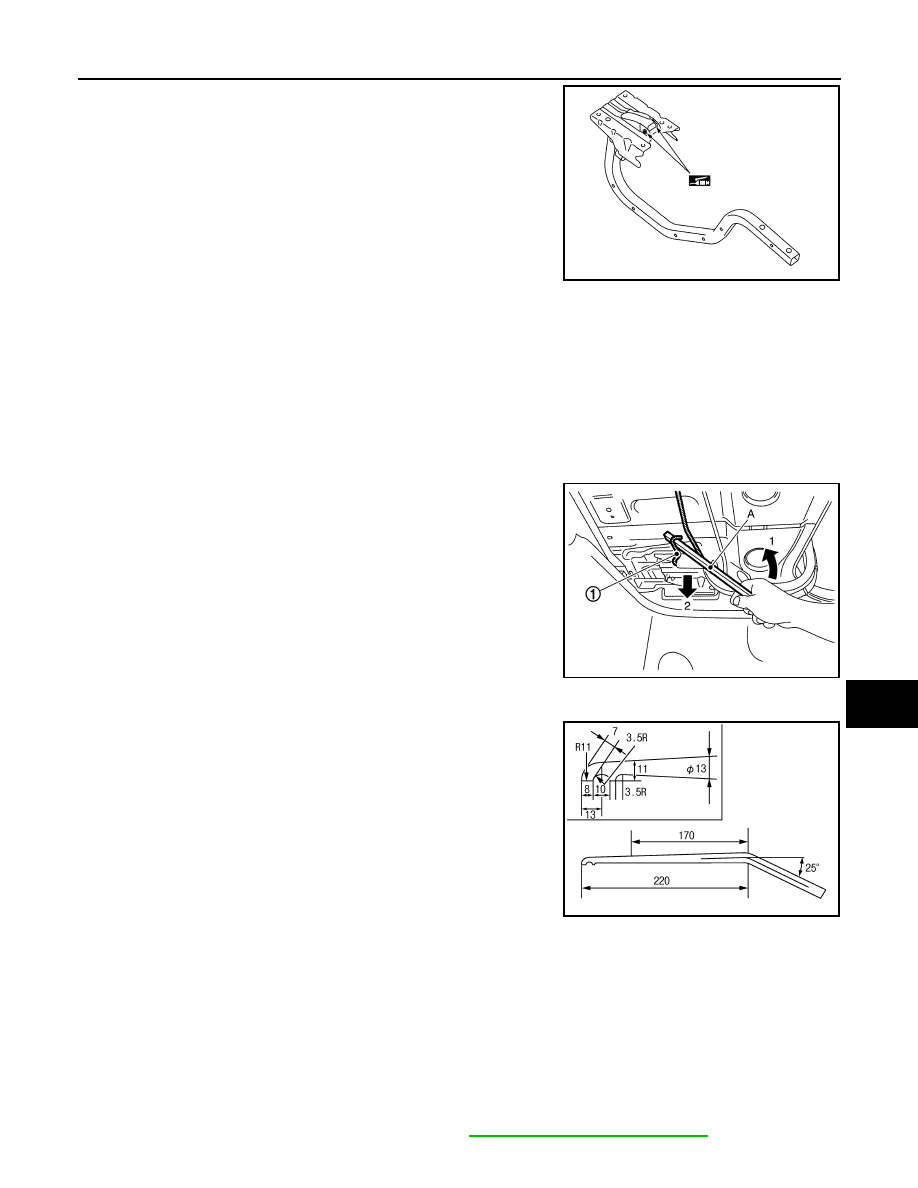
3. Lift torsion bar (1) using a suitable tool (A) as shown to remove.
NOTE:
The suitable tool specifications are as shown.
INSTALLATION
Installation is in the reverse order of removal.
CAUTION:
After installation check the trunk lid open/close, lock/unlock operation.
TRUNK LID LOCK
TRUNK LID LOCK : Removal and Installation
INFOID:0000000009756499
REMOVAL
1. Remove the trunk lid finisher (if equipped). Refer to
INT-45, "Removal and Installation"
.
JMKIA8127ZZ
JMKIA8128ZZ
PIIB3774J
Нет комментариевНе стесняйтесь поделиться с нами вашим ценным мнением.
Текст