Nissan Qashqai (2007-2010). Manual — part 642

DRIVE PINION
DLN-141
< DISASSEMBLY AND ASSEMBLY >
[REAR FINAL DRIVE: R145]
C
E
F
G
H
I
J
K
L
M
A
B
DLN
N
O
P
DRIVE PINION
Exploded View
INFOID:0000000001077005
Disassembly
INFOID:0000000000972195
1.
Filler plug
2.
Gasket
3.
Drain plug
4.
Rear cover
5.
Side oil seal
6.
Side bearing adjusting shim
7.
Side bearing
8.
Drive gear
9.
Differential case
10. Pinion mate thrust washer
11.
Pinion mate gear
12. Pinion mate shaft
13. Lock pin
14. Side gear thrust washer
15. Side gear
16. Drive pinion
17. Pinion rear bearing
18. Drive pinion adjusting shim
19. Collapsible spacer
20. Gear carrier
21. Pinion front bearing
22. Drive pinion nut
23. Center oil seal
24. 4WD solenoid harness
25. Electric controlled coupling
26. Bearing shim
27. Coupling front bearing
28. Reamer bolt
29. Connector bracket
30. Coupling cover
31. Front oil seal
32. Companion flange
33. Companion flange lock nut
A: Oil seal lip
B: Screw hole
: Apply gear oil.
: Apply anti-corrosive oil.
: Apply Genuine Liquid Gasket, Three Bond TB1217 or equivalent.
: Apply Genuine Medium Strength Thread Locking Sealant, Three Bond TB1322B or equivalent.
Refer to
for symbols not described on the above.
JSDIA0234GB
DLN-142
< DISASSEMBLY AND ASSEMBLY >
[REAR FINAL DRIVE: R145]
DRIVE PINION
1.
Remove electric controlled coupling assembly. Refer to
2.
Remove differential case assembly. Refer to
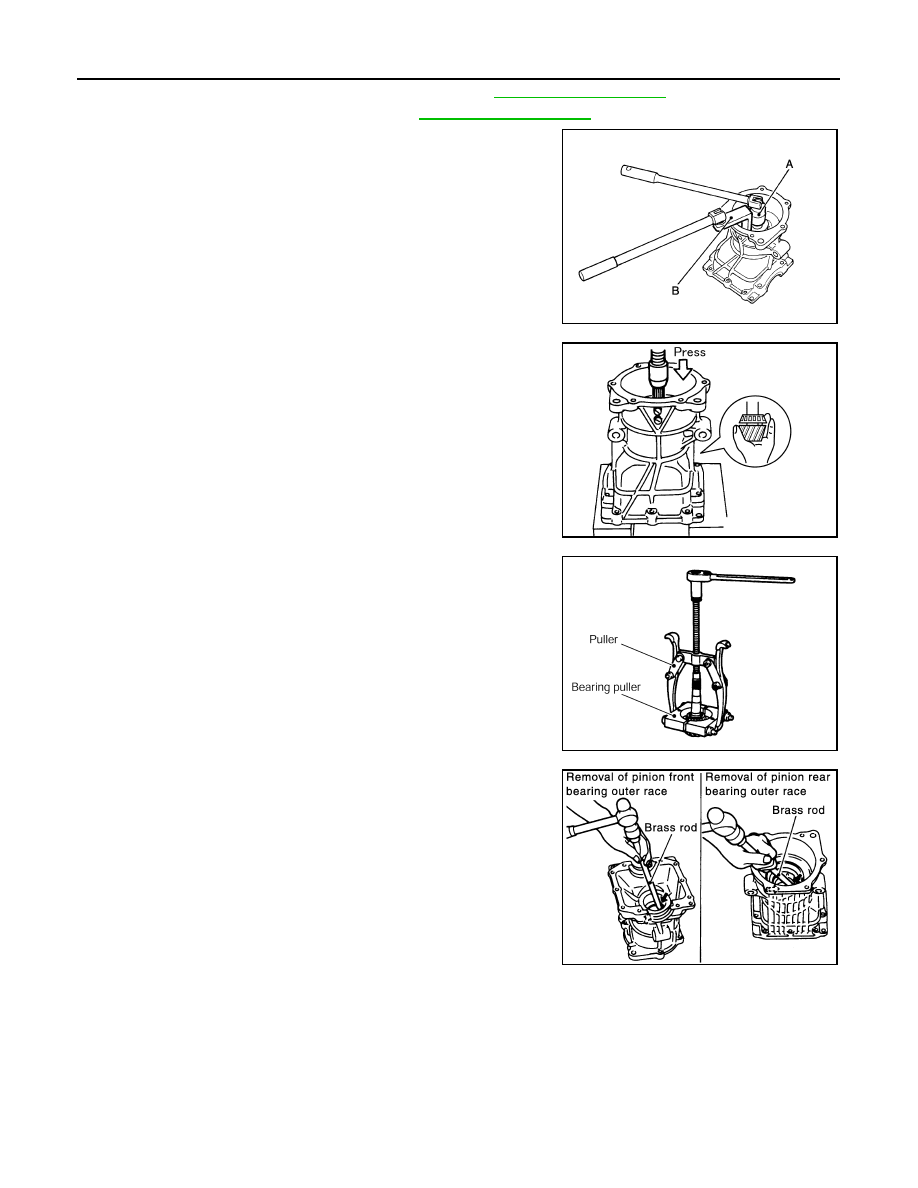
3.
Fit drive pinion socket (A) (SST: KV38108500) onto drive pinion
spline. Remove drive pinion nut, using the pinion nut wrench (B)
(SST: KV38108400).
4.
Press drive pinion assembly out of gear carrier.
CAUTION:
Never drop drive pinion assembly.
5.
Remove pinion front bearing inner race.
6.
Remove collapsible spacer.
7.
Remove pinion rear bearing inner race from drive pinion, using
puller and bearing puller.
8.
Using a brass rod, tap pinion front bearing outer race evenly
from the 2 cutouts on gear carrier and remove pinion front bear-
ing outer race.
CAUTION:
Be careful not to damage gear carrier.
9.
Using a brass rod, tap drive pinion adjusting shim evenly from
the 2 cutouts on gear carrier and remove drive pinion adjusting
shim and pinion rear bearing outer race.
CAUTION:
Be careful not to damage the gear carrier.
Assembly
INFOID:0000000000972196
JSDIA0265ZZ
PDIA0445E
PDIA0179E
SDIA0564E
DRIVE PINION
DLN-143
< DISASSEMBLY AND ASSEMBLY >
[REAR FINAL DRIVE: R145]
C
E
F
G
H
I
J
K
L
M
A
B
DLN
N
O
P
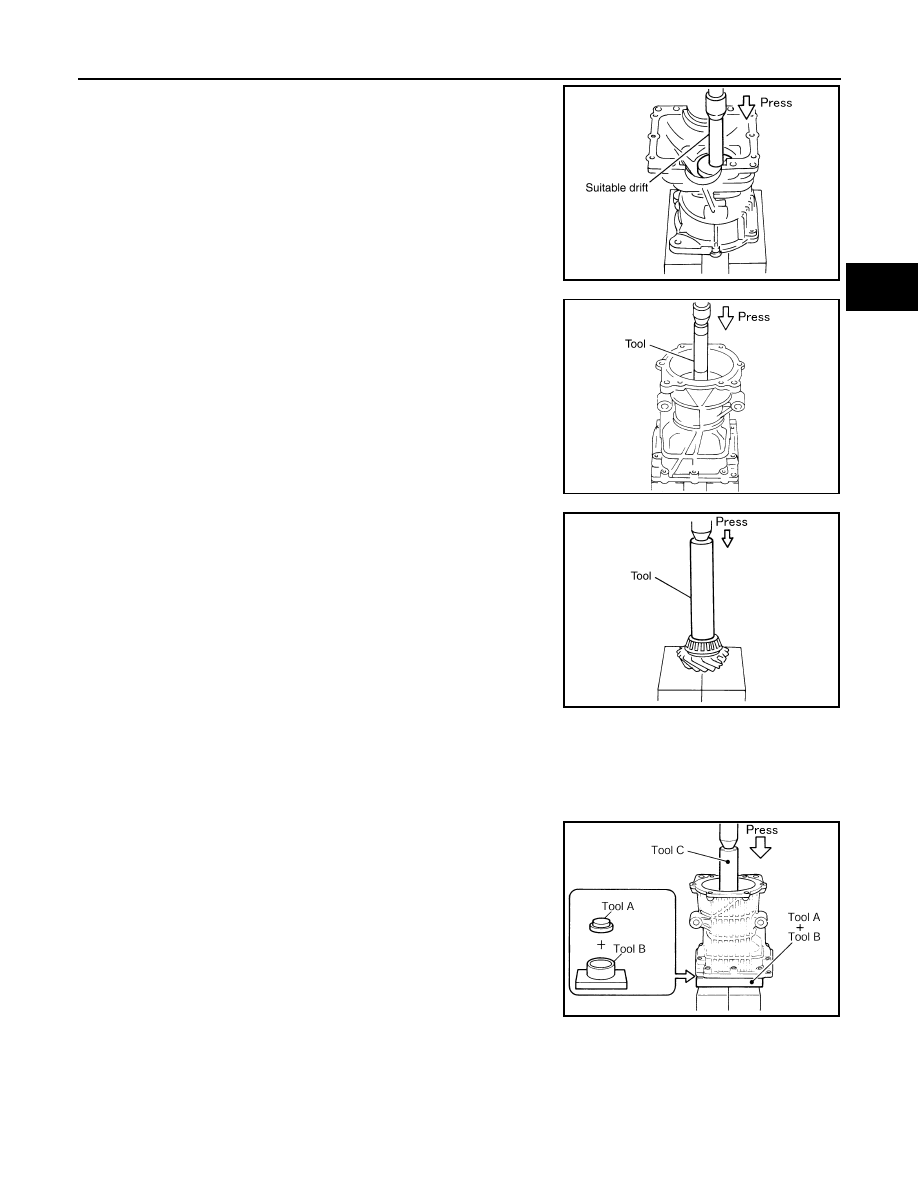
1.
Install a drive pinion adjusting shim of the same thickness as
was installed prior to disassembly. Press pinion rear bearing
outer race into gear carrier, using the suitable drift.
CAUTION:
• At first, using a hammer, tap bearing outer race until it
becomes flush to gear carrier.
• Never reuse pinion rear bearing outer race.
2.
Press pinion front bearing outer race into gear carrier, using the
drift (SST: 33230000).
CAUTION:
• At first, using a hammer, tap bearing outer race until it
becomes flush to gear carrier.
• Never reuse pinion front bearing outer race.
3.
Press pinion rear bearing inner race to drive pinion, using the
drift (SST: ST23860000).
CAUTION:
Never reuse pinion rear bearing inner race.
4.
After checking and adjusting the tooth contact and backlash of the hypoid gear following the procedure
below.
a.
Apply gear oil to the pinion rear bearing, and assemble the drive pinion to the gear carrier.
CAUTION:
Never assemble a collapsible spacer.
b.
Apply gear oil to pinion front bearing, and assemble pinion front
bearing inner race to drive pinion. Using the drifts and stand,
press pinion front bearing inner race to drive pinion as far as
drive pinion nut can be tightened.
CAUTION:
Never reuse pinion front bearing inner race.
c.
Temporarily tighten removed drive pinion nut to drive pinion.
NOTE:
Use removed drive pinion nut only for the preload measurement.
PDIA0898E
PDIA0067E
PDIA0068E
A
: Drift (commercial service tool)
B
: Stand (commercial service tool)
C
: Drift (SST: ST23860000)
PDIA0057E
DLN-144
< DISASSEMBLY AND ASSEMBLY >
[REAR FINAL DRIVE: R145]
DRIVE PINION
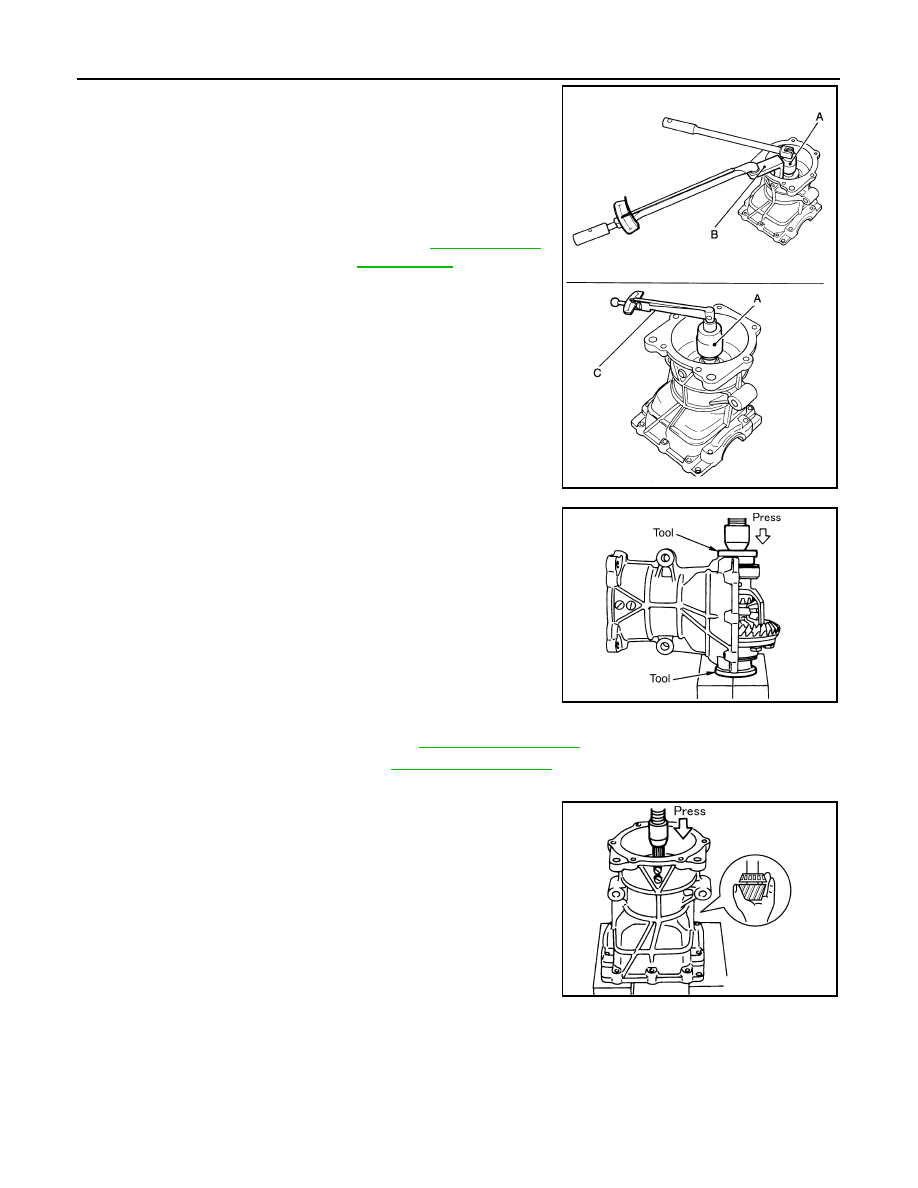
d.
Fit the drive pinion socket (A) (SST: KV38108500) onto the drive
pinion spline. Using the pinion nut wrench (B) (SST:
KV38108400), tighten drive pinion nut to the specified preload
torque.
CAUTION:
Drive pinion nut is tightened with no collapsible spacer. Be
careful not to overtighten it. While measuring the preload,
tighten it by 5
°
to 10
°
.
e.
Apply gear oil to side bearings, and install new side bearing
adjusting shims with the same thickness or re-install the old
ones to the same mounting position they were in prior to disas-
sembly. Set the drifts (commercial service tool) to the right and
left. Install differential case assembly to gear carrier.
CAUTION:
• The drifts shall be placed on the center of the adjusting
shims.
• The pressure shall be as low as possible to install gear
carrier assembly to differential assembly. The maximum
pressure shall be 10 kN (1 ton, 1.0 Imp ton).
• If adjusting shims are installed by tapping, gear carrier
may be damaged. Avoid tapping.
f.
Check and adjust the tooth contact. Refer to
g.
Check and adjust the backlash. Refer to
h.
Remove dummy cover set, and remove differential case assembly.
i.
Remove drive pinion nut and press drive pinion assembly out of
gear carrier.
CAUTION:
Never drop drive pinion assembly.
j.
Remove pinion front bearing inner race.
C
: Preload gauge (SST: ST3127S000)
Standard
Pinion bearing preload
: Refer to
.
JSDIA0266ZZ
PDIA0064E
PDIA0445E
Нет комментариевНе стесняйтесь поделиться с нами вашим ценным мнением.
Текст