Nissan Qashqai (2007-2010). Manual — part 966
INT-24
< ON-VEHICLE REPAIR >
LUGGAGE FLOOR TRIM
LUGGAGE FLOOR TRIM
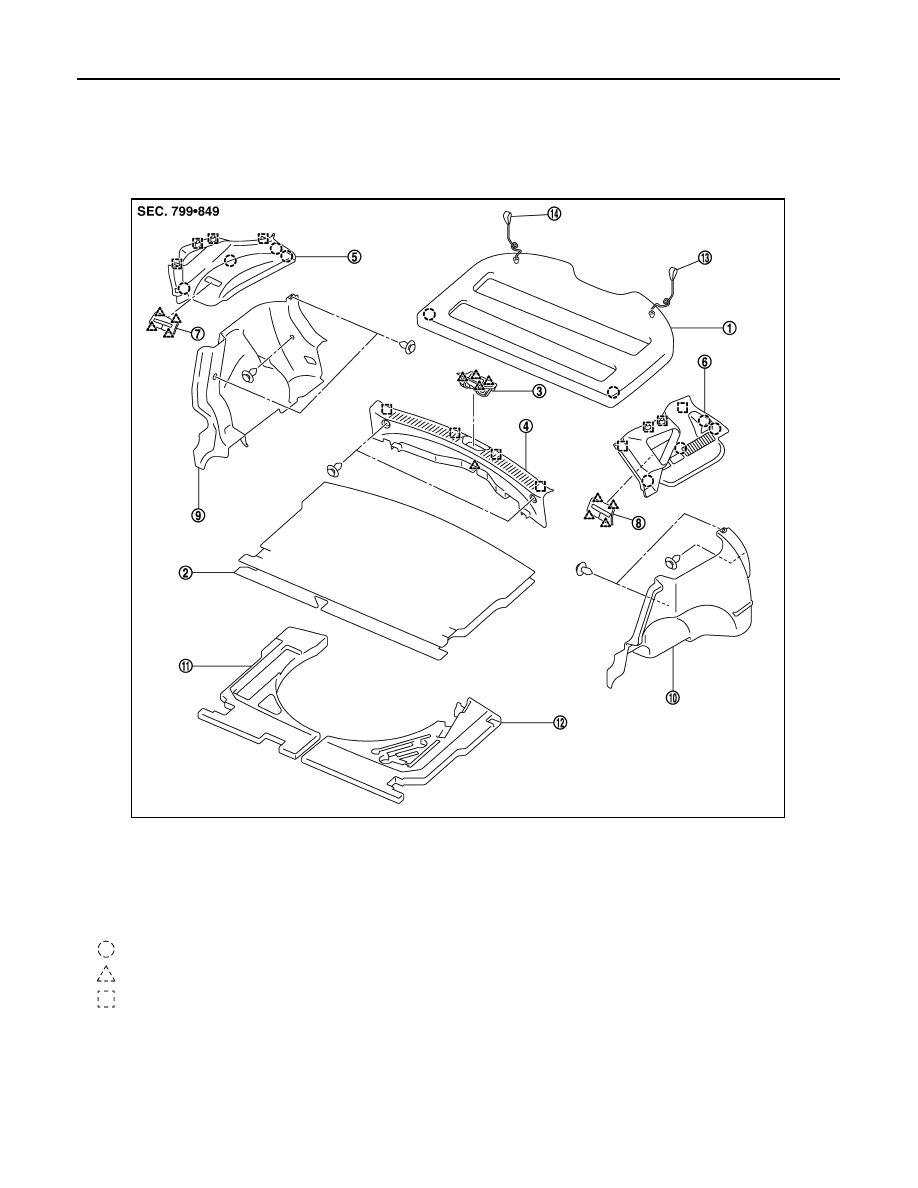
Exploded View
INFOID:0000000000892106
TRUNK ROOM TRIM
Removal and Installation
INFOID:0000000000892107
REMOVAL
LUGGAGE REAR PLATE
1.
Fully open back door.
1.
Parcel shelf
2.
Luggage floor carpet
3.
Luggage rear plate cap
4.
Luggage rear plate
5.
Rear pillar finisher (RH)
6.
Rear pillar finisher (LH)
7.
Rear seat belt escutcheon (RH)
8.
Rear seat belt escutcheon (LH)
9.
Luggage side lower finisher (RH)
10. Luggage side lower finisher (LH)
11. Luggage floor spacer (RH)
12. Luggage floor spacer (LH)
13. Hook rope (LH)
14. Hook rope (RH)
: Clip
: Metal
: Metal clip
JMJIA0234ZZ
LUGGAGE FLOOR TRIM
INT-25
< ON-VEHICLE REPAIR >
C
D
E
F
G
H
I
K
L
M
A
B
INT
N
O
P
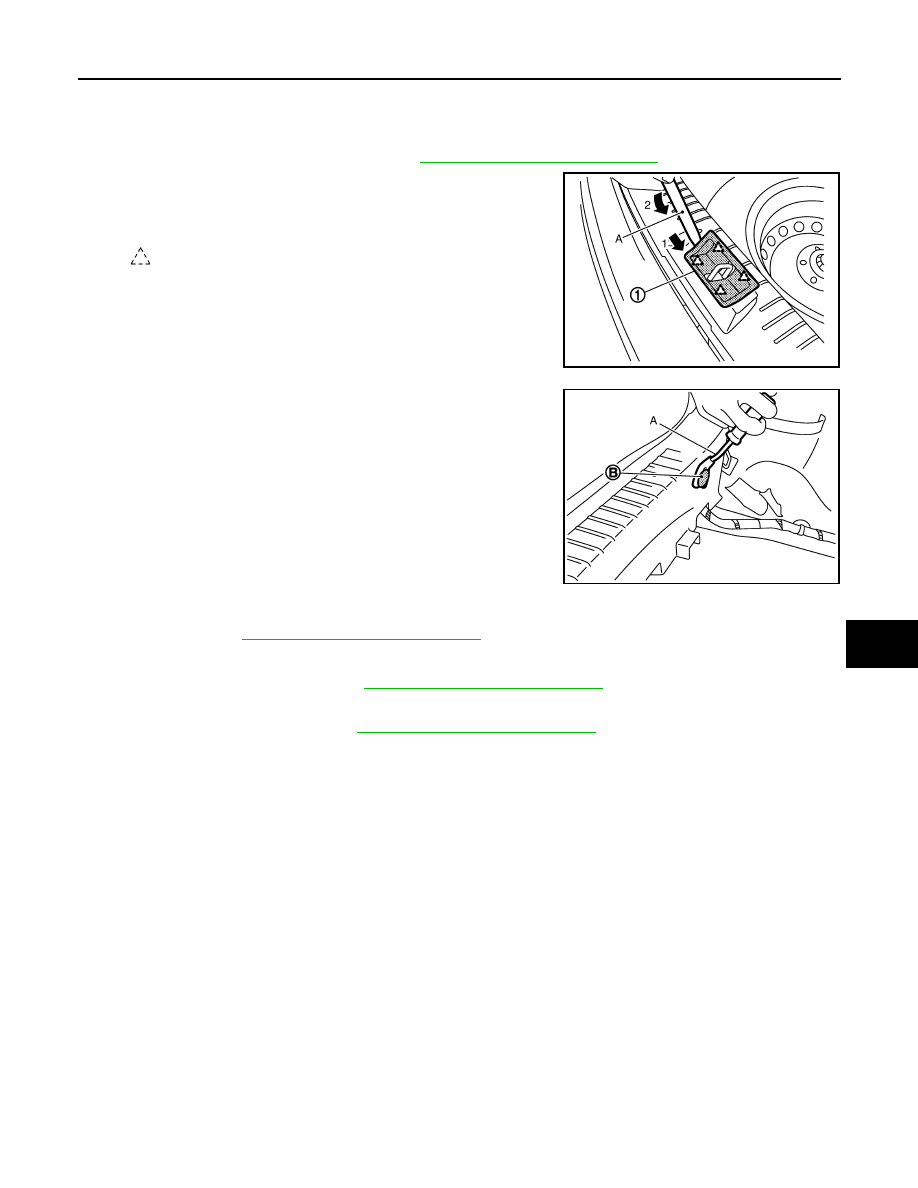
2.
Remove parcel shelf.
3.
Remove luggage floor carpet.
4.
Remove back door welt.
5.
Remove rear pillar finisher (LH/RH).Refer to
INT-14, "Removal and Installation"
.
6.
Insert remover tool (A) between luggage rear plate and luggage
rear plate cap (1) to disengage pawls and then remove luggage
rear plate cap.
7.
Remove both clips (B) on luggage rear plate using a remover
tool (A).
8.
Hold both sides of rear plate, pull upwards to remove.
REAR PILLAR FINISHER
Refer to body side trim
INT-14, "Removal and Installation"
.
LUGGAGE SIDE LOWER FINISHER
1.
Remove luggage rear plate.Refer to
INT-24, "Removal and Installation"
2.
Remove luggage floor carpet.
3.
Remove rear pillar finisher.Refer to
INT-14, "Removal and Installation"
4.
Remove clips on luggage side lower finisher (LH/RH) by using remover tool.
5.
Remove luggage side lower finisher (left/right).
INSTALLATION
Install in the reverse order of removal.
: Pawl
JMJIA0235ZZ
JMJIA0236ZZ
INT-26
< ON-VEHICLE REPAIR >
BACK DOOR TRIM
BACK DOOR TRIM
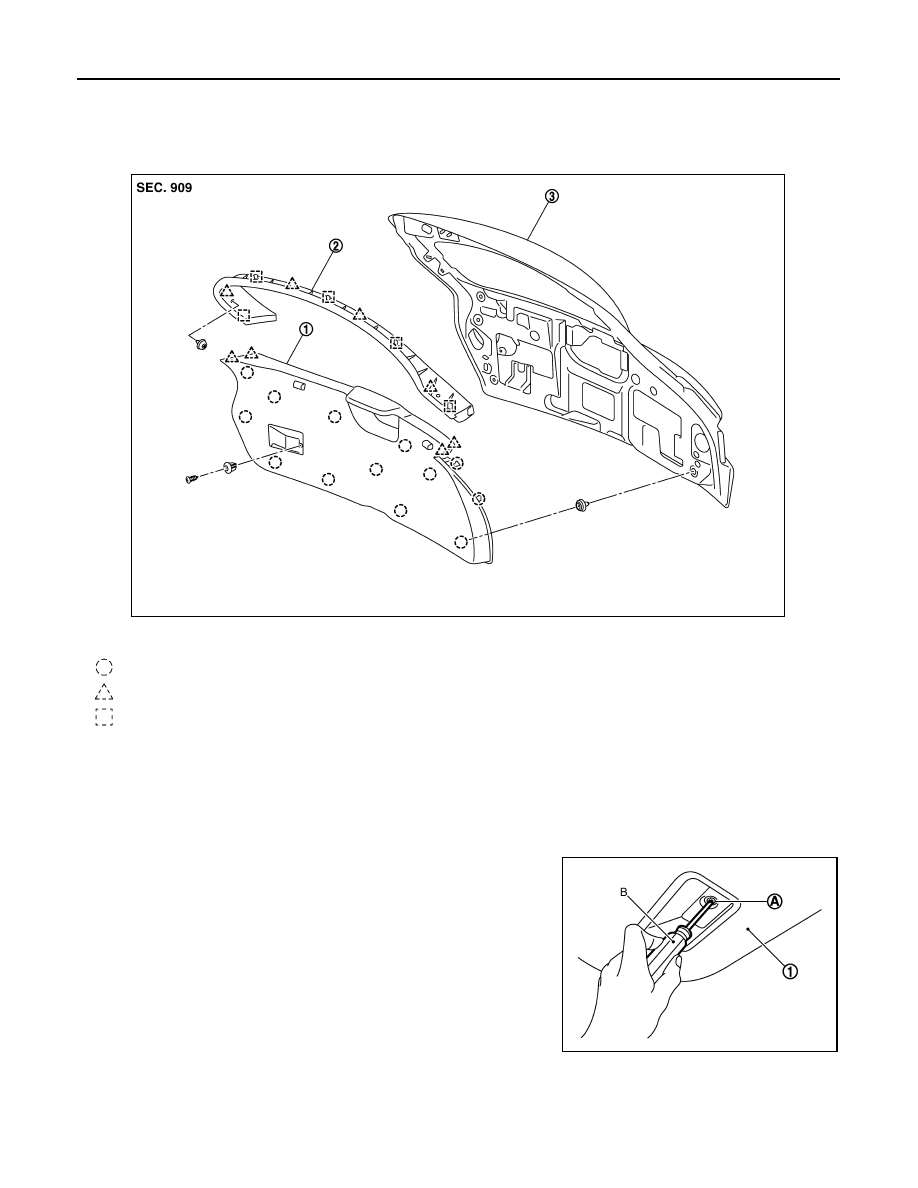
Exploded View
INFOID:0000000000892108
Removal and Installation
INFOID:0000000000892109
REMOVAL
BACK DOOR TRIM
1.
Fully open back door.
2.
Remove screw tap (A) located in back door trim finisher lower
(1) with screwdriver (B).
1.
Back door trim finisher lower
2.
Back door trim finisher upper
3.
Back door assembly
: Clip
: Pawl
: Metal clip
JMJIA0231ZZ
JMJIA0233ZZ
BACK DOOR TRIM
INT-27
< ON-VEHICLE REPAIR >
C
D
E
F
G
H
I
K
L
M
A
B
INT
N
O
P
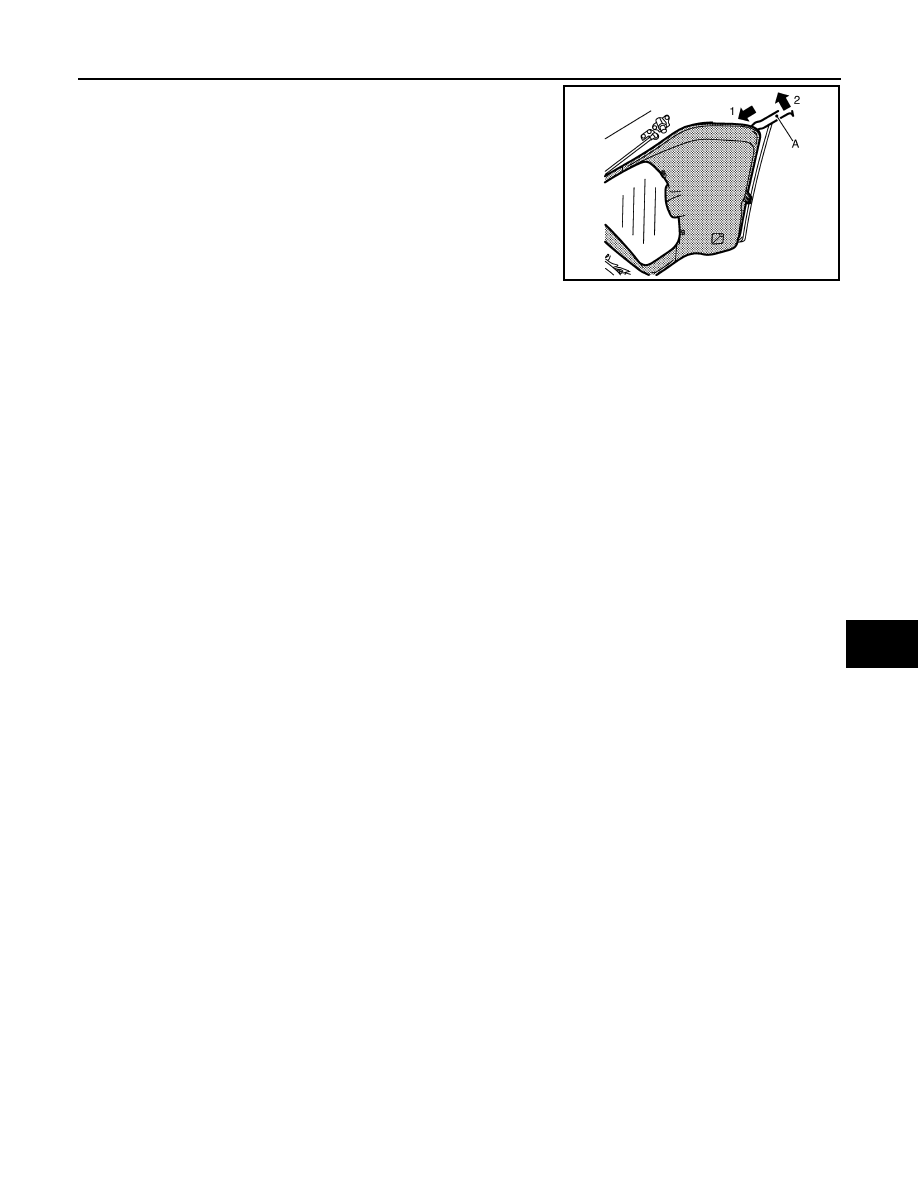
3.
Insert remover tool (A) between back door trim finisher lower
and back door panel to disengage clips.Starting by the lower
downwards and works around the edges and up to the sides.
4.
Pull downwards carefully the back trim finisher to disengage center clips and remove back door trim fin-
isher.
5.
Remove back door trim finisher upper.
INSTALLATION
Install in the reverse order of removal.
CAUTION:
When installing door finisher, check that clips are securely fitted in panel holes on body, and then
press them in.
JMJIA0232ZZ
Нет комментариевНе стесняйтесь поделиться с нами вашим ценным мнением.
Текст