Nissan Qashqai (2007-2010). Manual — part 964
INT-16
< ON-VEHICLE REPAIR >
BODY SIDE TRIM
2.
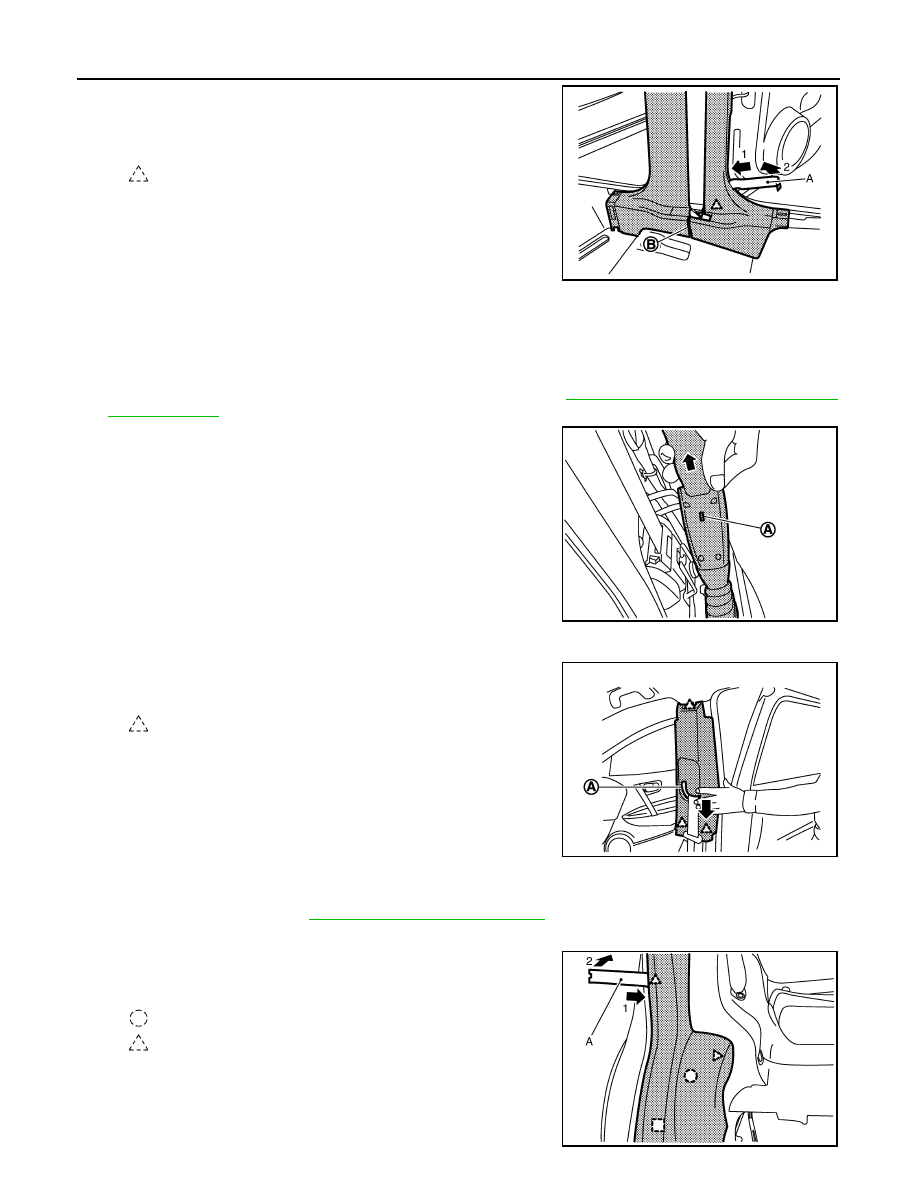
Remove front seat belt through slit (B).
3.
Insert remover tool (A) between center pillar lower garnish and
body side panel to disengage pawls.
4.
Remove center pillar lower garnish.
CENTER PILLAR UPPER GARNISH
1.
Remove center pillar lower garnish.
2.
Remove front seat belt floor anchor bolt (passenger side).Refer to
SB-8, "SEAT BELT BUCKLE : Removal
3.
Remove seat belt (driver side) by inserting a flat bladed screw-
driver into hole (A), press while pulling upwards the seat belt as
shown by the arrow in the figure beside.
4.
Slide center pillar upper garnish downwards to release hook from emboss in rail roof.
5.
Remove seat belt tongue through slit (A) and then remove cen-
ter pillar upper garnish.
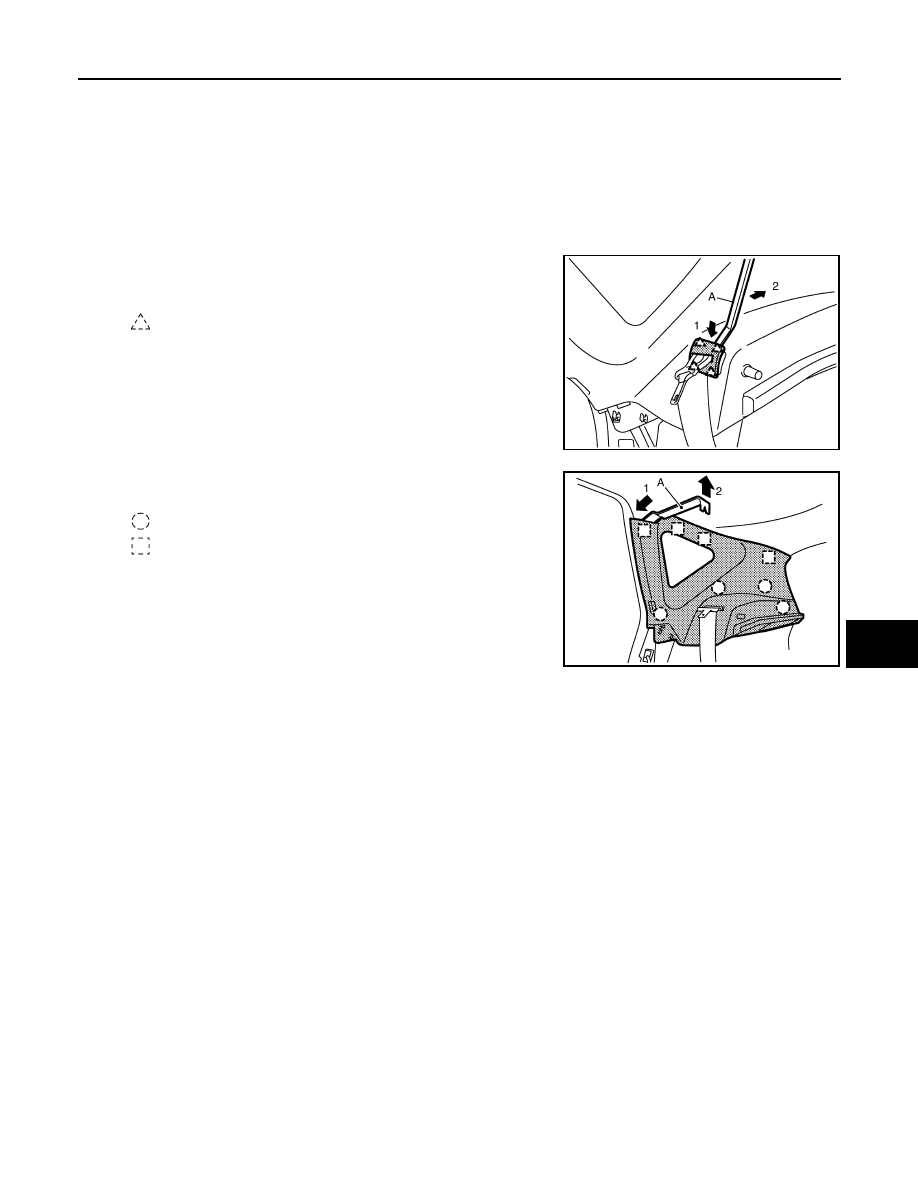
LUGGAGE SIDE LOWER FINISHER (FRONT)
1.
Remove rear kicking plate inner.
2.
Remove rear seats. Refer to
SE-31, "Removal and Installation"
3.
Remove rear body side welt.
4.
Insert remover tool (A) between luggage side lower finisher
(front) and body side panel to disengage clips and pawls.
: Pawl
JMJIA0243ZZ
JMJIA0264ZZ
: Pawl
JMJIA0244ZZ
: Clip
: Pawl
JMJIA0245ZZ
BODY SIDE TRIM
INT-17
< ON-VEHICLE REPAIR >
C
D
E
F
G
H
I
K
L
M
A
B
INT
N
O
P
5.
Pull upwards and forwards to remove clips and pawls from body and rear pillar finisher.
6.
Remove luggage side lower finisher (front).
REAR PILLAR FINISHER
1.
Remove rear body side and back door welts.
2.
Remove luggage side lower finisher (front).
3.
Remove rear seats.
4.
Disconnect the rear outer seat belt anchor.
5.
Remove the rear seat belt escutcheon from rear pillar finisher
using remover tool (A).
6.
Disengage clips using remover tool (A).
7.
Remove rear seat belt through the hole in rear pillar finisher.
8.
Carefully pull rear pillar finisher backwards and disconnect harness connector for luggage room lamp
(LH).
9.
Remove rear pillar finisher (LH/RH).
CAUTION:
Be careful not to damage the body while removing side trim.
INSTALLATION
Install in the reverse order of removal.
CAUTION:
Check that clips are securely fitted in panel holes on body when installing, and then press them in.
: Pawl
JMJIA0265ZZ
: Clip
: Metal clip
JMJIA0246ZZ
INT-18
< ON-VEHICLE REPAIR >
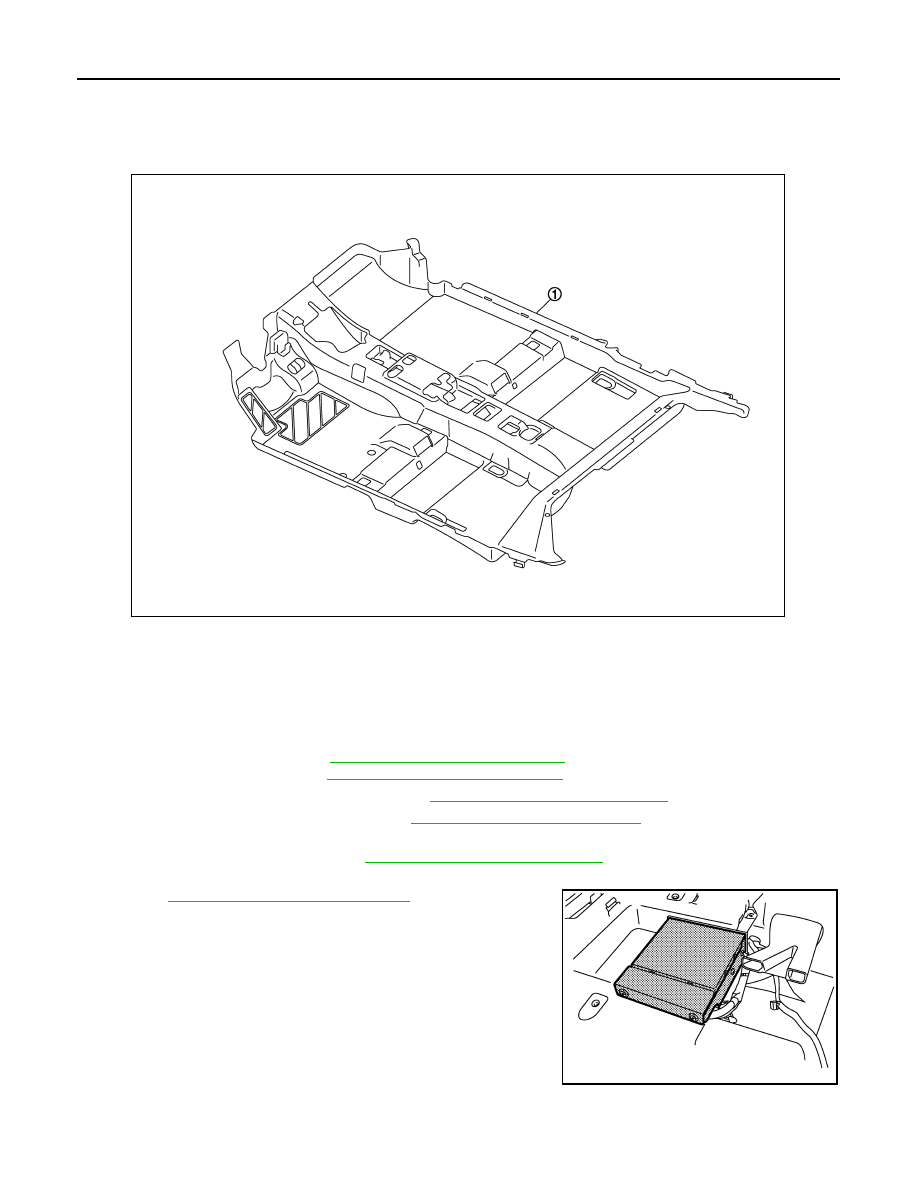
FLOOR TRIM
FLOOR TRIM
Exploded View
INFOID:0000000000892102
Removal and Installation
INFOID:0000000000892103
REMOVAL
1.
Remove front seat (LH/RH) and rear seat cushion.
• Front seat assembly. Refer to
SE-24, "Removal and Installation"
.
• Rear seat assembly. Refer to
SE-31, "Removal and Installation"
2.
Remove accelerator pedal assembly. Refer to
ACC-3, "Removal and Installation"
.
3.
Remove center console assembly. Refer to
IP-18, "Removal and Installation"
4.
Remove dash side finisher (LH/RH), front kicking plate inner (LH/RH), center pillar lower garnish (LH/RH),
and rear kicking plate inner. Refer to
INT-14, "Removal and Installation"
.
5.
Remove navigation control unit.
Refer to
AV-201, "Removal and Installation"
.
1.
Carpet assy floor
JMJIA0237ZZ
JMJIA0238ZZ
FLOOR TRIM
INT-19
< ON-VEHICLE REPAIR >
C
D
E
F
G
H
I
K
L
M
A
B
INT
N
O
P
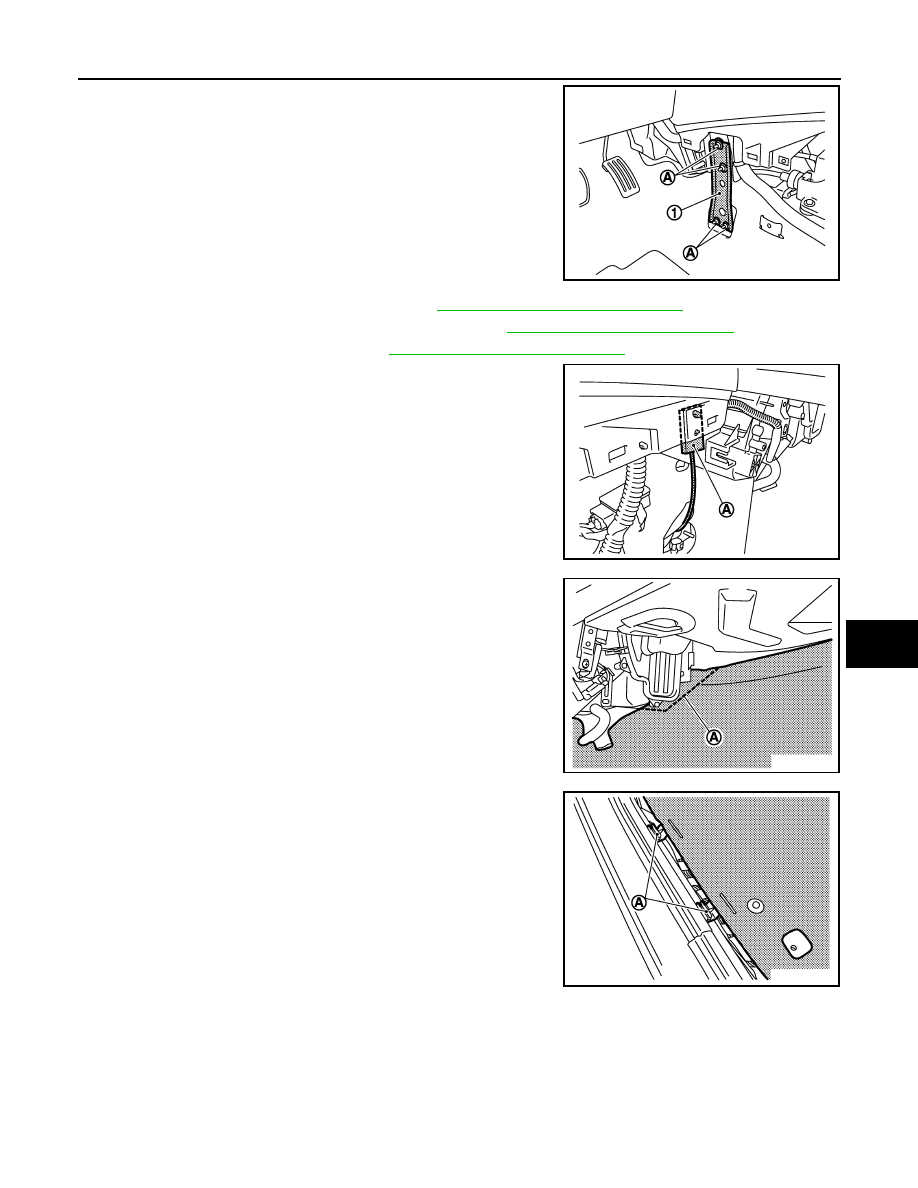
6.
Remove console bracket mounting nuts (A), and then remove
console bracket(1).
7.
Remove A/T control device assembly. Refer to
TM-326, "Removal and Installation"
8.
Remove parking brake control device assembly. Refer to
PB-5, "Removal and Installation"
9.
Remove diagnosis sensor unit. Refer to
SR-16, "Removal and Installation"
.
10. Disconnect GPS antenna cable connector (A). (with NAVI)
11. Cut floor carpet front side (Portion A) using cutter knife.
12. Remove floor carpet from fixing clips (A).
13. Remove floor carpet.
INSTALLATION
Install in the reverse order of removal.
CAUTION:
• When replacing the floor carpet with a new one, install by cutting the front end like the old one. After
that, ensure matching quality between floor trim and instrument lower cover, etc. by tucking.
• Joints both new floor carpet and old front carpet ends by using a tucker.
JMJIA0476ZZ
JMJIA0477ZZ
JMJIA0478ZZ
JMJIA0479ZZ
Нет комментариевНе стесняйтесь поделиться с нами вашим ценным мнением.
Текст