Nissan Qashqai (2007-2010). Manual — part 629
DRIVE PINION
DLN-89
< DISASSEMBLY AND ASSEMBLY >
[TRANSFER: TY30A]
C
E
F
G
H
I
J
K
L
M
A
B
DLN
N
O
P
1.
Remove adapter case. Refer to
2.
Remove ring gear shaft assembly. Refer to
3.
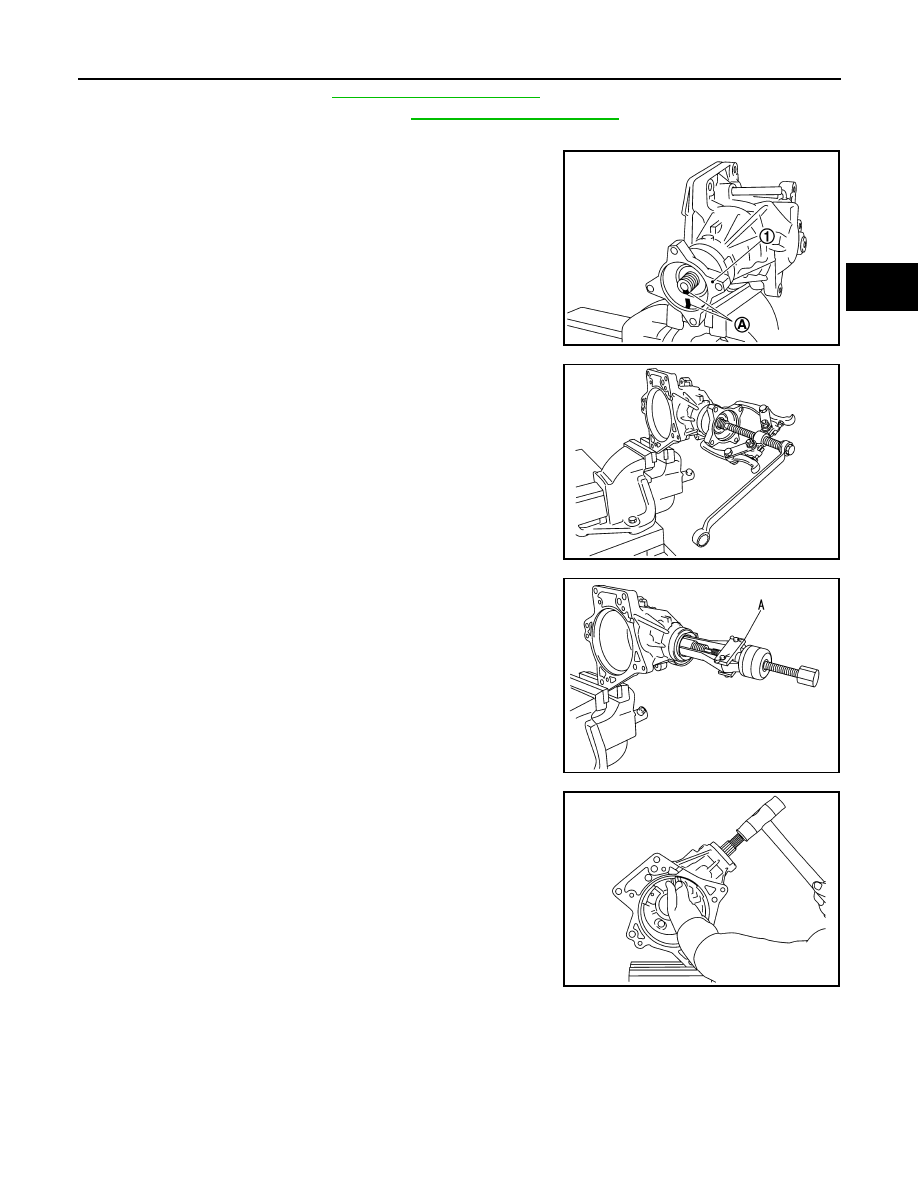
Remove lock nut from the drive pinion.
4.
Put matching marks (A) on screw ends of companion flange (1)
and drive pinion.
CAUTION:
Use paint to avoid scratching the surface.
5.
Remove companion flange from drive pinion with a puller.
6.
Remove drive pinion oil seal from the transfer case with a puller
(A) (SST: KV381054S0).
CAUTION:
Never damage transfer case.
7.
Remove drive pinion assembly from transfer case while tapping
the drive pinion lightly with a plastic hammer.
CAUTION:
Never drop the drive pinion assembly.
8.
Remove collapsible spacer from the drive pinion.
9.
Remove inner race of drive pinion bearing (rear side) from trans-
fer case.
SDIA3084J
SDIA3085J
SDIA3089J
SDIA3086J
DLN-90
< DISASSEMBLY AND ASSEMBLY >
[TRANSFER: TY30A]
DRIVE PINION
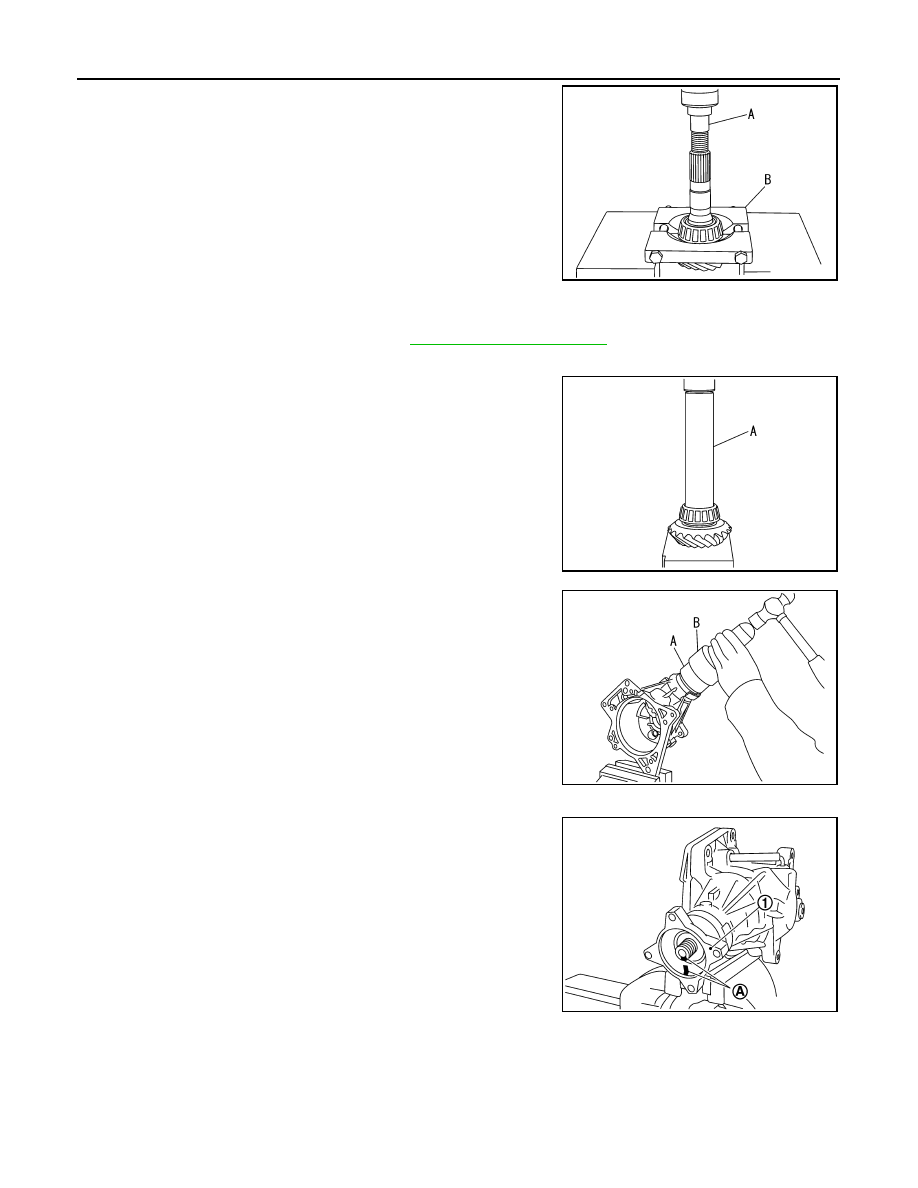
10. Remove inner race of drive pinion bearing (front side) from drive
pinion with a drift (A) (SST: ST33052000) and replacer (B) (SST:
ST22730000).
11. Remove drive pinion adjusting shim from the drive pinion.
CVT : Assembly
INFOID:0000000001060154
1.
Select drive pinion adjusting shim. Refer to
2.
Install selected drive pinion adjusting shim to drive pinion.
3.
Install inner race of drive pinion bearing (front side) to drive pin-
ion with a drift (A) (SST: ST23860000).
CAUTION:
• Never reuse drive pinion bearing (front side).
• Apply gear oil to the drive pinion bearing (front side).
4.
Assemble the inner race of drive pinion bearing (rear side) into
the transfer case.
CAUTION:
• Never reuse drive pinion bearing (rear side).
• Apply gear oil to the drive pinion bearing (rear side).
5.
Install drive pinion oil seal to transfer case with drifts so that it
becomes flush with case end surface.
CAUTION:
• Never reuse oil seal.
• Apply multi-purpose grease onto oil seal lips, and gear oil
onto the circumference.
6.
Assemble a collapsible spacer onto the drive pinion.
CAUTION:
Never reuse the collapsible spacer.
7.
Assemble drive pinion assembly into the transfer case, and then
install companion flange (1) to drive pinion.
NOTE:
Align matching marks (A) on the thread edge of companion
flange and drive pinion and install companion flange if drive pin-
ion is reused.
SDIA3087J
SDIA3094J
A
: Drift (SST: ST27861000)
B
: Drift (SST: ST30720000)
SDIA3093J
SDIA3084J
DRIVE PINION
DLN-91
< DISASSEMBLY AND ASSEMBLY >
[TRANSFER: TY30A]
C
E
F
G
H
I
J
K
L
M
A
B
DLN
N
O
P
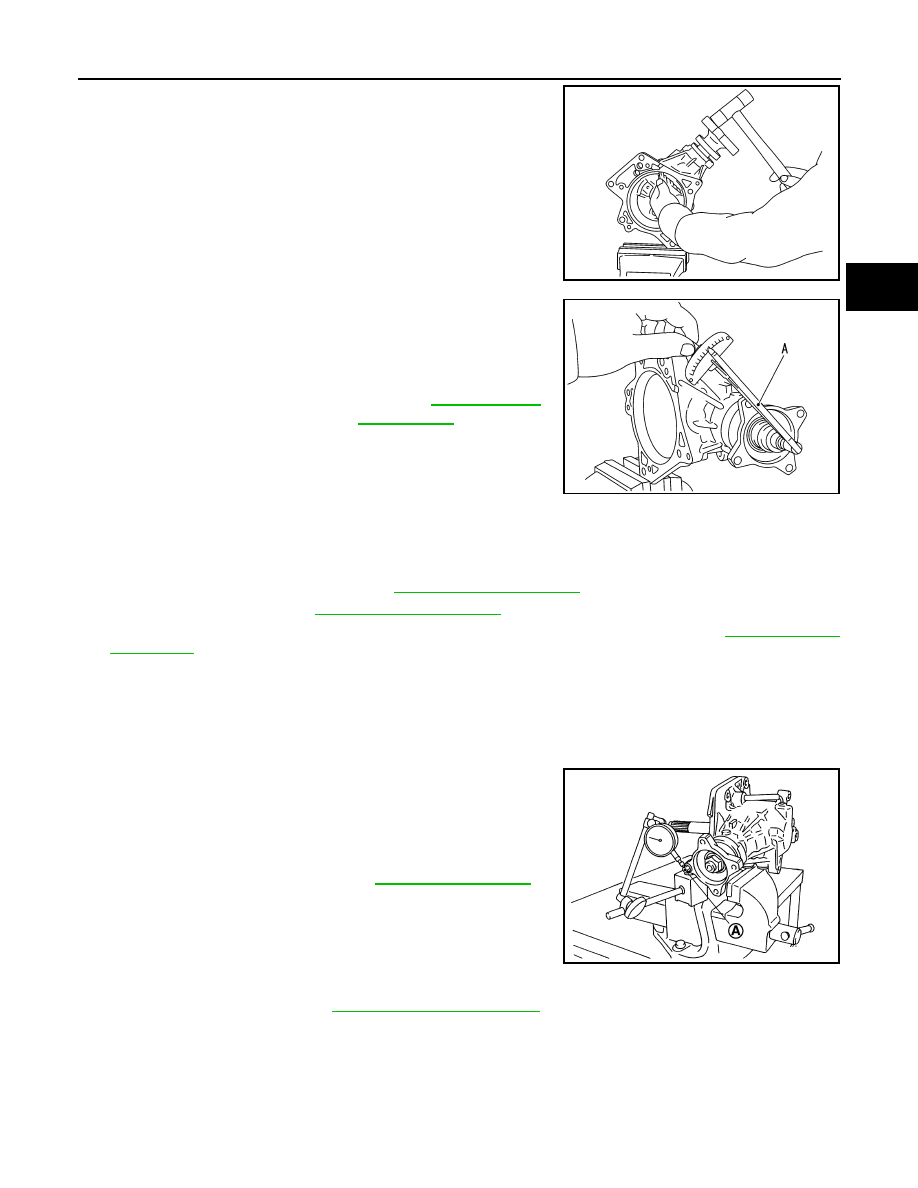
8.
Tap the companion flange with a plastic hammer as far as the
lock nut can be tightened.
CAUTION:
Never damage drive pinion oil seal.
9.
Apply anti-corrosive oil to the thread and seat of the lock nut,
and temporarily tighten lock nut to the drive pinion.
CAUTION:
Never reuse lock nut.
10. Tighten lock nut within the specified torque range with a preload
gauge (A) (SST: ST3127S000) so that the drive pinion bearing
preload is within standard.
CAUTION:
• Start the tightening of lock nut from lower limit of the
specified torque. Check the preload every 5
°
to 10
°
while
tightening the lock nut.
• Replace the collapsible spacer and tighten it again to adjust if preload exceeds the specified
value. Never loosen lock nut to adjust preload.
• After adjustment, rotate the drive pinion back and forth from 2 to 3 times to check for unusual
noise, sticking, binding, and so on.
11. Install ring gear shaft assembly. Refer to
.
12. Install adapter case. Refer to
.
13. Check backlash, tooth contact, total preload and companion flange runout. Refer to
.
CAUTION:
Measure the total preload without the adapter case oil seal.
CVT : Adjustment
INFOID:0000000001060155
BACKLASH
1.
Install the bolt (A) to the companion flange.
2.
Fit a dial indicator onto the bolt.
3.
Measure the circumference backlash of the companion flange.
Disassemble the transfer assembly to check and adjust each
part if outside the standard.
TOOTH CONTACT
1.
Remove adapter case. Refer to
SDIA3095J
Standard
Drive pinion bearing preload
: Refer to
SDIA3072J
Standard
Backlash
: Refer to
SDIA3065J
DLN-92
< DISASSEMBLY AND ASSEMBLY >
[TRANSFER: TY30A]
DRIVE PINION
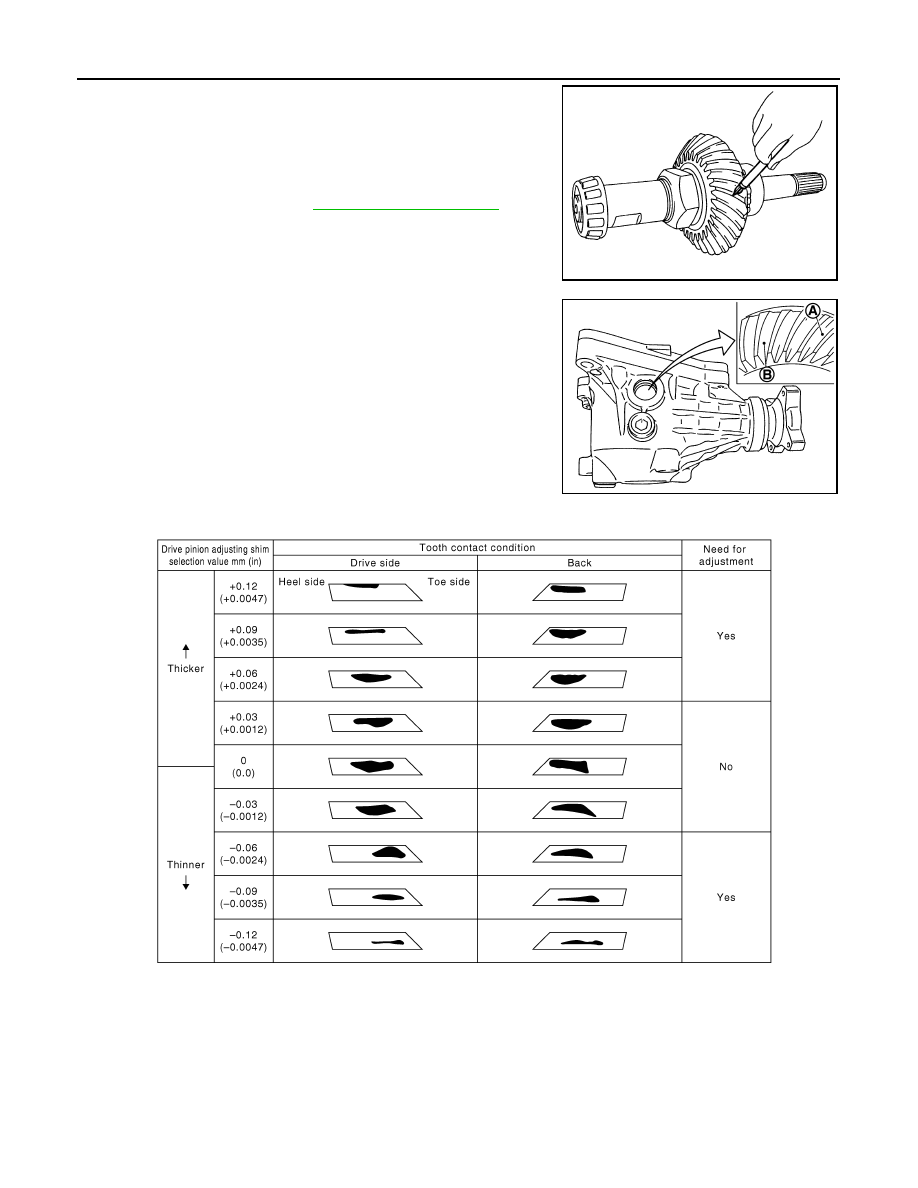
2.
Remove ring gear shaft assembly from transfer case. Then
apply red lead onto the ring gear.
CAUTION:
Apply red lead to both faces of 3 to 4 gears at 4 locations
evenly spaced on the ring gear.
3.
Assemble the ring gear shaft assembly to the transfer case.
4.
Install adapter case. Refer to
.
5.
Remove plug on the lower side of the transfer case.
6.
Rotate the companion flange back and forth several times. Then
check drive pinion to ring gear tooth contact by viewing from the
tooth contact test hole. (A: Drive side, B: Reverse side)
Tooth Contact Judgment Guide
SDIA3066J
SDIA3067J
JSDIA0213GB
Нет комментариевНе стесняйтесь поделиться с нами вашим ценным мнением.
Текст