Subaru Impreza 3 / Impreza WRX / Impreza WRX STI. Service manual — part 49
EC(STI)-10
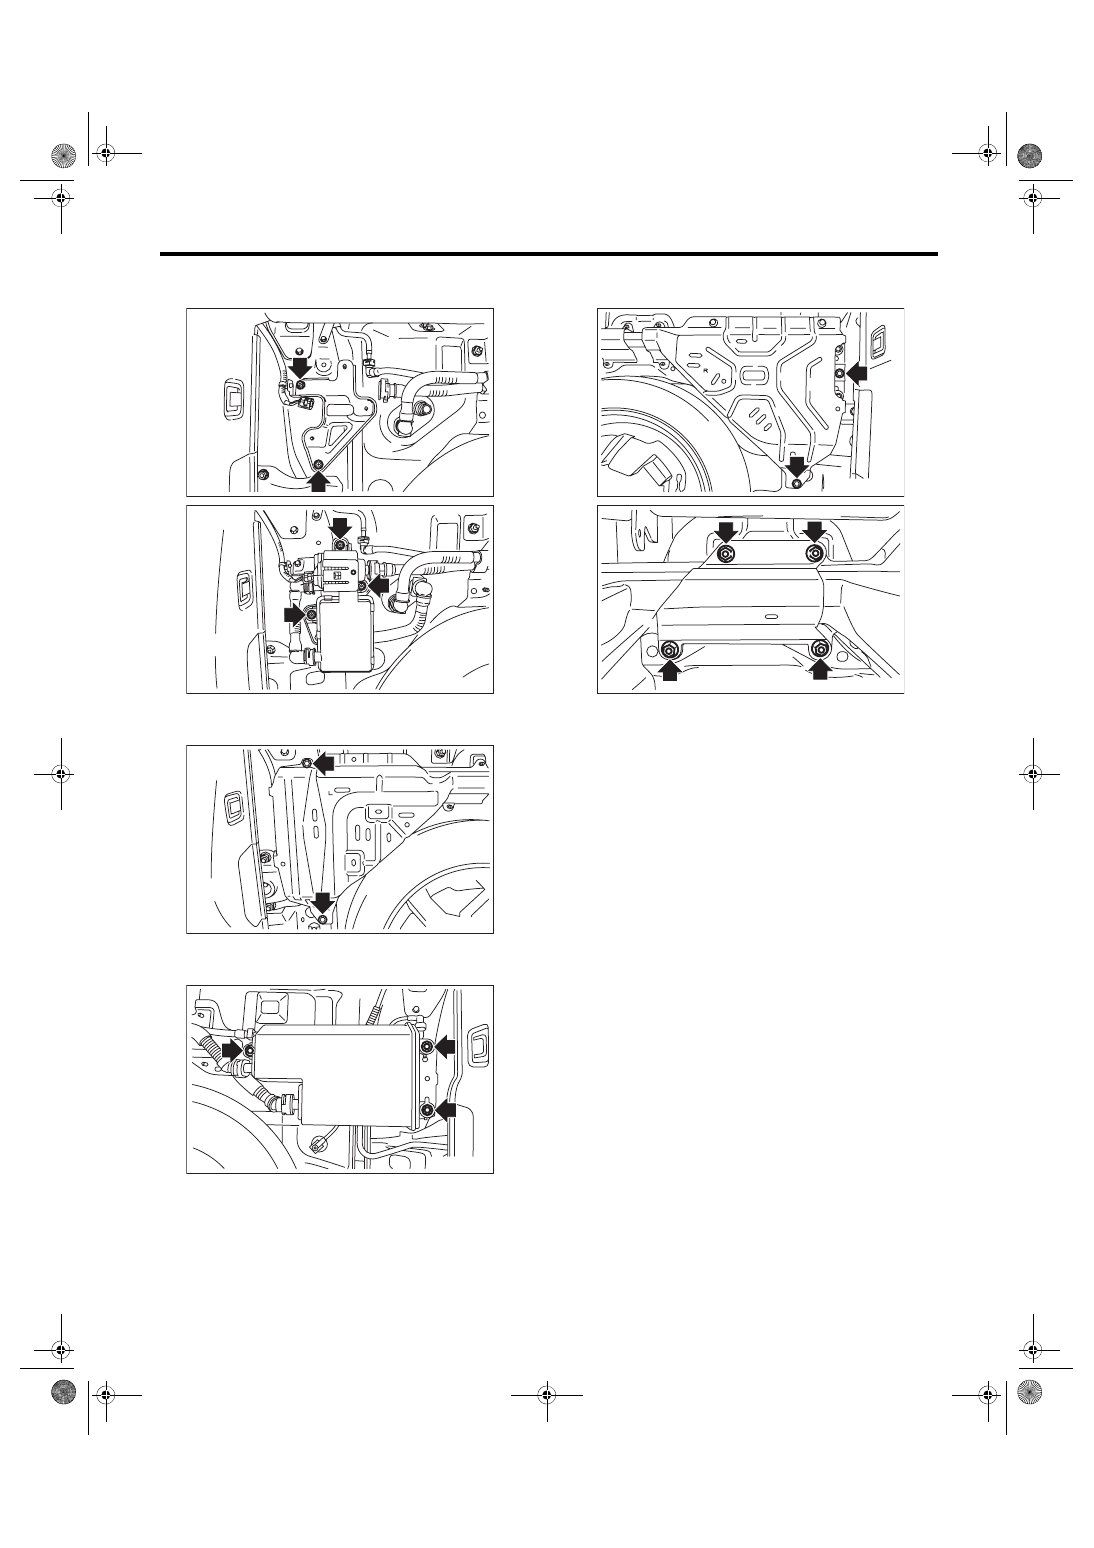
Canister
EMISSION CONTROL (AUX. EMISSION CONTROL DEVICES)
Tightening torque:
7.5 N·m (0.8 kgf-m, 5.5 ft-lb)
Tightening torque:
18 N·m (1.8 kgf-m, 13.3 ft-lb)
Tightening torque:
8 N·m (0.8 kgf-m, 5.9 ft-lb)
Tightening torque:
18 N·m (1.8 kgf-m, 13.3 ft-lb)
C: INSPECTION
1) Check that the canister and leak check valve as-
sembly have no deformation, cracks or other dam-
ages.
2) Check that the tube has no cracks, damage or
loose part.
EC-02982
EC-02983
EC-02984
EC-02985
EC-02986
EC-02987
EC(STI)-11
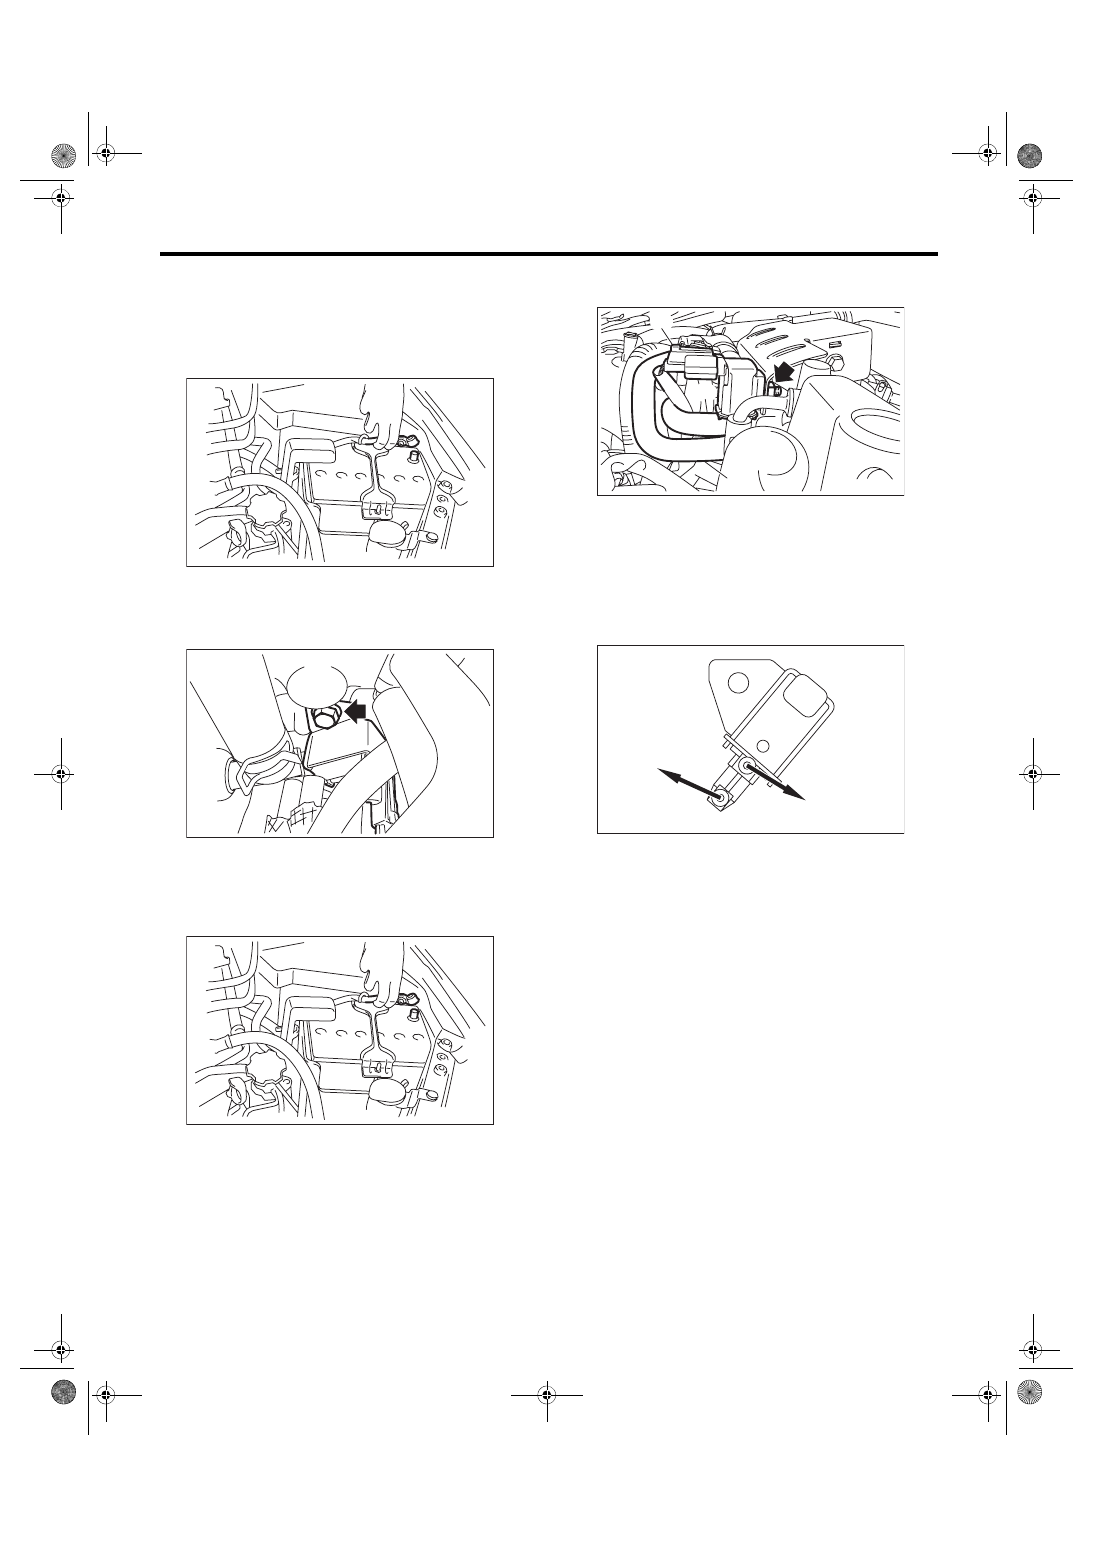
Purge Control Solenoid Valve
EMISSION CONTROL (AUX. EMISSION CONTROL DEVICES)
5. Purge Control Solenoid Valve
A: REMOVAL
1. PURGE CONTROL SOLENOID VALVE 1
1) Disconnect the ground cable from battery.
2) Remove the bolts which secure purge control
solenoid valve 1 to the intake manifold, and discon-
nect the connector from the purge control solenoid
valve 1.
3) Disconnect the vacuum hose and the vacuum
control hose from purge control solenoid valve 1.
2. PURGE CONTROL SOLENOID VALVE 2
1) Disconnect the ground cable from battery.
2) Disconnect connector (A), vacuum hose (B), and
vacuum control hose (C) from purge control sole-
noid valve 2.
3) Remove purge control solenoid valve 2 from the
solenoid valve bracket.
B: INSTALLATION
1. PURGE CONTROL SOLENOID VALVE 1
Install in the reverse order of removal.
NOTE:
Connect the vacuum hose and vacuum control
hose as shown in the figure.
Tightening torque:
19 N·m (1.9 kgf-m, 14.0 ft-lb)
IN-00203
EC-03005
IN-00203
(a) To intake manifold
(b) To branching pipe → fuel pipe
EC-03006
(A)
(B)
(C)
EC-02485
(b)
(a)
EC(STI)-12
Purge Control Solenoid Valve
EMISSION CONTROL (AUX. EMISSION CONTROL DEVICES)
2. PURGE CONTROL SOLENOID VALVE 2
Install in the reverse order of removal.
NOTE:
Connect the vacuum hose and vacuum control
hose as shown in the figure.
Tightening torque:
6.4 N·m (0.7 kgf-m, 4.7 ft-lb)
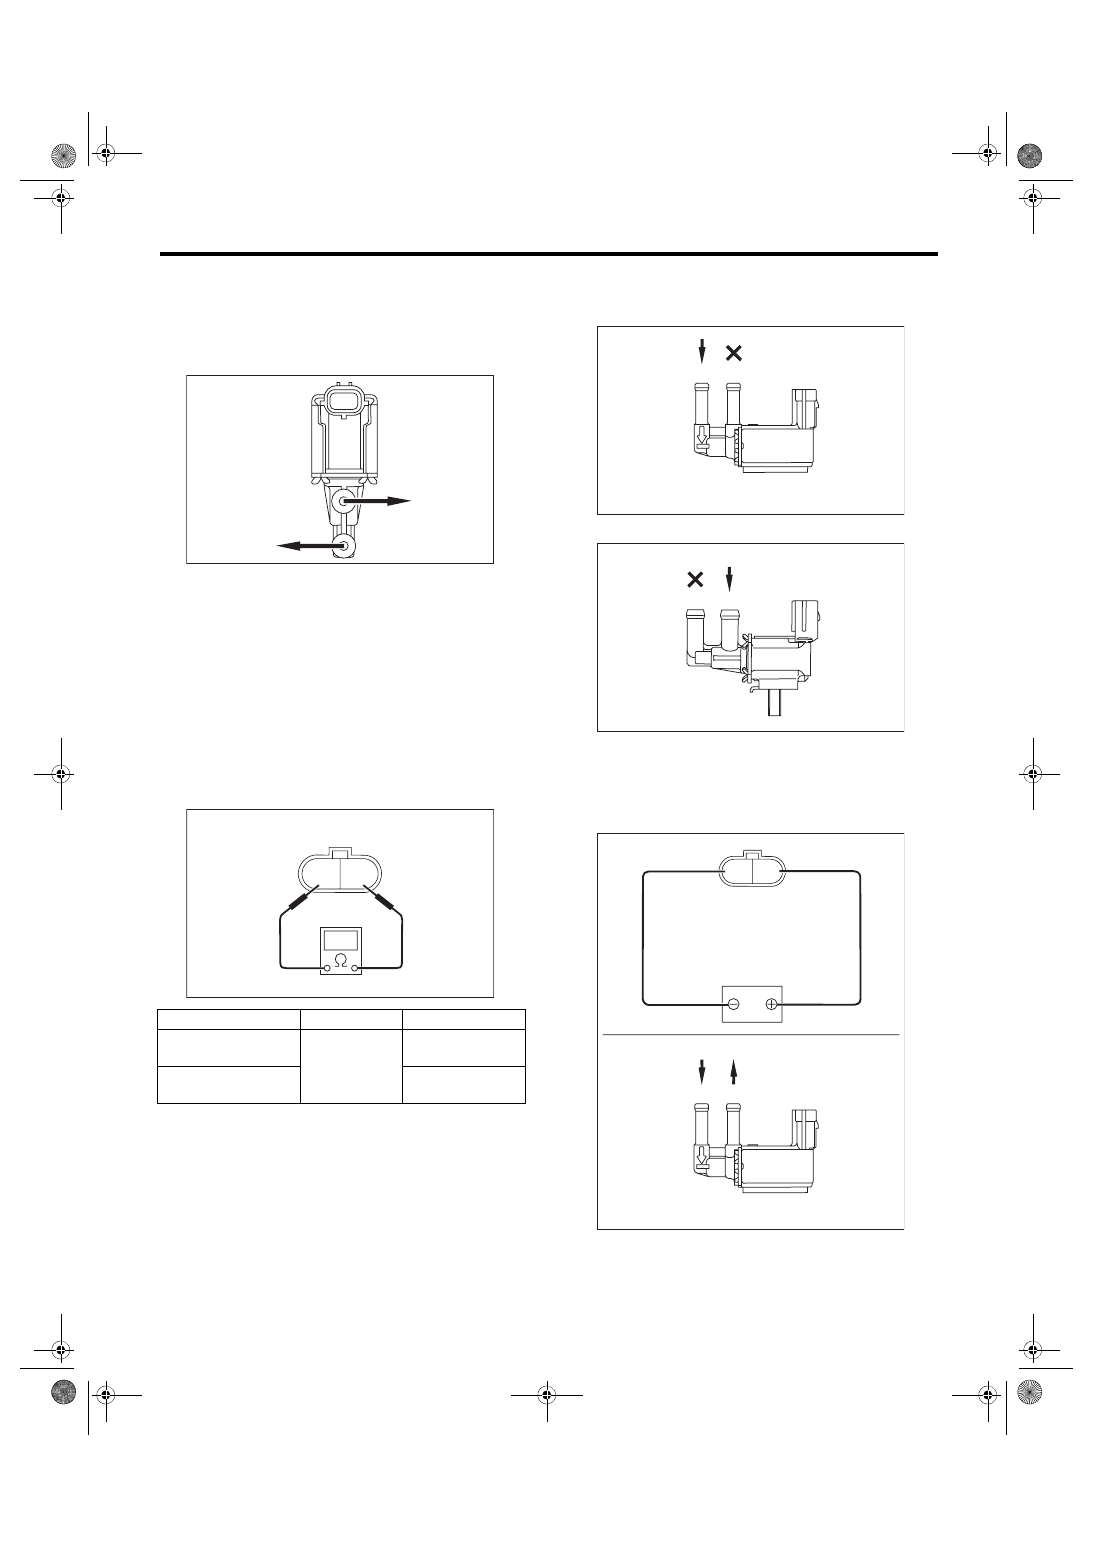
C: INSPECTION
1. PURGE CONTROL SOLENOID VALVE
1) Check that the purge control solenoid valve has
no deformation, cracks or other damages.
2) Measure the resistance between the purge con-
trol solenoid valve terminals.
3) Check that air does not come out from (B) when
air is blown into (A).
• Purge control solenoid valve 1
• Purge control solenoid valve 2
4) Connect the battery positive terminal to the ter-
minal No. 1 and the battery negative terminal to the
terminal No. 2. Check that air is discharged from
(B), when supplying air to (A).
• Purge control solenoid valve 1
(a) To intake duct
(b) To branching pipe → fuel pipe
Terminal No.
Standard
Purge control sole-
noid valve 1
1 and 2
32±2 Ω (when
20°C (68°F))
Purge control sole-
noid valve 2
24±3 Ω (when
20°C (68°F))
EC-02486
(a)
(b)
2 1
EC-02426
EC-02474
(A)
(B)
EC-02431
(A)
(B)
2 1
(A)
(B)
EC-02475
EC(STI)-13
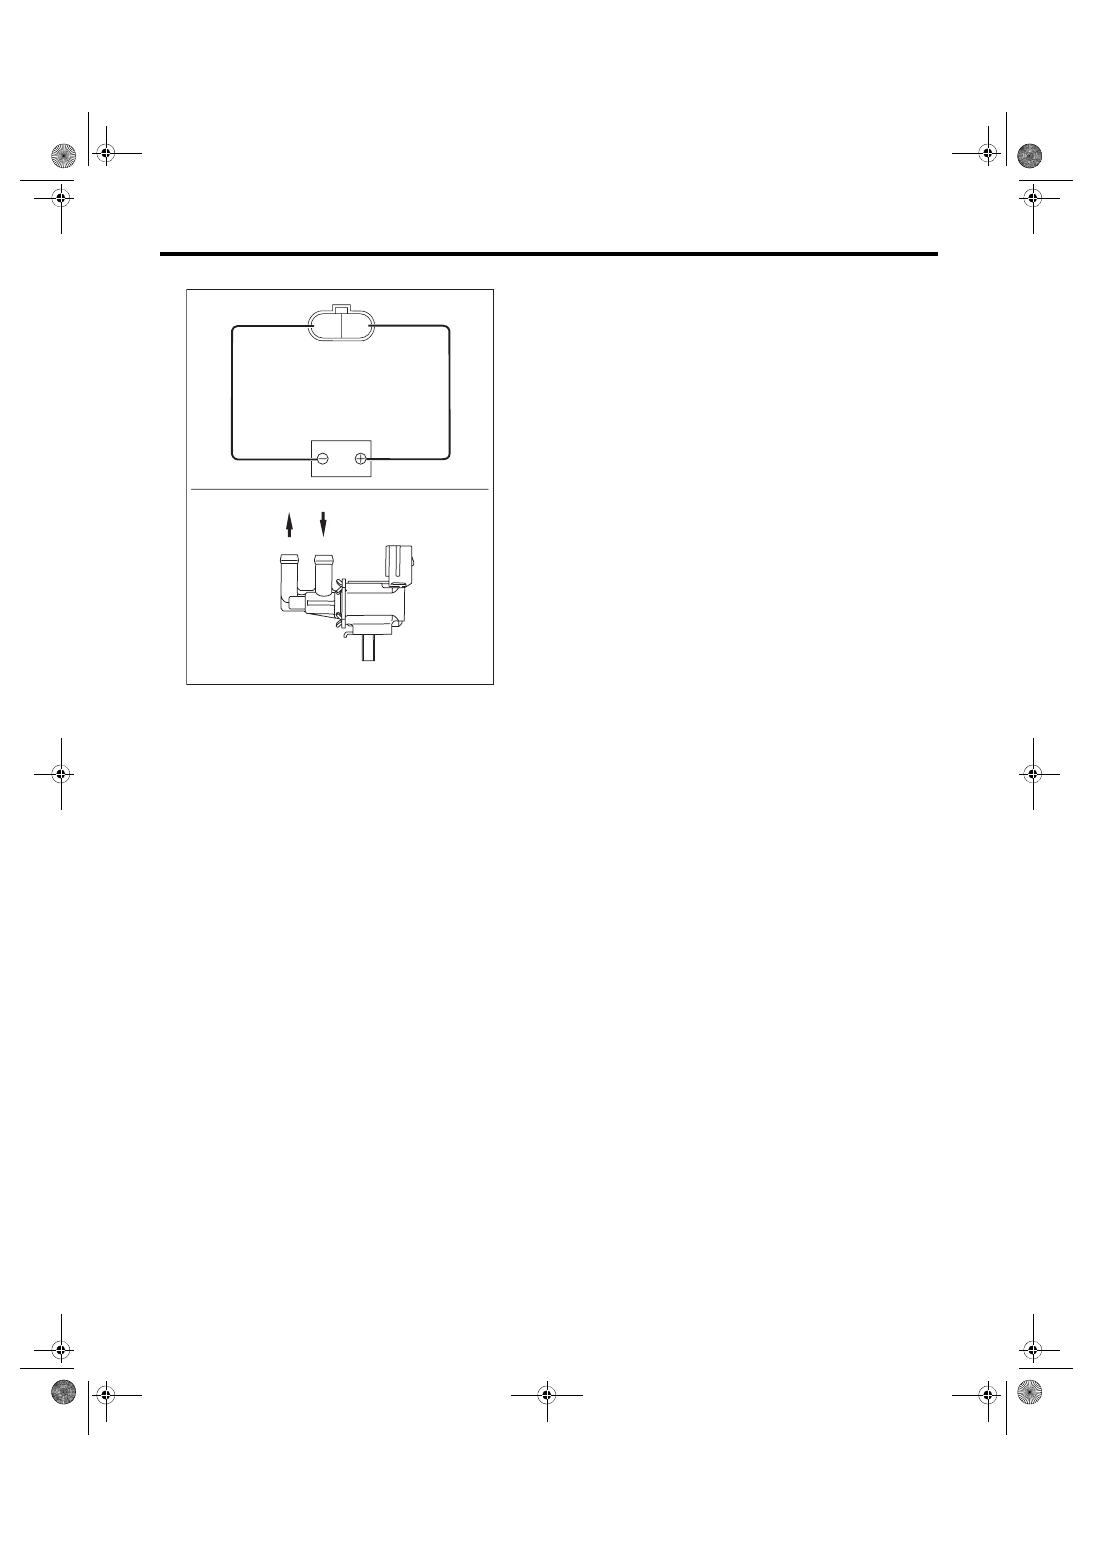
Purge Control Solenoid Valve
EMISSION CONTROL (AUX. EMISSION CONTROL DEVICES)
• Purge control solenoid valve 2
2. OTHER INSPECTIONS
Make sure the vacuum hoses and vacuum control
hoses are not cracked or loose.
EC-02432
2 1
(A)
(B)
Нет комментариевНе стесняйтесь поделиться с нами вашим ценным мнением.
Текст