Subaru Impreza 3 / Impreza WRX / Impreza WRX STI. Service manual — part 152
IN(w/o STI)-7
Air Cleaner Element
INTAKE (INDUCTION)
2. Air Cleaner Element
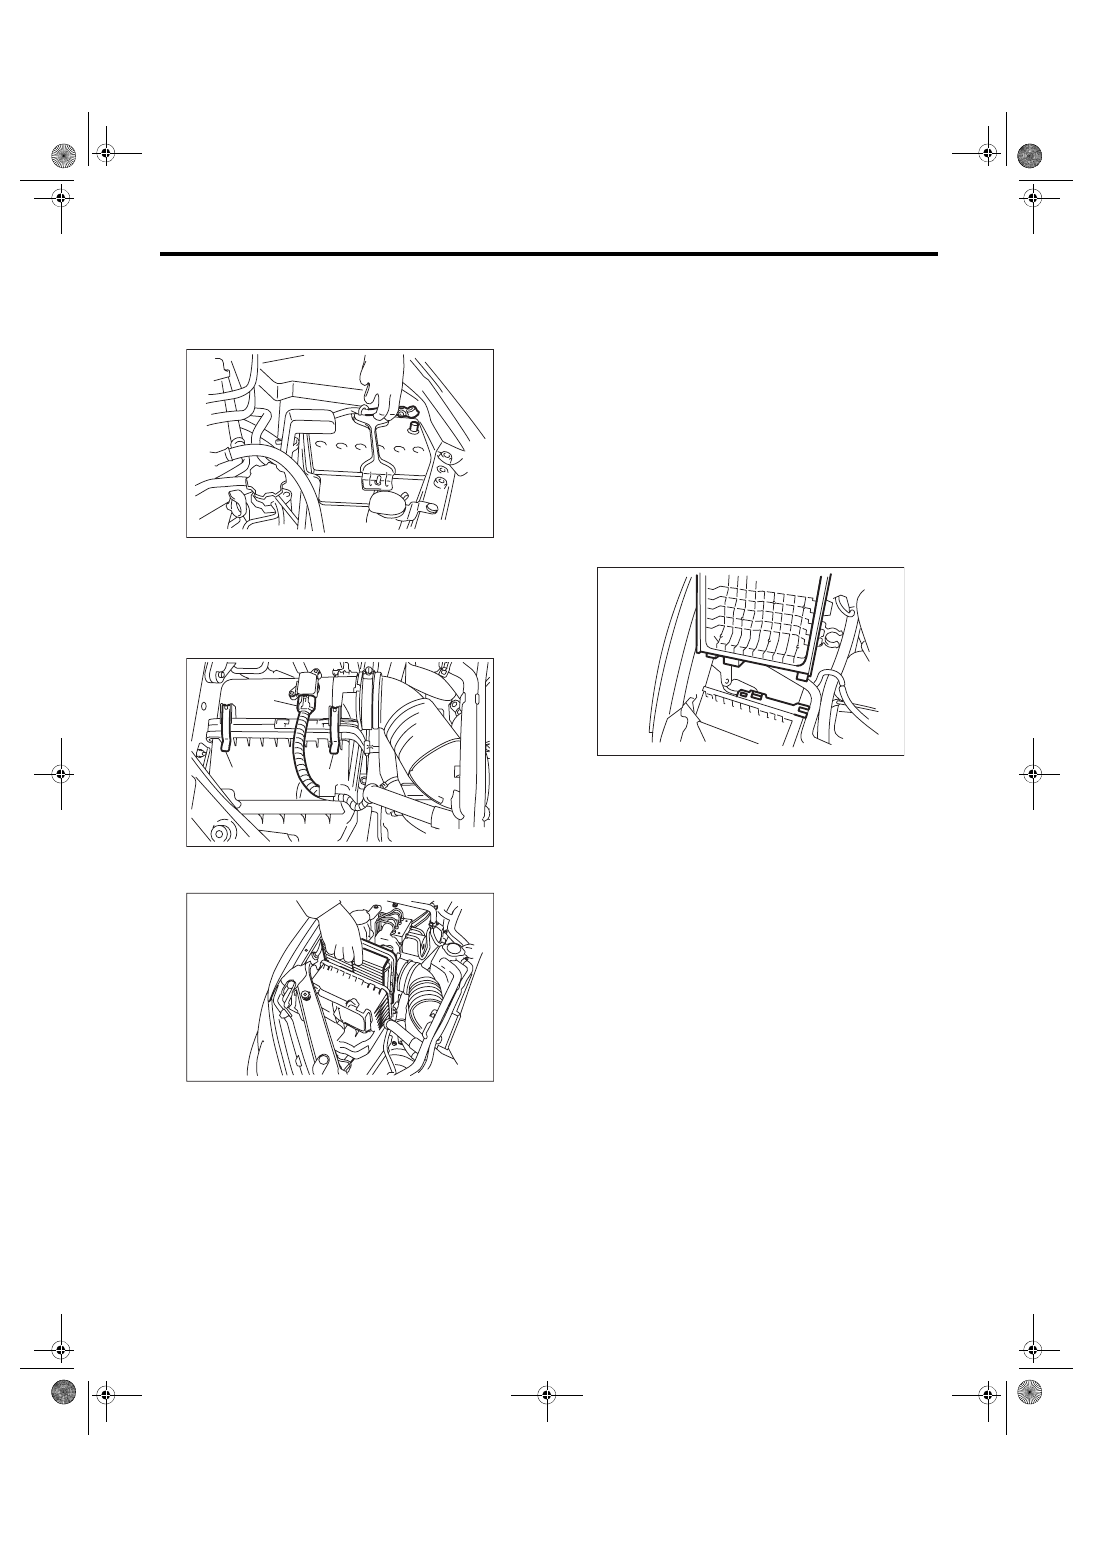
A: REMOVAL
1) Disconnect the ground cable from battery.
2) Remove the air intake duct. <Ref. to IN(w/o STI)-
10, REMOVAL, Air Intake Duct.>
3) Disconnect the connector (A) from air flow and
intake air temperature sensor.
4) Remove the clips (B) from the air cleaner case
(front).
5) Open the air cleaner case, and remove the air
cleaner element.
B: INSTALLATION
Install in the reverse order of removal.
CAUTION:
Be sure to use SUBARU genuine air cleaner el-
ement depending on the engine type when re-
placing the air cleaner elements. Using other air
cleaner element may affect the engine perfor-
mance.
NOTE:
• Check that there are no foreign objects in the air
cleaner case.
• If the protrusion of the air cleaner case (rear) is
removed when removing the air cleaner element,
align the protrusion of the air cleaner case (rear) to
the hole on the air cleaner case (front) to install.
C: INSPECTION
1) Check that the air cleaner element has no defor-
mation, cracks or other damages.
2) Check the air cleaner element for excessive dirt.
IN-00203
(A)
(B)
(B)
IN-02444
IN-02255
IN-02376
IN(w/o STI)-8
Air Cleaner Case
INTAKE (INDUCTION)
3. Air Cleaner Case
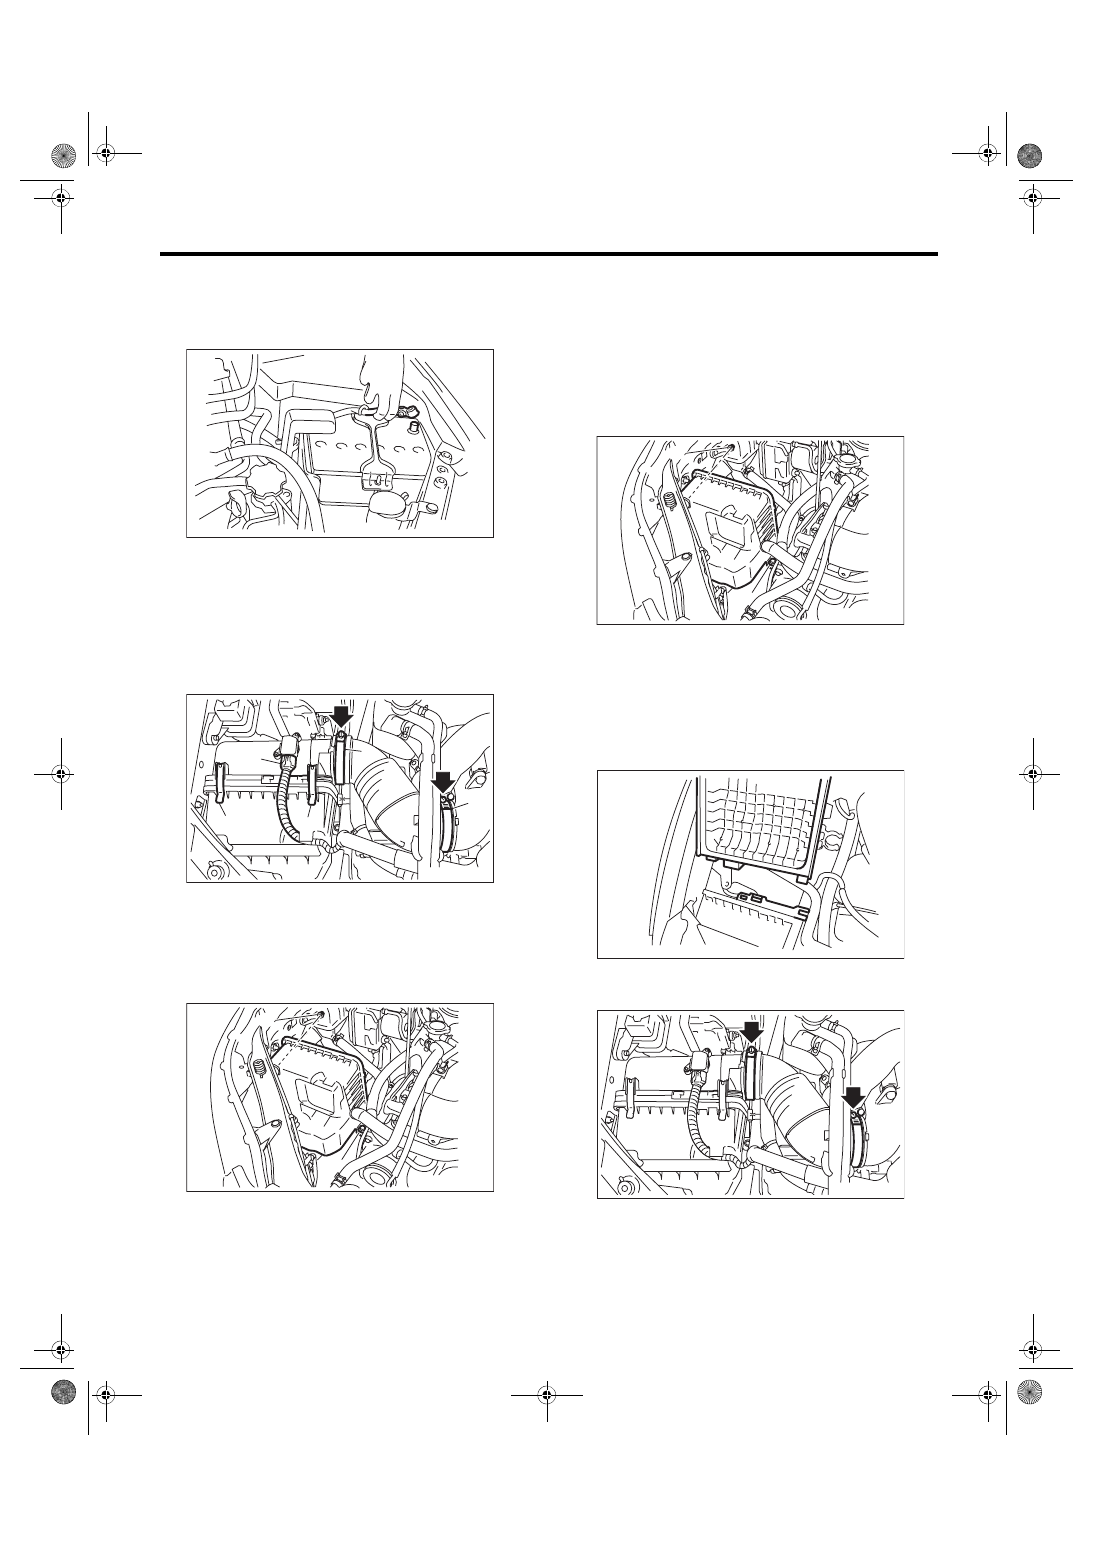
A: REMOVAL
1) Disconnect the ground cable from battery.
2) Remove the air intake duct. <Ref. to IN(w/o STI)-
10, REMOVAL, Air Intake Duct.>
3) Disconnect the connector (A) from air flow and
intake air temperature sensor.
4) Loosen the clamp (B) which holds the air intake
boot.
5) Remove the clip (C) from the air cleaner case
(front).
6) Remove the air cleaner case (rear) and air in-
take boot.
7) Remove the air cleaner element.
8) Remove bolts (A) and nuts (B) which secure the
air cleaner case (front) to the body, and remove the
air cleaner case (front).
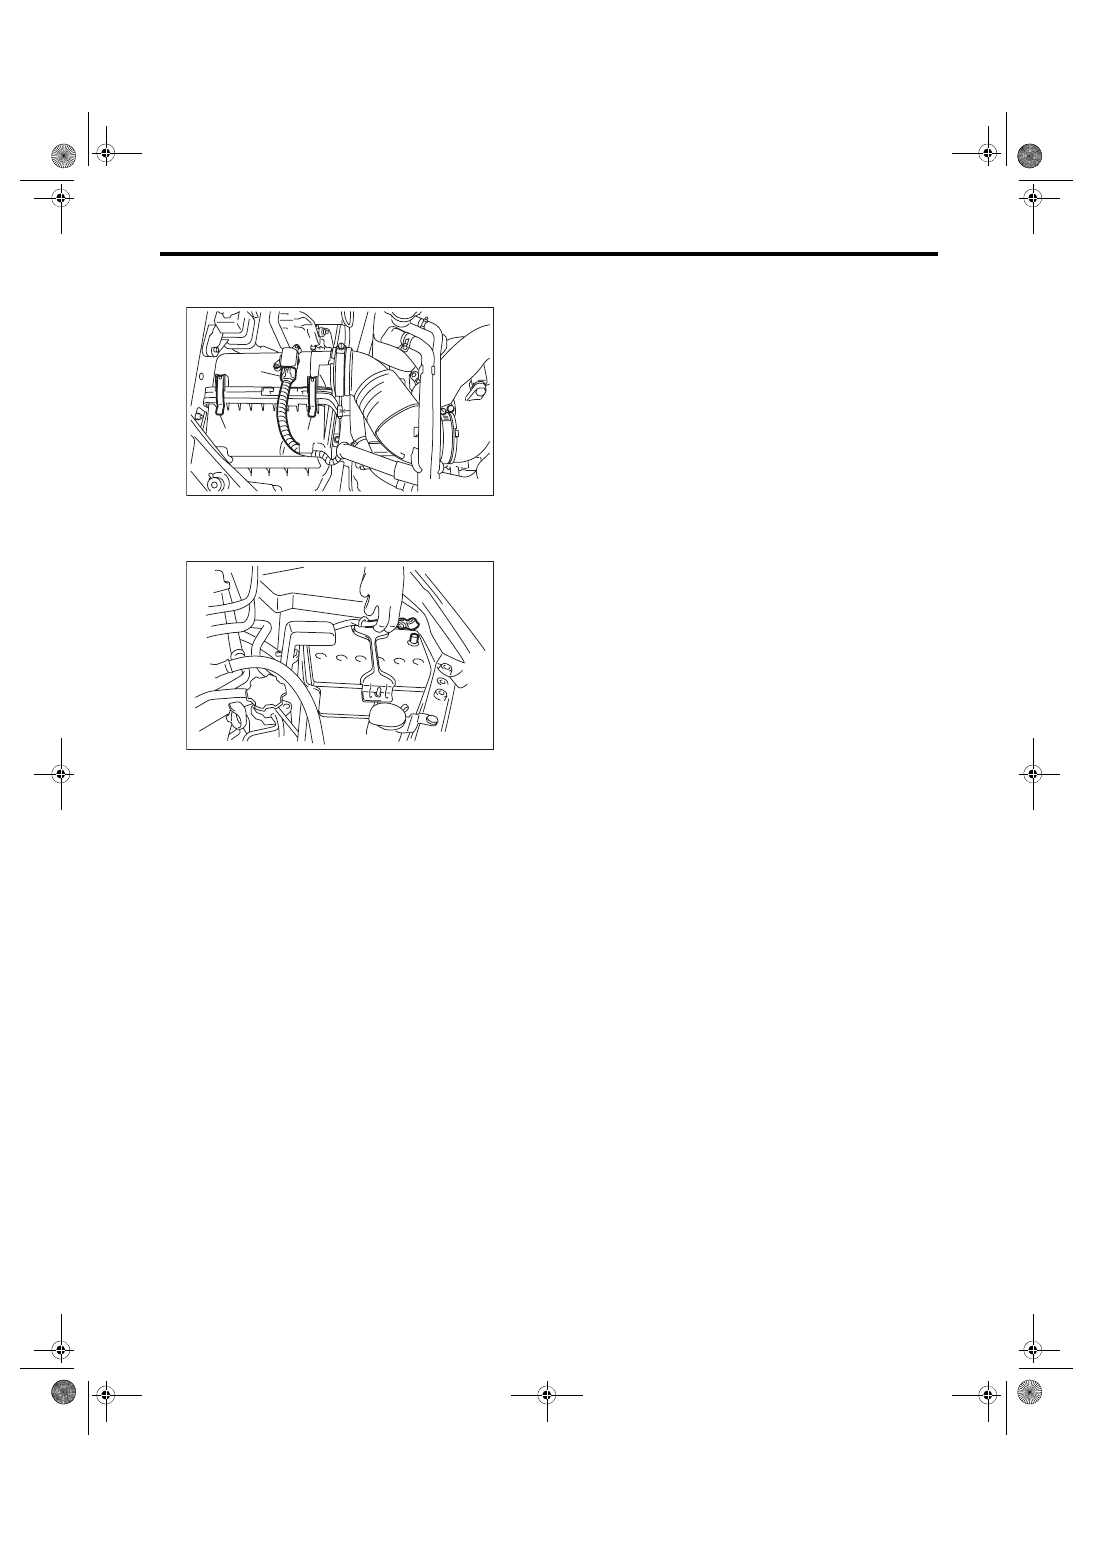
B: INSTALLATION
1) Install the bolt (A) and nut (B) which secure the
air cleaner case (front) to the body.
Tightening torque:
Bolt (A)
6 N·m (0.6 kgf-m, 4.4 ft-lb)
Nut (B)
7.5 N·m (0.8 kgf-m, 5.5 ft-lb)
2) Install the air cleaner element.
3) Install the air cleaner case (rear) and air intake
boot.
NOTE:
When installing the air cleaner case (rear), align the
protrusion of the air cleaner case (rear) to the hole
on the air cleaner case (front) to install.
Tightening torque:
2.5 N·m (0.3 kgf-m, 1.8 ft-lb)
4) Install the clip (B) to the air cleaner case (front).
IN-00203
(A)
(B)
(B)
(C)
(C)
IN-02273
IN-02445
(A)
(B)
IN-02445
(A)
(B)
IN-02376
IN-02475
IN(w/o STI)-9
Air Cleaner Case
INTAKE (INDUCTION)
5) Connect the connector (A) to the mass air flow
and intake air temperature sensor.
6) Install the air intake duct. <Ref. to IN(w/o STI)-
10, INSTALLATION, Air Intake Duct.>
7) Connect the battery ground terminal.
C: INSPECTION
1) Check that the air cleaner case has no deforma-
tion, cracks or other damages.
2) Check that the air intake boot has no cracks,
damage or loose part.
(A)
(B)
(B)
IN-02272
IN-00203

IN(w/o STI)-10
Air Intake Duct
INTAKE (INDUCTION)
4. Air Intake Duct
A: REMOVAL
Remove the clip which secures the air intake duct,
and remove the air intake duct.
B: INSTALLATION
Install in the reverse order of removal.
C: INSPECTION
1) Check that the air intake duct has no deforma-
tion, cracks or other damages.
2) Inspect that no foreign objects are mixed in the
air intake duct.
IN-02867
Нет комментариевНе стесняйтесь поделиться с нами вашим ценным мнением.
Текст