Subaru Impreza 3 / Impreza WRX / Impreza WRX STI. Service manual — part 134
FU(w/o STI)-63
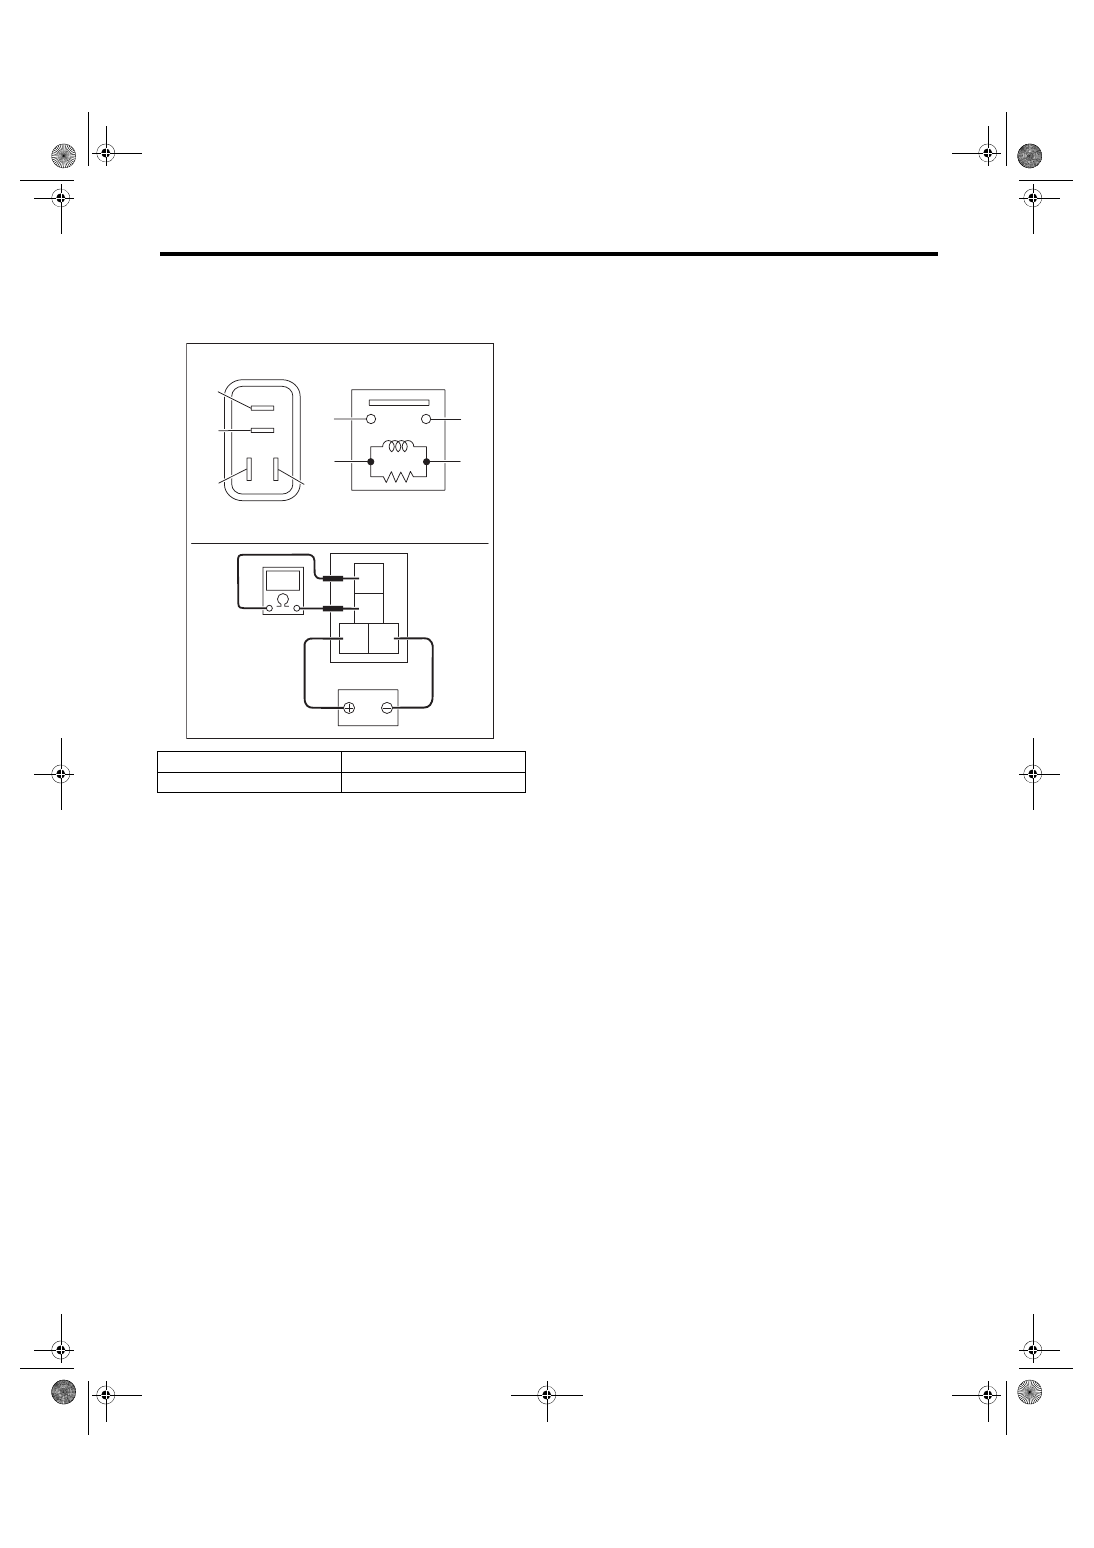
Electronic Throttle Control Relay
FUEL INJECTION (FUEL SYSTEMS)
3) Connect battery positive terminal to terminal No.
3 and battery ground terminal to terminal No. 4, and
measure the resistance between the electronic
throttle control relay terminals.
Terminal No.
Standard
1 and 2
Less than 1 Ω
FU-04077
1
2
3 4
(1)
(2)
(1)
(4)
(2)
(3)
(3)
(4)
FU(w/o STI)-64
Fuel Pump Control Unit
FUEL INJECTION (FUEL SYSTEMS)
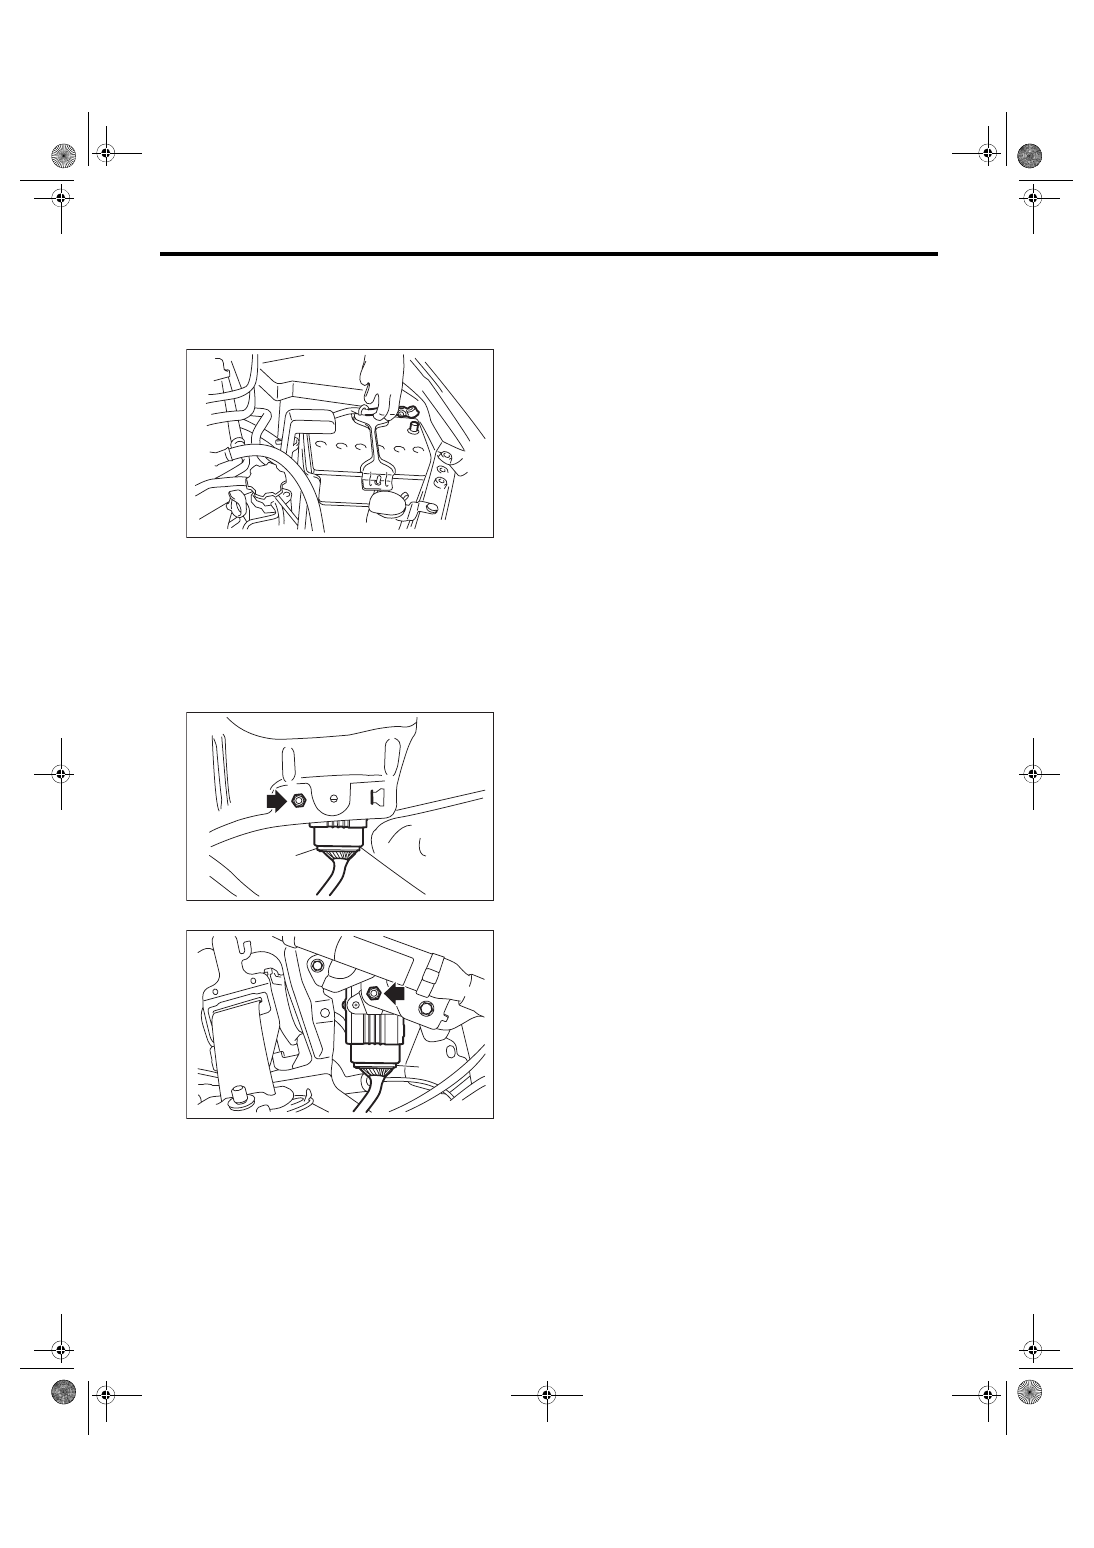
22.Fuel Pump Control Unit
A: REMOVAL
1) Disconnect the ground cable from battery.
2) Remove the right side trunk side trim. (4 door
model) <Ref. to EI-63, REMOVAL, Trunk Room
3) Remove the right side rear quarter trim. (5 door
model) <Ref. to EI-60, REMOVAL, Rear Quarter
4) Disconnect the connector (A) from the fuel pump
control unit, and remove the fuel pump control unit.
• 4 door model
• 5 door model
B: INSTALLATION
Install in the reverse order of removal.
Tightening torque:
5 N·m (0.5 kgf-m, 3.7 ft-lb)
C: INSPECTION
Check that the fuel pump control unit has no defor-
mation, cracks or other damages.
IN-00203
FU-05753
(A)
FU-05754
(A)
FU(w/o STI)-65
Fuel
FUEL INJECTION (FUEL SYSTEMS)
23.Fuel
A: PROCEDURE
1. RELEASING OF FUEL PRESSURE
WARNING:
Place “NO OPEN FLAMES” signs near the
working area.
CAUTION:
Be careful not to spill fuel.
1) Remove the fuse of fuel pump from main fuse
box.
2) Start the engine and run it until it stalls.
3) After the engine stalls, crank it for five more sec-
onds.
4) Turn the ignition switch to OFF.
5) Install the fuse of fuel pump to the main fuse box.
2. DRAINING FUEL (WITH SUBARU SE-
LECT MONITOR)
WARNING:
Place “NO OPEN FLAMES” signs near the
working area.
CAUTION:
Be careful not to spill fuel.
NOTE:
• If the fuel pump cannot be driven, refer to the
procedures for draining from the fuel filler hose.
<Ref. to FU(w/o STI)-66, DRAINING FUEL
(THROUGH THE FUEL FILLER HOSE), PROCE-
• Be careful not to let the battery run-out.
• Be aware that the fuel may remain in the fuel
tank after draining the fuel.
1) Release the fuel pressure. <Ref. to FU(w/o STI)-
65, RELEASING OF FUEL PRESSURE, PROCE-
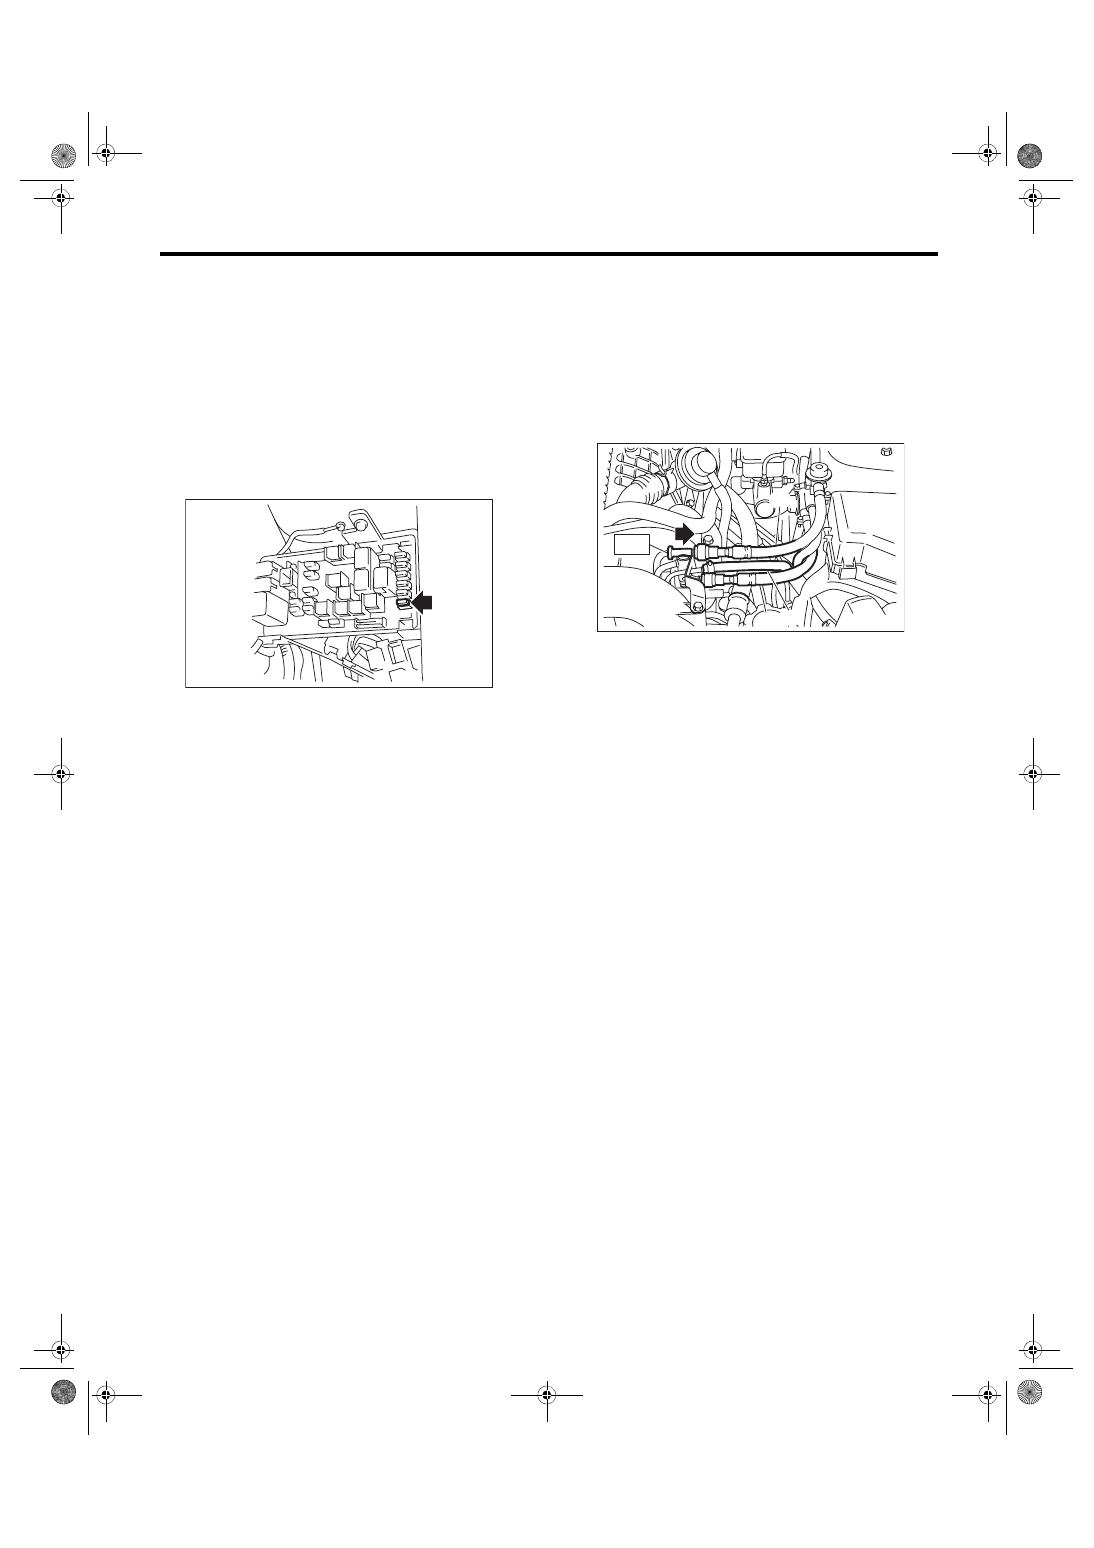
2) Attach ST to the fuel delivery pipe and push ST
in the direction of arrow mark to disconnect the fuel
delivery hose.
ST 42099AE000 QUICK CONNECTOR RE-
LEASE
CAUTION:
• Be careful not to spill fuel.
• Catch the fuel from hoses using a container
or cloth.
3) Connect ST to the fuel delivery hose.
ST 18471AA000 FUEL PIPE ADAPTER
4) Connect the gasoline proof hose to ST and put
the end of the hose in the container.
5) Drive the fuel pump and drain the fuel using Sub-
aru Select Monitor. <Ref. to EN(H4DOTC)(diag)-
65, FUEL PUMP CONTROL (ON/OFF DRIVE),
OPERATION, System Operation Check Mode.>
CAUTION:
Be careful not to spill fuel.
6) Install the related parts in the reverse order after
draining the fuel.
FU-01122
(A) Fuel delivery hose
(B) Fuel return hose
(C) Evaporation hose
ME-04968
(B) (C)
(A)
ST
FU(w/o STI)-66
Fuel
FUEL INJECTION (FUEL SYSTEMS)
3. DRAINING FUEL (THROUGH THE FUEL
FILLER HOSE)
• 4 door model
WARNING:
Place “NO OPEN FLAMES” signs near the
working area.
CAUTION:
• Be careful not to spill fuel.
• Fuel may remain in the fuel filler pipe. Drain
the fuel from the fuel filler pipe through the fill
opening using the gasoline proof pump and the
gasoline proof hose (ø10 or less) before the op-
eration.
NOTE:
Be aware that the fuel may remain in the fuel tank
after draining the fuel.
1) Lift up the vehicle.
2) Remove the rear exhaust pipe and muffler.
<Ref. to EX(STI)-13, REMOVAL, Rear Exhaust
Pipe.> <Ref. to EX(STI)-15, REMOVAL, Muffler.>
3) Remove the rear sub frame. <Ref. to RS-17, RE-
4) Open the fuel filler lid and remove the fuel filler
cap.
5) Drain the fuel from the fuel filler pipe through the
filler opening using the gasoline proof pump and
the gasoline proof hose (ø10 or less).
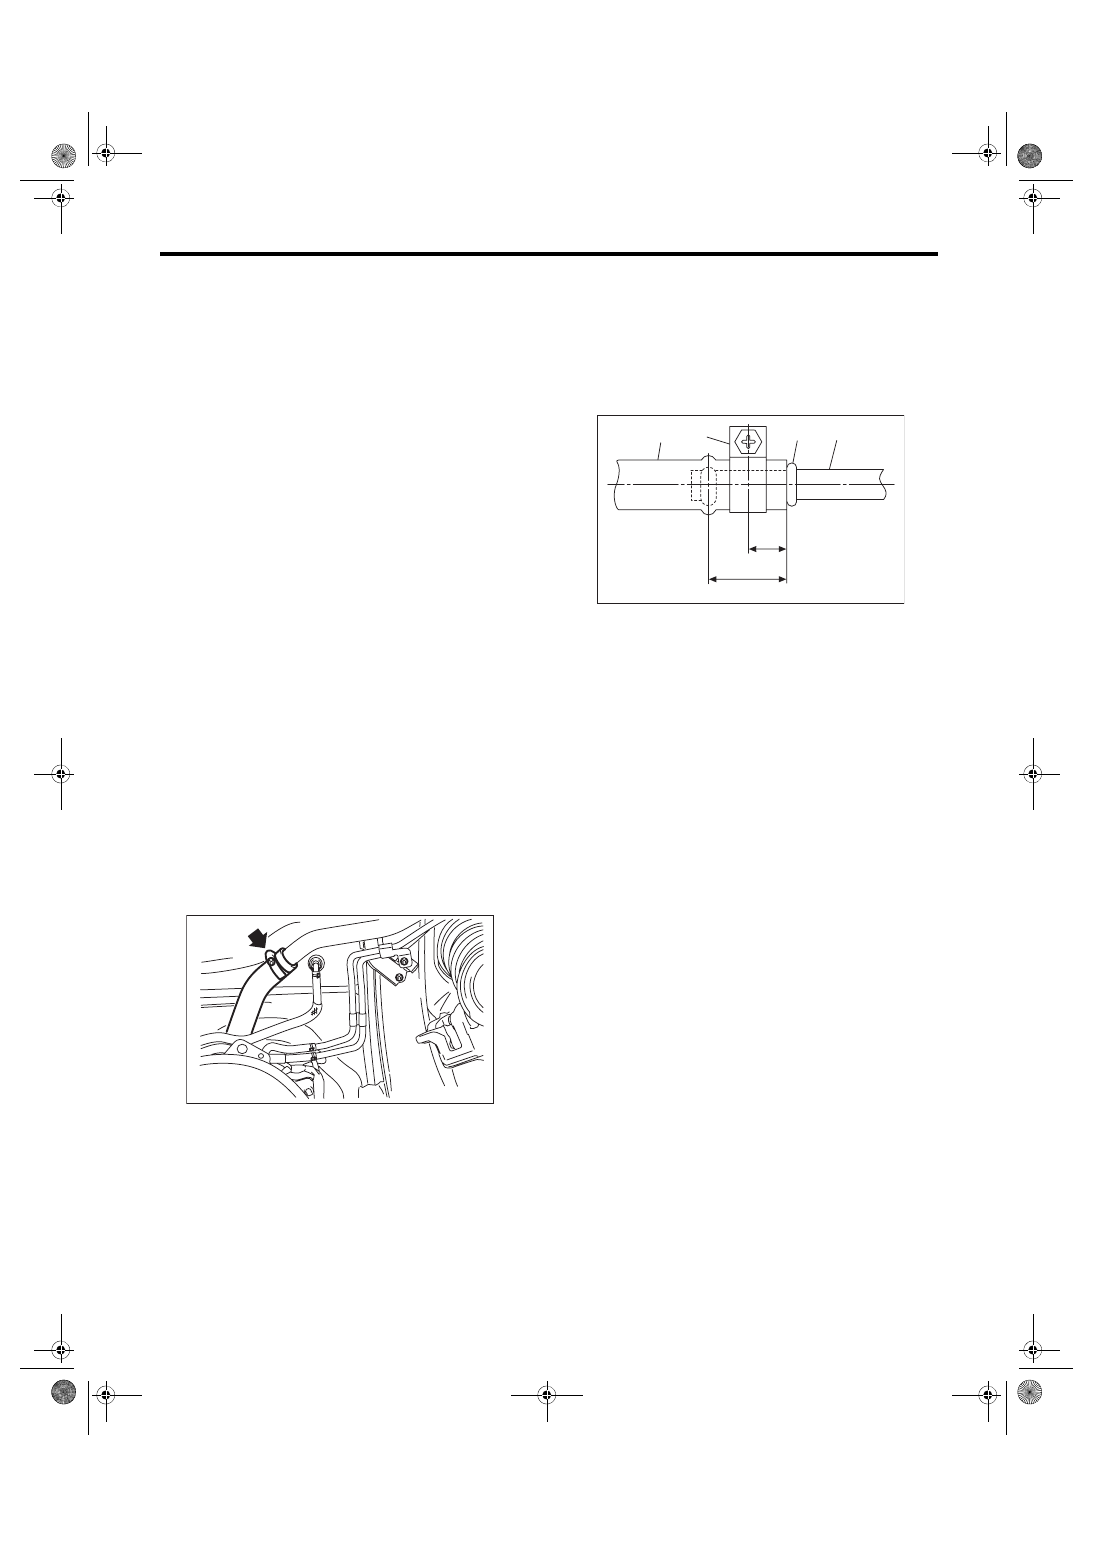
6) Disconnect the fuel filler hose from the fuel filler
pipe assembly.
CAUTION:
• Be careful not to spill fuel.
• Catch the fuel from hoses using a container
or cloth.
7) Set the container under the vehicle and insert
the gasoline proof hose (ø10 or less) into the fuel
filler hose to drain the fuel.
CAUTION:
Be careful not to spill fuel.
8) Install the related parts in the reverse order after
draining the fuel.
NOTE:
Correctly insert the fuel filler hose to the spool, and
then install the clamp as shown.
Tightening torque:
2.5 N·m (0.3 kgf-m, 1.8 ft-lb)
• 5 door model
WARNING:
Place “NO OPEN FLAMES” signs near the
working area.
CAUTION:
• Be careful not to spill fuel.
• Fuel may remain in the fuel filler pipe. Drain
the fuel from the fuel filler pipe through the fill
opening using the gasoline proof pump and the
gasoline proof hose (ø10 or less) before the op-
eration.
NOTE:
Be aware that the fuel may remain in the fuel tank
after draining the fuel.
1) Lift up the vehicle.
2) Remove the rear exhaust pipe and muffler.
<Ref. to EX(STI)-13, REMOVAL, Rear Exhaust
Pipe.> <Ref. to EX(STI)-15, REMOVAL, Muffler.>
3) Open the fuel filler lid and remove the fuel filler
cap.
4) Drain the fuel from the fuel filler pipe through the
filler opening using the gasoline proof pump and
the gasoline proof hose (ø10 or less).
FU-05836
(1) Fuel filler hose
(2) Clamp
(3) Spool
(4) Fuel filler pipe
FU-05815
(1)
(2)
(4)
L
L/2
(3)
Нет комментариевНе стесняйтесь поделиться с нами вашим ценным мнением.
Текст