Subaru Impreza 3 / Impreza WRX / Impreza WRX STI. Service manual — part 105
LU(STI)-22
Oil Pressure Switch
LUBRICATION
6. Oil Pressure Switch
A: REMOVAL
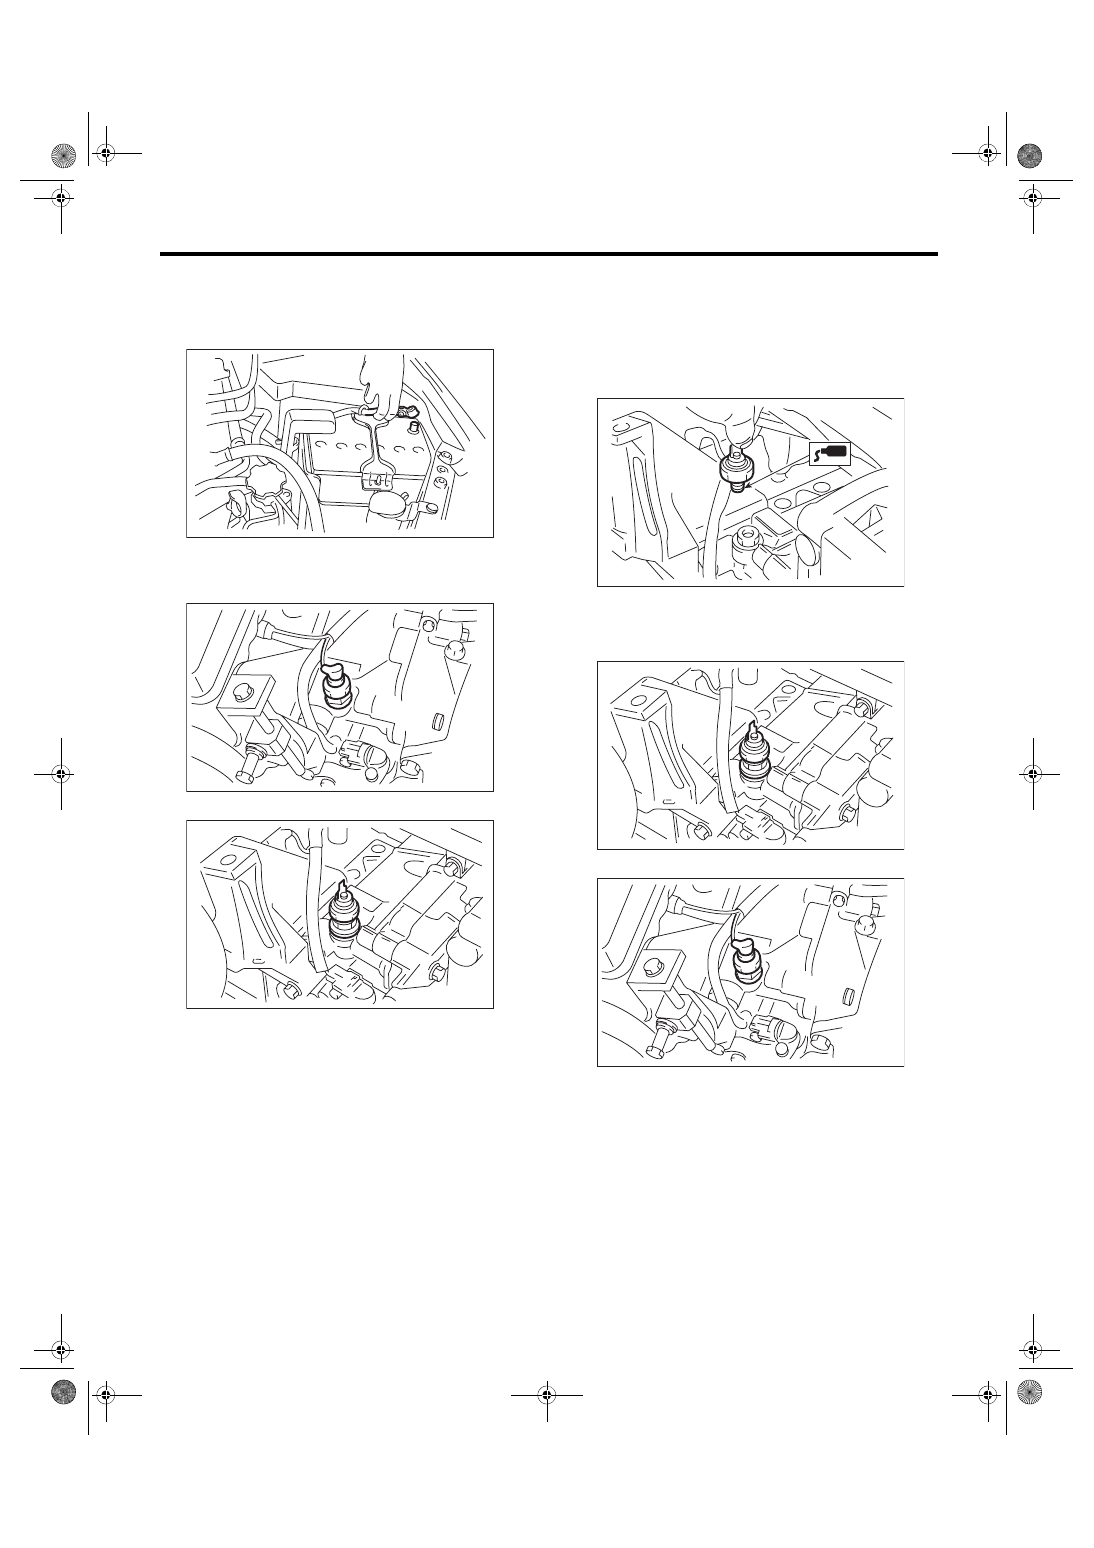
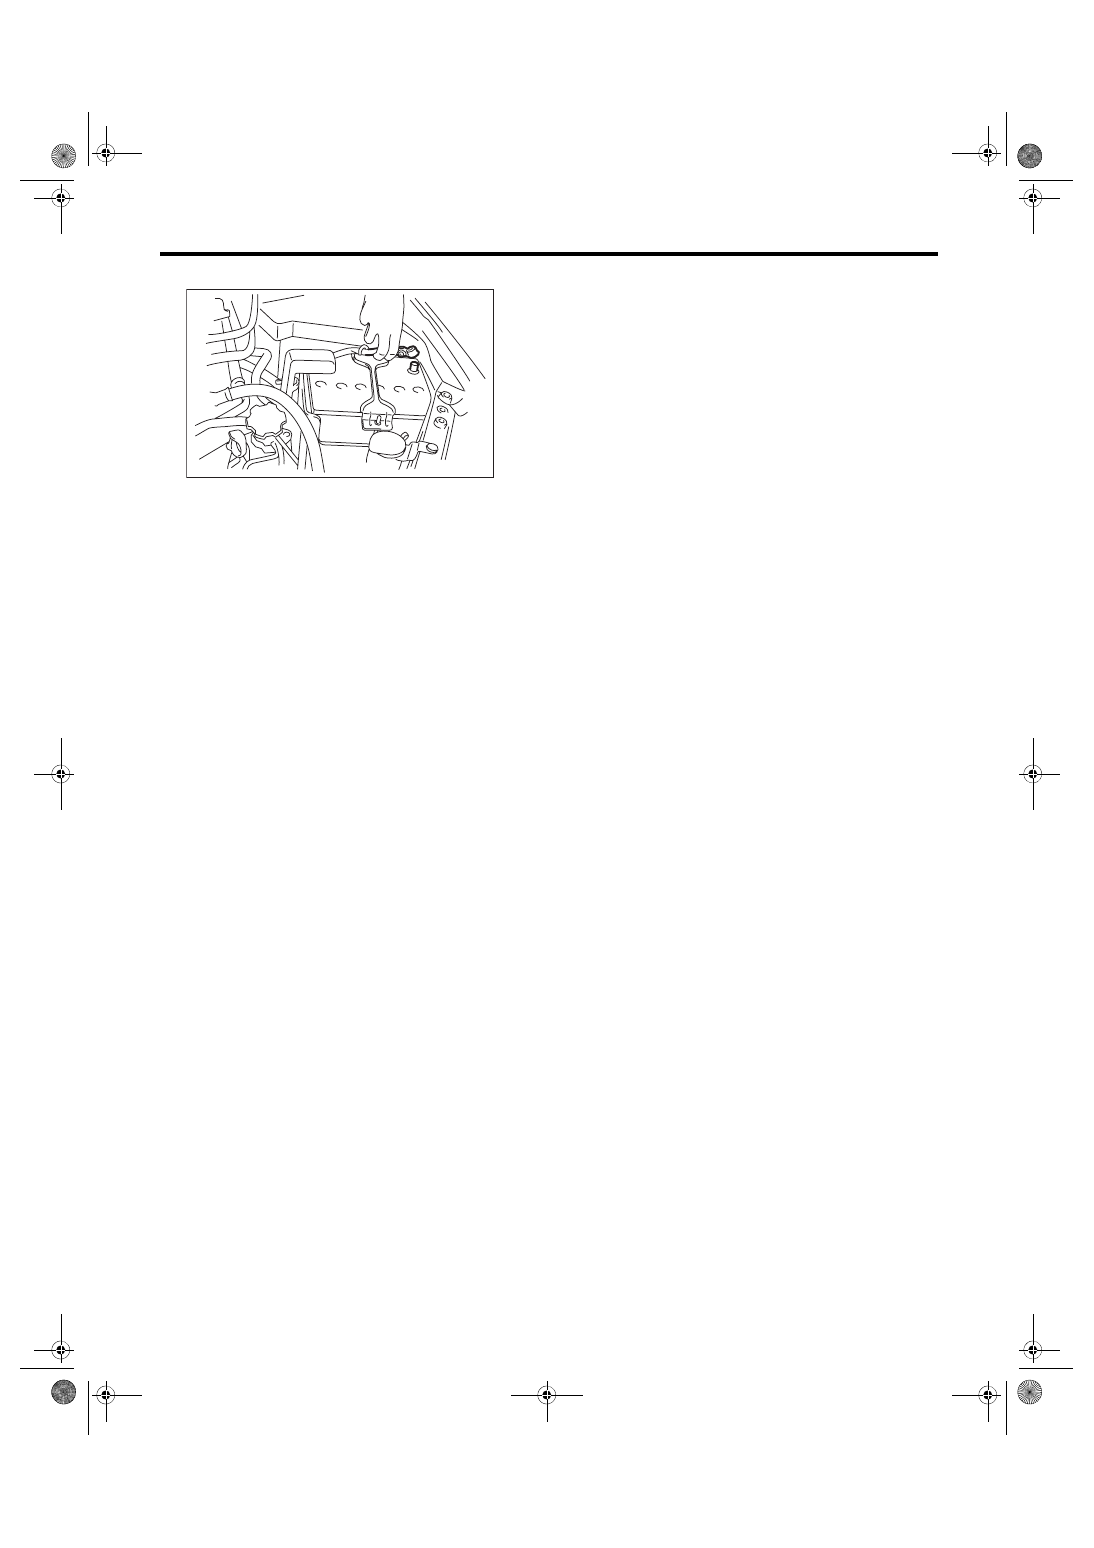
1) Disconnect the ground cable from battery.
2) Remove the generator from the bracket. <Ref. to
SC(STI)-21, REMOVAL, Generator.>
3) Disconnect the terminal from oil pressure switch.
4) Remove the oil pressure switch.
B: INSTALLATION
1) Apply liquid gasket to the oil pressure switch
threads.
Liquid gasket:
THREE BOND 1324 (Part No. 004403042) or
equivalent
2) Install the oil pressure switch to cylinder block.
Tightening torque:
25 N·m (2.5 kgf-m, 18.4 ft-lb)
3) Connect the terminal to the oil pressure switch.
4) Install the generator to the bracket. <Ref. to
SC(STI)-21, INSTALLATION, Generator.>
IN-00203
LU-00036
LU-00037
LU-00038
LU-00037
LU-00036
LU(STI)-23
Oil Pressure Switch
LUBRICATION
5) Connect the ground cable to battery.
C: INSPECTION
1) Check that the oil pressure switch does not have
deformation, cracks or damage.
2) Check that there are no oil leaks or oil oozing
from the oil pressure switch installation portion.
IN-00203
LU(STI)-24
Engine Oil Cooler
LUBRICATION
7. Engine Oil Cooler
A: REMOVAL
CAUTION:
If engine oil is spilt onto the exhaust pipe, wipe
it off with cloth to avoid emission of smoke or
causing a fire.
NOTE:
STI model is equipped with engine oil cooler.
1) Lift up the vehicle.
2) Remove the under cover. <Ref. to EI-28, RE-
3) Drain engine coolant. <Ref. to CO(STI)-13,
DRAINING OF ENGINE COOLANT, REPLACE-
4) Remove the engine oil filter. <Ref. to LU(STI)-
31, REMOVAL, Engine Oil Filter.>
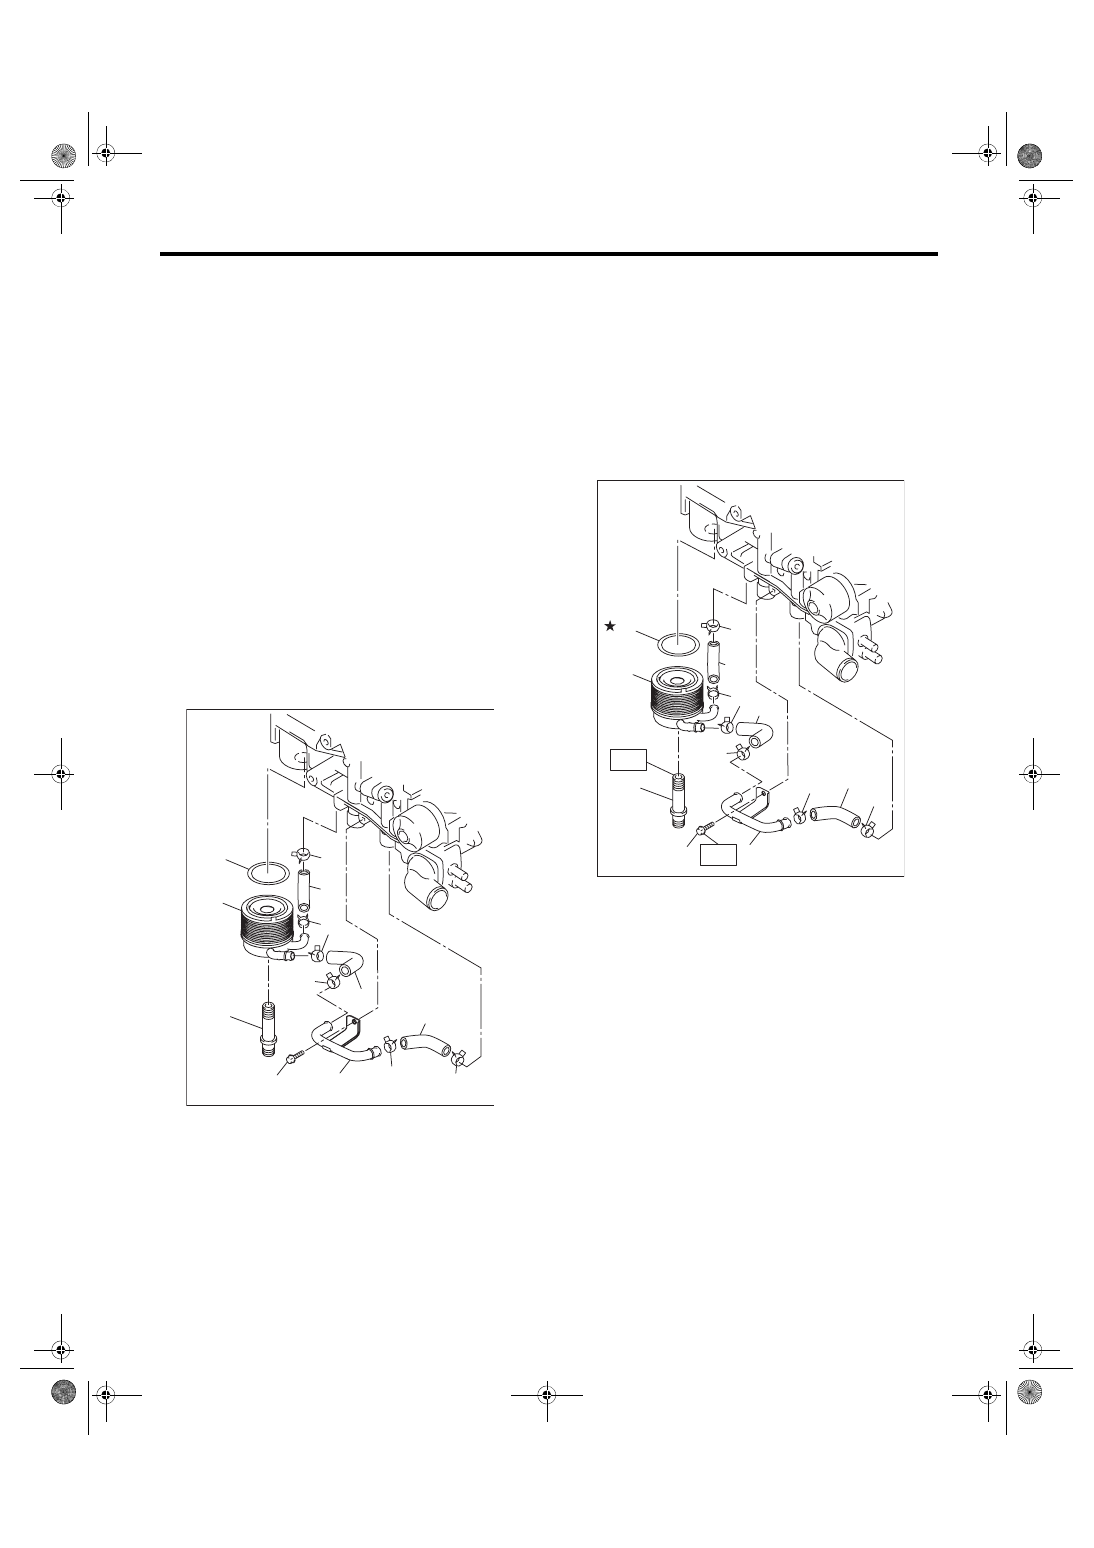
5) Remove the bolt (B) holding the oil cooler pipe
(A) to the oil pump.
6) Remove the oil cooler pipe (A), oil cooler hose A
(C), oil cooler hose B (H), and oil cooler hose C (I).
7) Remove the oil cooler connector (D) and oil cool-
er (E).
B: INSTALLATION
Install in the reverse order of removal.
NOTE:
• Use a new gasket.
• After installing, check the engine oil level and re-
plenish it if necessary. <Ref. to LU(STI)-11, IN-
SPECTION, Engine Oil.>
Tightening torque:
T1: 6.4 N·m (0.7 kgf-m, 4.7 ft-lb)
T2: 54 N·m (5.5 kgf-m, 39.8 ft-lb)
C: INSPECTION
1) Check that the engine oil cooler, oil cooler pipe
and oil cooler connector do not have deformation,
cracks or damage.
2) Make sure the oil cooler hoses are not cracked,
damaged or loose.
3) Blow with compressed air to make sure the cool-
ant passages are not clogged.
4) Make sure the mating surfaces of the cylinder
block do not have damage.
(A) Oil cooler pipe
(B) Bolt
(C) Oil cooler hose A
(D) Oil cooler connector
(E) Oil cooler
(F) Gasket
(G) Clip
(H) Oil cooler hose B
(I) Oil cooler hose C
LU-02837
(D)
(F)
(E)
(B)
(A)
(G)
(G)
(C)
(H)
(G)
(G)
(G)
(I)
(A) Oil cooler pipe
(B) Bolt
(C) Oil cooler hose A
(D) Oil cooler connector
(E) Oil cooler
(F) Gasket
(G) Clip
(H) Oil cooler hose B
(I) Oil cooler hose C
(D)
(F)
(E)
T2
(B)
(A)
(C)
(H)
(G)
(G)
(G)
T1
LU-02838
(G)
(I)
(G)
LU(STI)-25
Oil Pipe
LUBRICATION
8. Oil Pipe
A: REMOVAL
1) Disconnect the ground cable from battery.
2) Remove the intercooler. <Ref. to IN(STI)-12,
REMOVAL, Intercooler.> <Ref. to IN(w/o STI)-12,
3) Remove the turbocharger upper cover.
4) Remove the oil inlet pipe from the turbocharger.
CAUTION:
In order to prevent damaging the oil pipe on the
cylinder head side, fix the section (a) shown in
the figure when loosing the oil inlet pipe flare
nut, and avoid the part from rotating together
while loosening the nut.
5) Remove the turbocharger stay.
6) Remove the turbocharger oil pipe.
IN-00203
LU-02694
(A) Union bolt without filter (without protrusion)
(B) Gasket
(C) Turbocharger oil pipe
LU-02719
(a)
LU-02692
LU-02691
LU-02696
(C)
(B)
(A)
(B)
Нет комментариевНе стесняйтесь поделиться с нами вашим ценным мнением.
Текст