Subaru Legacy (2005 year). Service manual — part 997

EI-45
EXTERIOR/INTERIOR TRIM
Rear Quarter Protector
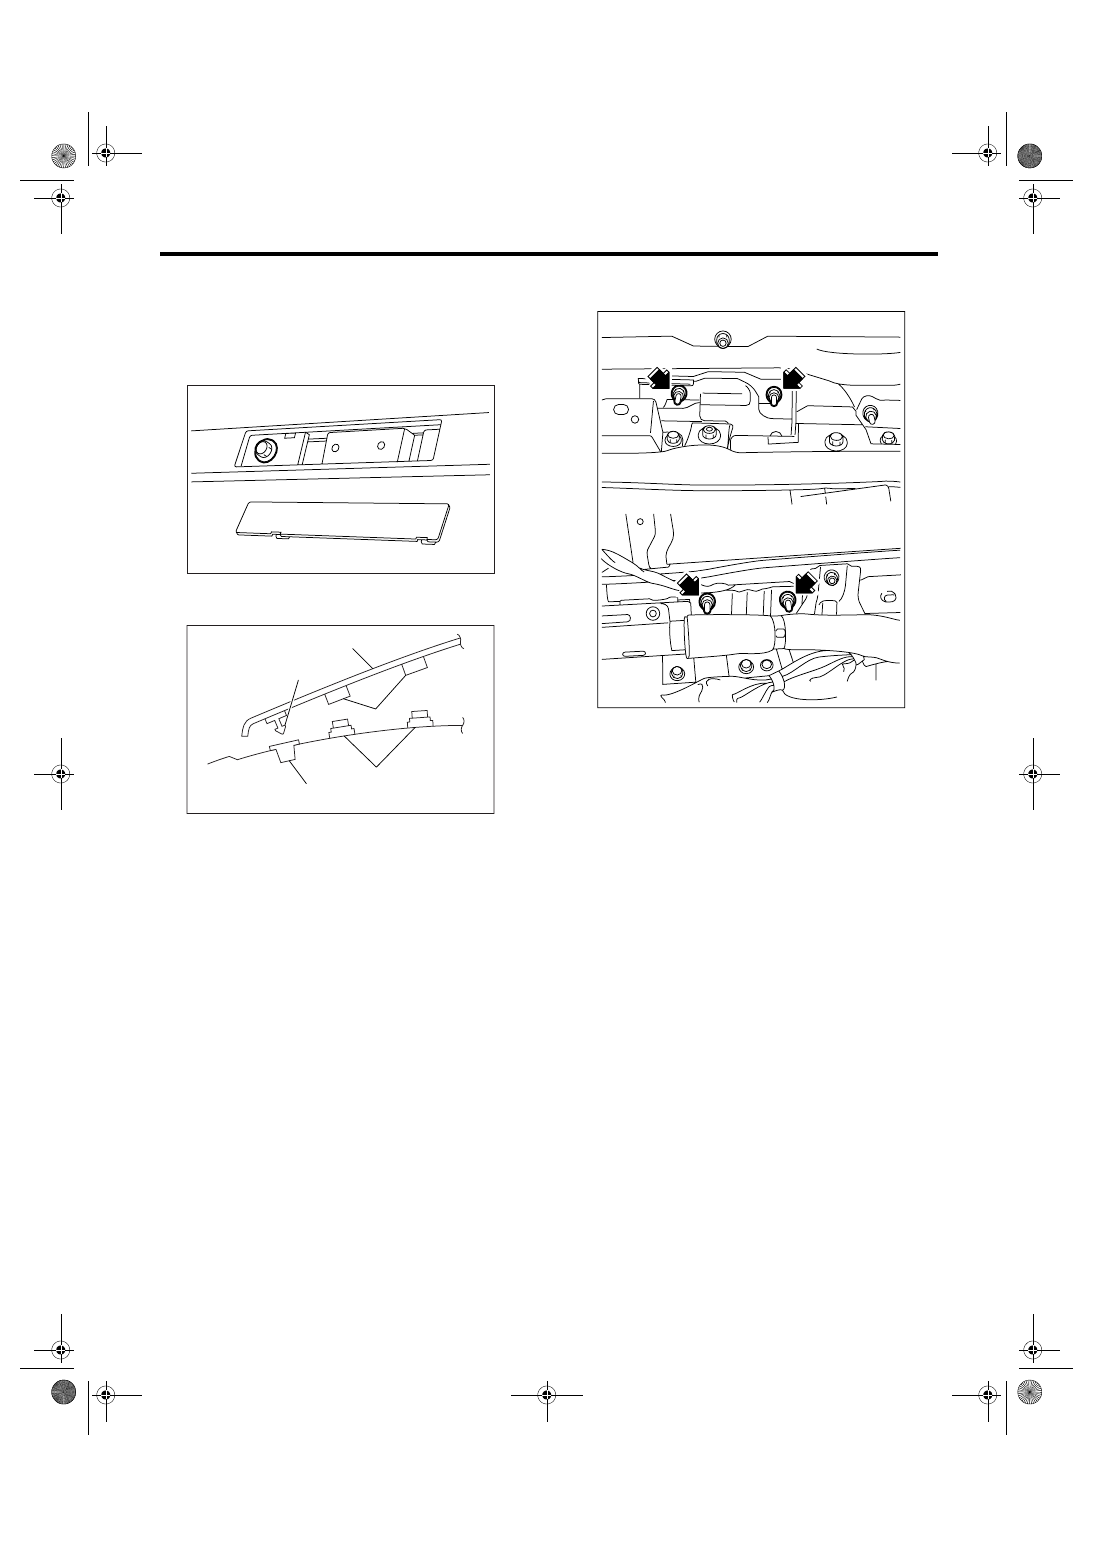
15.Rear Quarter Protector
A: REMOVAL
1) Remove the side sill spoilers. <Ref. to EI-41, RE-
MOVAL, Side Sill Spoiler.>
2) Remove the clips (A) with rotating it rearward us-
ing the fender arch as a fulcrum, and then remove
the rear quarter protector.
B: INSTALLATION
Install in the reverse order of removal.
EI-00734
: (A)
EI-46
EXTERIOR/INTERIOR TRIM
Roof Molding
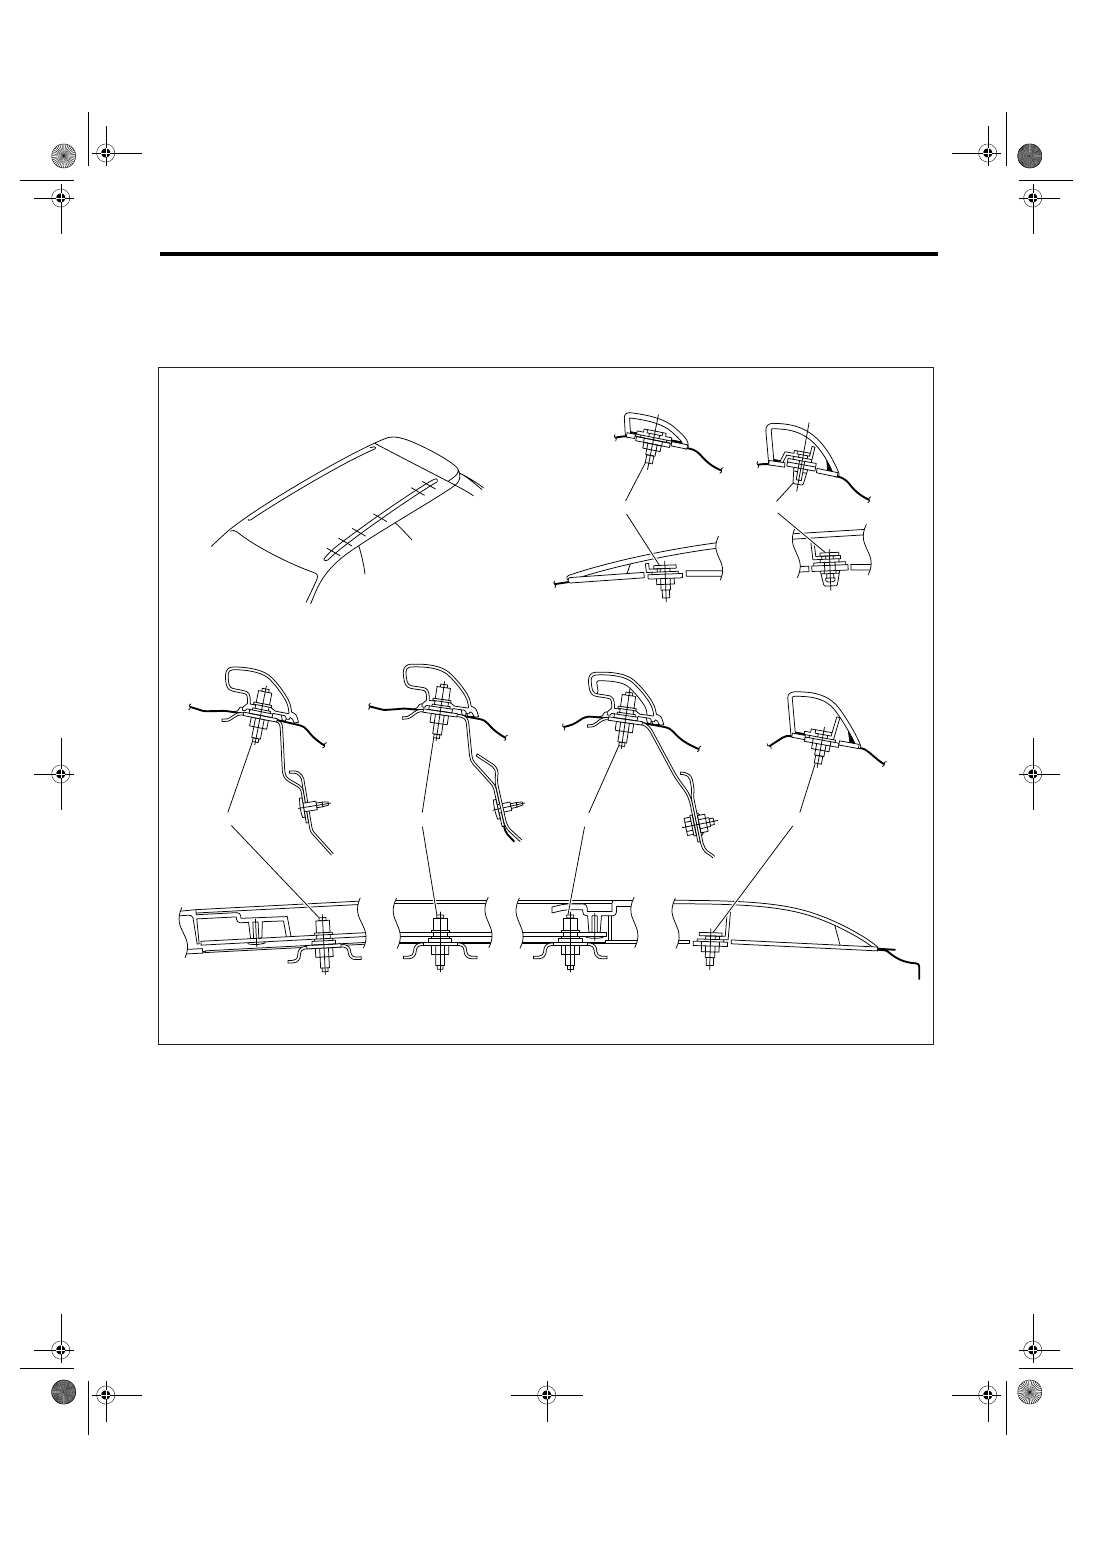
16.Roof Molding
A: REMOVAL
1) Disconnect the ground cable from battery.
2) Remove the roof carrier attachment cover, and
remove the bolts. (2 places for each side)
3) Pull the roof molding upward, and remove it from
vehicle body.
4) Remove the roof trim. <Ref. to EI-67, REMOV-
AL, Roof Trim.>
5) Remove the nuts, and remove the roof carrier at-
tachment.
B: INSTALLATION
Install in the reverse order of removal.
CAUTION:
Replace the clip with new one when the broken
pin grommet is found during the removal of
roof molding. When the body side cap or clip is
damaged, or the roof molding is lifted or peeled
from body, be sure to repair them correctly, be-
cause those troubles may cause water leakage.
Tightening torque:
7.5 N
⋅
m (0.77 kgf-m, 5.53 ft-lb)
(1) Locating pin
(2) Roof molding
(3) Cap
(4) Clip
(5) Grommet
EI-00658
EI-00660
(1)
(2)
(4)
(3)
(5)
EI-00659
EI-47
EXTERIOR/INTERIOR TRIM
Roof Rail
17.Roof Rail
A: REMOVAL
1) Remove the roof trim. <Ref. to EI-67, REMOVAL, Roof Trim.>
2) Remove the five installing nuts.
B: INSTALLATION
Install in the reverse order of removal.
CAUTION:
When removing or installing the roof rail, be
careful not to scratch the body panel with the
stud bolt of roof rail.
Tightening torque:
7.5 N
⋅
m (0.77 kgf-m, 5.53 ft-lb)
EI-00834
(A)
(B)
(C)
(D)
(E)
(F)
A
B
C
D
E
F
EI-48
EXTERIOR/INTERIOR TRIM
Door Trim
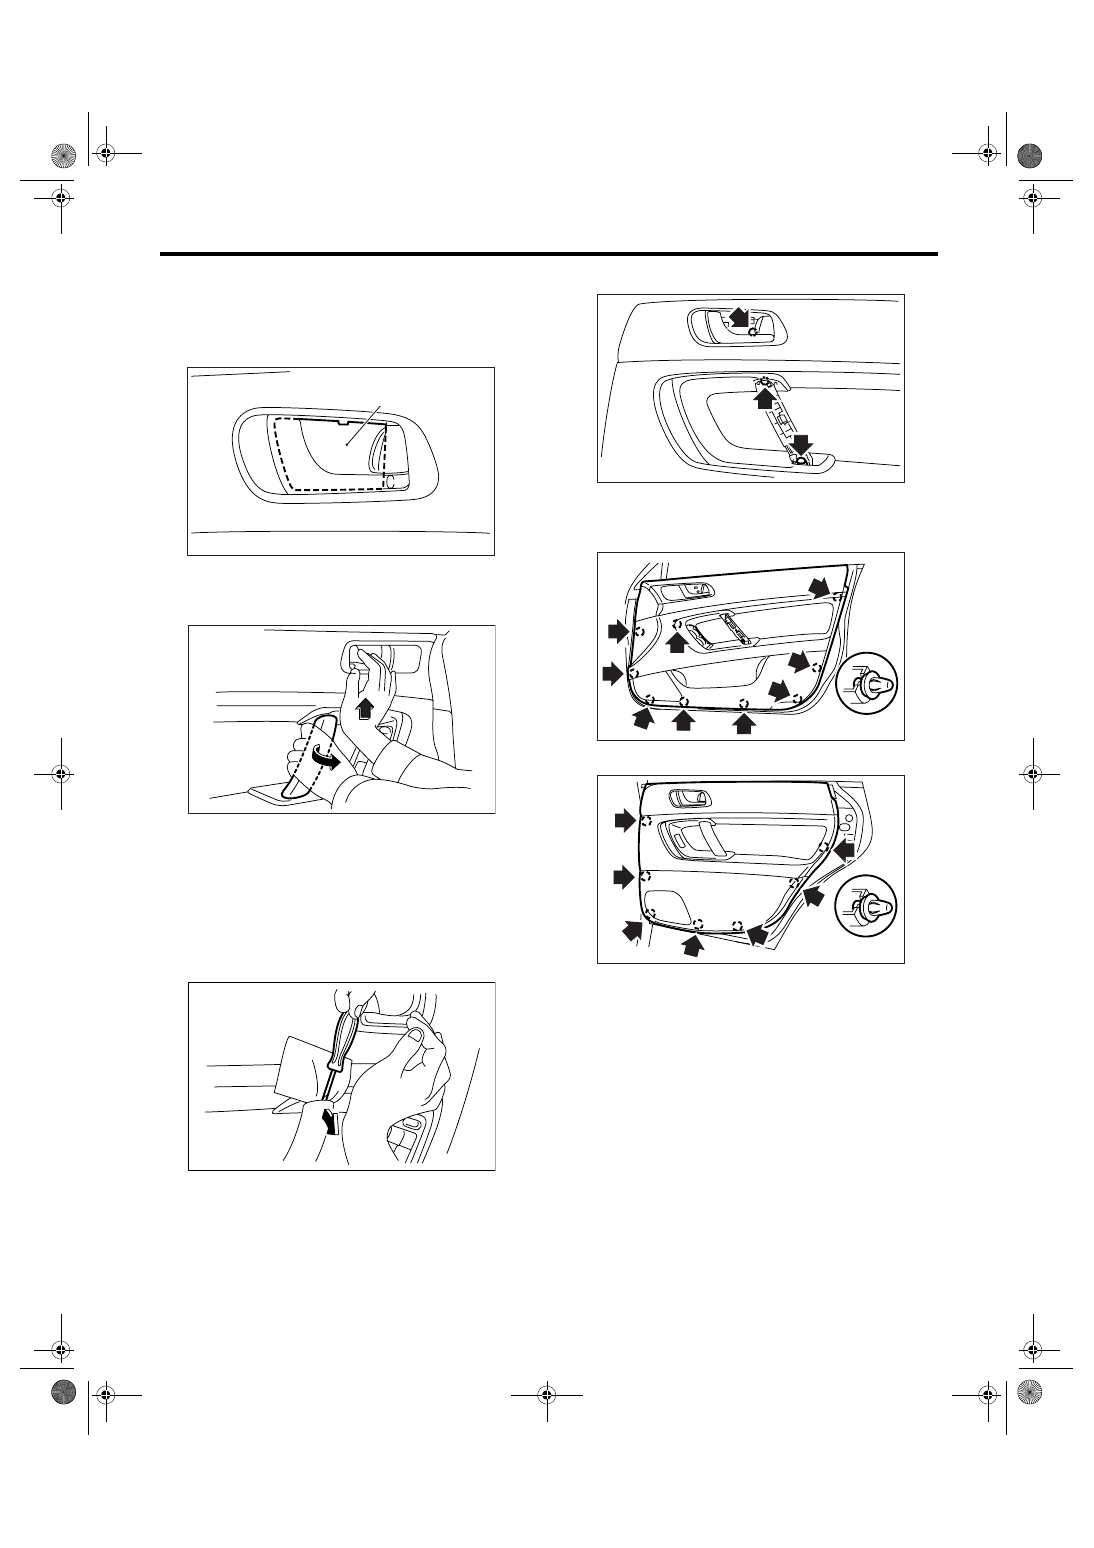
18.Door Trim
A: REMOVAL
1) Disconnect the ground cable from battery.
2) Remove the cover (A) at inner remote.
3) Push the root of hand grip upward, and remove
the hand grip cover by twisting it to the vehicle
frontward direction.
NOTE:
If the above procedure does not work, use a flat-tip
screw driver to pry out the upper side of hand grip
cover to remove, with the protection tape attached
to both the door trim and flat-tip screwdriver.
4) Loosen the screws.
5) Remove the clips, and disconnect each connec-
tor and wire to remove door trim.
• Front door trim
• Rear door trim
LH SIDE Counterclockwise
RH SIDE Clockwise
EI-00649
(A)
EI-01025
EI-01026
EI-00651
EI-00652
EI-00656
Нет комментариевНе стесняйтесь поделиться с нами вашим ценным мнением.
Текст