Subaru Legacy (2005 year). Service manual — part 996
EI-41
EXTERIOR/INTERIOR TRIM
Side Sill Spoiler
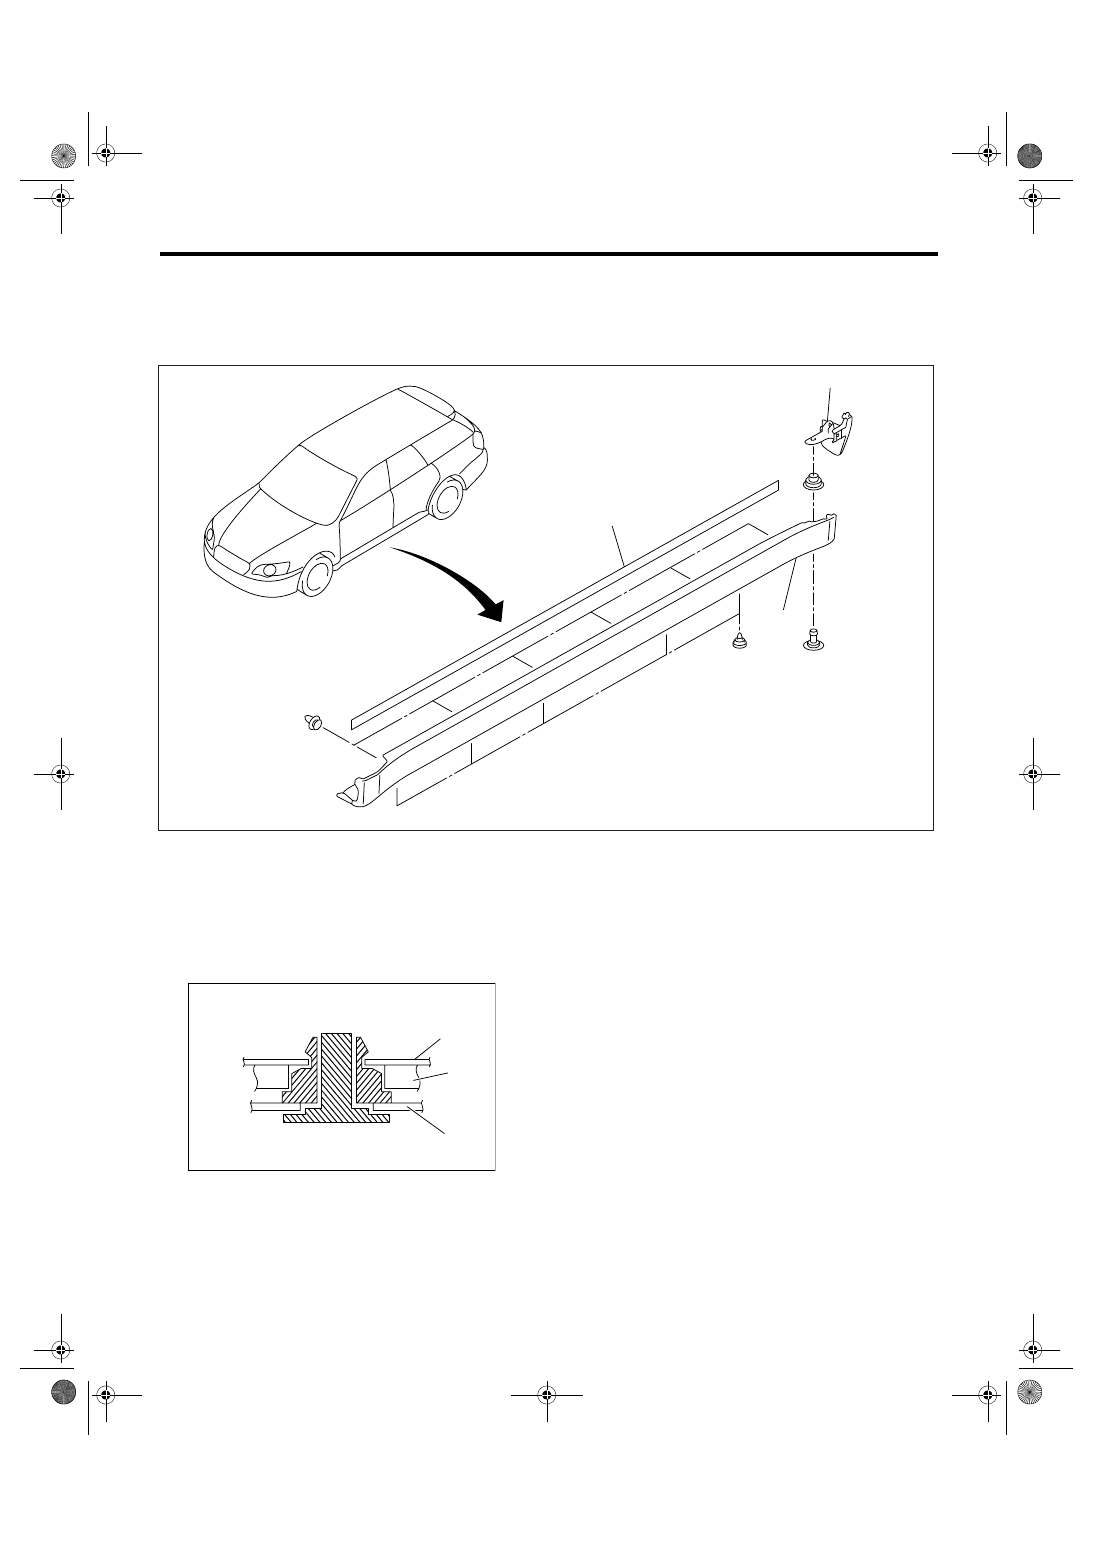
12.Side Sill Spoiler
A: REMOVAL
Remove the clips (two for front fender arch area, six for side sill spoiler lower area), and remove the side
spoiler.
B: INSTALLATION
Install in the reverse order of removal.
NOTE:
For the rearmost clip securing side sill spoiler, in-
stall through the side sill end.
(1)
Side sill spoiler
(2)
Packing
(3)
Side sill end
EI-01080
(1)
(2)
(3)
(1) Vehicle body
(2) Side sill end
(3) Side sill spoiler
(1)
EI-00791
(2)
(3)
EI-42
EXTERIOR/INTERIOR TRIM
Side Protector
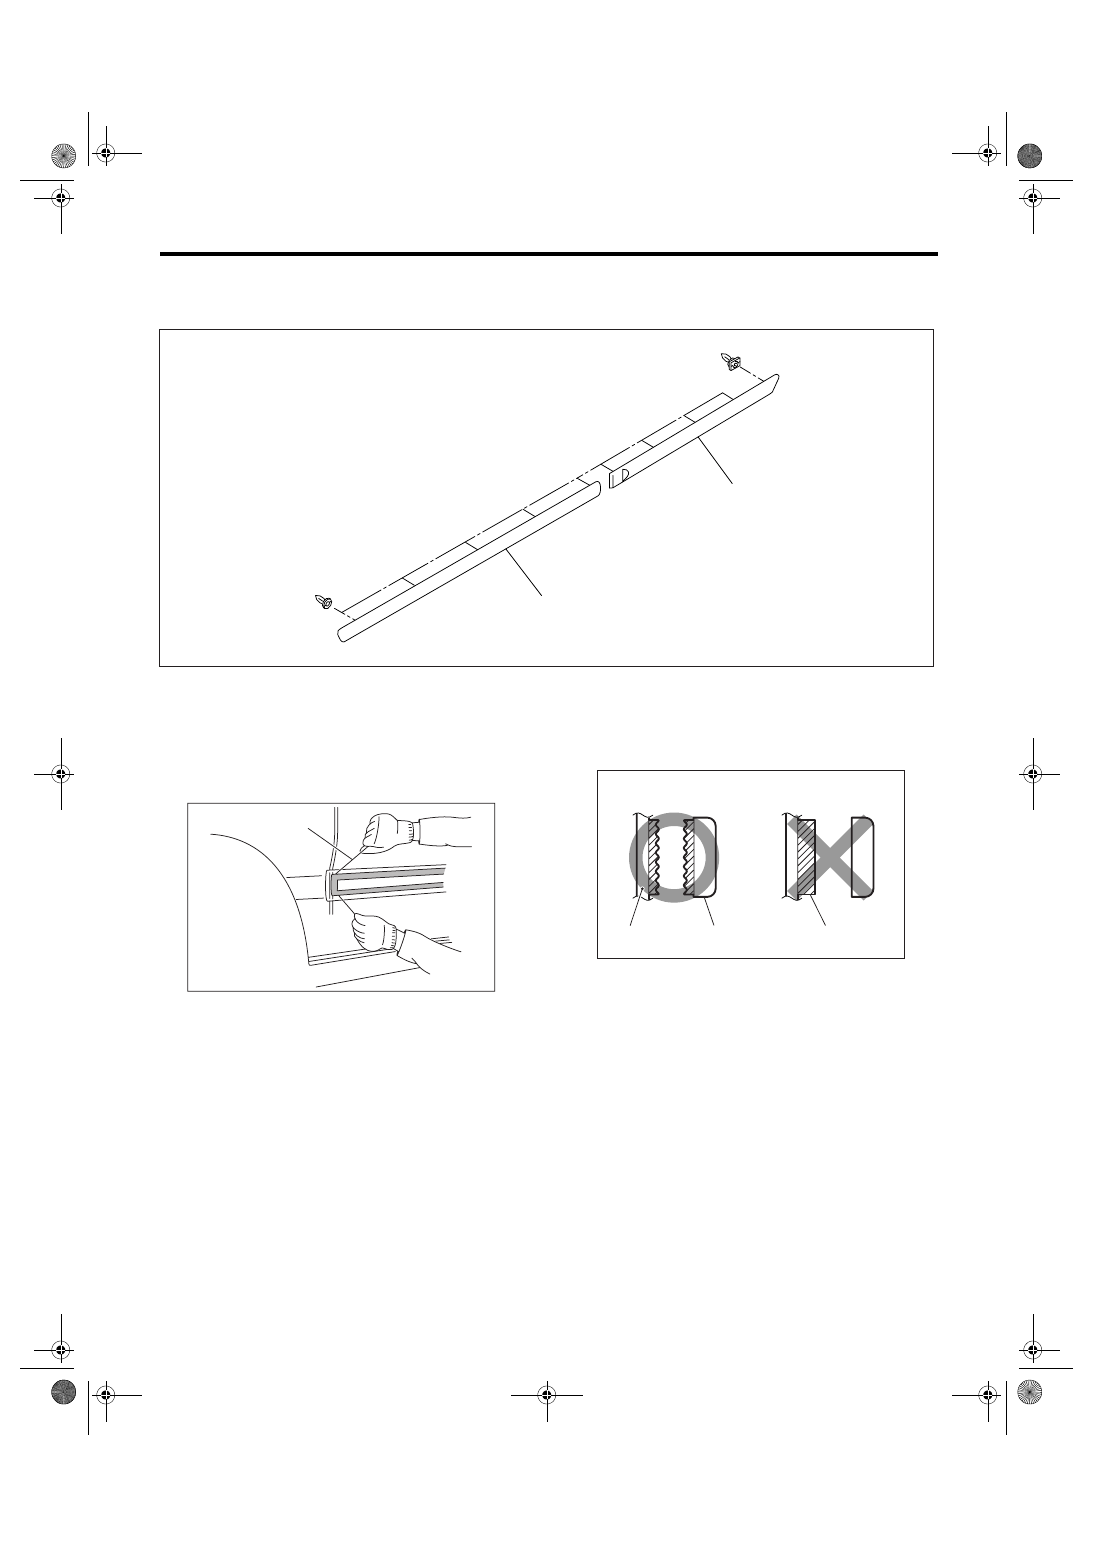
13.Side Protector
A: REMOVAL
1) Slide in a thin thread (A) of 0.8 mm (0.031 in) di-
ameter or less (fishing line etc.) between body and
protector, and cut the double-sided tape. By pulling
the protector toward you, remove the clip using clip
remover.
NOTE:
• To optimize the effect of solvent, slide the thread
along body without removing the double-sided tape
on the surface of body and spoiler.
• If it is difficult to remove the double-sided tape,
warm it up to approx. 40
°C (104°F).
• If the double-sided tape remains thick on the sur-
face due to interfacial peeling, apply solvent after
slicing off the double-sided tape using a cutter.
2) Apply masking tape around the double-sided
tape remaining on the surface of body or spoiler.
3) Apply solvent uniformly on the double-sided tape
using a brush.
CAUTION:
• Do not use solvent to the body which has
been repaired with lacquer paint.
• Wipe off immediately when the solvent is at-
tached on surface of the body or spoiler.
Solvent:
3M 8907 or equivalent
(1)
Front door protector
(2)
Rear door protector
(A)
White clip
EI-01084
(1)
(2)
(A)
(A)
EI-00153
(A)
(A) Panel
(B) Side protector
(C) Double-sided tape
EI-00478
(A)
(B)
(C)
EI-43
EXTERIOR/INTERIOR TRIM
Side Protector
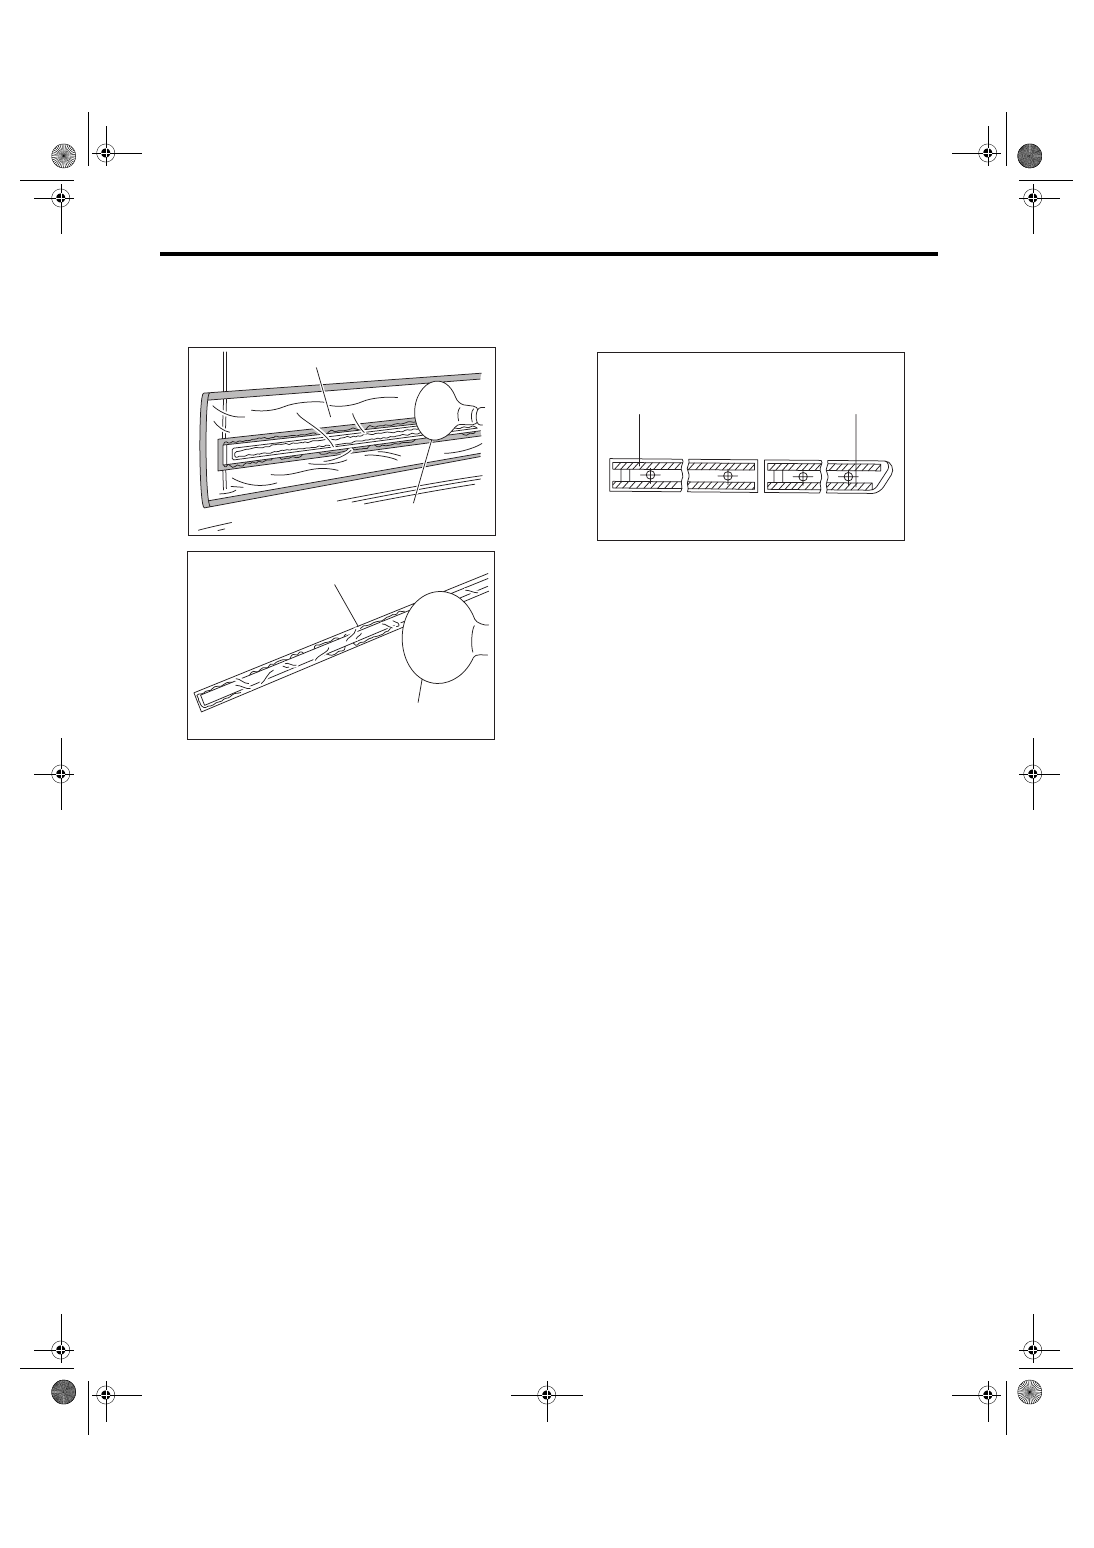
4) Cover the area where solvent is applied using
plastic wrap (A), and then heat the double-sided
tape for 5 to 10 minutes in 40 — 60
°C (104 —
140
°F) using a heat lamp (B).
CAUTION:
Do not heat the double-sided tape until the sur-
face becomes white and excessively dried.
5) Remove the double-sided tape using a plastic
spatula.
6) After completely removing the double-sided
tape, detach the masking tape and clean the sur-
face using a cotton cloth damped with white gaso-
line.
B: INSTALLATION
1) Apply primer to the protector surface where the
double-sided tape to be adhered, and then adhere
the double-sided tape as shown in the figure.
Primer:
3M K-500 or equivalent
Double-sided tape:
3M 5531-5 or equivalent
2) Heat the adhering part using a heat lamp.
Body side: 40 — 60
°C (104 — 140°F)
Protector side: 20 — 30
°C (68 — 86°F)
3) Peel off the backing sheet of double-sided tape,
align the clip position, and then adhere to the body
using care to avoid air entering.
CAUTION:
To keep the adhesion, do not wash the vehicle
within 24 hours from installation.
EI-00155
(A)
(B)
EI-00156
(A)
(B)
(1) Double-sided tape: thickness 1.2 mm (0.047 in),
width 5 mm (0.197 in)
EI-00536
(1)
(1)
EI-44
EXTERIOR/INTERIOR TRIM
Side Garnish
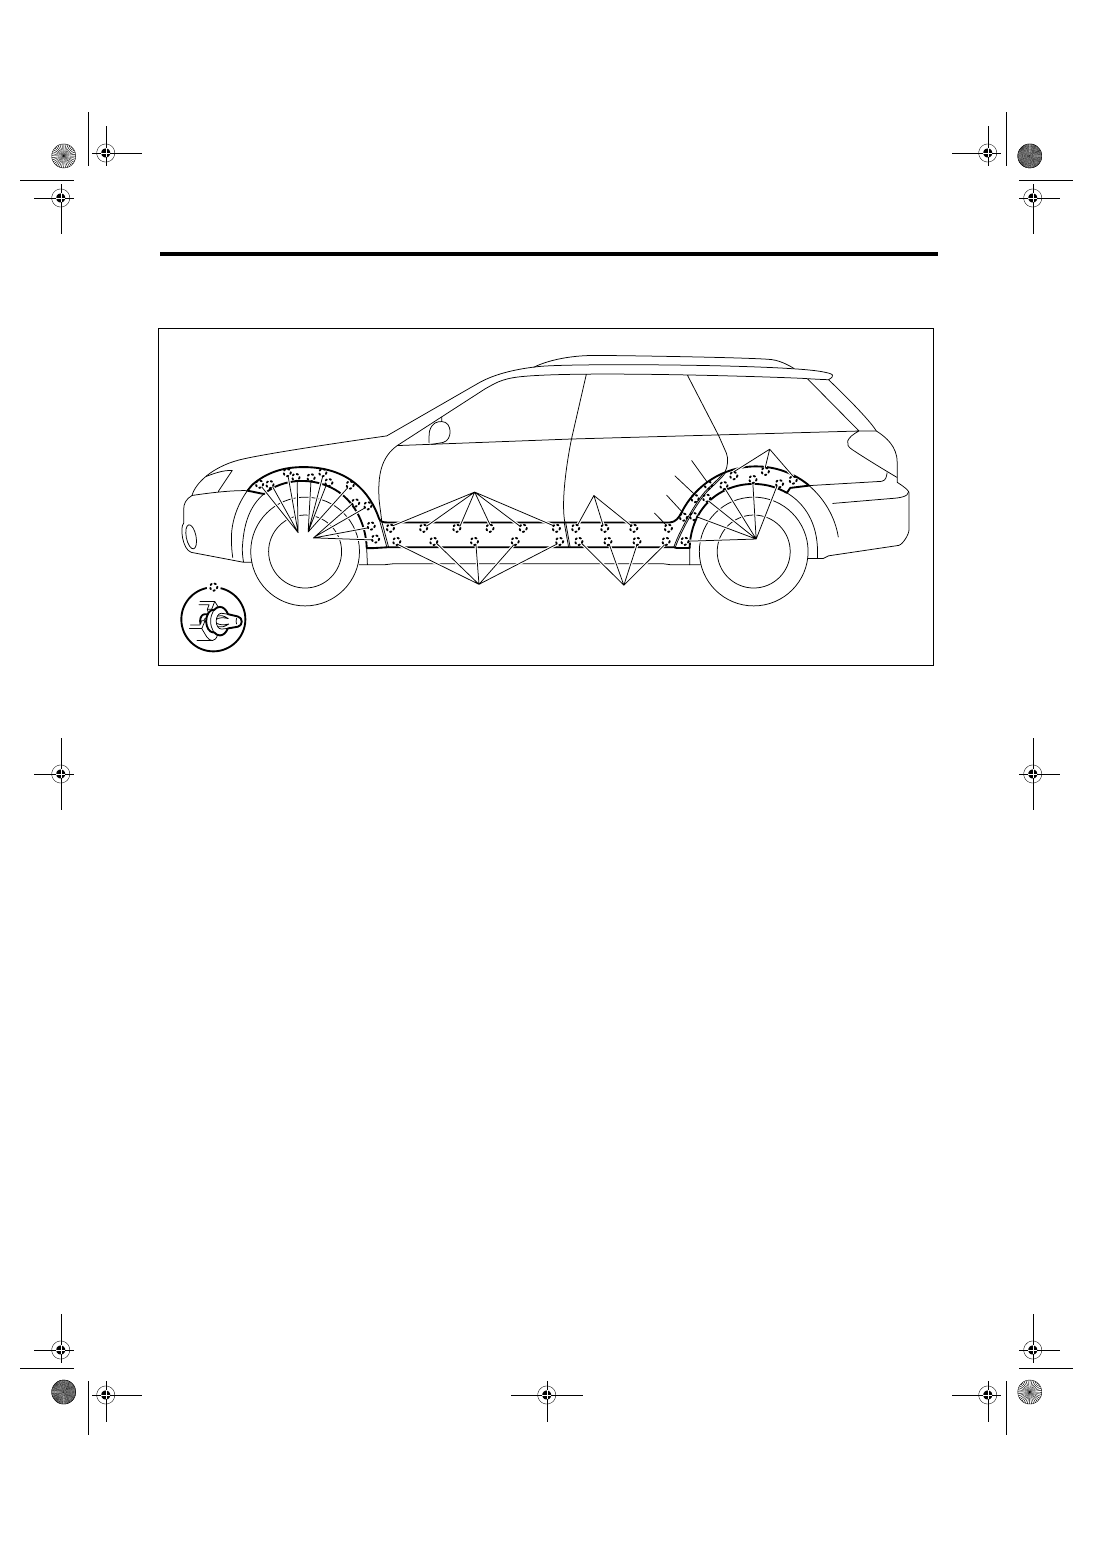
14.Side Garnish
A: REMOVAL
1) Remove the side sill spoilers, and remove the front fender garnish and rear quarter garnish. <Ref. to EI-
41, REMOVAL, Side Sill Spoiler.>
2) For removal of side garnish, refer to the removal procedure of “Side Protector”. <Ref. to EI-42, REMOVAL,
Side Protector.>
B: INSTALLATION
Check the color of clip, and then install in the reverse order of removal.
(A)
Black clip
(C)
Red clip
(E)
Green clip
(B)
White clip
(D)
Gray clip
EI-01085
(A)
(A)
(B)
(B)
(A)
(C)
(D)
(B)
(A)
(E)
(E)
Нет комментариевНе стесняйтесь поделиться с нами вашим ценным мнением.
Текст