Subaru Legacy (2005 year). Service manual — part 53
IN(H4SO 2.0)-5
INTAKE (INDUCTION)
Air Cleaner Case
3. Air Cleaner Case
A: REMOVAL
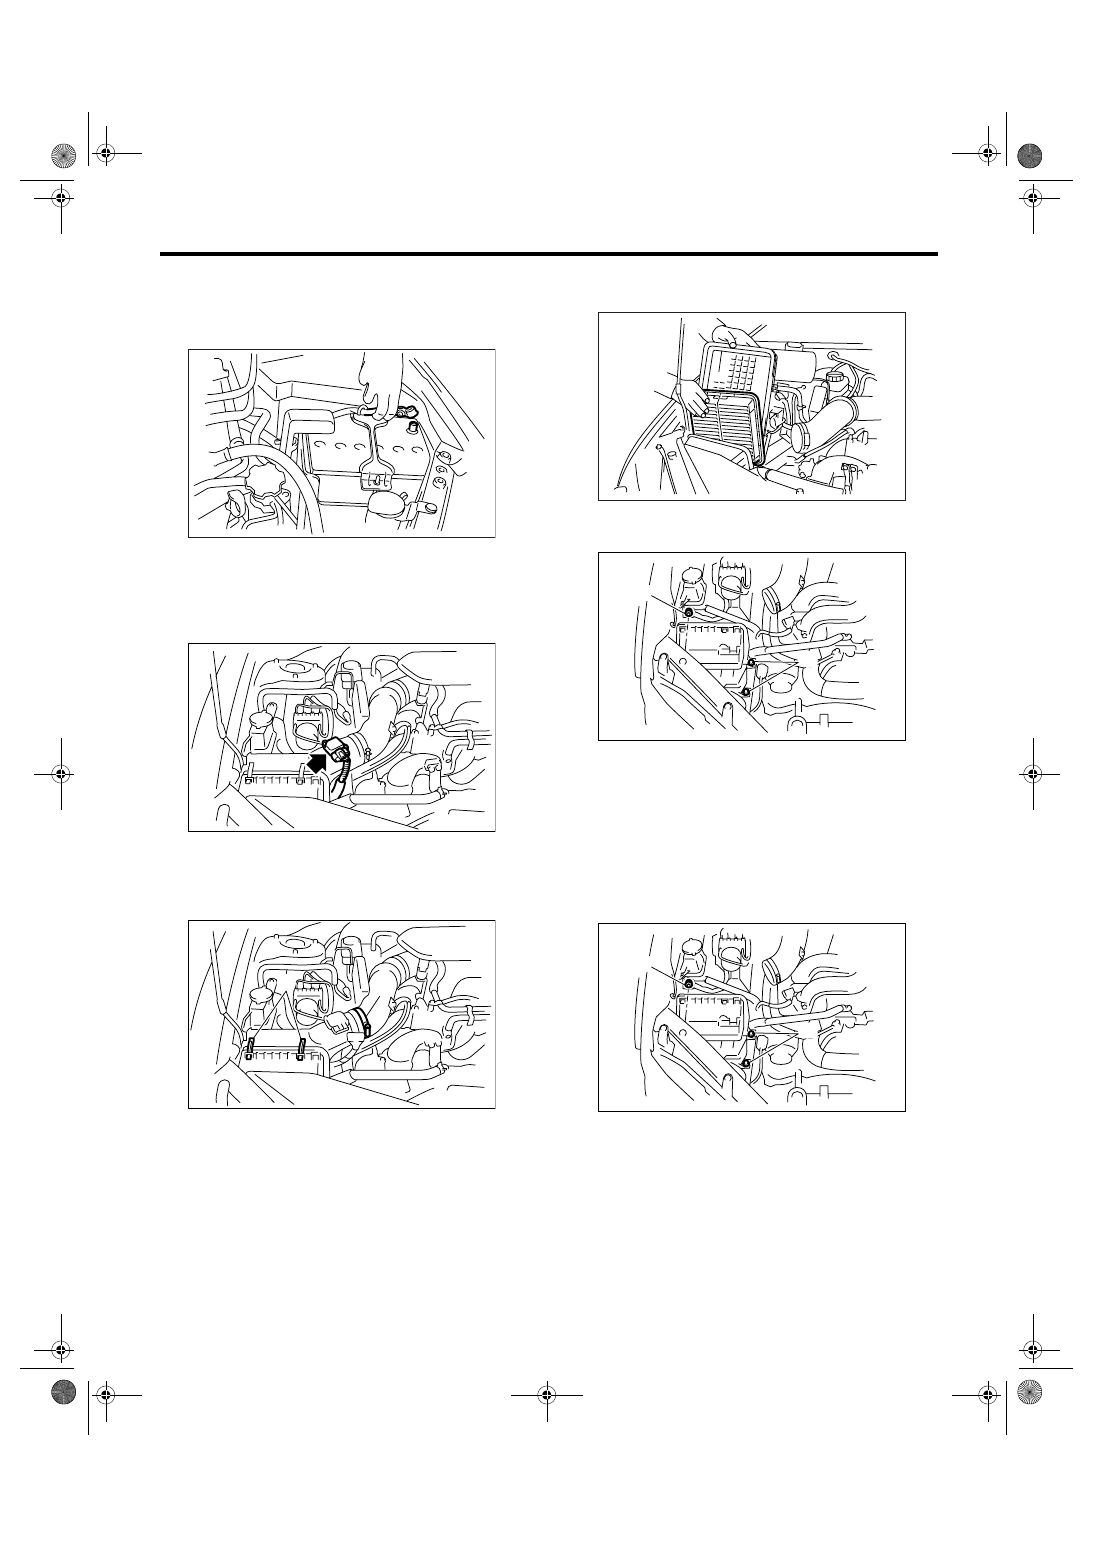
1) Disconnect the ground cable from battery.
2) Remove the air intake duct. <Ref. to IN(H4SO
2.0)-8, REMOVAL, Air Intake Duct.>
3) Disconnect the connector from mass air flow and
intake air temperature sensor. (2.5 L EC, EK, K4,
EH, ER model)
4) Loosen the clamps (A) which connect air cleaner
case to intake duct.
5) Remove the clip (B) securing upper side of air
cleaner case.
6) Remove the air cleaner case (rear) and air
cleaner element.
7) Remove the bolts (A) and nut (B) which secure
air cleaner case to body.
8) Remove the air cleaner case (front).
B: INSTALLATION
Install in the reverse order of removal.
Tightening torque:
Bolt (A)
6 N
⋅
m (0.6 kgf-m, 4.4 ft-lb)
Nut (B)
7.5 N
⋅
m (0.76 kgf-m, 5.5 ft-lb)
IN-00203
IN-00204
IN-00205
(A)
(B)
IN-00206
IN-00208
(B)
(A)
IN-00208
(B)
(A)
IN(H4SO 2.0)-6
INTAKE (INDUCTION)
Air Cleaner Case
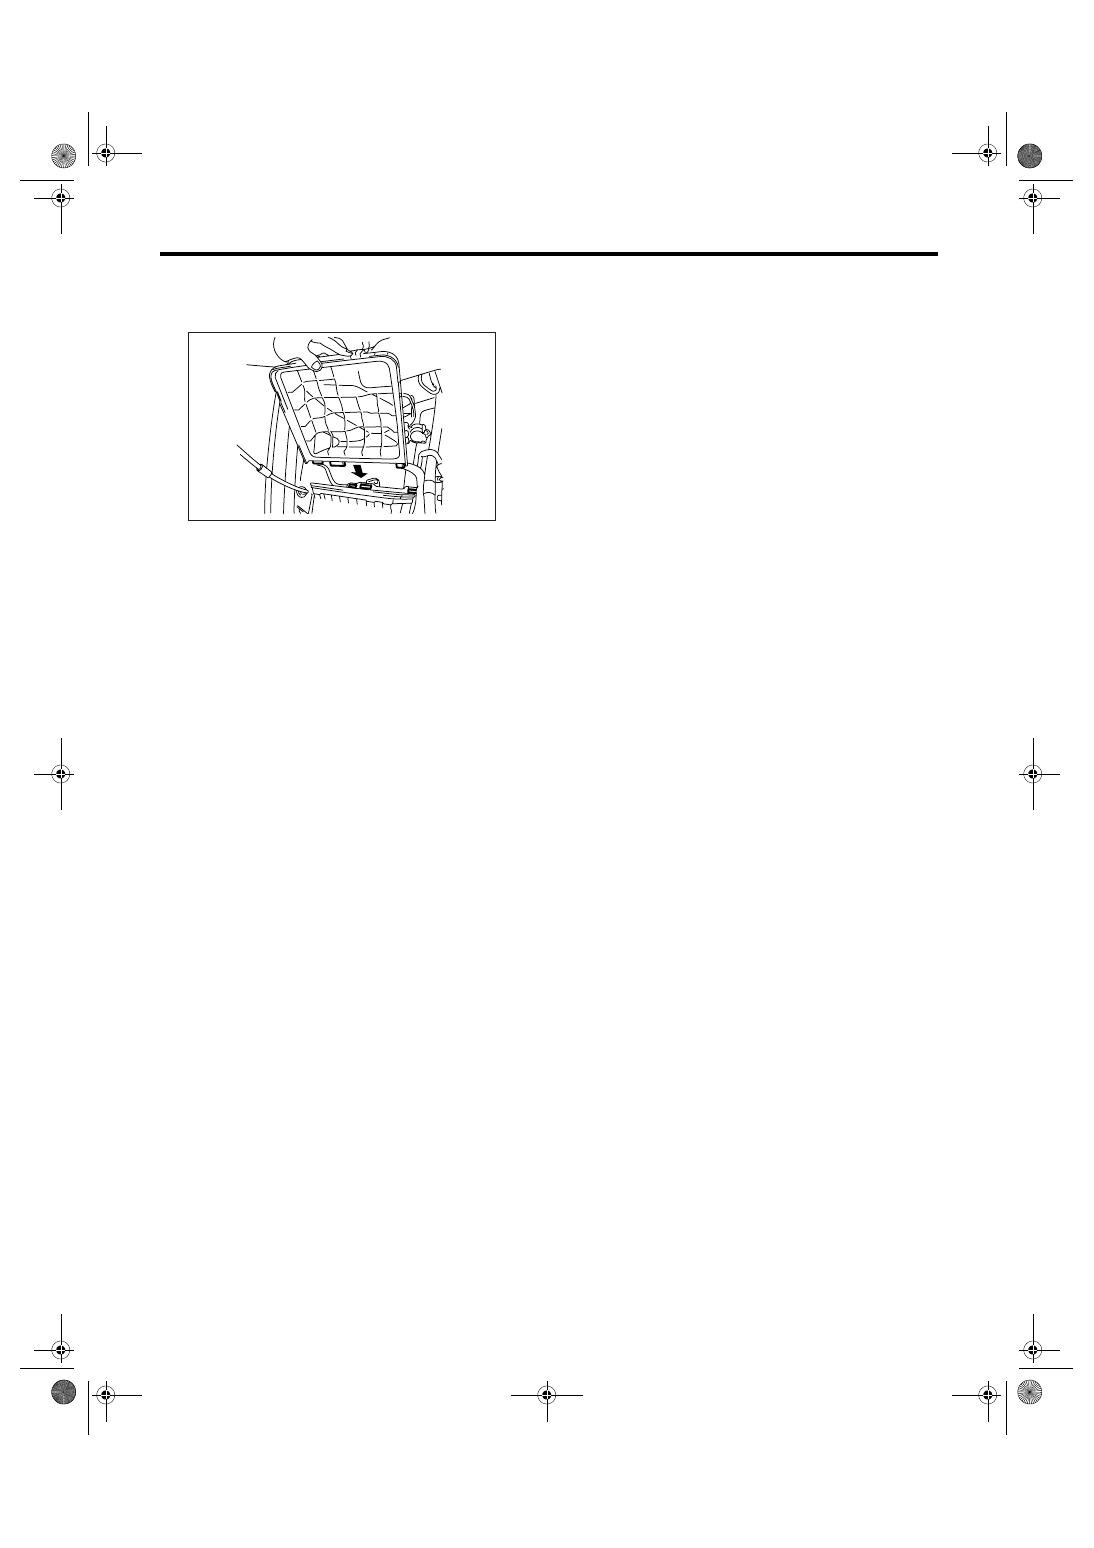
NOTE:
Fasten with a clip after inserting the lower tab of the
case.
C: INSPECTION
Check for cracks or loose connections.
IN-00207
IN(H4SO 2.0)-7
INTAKE (INDUCTION)
Air Intake Chamber
4. Air Intake Chamber
A: REMOVAL
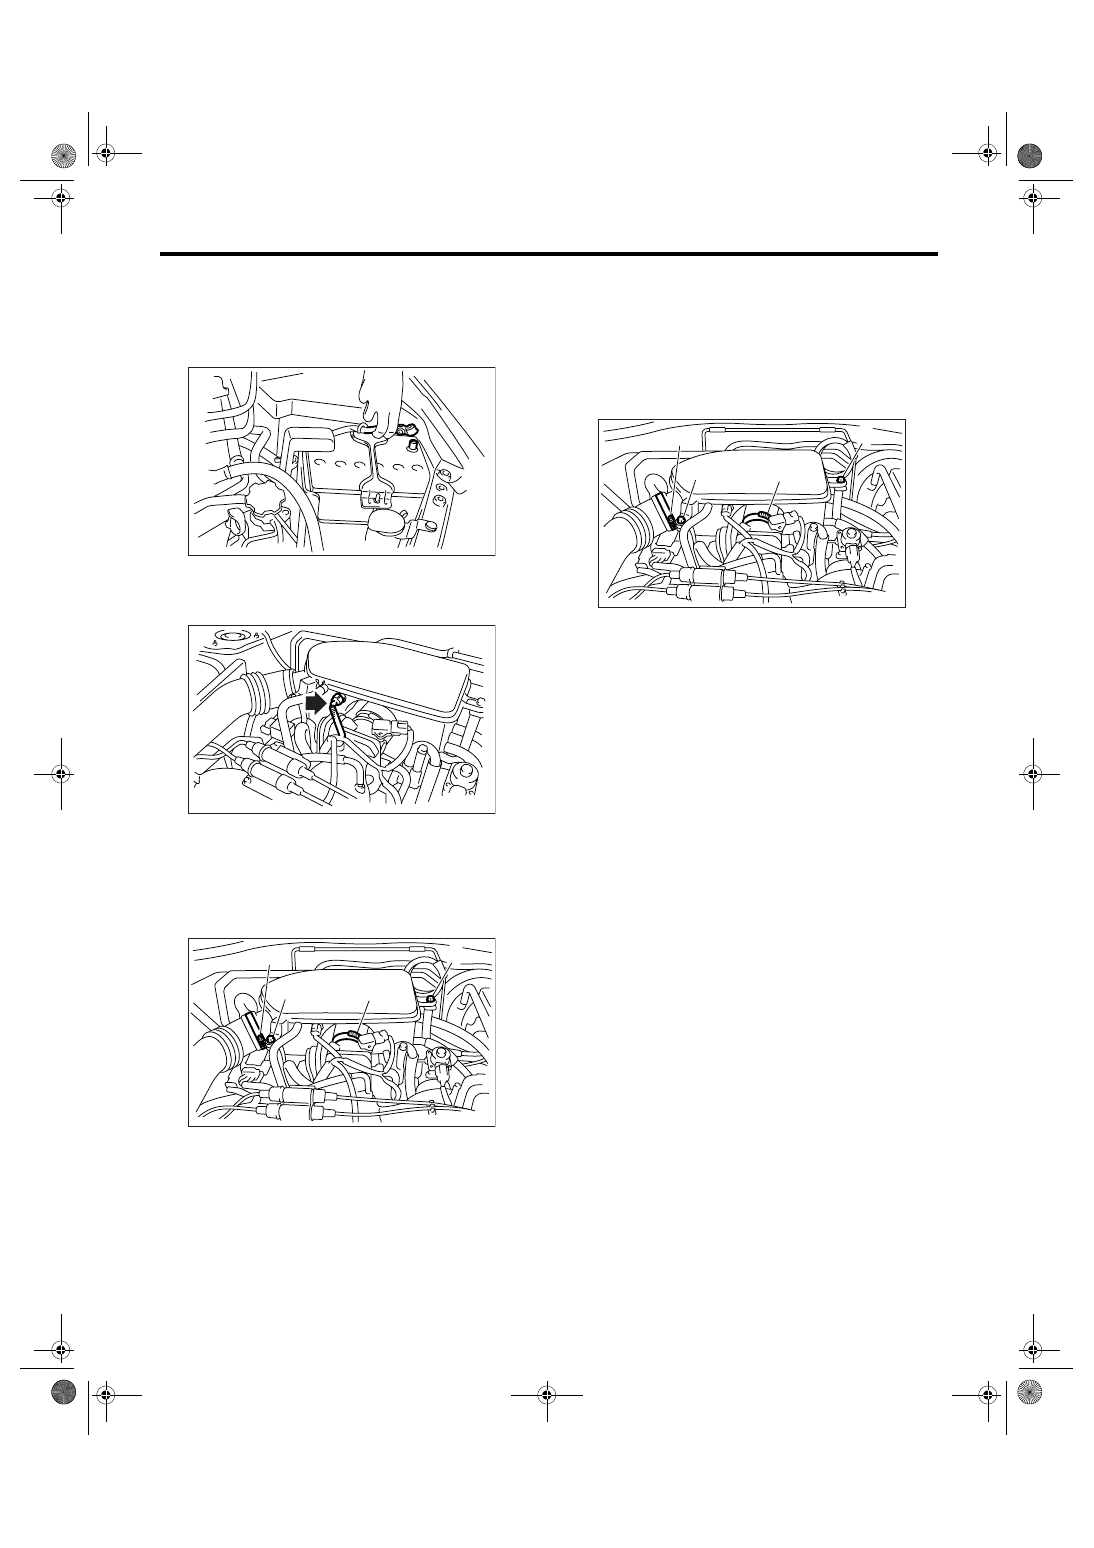
1) Disconnect the ground cable from battery. (2.0 L
model and 2.5 L KA, KS model)
2) Disconnect the connector from intake air tem-
perature sensor. (2.0 L model and 2.5 L KA, KS
model)
3) Loosen the clamp (A) which connects air intake
chamber to throttle body.
4) Loosen the clamp (B) which connects intake
duct to air intake chamber.
5) Remove the bolt (C) which secures air intake
chamber to the stay.
6) Disconnect the blow-by hose at three points, and
remove the air intake chamber.
B: INSTALLATION
Install in the reverse order of removal.
Tightening torque:
Clamp (A), (B)
3 N
⋅
m (0.3 kgf-m, 2.2 ft-lb)
Bolt (C)
6.5 N
⋅
m (0.66 kgf-m, 4.8 ft-lb)
C: INSPECTION
1) Check for cracks or loose connections.
2) Check that no foreign objects are mixed in air in-
take chamber.
IN-00203
FU-02080
IN-02005
(C)
(A)
(B)
(C)
IN-02005
(C)
(A)
(B)
(C)
IN(H4SO 2.0)-8
INTAKE (INDUCTION)
Air Intake Duct
5. Air Intake Duct
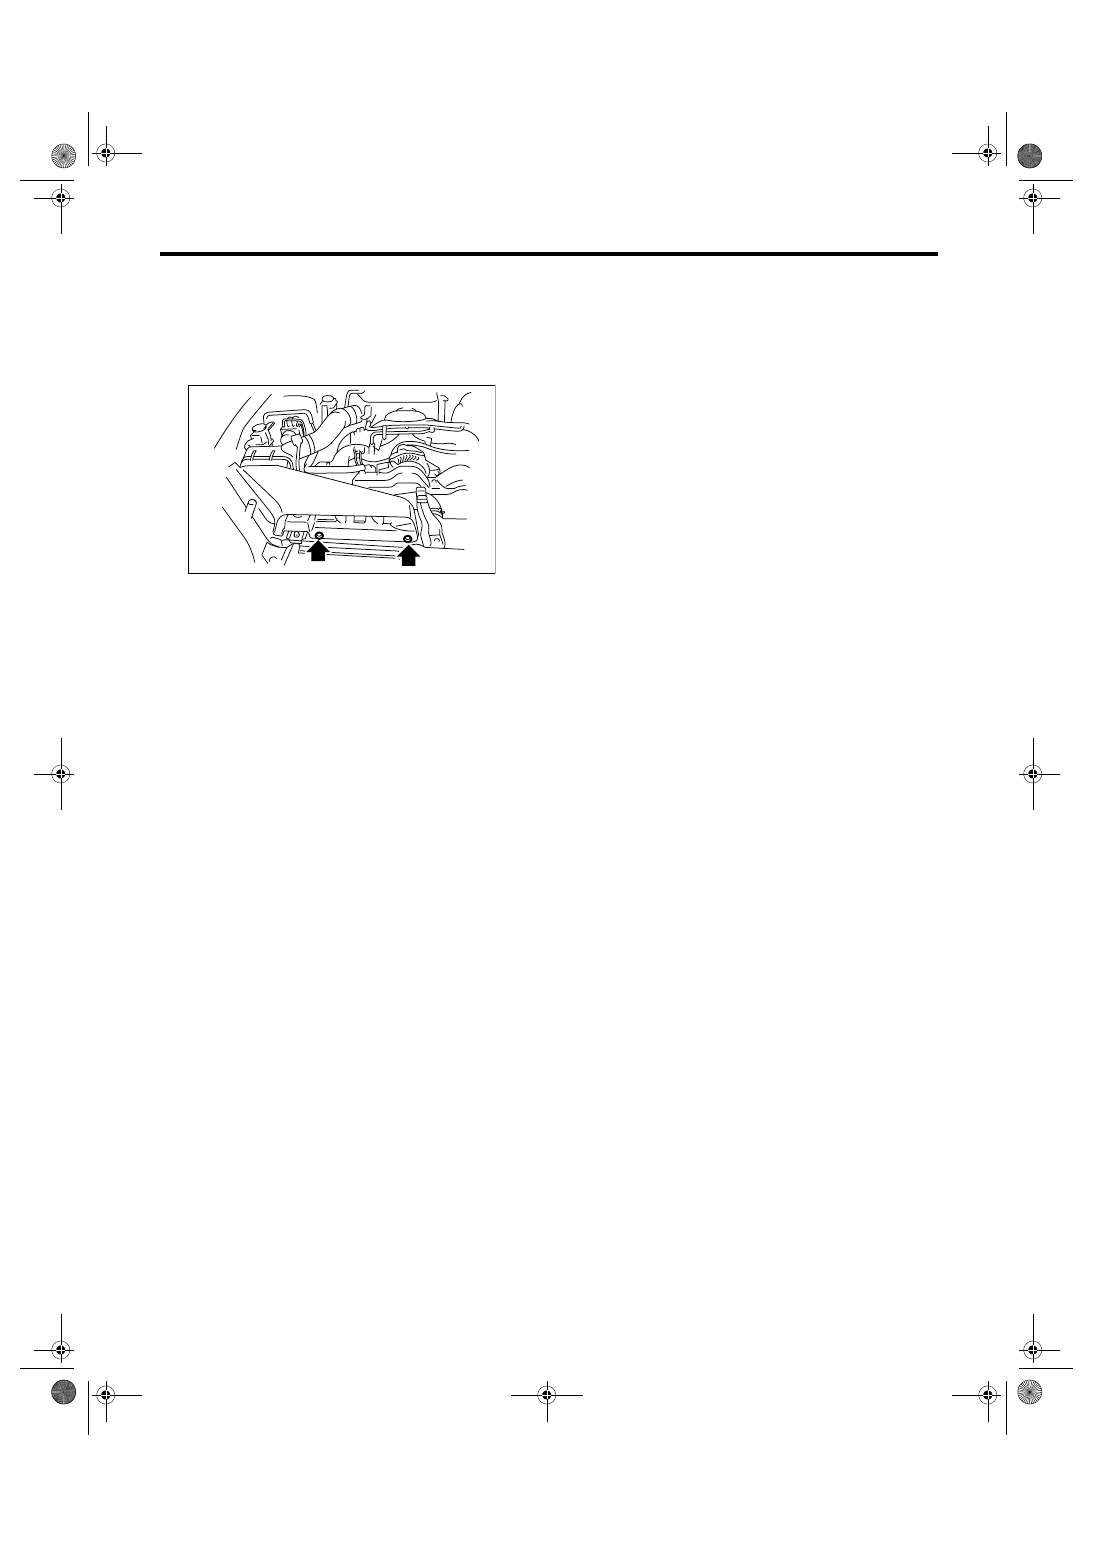
A: REMOVAL
1) Remove the clip securing air intake duct to body
front area.
2) Remove the air intake duct.
B: INSTALLATION
Install in the reverse order of removal.
C: INSPECTION
1) Check for cracks or loose connections.
2) Check that no foreign objects are mixed in air in-
take duct.
IN-00210
Нет комментариевНе стесняйтесь поделиться с нами вашим ценным мнением.
Текст