Subaru Legacy (2005 year). Service manual — part 26
PM-11
PERIODIC MAINTENANCE SERVICES
V-belt
6. V-belt
A: INSPECTION
1. EXCEPT FOR 3.0 L MODEL
1) Replace the belts if crack, fraying or wear is
found.
2) Check the V-belt tension and adjust it if neces-
sary by changing the generator installing position
or idler pulley installing position. <Ref. to PM-12,
REPLACEMENT, V-belt.>
Belt tension (without belt tension gauge):
(A)
When installing new one: 7 — 9 mm (0.276 —
0.354 in)
At inspection: 9 — 11 mm (0.354 — 0.433 in)
(B)
When installing new one: 7.5 — 8.5 mm (0.295
— 0.335 in)
At inspection: 9.0 — 10.0 mm (0.354 — 0.394
in)
Belt tension (with belt tension gauge):
(A)
When installing new one: 640 — 785 N (65.3
— 80.0 kgf, 144 — 176 lbf)
At inspection: 490 — 640 N (50 — 65 kgf, 110
— 144 lbf)
(B)
When installing new one: 620 — 760 N (63 —
77 kgf, 140 — 170 lbf)
At inspection: 350 — 450 N (36 — 46 kgf, 79 —
101 lbf)
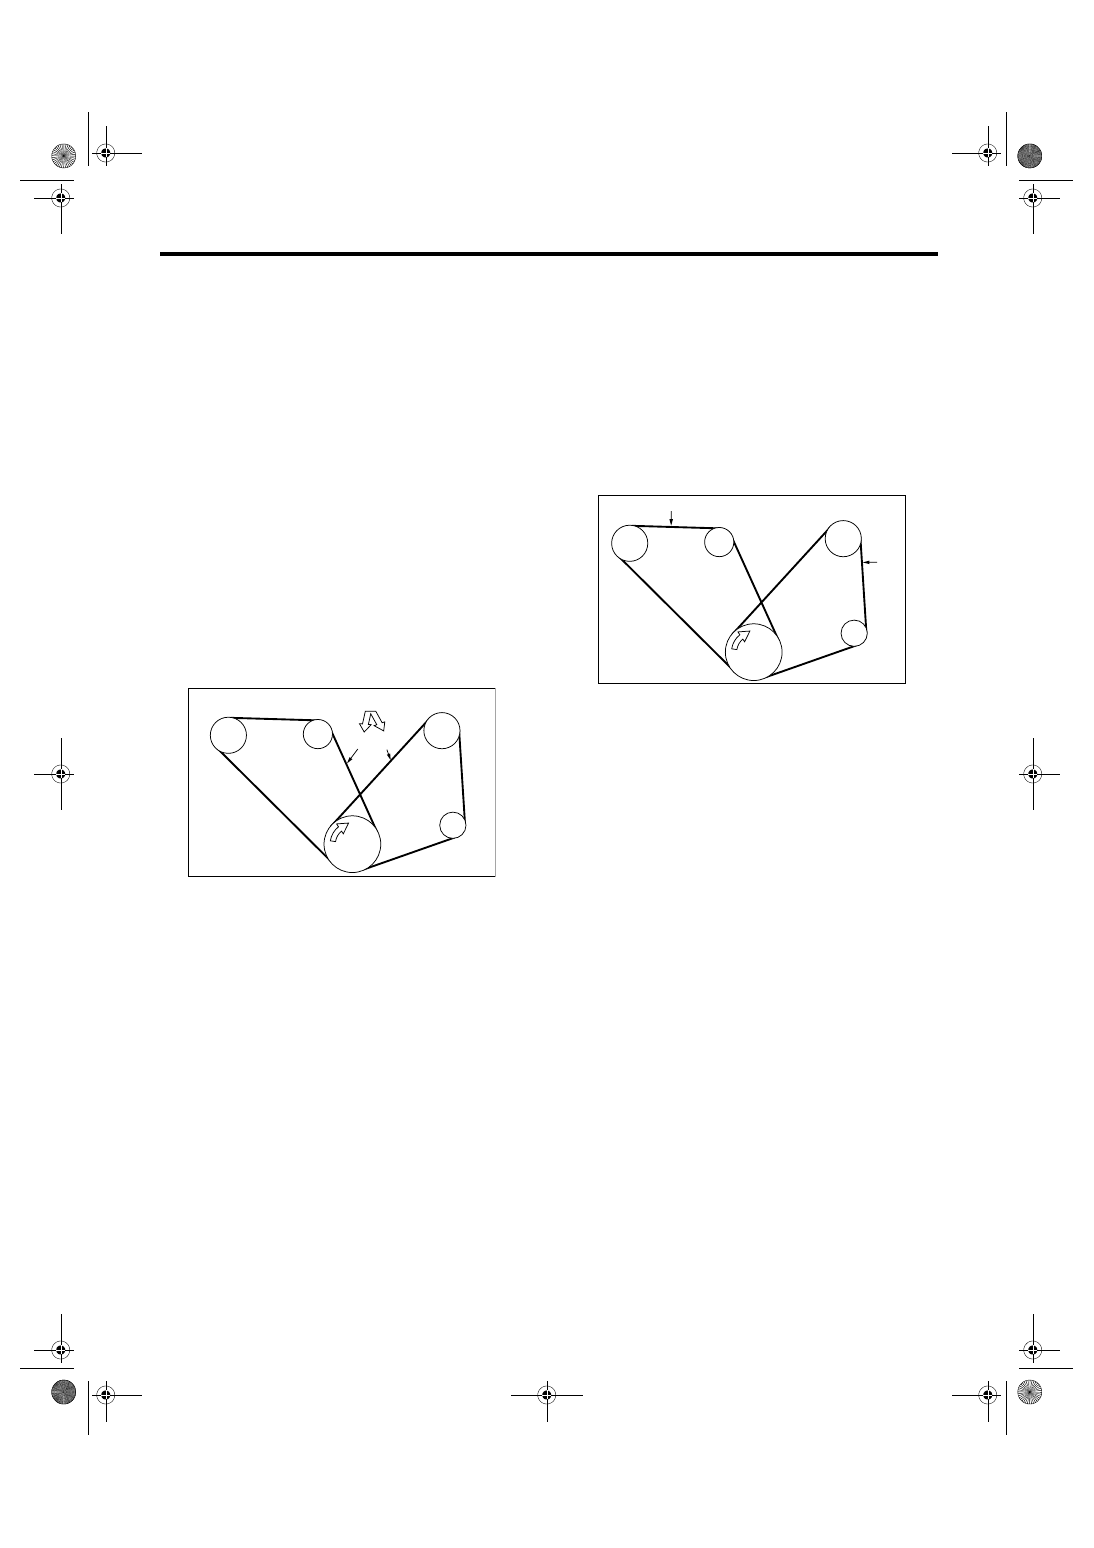
(A) Front side belt
(B) Rear side belt
(C) 98 N (10 kgf, 22 lbf)
C/P Crank pulley
GEN Generator
P/S Power steering oil pump pulley
A/C A/C compressor pulley
I/P Idler pulley
C/P
P/S
A/C
GEN
(A) (B)
(C)
I/P
PM-00272
(A) Front side belt
(B) Rear side belt
C/P Crank pulley
GEN Generator
P/S Power steering oil pump pulley
A/C A/C compressor pulley
I/P Idler pulley
C/P
P/S
A/C
GEN
(A)
(B)
I/P
PM-00154
PM-12
PERIODIC MAINTENANCE SERVICES
V-belt
2. 3.0 L MODEL
1) Replace the belts if crack, fraying or wear is
found.
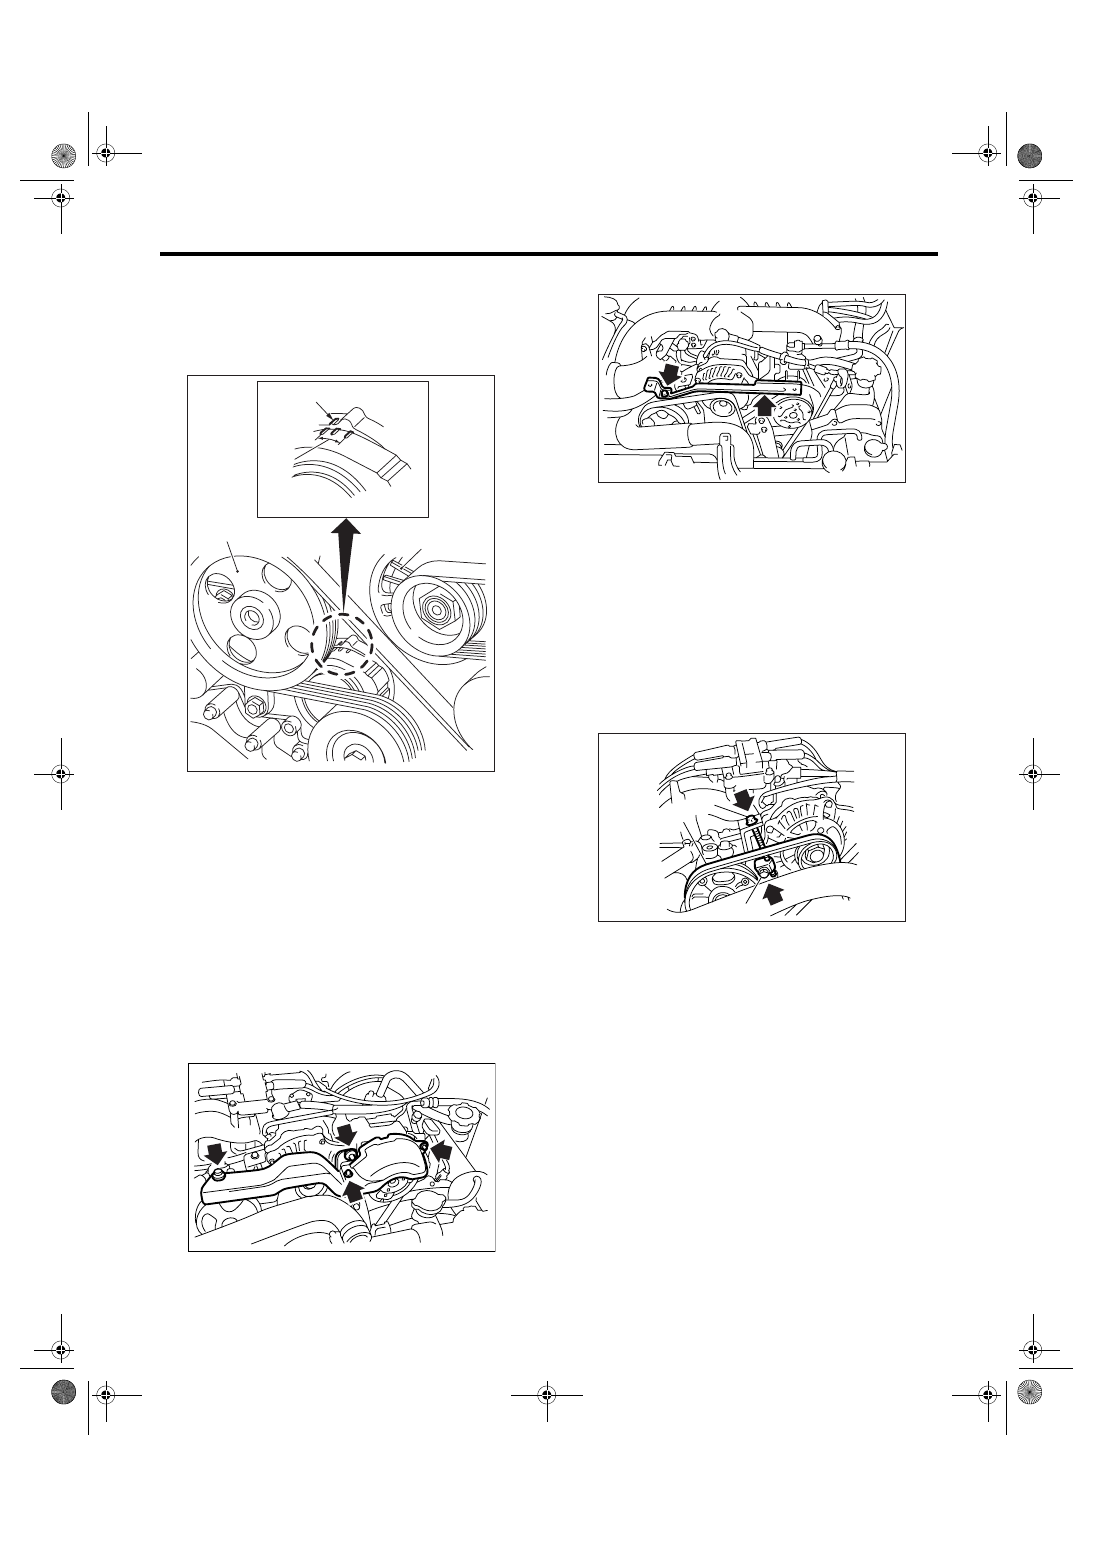
2) Check that the V-belt automatic tensioner indica-
tor (A) is within the range (D).
B: REPLACEMENT
1. FRONT SIDE BELT (FOR POWER
STEERING OIL PUMP AND GENERATOR)
NOTE:
Wipe off any oil and water on the belt and pulley.
1) Remove the collector cover. (If equipped)
2) Remove the V-belt covers.
• Non-turbo model
• Turbo model
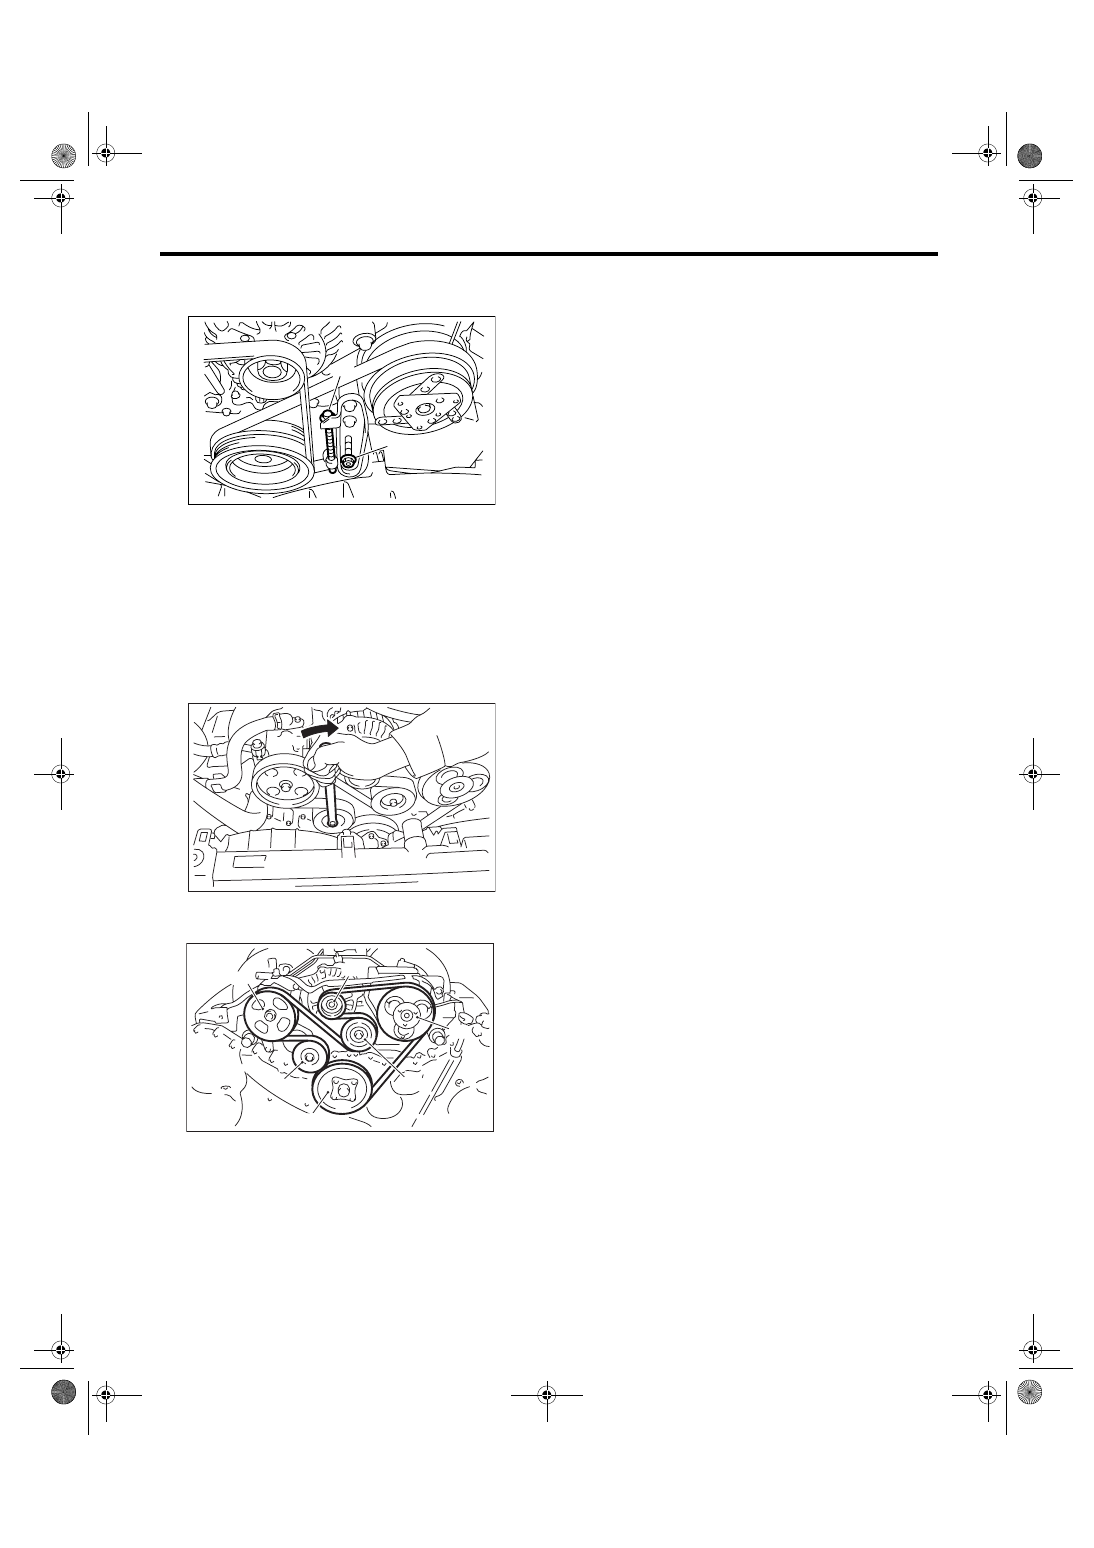
3) Loosen the lock bolt (A).
4) Loosen the slider bolt (B).
5) Remove the front side belt (C).
6) Install a new V-belt, and tighten the slider bolt so
as to obtain the specified belt tension.
7) Tighten the lock bolt (A).
8) Tighten the slider bolt (B).
Tightening torque:
Lock bolt
25 N
⋅
m (2.5 kgf-m, 18.4 ft-lb)
Slider bolt
8 N
⋅
m (0.8 kgf-m, 5.8 ft-lb)
2. REAR SIDE BELT (FOR A/C)
NOTE:
Wipe off any oil and water on the belt and pulley.
1) Remove the front side belt.
2) Loosen the lock nut (A).
3) Loosen the slider bolt (B).
4) Remove the rear side belt.
5) Install a new V-belt, and tighten the slider bolt so
as to obtain the specified belt tension.
6) Tighten the lock nut (A).
(A) Indicator
(B) Generator
(C) Power steering oil pump
(D) Service limit
(B)
(A)
(D)
(C)
ME-00475
PM-00003
ME-00807
PM-00004
(B)
(C)
(A)
PM-13
PERIODIC MAINTENANCE SERVICES
V-belt
Tightening torque:
23 N
⋅
m (2.3 kgf-m, 17.0 ft-lb)
7) Install the front side belt.
• Non-turbo model <Ref. to ME(H4SO 2.0)-37,
FRONT SIDE BELT, INSTALLATION, V-belt.>
• Turbo model <Ref. to ME(H4DOTC)-40, FRONT
SIDE BELT, INSTALLATION, V-belt.>
3. 3.0 L MODEL
1) Fit the tool to the belt tensioner mounting bolt.
2) Turn the tool clockwise, and loosen the V-belt to
remove.
3) Remove the V-belt cover.
4) Install in the reverse order of removal.
(1) Power steering oil pump
(2) Belt tension adjuster
(3) Crankshaft pulley
(4) A/C compressor
(5) Belt idler
(6) Generator
(A)
(B)
PM-00005
ME-00473
(1)
(6)
(4)
(5)
(2)
(3)
ME-00474
PM-14
PERIODIC MAINTENANCE SERVICES
Timing Belt
7. Timing Belt
A: REPLACEMENT
1. SOHC MODEL
1) Protect the radiator with cardboard and blanket.
2) Remove the V-belt covers.
3) Remove the V-belts. <Ref. to ME(H4SO 2.0)-37,
V-belt.>
4) Remove the A/C compressor V-belt tensioner.
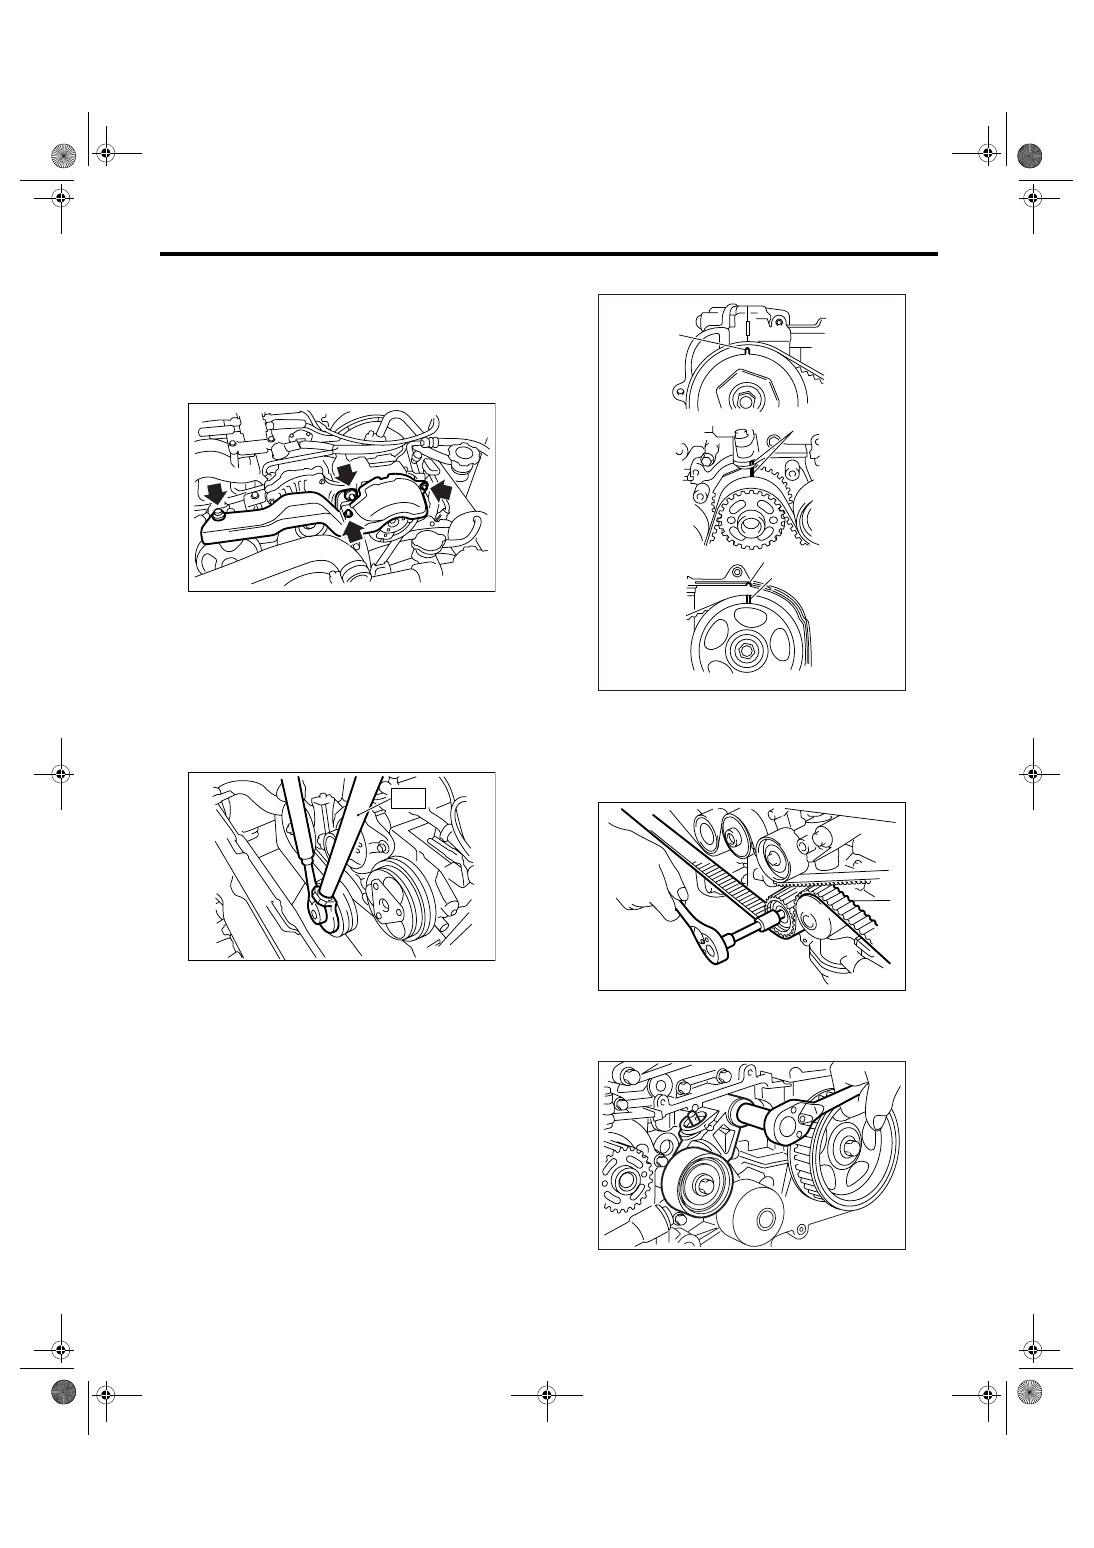
5) Use the ST to lock the crankshaft, and remove
the pulley bolt.
ST
499977400
CRANK PULLEY WRENCH
(2.0 L MODEL)
ST
499977100
CRANK PULLEY WRENCH
(2.5 L MODEL)
6) Remove the crank pulley.
7) Remove the belt cover (LH).
8) Remove the front timing belt cover.
9) Remove the timing belt guide. (MT model)
10) Turn the crankshaft and align the alignment
marks on crankshaft, and left and right cam sprock-
ets with notches of belt cover and cylinder block.
ST
499987500
CRANKSHAFT SOCKET
11) Remove the belt idler.
12) Remove the belt idler (No. 2).
13) Remove the timing belt.
14) Remove the automatic belt tension adjuster as-
sembly.
15) Install in the reverse order of removal. <Ref. to
ME(H4SO 2.0)-44, INSTALLATION, Timing Belt.>
PM-00003
PM-00007
ST
(A) Notch
(B) Alignment mark
PM-00009
(B)
(B)
(B)
(A)
PM-00010
PM-00011
Нет комментариевНе стесняйтесь поделиться с нами вашим ценным мнением.
Текст