Subaru Legacy (2005 year). Service manual — part 526
4AT-85
AUTOMATIC TRANSMISSION
Extension Case
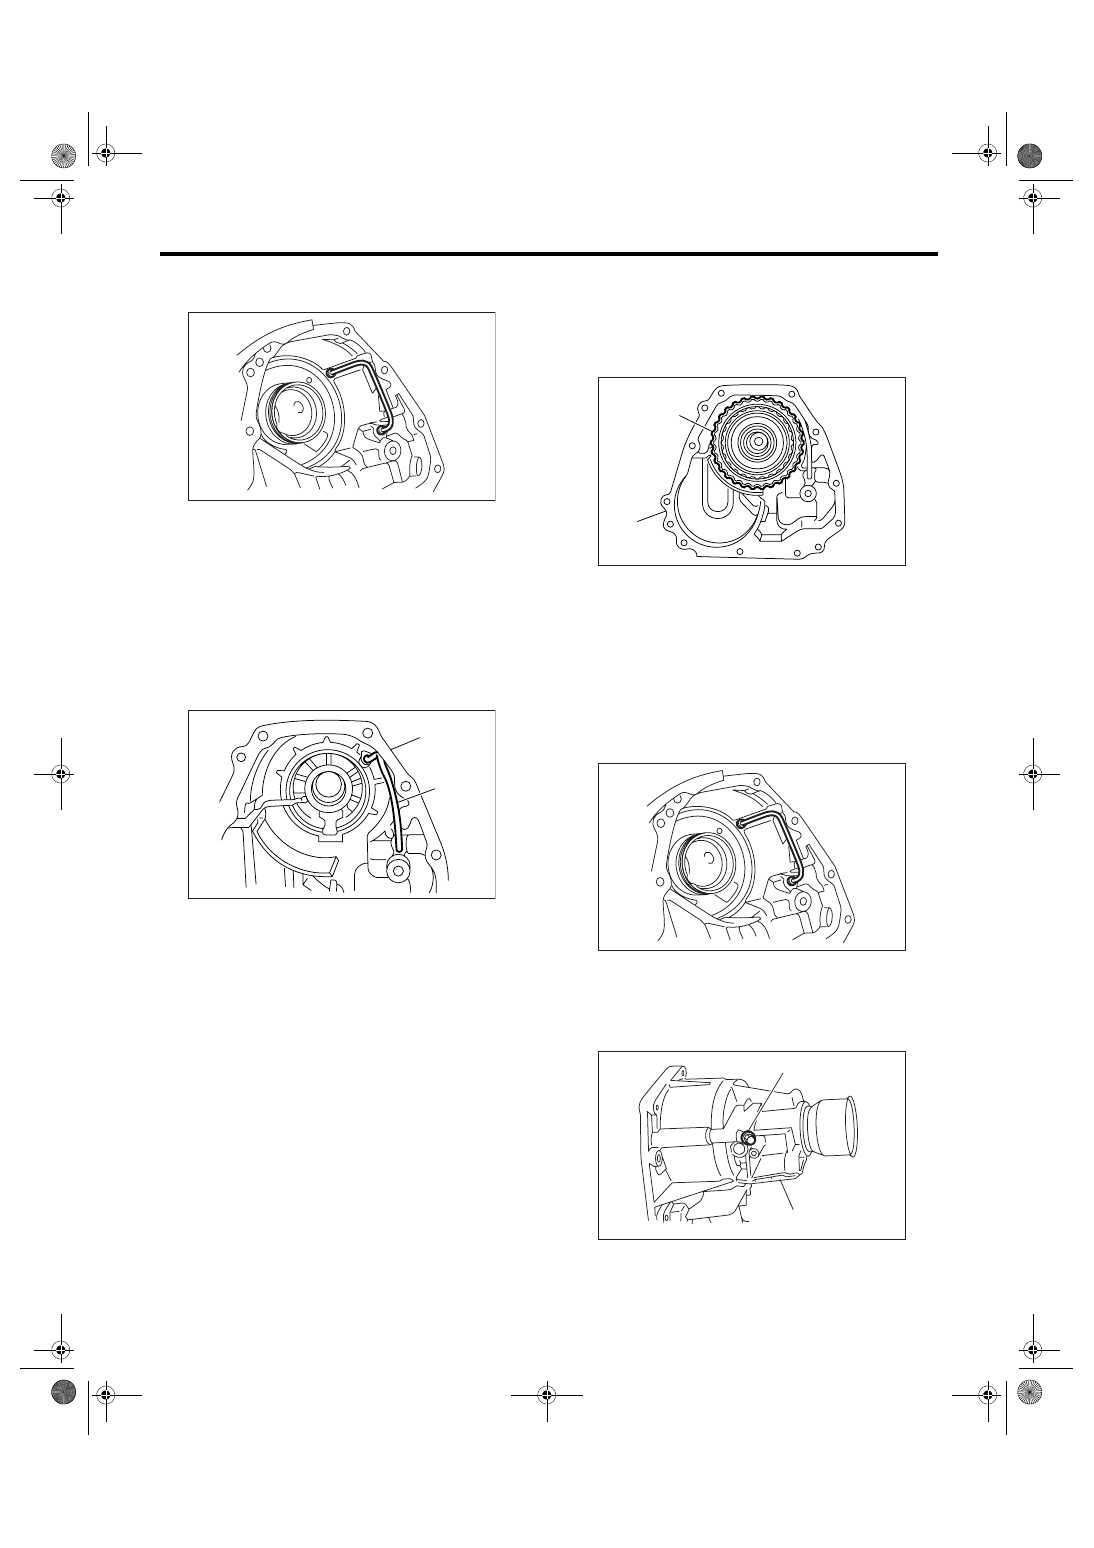
4) Remove the transfer clutch pipe without deform-
ing the pipe.
5) Remove the dust cover from extension case.
6) Remove the oil seal from extension case.
D: ASSEMBLY
1. MP-T MODEL
1) Press-fit new oil seal using ST and press.
ST
498057300
INSTALLER
2) Press-fit the dust cover.
3) Install the transfer clutch pipe to extension case
without deforming the pipe.
4) Install the transfer clutch assembly to case.
NOTE:
• Be careful not to damage the seal ring.
• Insert the clutch assembly to bottom of bearing
shoulder completely.
2. VTD MODEL
1) Press-fit new oil seal using ST and press.
ST
498057300
INSTALLER
2) Press-fit the dust cover.
3) Install the transfer clutch pipe to extension case
without deforming the pipe.
4) Apply ATF to new O-ring, and install the test
plug.
Tightening torque:
13 N
⋅
m (1.3 kgf-m, 9.6 ft-lb)
(A) Extension case
(B) Transfer clutch pipe
AT-00124
AT-00120
(A)
(B)
(A) Transfer clutch
(B) Extension case
(A) Test plug
(B) Extension case
AT-00125
(A)
(B)
AT-00124
AT-00122
(A)
(B)
4AT-86
AUTOMATIC TRANSMISSION
Extension Case
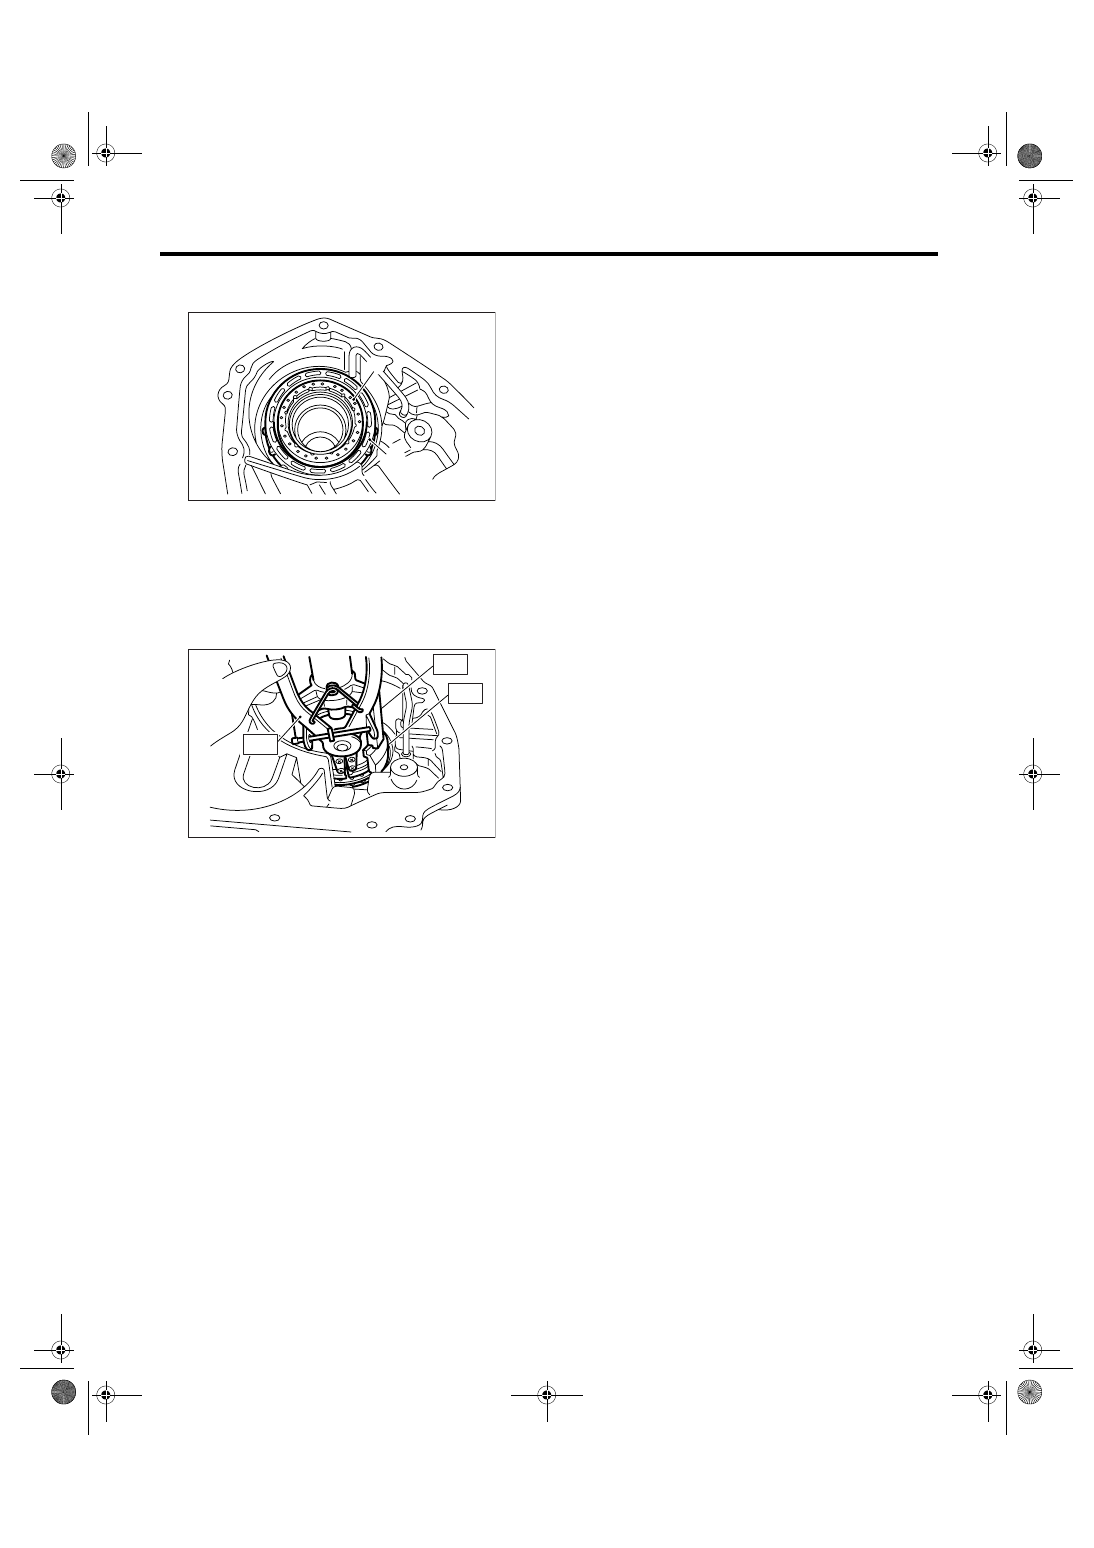
5) Insert the multi-plate clutch, drive plate, driven
plate and spring retainer.
6) Install the snap ring using ST1, ST2 and ST3.
ST1
398673600
COMPRESSOR
ST2
498627100
SEAT
ST3
398663600
PLIERS
E: INSPECTION
• Spray compressed air, and make sure the trans-
fer pipe and extension case routes are not clogged
and have no leak.
• Inspect the extension end play, and adjust it to
within specification.
MP-T model
<Ref. to 4AT-90, MP-T MODEL, ADJUST-
MENT, Transfer Clutch.>
VTD model
<Ref. to 4AT-91, VTD MODEL, ADJUSTMENT,
Transfer Clutch.>
(A) Spring retainer
(B) Multi-plate clutch (LSD) piston assembly
AT-00126
(A)
(B)
AT-00121
ST3
ST2
ST1
4AT-87
AUTOMATIC TRANSMISSION
Transfer Clutch
30.Transfer Clutch
A: REMOVAL
1) Remove the transmission assembly from vehi-
cle. <Ref. to 4AT-39, REMOVAL, Automatic Trans-
mission Assembly.>
2) Remove the extension case, and then remove
the transfer clutch. <Ref. to 4AT-83, REMOVAL,
Extension Case.> <Ref. to 4AT-84, DISASSEM-
BLY, Extension Case.>
B: INSTALLATION
1) Select the thrust needle bearing. <Ref. to 4AT-
90, ADJUSTMENT, Transfer Clutch.>
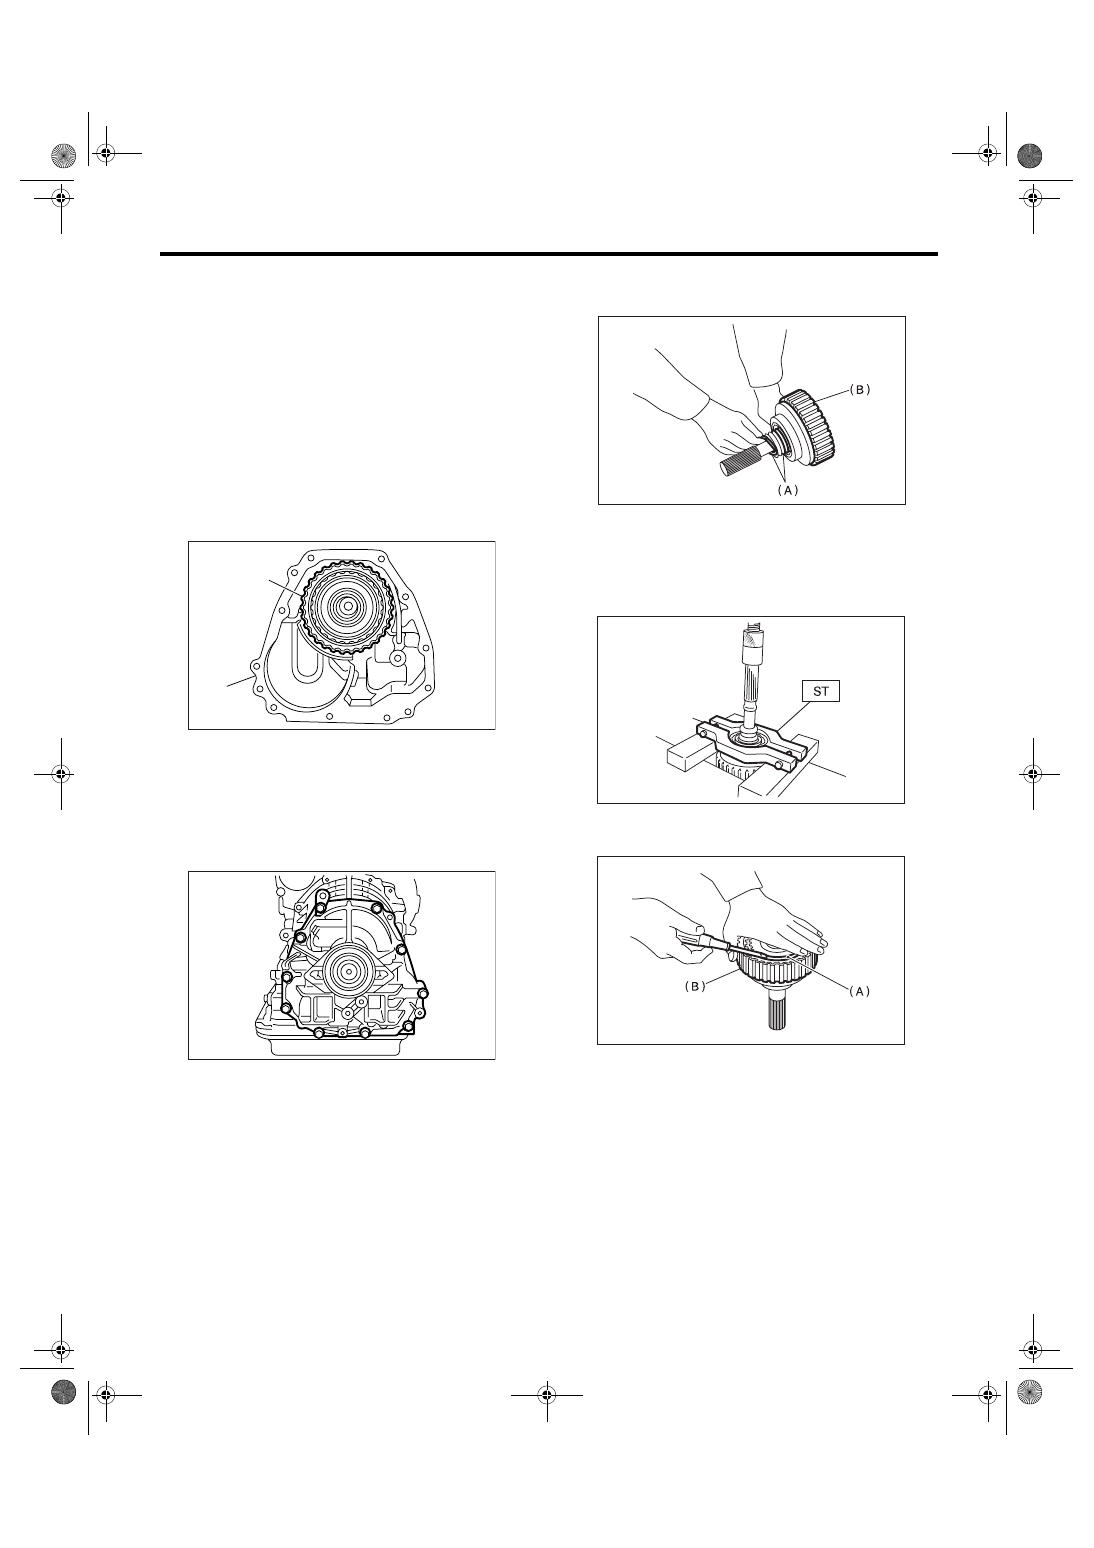
2) Install the transfer clutch assembly to case.
3) Tighten the bolts to secure the case.
Tightening torque:
25 N
⋅
m (2.5 kgf-m, 18.4 ft-lb)
4) Install the transmission assembly into vehicle.
<Ref. to 4AT-42, INSTALLATION, Automatic
Transmission Assembly.>
C: DISASSEMBLY
1) Remove the seal ring.
2) Remove the ball bearing using ST and press.
ST
498077600
REMOVER
3) Remove the snap ring, and then take out the
pressure plate, drive plate and driven plate.
(A) Transfer clutch
(B) Extension case
AT-00125
(A)
(B)
AT-00118
(A) Seal ring
(B) Transfer clutch
(A) Snap ring
(B) Transfer clutch
AT-00127
AT-00128
AT-00129
4AT-88
AUTOMATIC TRANSMISSION
Transfer Clutch
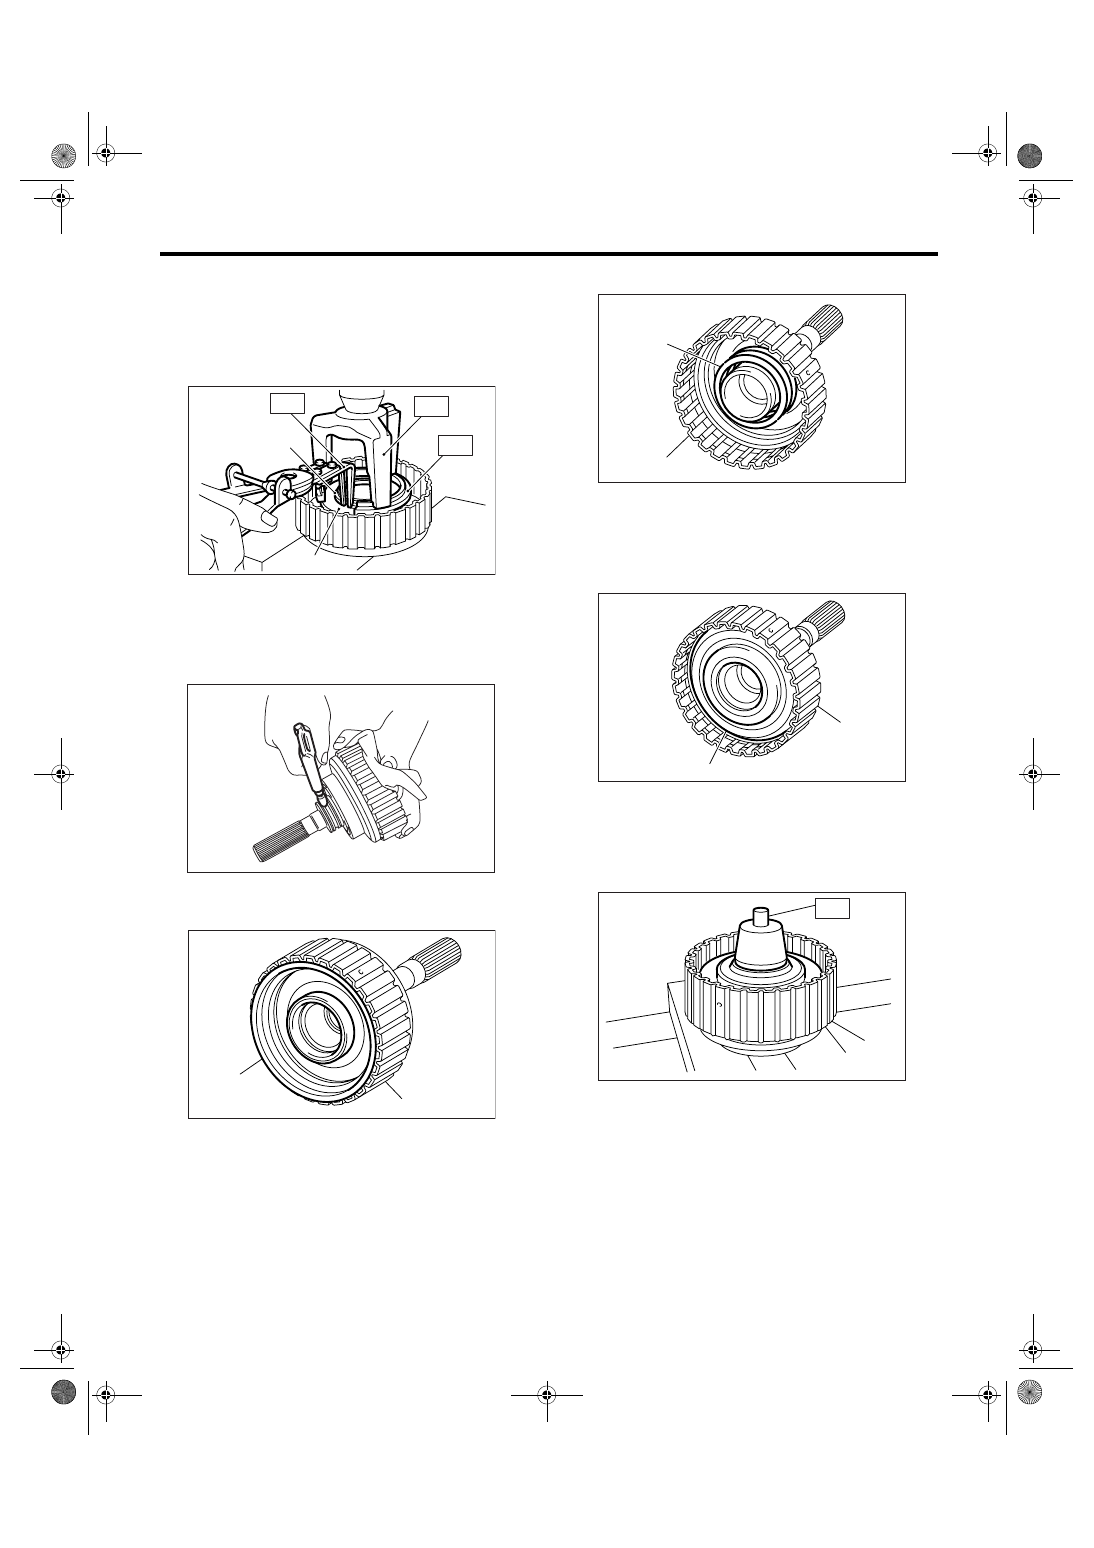
4) Using the ST1, ST2 and ST3, remove the snap
ring, and then take out the return spring and trans-
fer clutch piston seal.
ST1
399893600
PLIERS
ST2
398673600
COMPRESSOR
ST3
398623600
SEAT
5) Apply compressed air to rear drive shaft to re-
move the transfer clutch piston.
D: ASSEMBLY
1) Install the transfer clutch piston.
2) Install the return spring to transfer clutch piston.
3) Apply ATF to the lip of transfer clutch piston seal
and install it.
4) Install the ST to rear drive shaft.
ST
499257300
SNAP RING OUTER GUIDE
(A) Snap ring
(B) Transfer piston seal
(A) Transfer clutch piston
(B) Rear drive shaft
AT-00130
(B)
(A)
ST1
ST2
ST3
AT-00131
(B)
AT-00132
(A)
(A) Return spring
(B) Rear drive shaft
(A) Transfer clutch piston seal
(B) Rear drive shaft
(A) Transfer clutch
(B)
AT-00133
(A)
(B)
AT-00134
(A)
AT-00135
(A)
ST
Нет комментариевНе стесняйтесь поделиться с нами вашим ценным мнением.
Текст