Subaru Legacy III (2000-2003 year). Service manual — part 979
EI-18
EXTERIOR/INTERIOR TRIM
FRONT BUMPER
10
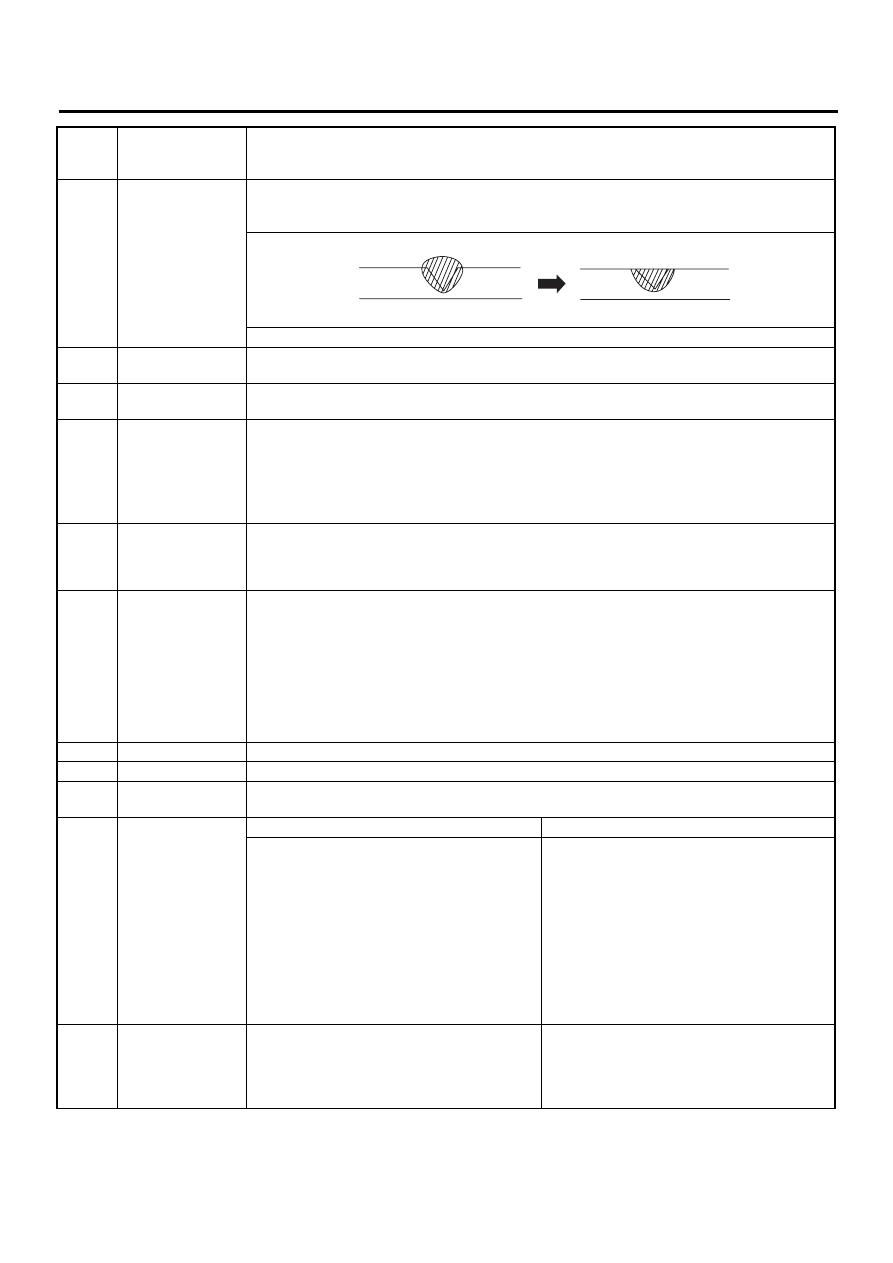
Sanding (II)
Remove excess part of weld with a putty knife. If a drill or disc wheel is used instead of the knife,
operate it at a rate lower than 1,500 rpm and grind the excess part little by little. A higher rpm will
cause the PP substrate to melt from the heat.
Sand the welded spot smooth with #240 sand paper.
11
Masking
Mask the black substrate section using masking tape.
Recommended masking tape: Nichiban No. 533 or equivalent
12
Cleaning/
degreasing
Completely clean the entire coated area, using solvent similar to that used in Process No. 4.
13
Primer coating
Apply a coat of primer to the repaired surface and its surrounding areas. Mask these areas, if nec-
essary.
Recommended primer: Mp/ 364 PP Primer
NOTE:
Be sure to apply one coat of primer at a spraying pressure of 245 to 343 kPa
(2.5 to 3.5 kg/cm
2
, 36 to 50 psi) with a spray gun.
14
Leave unattended.
Leave the repaired area unattended at 20
°
C (68
°
F) for 10 to 15 minutes until primer is half-dry.
NOTE:
If dirt or dust comes in contact with the coated area, wipe it off with a cloth dampended with alcohol.
(Do not use thinner since the coated area tends to melt.)
15
Primer surfacer
coating
Apply a coat of primer surfacer to the repaired area two or three times at an interval of 3 to 5 min-
utes.
Recommended surfacer:
• UPS 300 Flex Primer
• No. 303 UPS 300 Exclusive hardener
• NPS 725 Exclusive Reducer (thinner)
• Mixing ratio: 2 : 1 (UPS 300: No. 303)
• Viscosity: 12 — 14 sec/20
°
C (68
°
F)
• Coated film thickness: 40 — 50
µ
16
Drying
Allow the coated surface to dry for 60 minutes at 20
°
C (68
°
F) [or 30 minutes at 60
°
C (140
°
F)].
17
Sanding (III)
Sand the coated surface and its surrounding areas using #400 sand paper and water.
18
Cleaning/
degreasing
Same as Process No. 12.
19
Top coat (I)
Solid color
Metallic color
Use a “block” coating method.
• Recommended paint:
Suncryl (SC)
No. 307 Flex Hardener
SC Reducer (thinner)
• Mixing ratio: 3 : 1
Suncryl (SC) vs. No. 307 Flex Hardener
• Viscosity: 11 — 13 sec/20
°
C (68
°
F)
• Coated film thickness: 40 — 50
µ
• Spraying thickness: 245 — 343 kPa
(2.5 — 3.5 kg/cm
2
, 36 — 50 psi)
Use a “block” coating method.
• Recommended paint:
Suncryl (SC)
No. 307 Flex Hardener
SC Reducer (thinner)
• Mixing ratio: 3 : 1
Suncryl (SC) vs. No. 307 Flex Hardener
• Viscosity: 11 — 13 sec/20
°
C (68
°
F)
• Coated film thickness: 20 — 30
µ
• Spraying thickness: 245 — 343 kPa
(2.5 — 3.5 kg/cm
2
, 36 — 50 psi)
20
Leave unattended.
Not required.
Leave unattended at 20
°
C (68
°
F) for at least 10
minutes until the topcoated area is half-dry.
NOTE:
Be careful to keep dust or dirt from coming in
contact with the affected area.
Pro-
cess
No.
Process name
Job contents
EI-00042
EI-19
EXTERIOR/INTERIOR TRIM
FRONT BUMPER
21
Top coat (II)
Not required.
Apply a clear coat three times at an interval of 3
to 5 minutes.
• Recommended paint:
SC710 Overlay Clear
No. 307 Flex Hardener
SC Reducer (thinner)
• Mixing ratio: 3 : 1
Suncryl (SC) vs. No. 307 Flex Hardener
• Viscosity: 10 — 13 sec/20
°
C (68
°
F)
• Coated film thickness: 20 — 30
µ
• Spraying pressure: 245 — 343 kPa
(2.5 — 3.5 kg/cm
2
, 36 — 50 psi)
22
Drying
Allow the coated surface to dry at 20
°
C (68
°
F) for two hours or 60
°
C (140
°
F) for 30 minutes.
NOTE:
Do not allow the temperature to exceed 80
°
C (176
°
F) since this will deform the PP substrate.
23
Inspection
Carefully check the condition of the repaired area.
24
Masking removal
Remove masking tape applied in Process No. 11 and 13.
25
Parts installation
Install parts on bumper in reverse order of removal.
26
Bumper installation
Install bumper.
Pro-
cess
No.
Process name
Job contents
EI-20
EXTERIOR/INTERIOR TRIM
REAR BUMPER
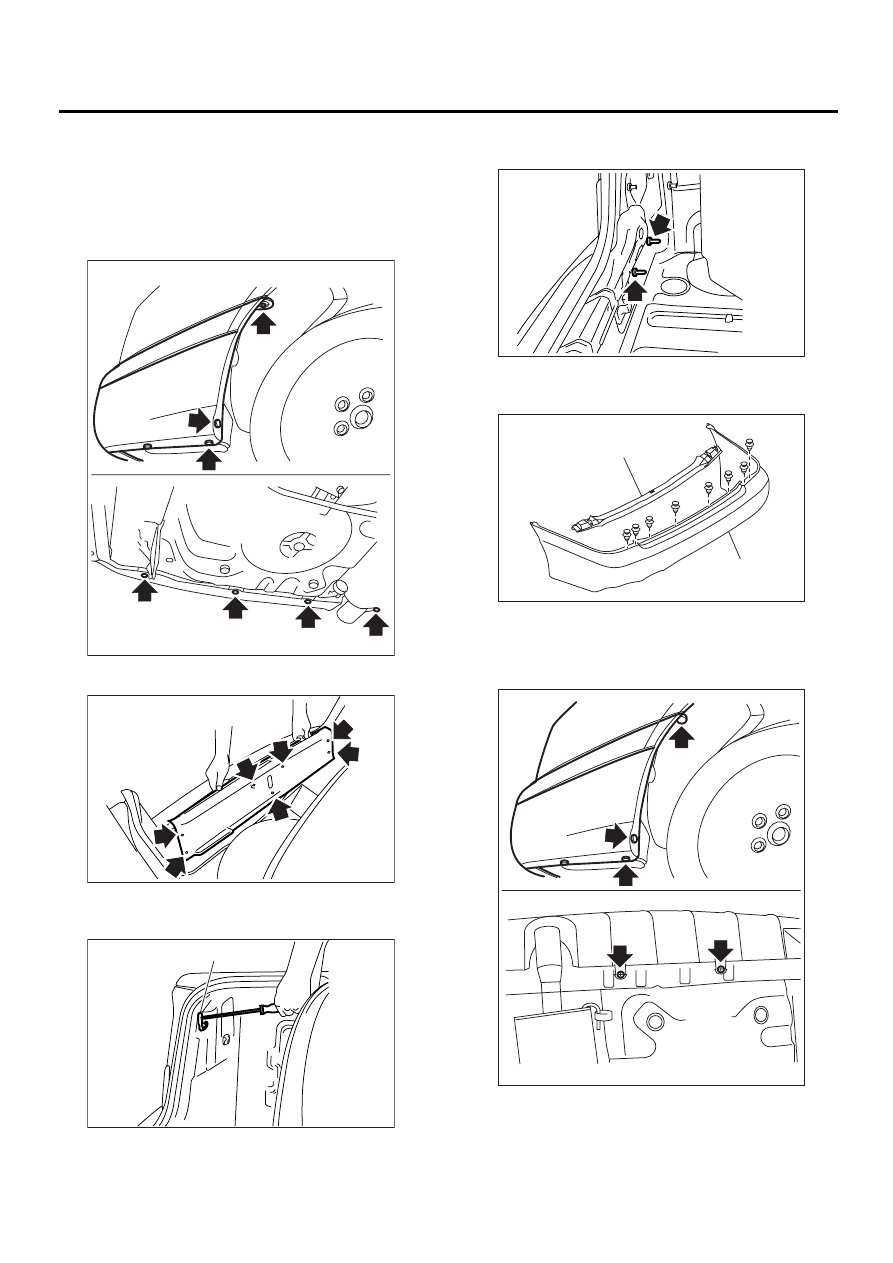
5. Rear Bumper
A: REMOVAL
1. SEDAN
1) Lift-up the vehicle.
2) Remove bolts and clips.
3) Loosen clips to remove trunk rear trim.
4) Remove hook (A) to pull off rear side of trunk
side trim.
5) Remove two nuts from each side to remove rear
bumper.
6) Loosen clips to remove upper beam (A) from
bumper face.
2. WAGON
1) Lift-up the vehicle.
2) Remove bolts and clips.
3) Remove rear floor box. <Ref. to EI-40, Remov-
al.>
EI-00137
EI-00138
EI-00139
( A )
EI-00140
EI-00141
( A )
( B )
EI-00143
EI-21
EXTERIOR/INTERIOR TRIM
REAR BUMPER
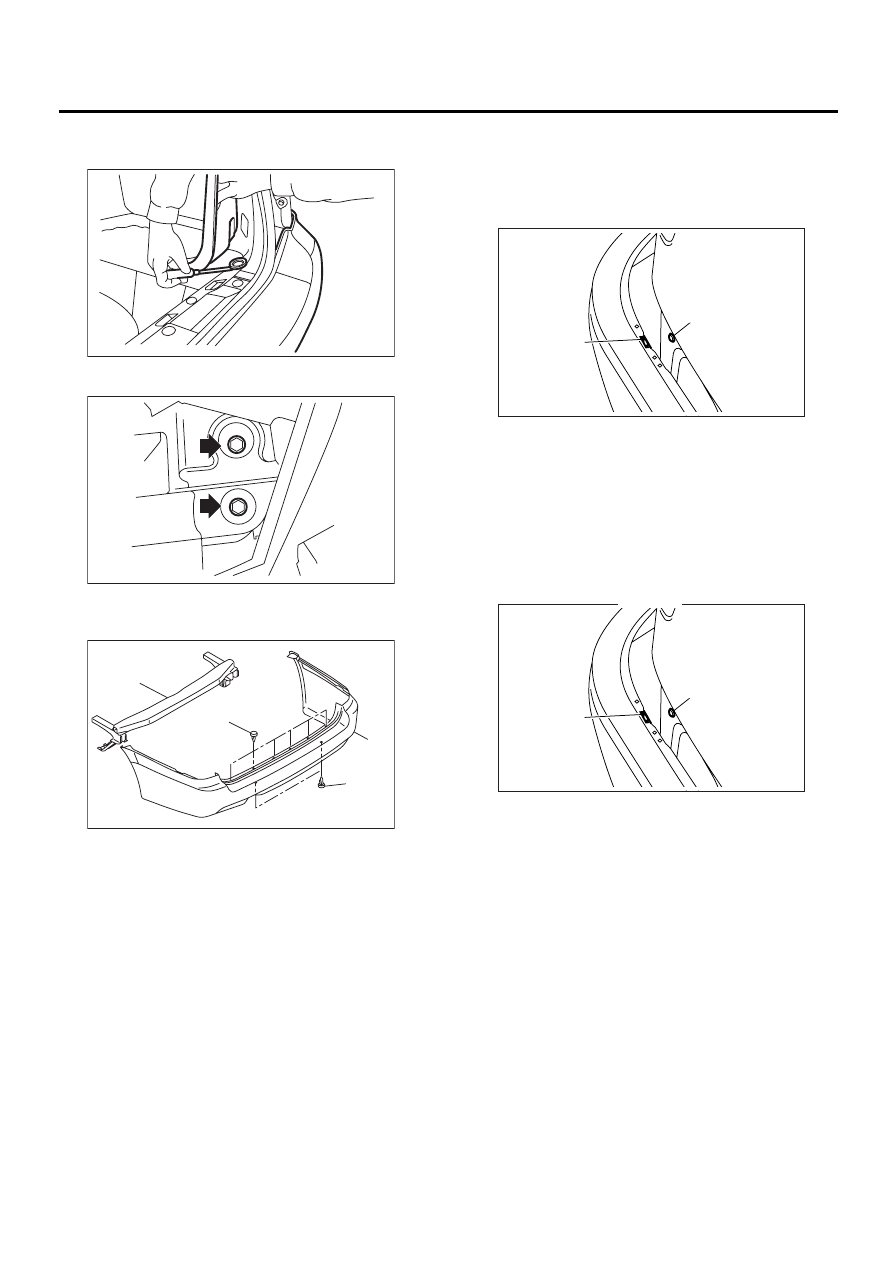
4) Pull off rear end of rear quarter lower trim to re-
move cap.
5) Loosen bolts to remove rear bumper.
6) Loosen clip (A) to remove bumper beam (B)
from rear bumper face (C).
B: INSTALLATION
1. SEDAN
1) Install in the reverse order of removal.
2) Fit slider (A) to guide pin (B) securely.
Tightening torque:
Refer to COMPONENT in General Descrip-
tion. <Ref. to EI-3, REAR BUMPER (SE-
DAN), COMPONENT, General
Description.>
2. WAGON
1) Install in the reverse order of removal.
2) Fit slider (A) to guide pin (B) securely.
Tightening torque:
Refer to COMPONENT in General Descrip-
tion. <Ref. to EI-4, REAR BUMPER (WAG-
ON), COMPONENT, General Description.>
C: REPAIR
Refer to front bumper repair. <Ref. to EI-14, RE-
MOVAL, Front Bumper.>
EI-00144
EI-00145
EI-00295
( A )
( A )
( B )
( C )
EI-00148
( A )
( B )
EI-00148
( A )
( B )
Нет комментариевНе стесняйтесь поделиться с нами вашим ценным мнением.
Текст