Subaru Legacy III (2000-2003 year). Service manual — part 34
FU(H4SO)-38
FUEL INJECTION (FUEL SYSTEMS)
FUEL INJECTOR
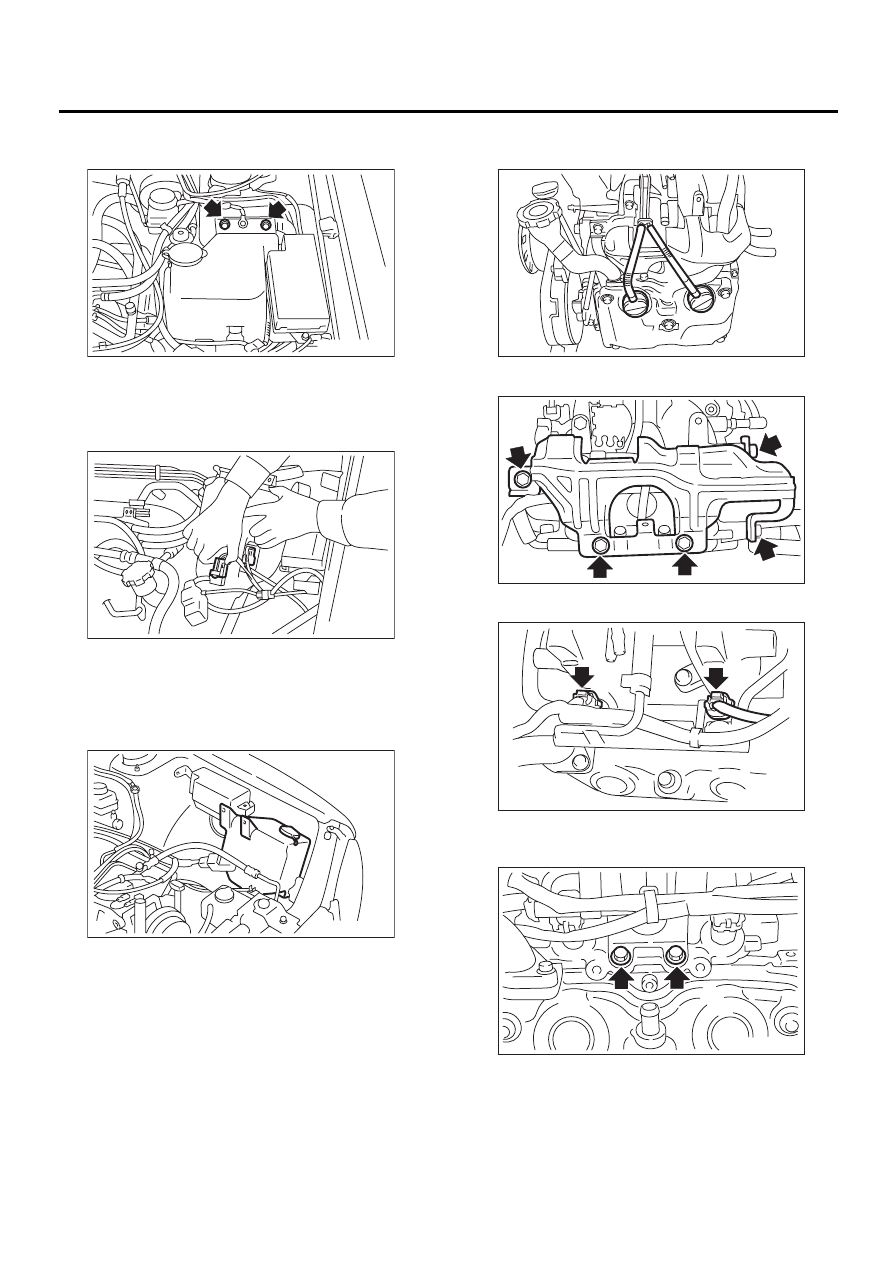
4) Remove the two bolts which install the washer
tank on the body.
5) Disconnect the connector from the front window
washer motor.
6) Disconnect the connector from the rear gate
glass washer motor.
7) Disconnect the rear window glass washer hose
from the washer motor, then plug the connection
with a suitable cap.
8) Move the washer tank, and secure it away from
the working area.
9) Remove the spark plug cords from the spark
plugs (#2 and #4 cylinders).
10) Remove the fuel pipe protector LH.
11) Disconnect the connector from the fuel injector.
12) Remove the bolt which holds the injector pipe
to the intake manifold.
FU-00190
FU-00191
FU-00192
FU-00307
FU-00266
FU-00308
FU-00309
FU(H4SO)-39
FUEL INJECTION (FUEL SYSTEMS)
FUEL INJECTOR
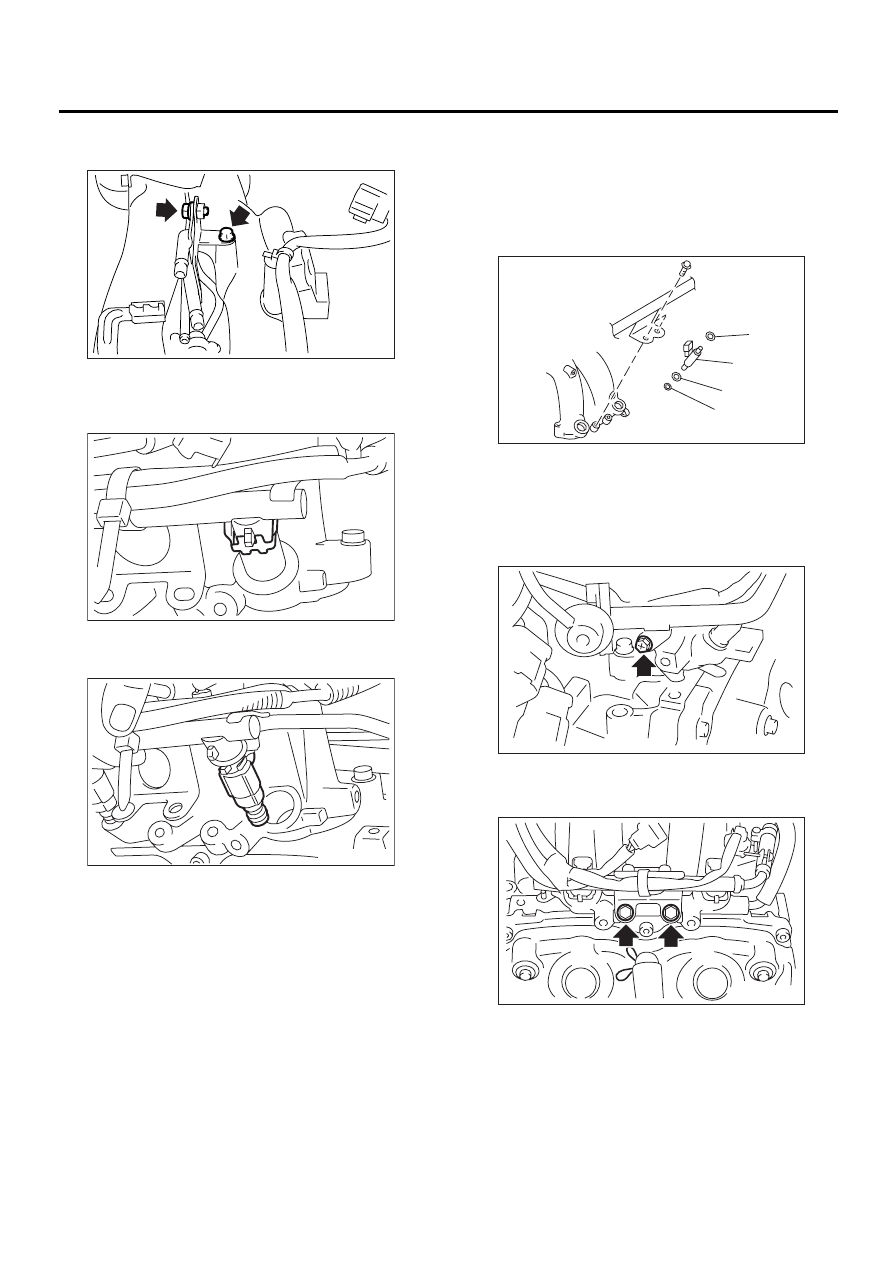
13) Remove the bolt which holds the fuel pipe on
the left side intake manifold.
14) Remove the fuel injector from the intake mani-
fold.
(1) Remove the fuel injector securing clip.
(2) Remove the fuel injector while lifting up the
fuel injector pipe
B: INSTALLATION
1. RH SIDE
Install in the reverse order of removal.
NOTE:
Replace O-rings with new ones.
Tightening torque:
5.0 N·m (0.51 kgf-m, 3.7 ft-lb)
Tightening torque:
19 N·m (1.9 kgf-m, 13.7 ft-lb)
FU-00170
FU-00312
FU-00313
(A) O-ring
(B) Fuel injector
FU-00282
( A )
( A )
( A )
( B )
FU-00314
FU-00284
FU(H4SO)-40
FUEL INJECTION (FUEL SYSTEMS)
FUEL INJECTOR
Tightening torque:
19 N·m (1.9 kgf-m, 13.7 ft-lb)
Tightening torque:
33 N·m (3.4 kgf-m, 24.3 ft-lb)
2. LH SIDE
Install in the reverse order of removal.
CAUTION:
Replace O-rings with new ones.
Tightening torque:
5.0 N·m (0.51 kgf-m, 3.7 ft-lb)
Tightening torque:
19 N·m (1.94 kgf-m, 13.7 ft-lb)
Tightening torque:
19 N·m (1.94 kgf-m, 13.7 ft-lb)
(A) O-ring
(B) Fuel injector
FU-00267
FU-00261
FU-00282
( A )
( A )
( A )
( B )
FU-00170
FU-00309
FU-00266
FU(H4SO)-41
FUEL INJECTION (FUEL SYSTEMS)
FRONT OXYGEN (A/F) SENSOR
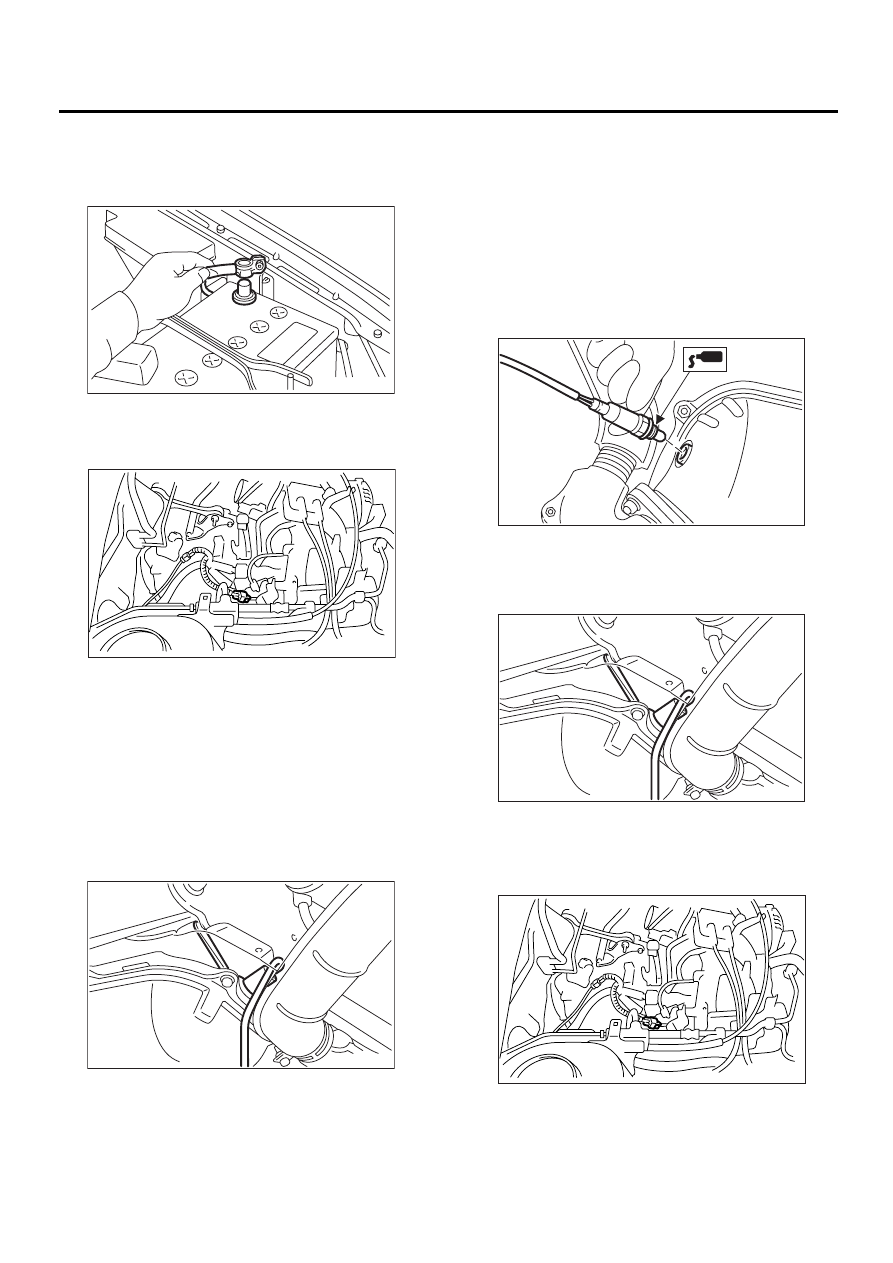
14.Front Oxygen (A/F) Sensor
A: REMOVAL
1) Disconnect the ground cable from battery.
2) Disconnect the connector from engine hanger,
and then disconnect the connector from front oxy-
gen (A/F) sensor.
3) Lift-up the vehicle.
4) Apply SUBARU CRC or its equivalent to the
threaded portion of front oxygen (A/F) sensor, and
leave it for one minute or more.
SUBARU CRC (Part No. 004301003)
5) Remove the front oxygen (A/F) sensor.
CAUTION:
When removing the oxygen (A/F) sensor, wait
until exhaust pipe cools, otherwise it will dam-
age exhaust pipe.
B: INSTALLATION
1) Before installing front oxygen (A/F) sensor, ap-
ply the anti-seize compound only to the threaded
portion of front oxygen (A/F) sensor to make the
next removal easier.
Anti-seize compound:
SS-30 by JET LUBE
CAUTION:
Never apply anti-seize compound to protector
of front oxygen (A/F) sensor.
2) Install the front oxygen (A/F) sensor.
Tightening torque:
21 N·m (2.1 kgf-m, 15.2 ft-lb)
3) Lower the vehicle.
4) Connect the connector to front oxygen (A/F)
sensor, and then connect the connector to engine
hanger.
FU-00009
EX-00029
FU-00195
FU-00196
FU-00195
EX-00029
Нет комментариевНе стесняйтесь поделиться с нами вашим ценным мнением.
Текст