Subaru Legacy III (2000-2003 year). Service manual — part 546
AT-78
AUTOMATIC TRANSMISSION
ATF COOLER PIPE AND HOSE
21.ATF Cooler Pipe and Hose
A: REMOVAL
1. EXCEPT 3.0 L MODEL
1) Set the vehicle on a lift.
2) Remove battery and washer tank.
3) Lift-up the vehicle.
4) Remove the under cover.
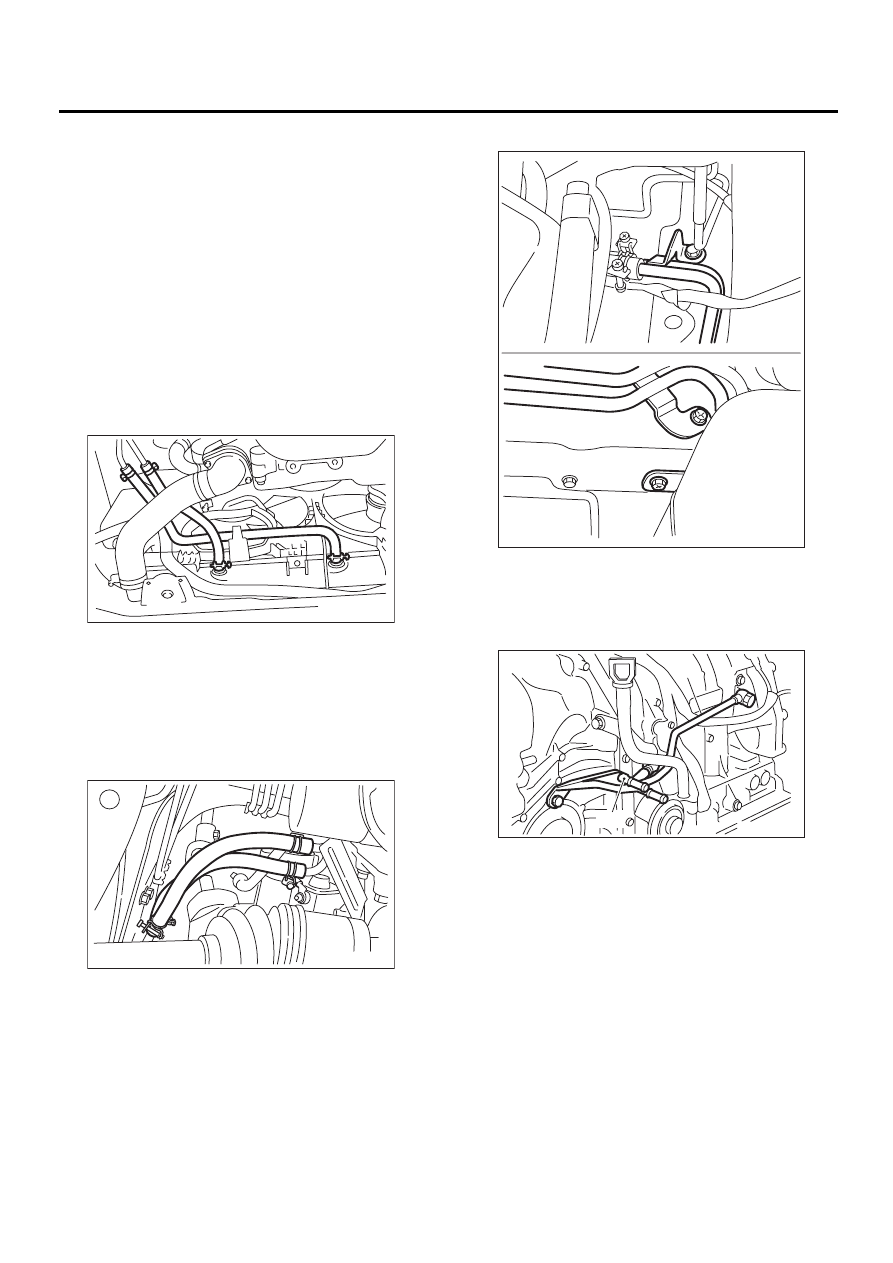
5) Disconnect ATF cooler hose from radiator.
NOTE:
• Do not remove with a screwdriver or other point-
ed tools.
• When the hose is difficult to remove, wrap a shop
cloth around the hose to protect it. Turn it with pli-
ers, and then pull directly out with your hand.
6) Disconnect ATF cooler hoses from pipes.
NOTE:
• Do not remove with a screwdriver or other point-
ed tools.
• When the hose is difficult to remove, wrap a shop
cloth around the hose to protect it. Turn it with pli-
ers, and then pull directly out with your hand.
7) Remove ATF cooler pipe from frame.
8) Remove the oil cooler inlet and outlet pipes.
NOTE:
When removing outlet pipe, be careful not to lose
ball and spring used with retaining screw.
AT-00703
AT-00683
(A) Inlet pipe
(B) Outlet pipe
AT-00704
AT-00806
( A )
( B )
AT-79
AUTOMATIC TRANSMISSION
ATF COOLER PIPE AND HOSE
2. 3.0 L MODEL
1) Set the vehicle on a lift.
2) Remove battery and washer tank.
3) Lift-up the vehicle.
4) Remove the under cover.
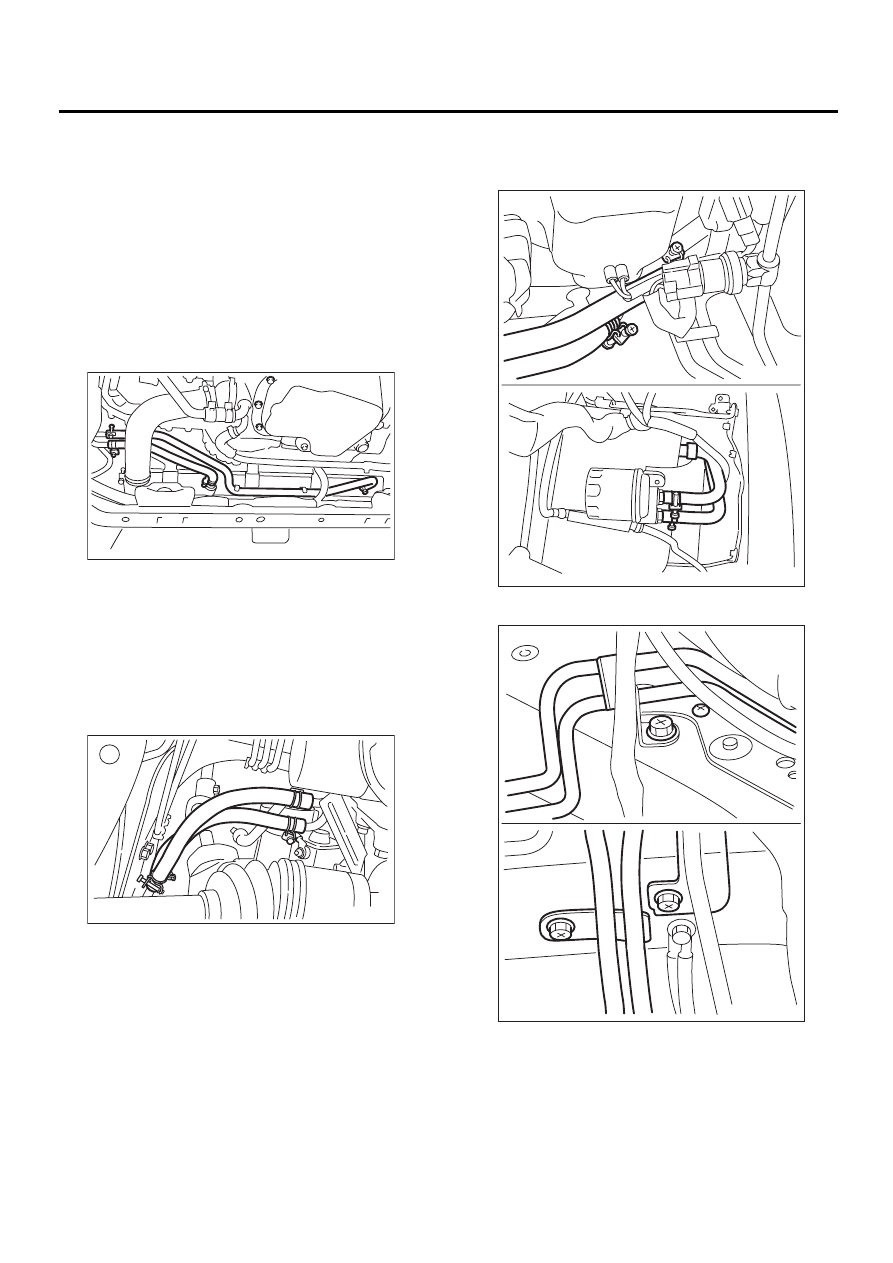
5) Disconnect ATF cooler hose from radiator.
NOTE:
• Do not remove with a screwdriver or other point-
ed tools.
• When the hose is difficult to remove, wrap a shop
cloth around the hose to protect it. Turn it with pli-
ers, and then pull directly out with your hand.
6) Disconnect ATF cooler hoses from transmis-
sion.
NOTE:
• Do not remove with a screwdriver or other point-
ed tools.
• When the hose is difficult to remove, wrap a shop
cloth around the hose to protect it. Turn it with pli-
ers, and then pull directly out with your hand.
7) Remove front left mud guard.
<Ref. to EI-22, REMOVAL, Mud Guard.>
8) Disconnect ATF cooler hoses from ATF filter.
NOTE:
• Do not remove with a screwdriver or other point-
ed tools.
• When the hose is difficult to remove, wrap a shop
cloth around the hose to protect it. Turn it with pli-
ers, and then pull directly out with your hand.
9) Remove AT cooler pipe from frame.
AT-00705
AT-00683
AT-00706
AT-00707
AT-80
AUTOMATIC TRANSMISSION
ATF COOLER PIPE AND HOSE
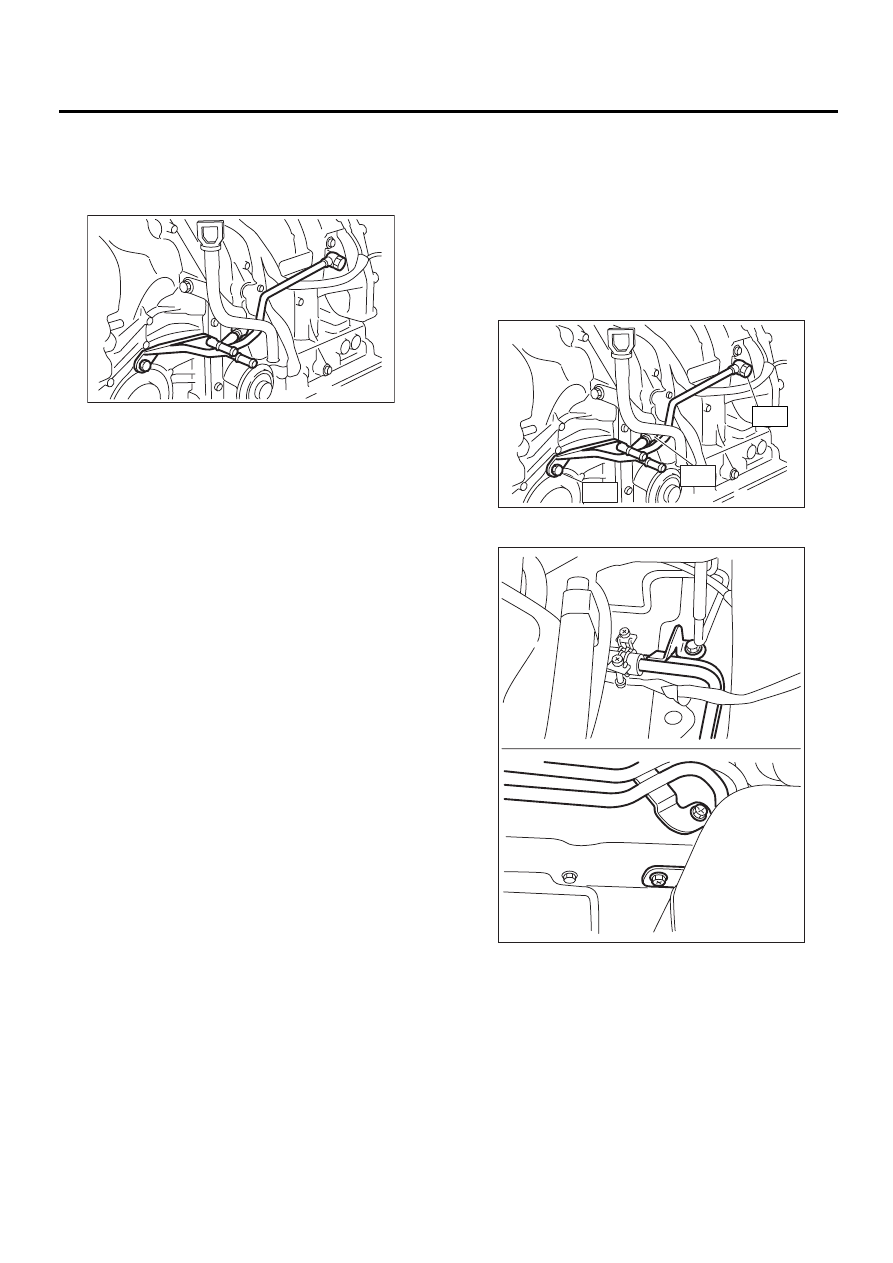
10) Remove the oil cooler inlet and outlet pipes.
NOTE:
When removing outlet pipe, be careful not to lose
ball and spring used with retaining screw.
B: INSTALLATION
1. EXCEPT 3.0 L MODEL
1) Install the oil cooler outlet and inlet pipes.
NOTE:
Be sure to use a new aluminum washer.
Tightening torque:
T1: 44 N·m (4.5 kgf-m, 32.5 ft-lb)
T2: 25 N·m (2.5 kgf-m, 18.1 ft-lb)
2) Install ATF cooler pipe to frame.
AT-00807
AT-00805
T1
T1
T2
AT-00704
AT-81
AUTOMATIC TRANSMISSION
ATF COOLER PIPE AND HOSE
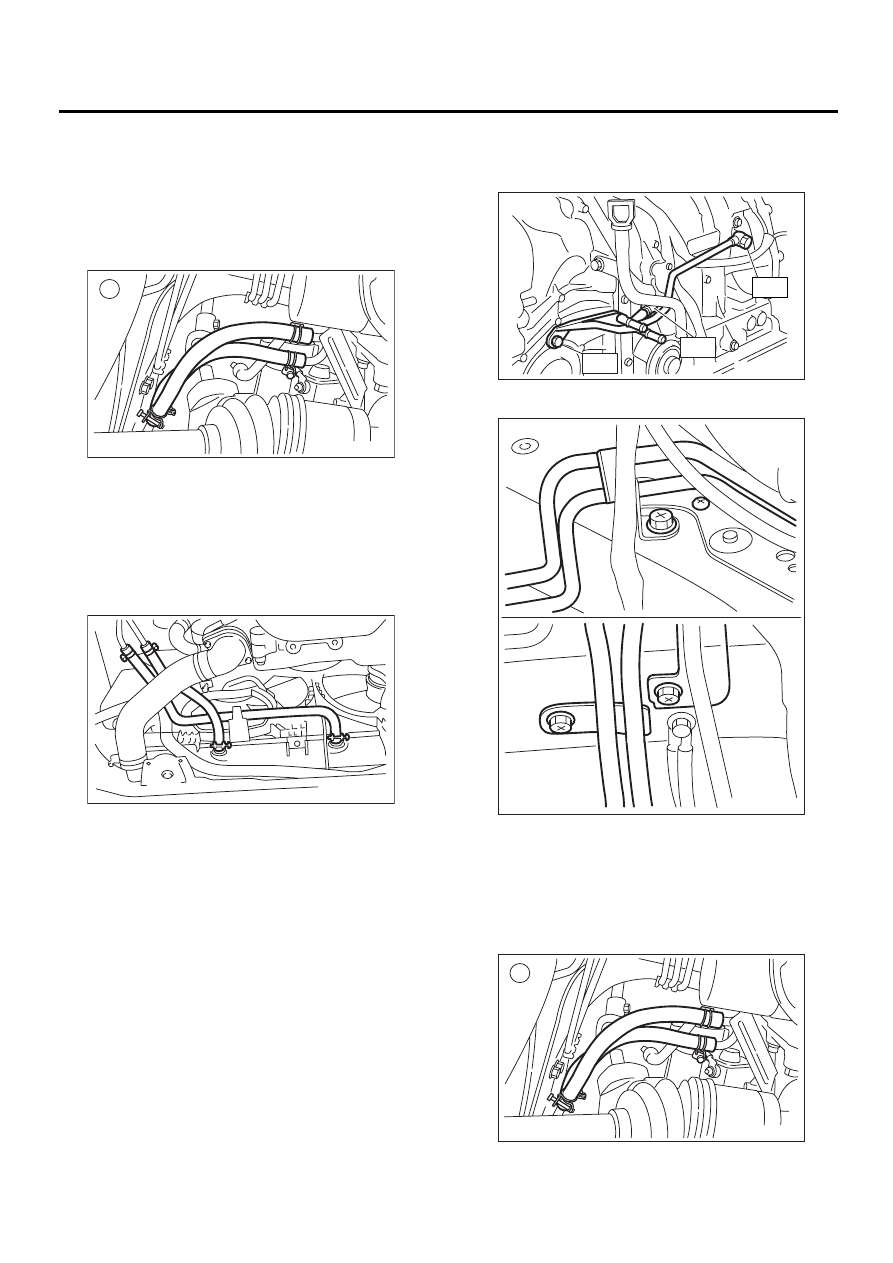
3) Connect ATF cooler hose to pipe transmission
side.
NOTE:
• Install so that the hose is not folded over, exces-
sively bent, or twisted.
• Be careful to insert the hose to the specified po-
sition.
4) Connect ATF cooler hose to pipe of radiator
side.
NOTE:
• Install so that the hose is not folded over, exces-
sively bent, or twisted.
• Be careful to insert the hose to the specified po-
sition.
5) Install the under cover.
6) Install battery and washer tank.
7) Fill ATF. <Ref. to AT-30, Automatic Transmis-
sion Fluid.>
NOTE:
Make sure there are no ATF leaks in joints between
the transmission, radiator, pipes, and hoses.
2. 3.0 L MODEL
1) Install the oil cooler outlet and inlet pipes.
NOTE:
Be sure to use a new aluminum washer.
Tightening torque:
T1: 44 N·m (4.5 kgf-m, 32.5 ft-lb)
T2: 25 N·m (2.5 kgf-m, 18.1 ft-lb)
2) Install ATF cooler pipe to frame.
3) Connect ATF cooler hose to transmission.
NOTE:
• Install so that the hose is not folded over, exces-
sively bent, or twisted.
• Be careful to insert the hose to the specified po-
sition.
AT-00683
AT-00703
AT-00805
T1
T1
T2
AT-00707
AT-00683
Нет комментариевНе стесняйтесь поделиться с нами вашим ценным мнением.
Текст