Subaru Legacy III (2000-2003 year). Service manual — part 85
LU(H4SO)-14
LUBRICATION
OIL PAN AND STRAINER
5. Oil Pan and Strainer
A: REMOVAL
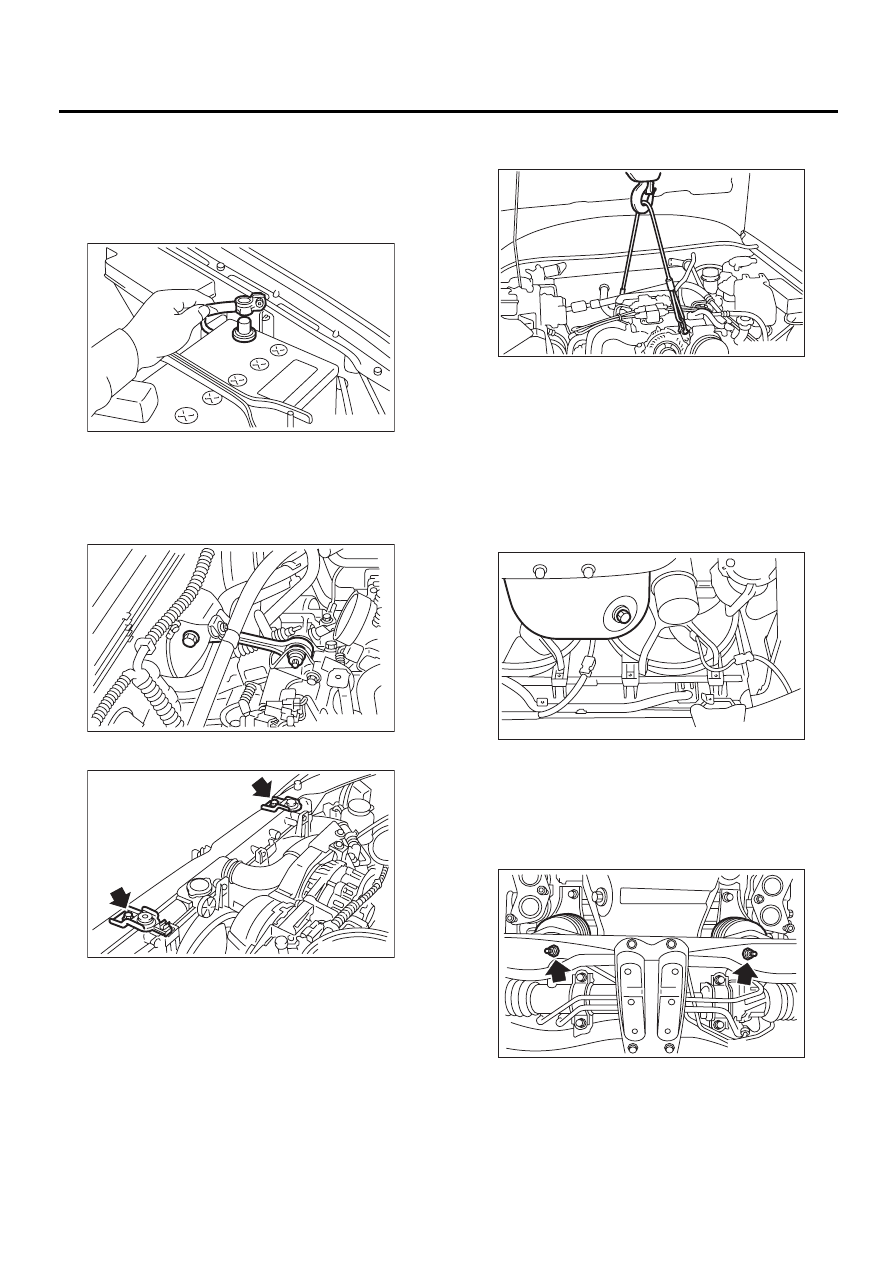
1) Set the vehicle on lift arms.
2) Remove front wheels.
3) Disconnect battery ground cable.
4) Remove air intake duct and air cleaner case.
<Ref. to IN(H4SO)-7, REMOVAL, Air Intake Duct.>
and <Ref. to IN(H4SO)-6, REMOVAL, Air Cleaner
Case.>
5) Remove pitching stopper.
6) Remove radiator upper brackets.
7) Support engine with a lifting device and wire
ropes.
8) Lift-up the vehicle.
CAUTION:
When lifting up the vehicle, wire rope must be
raised at the same time.
9) Remove under cover. <Ref. to EI-13, REMOV-
AL, Front Under Cover.>
10) Drain engine oil.
Set container under the vehicle, and remove drain
plug from oil pan.
11) Remove front and center exhaust pipes. <Ref.
to EX(H4SO)-5, REMOVAL, Front Exhaust Pipe.>
or <Ref. to EX(H4SOw/oOBD)-9, REMOVAL, Front
Exhaust Pipe.>
12) Remove nuts which secure front cushion rub-
ber onto front crossmember.
13) Remove bolts which secure oil pan on cylinder
block while raising up engine.
FU-00009
ME-00213
LU-00097
LU-00028
LU-00098
LU-00030
LU(H4SO)-15
LUBRICATION
OIL PAN AND STRAINER
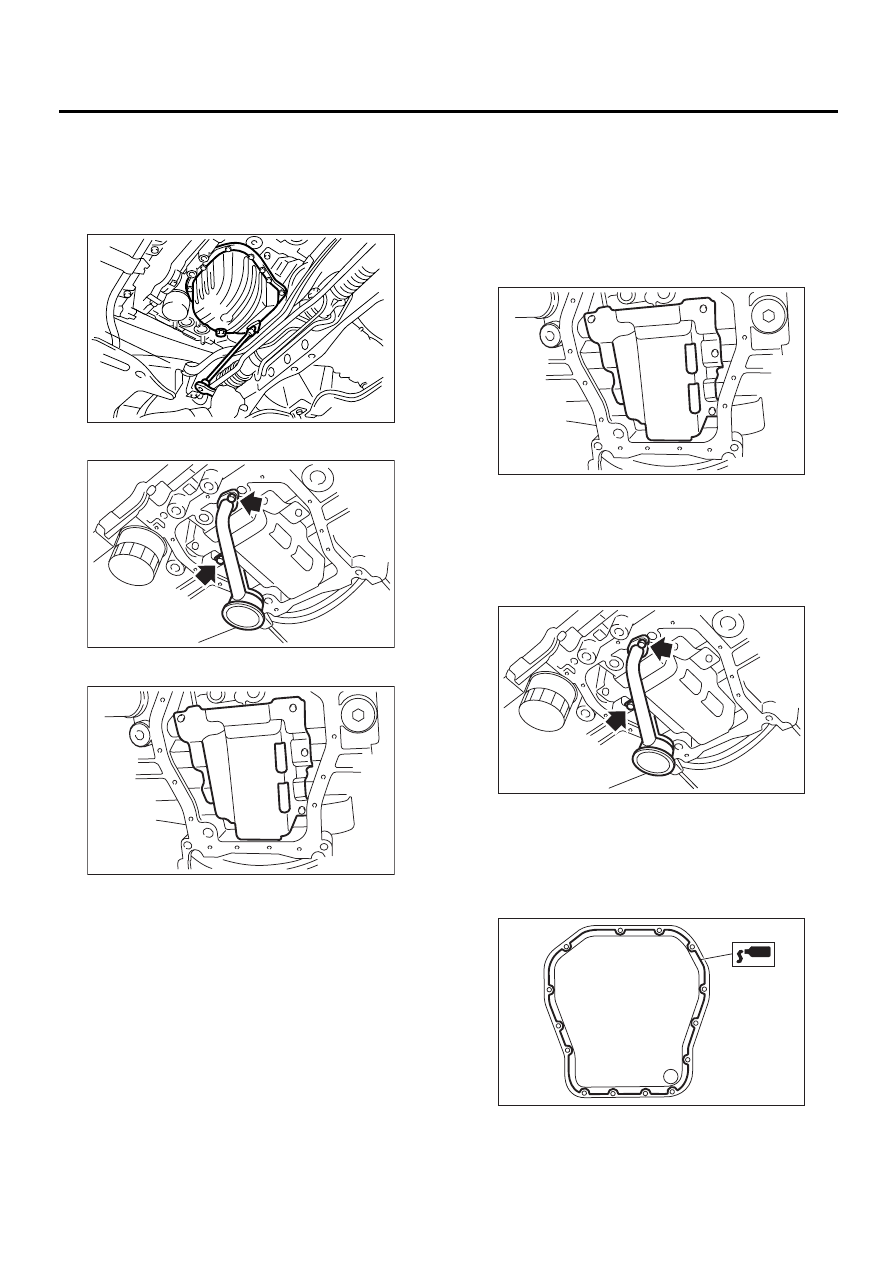
14) Insert oil pan cutter blade between cylinder
block-to-oil pan clearance.
CAUTION:
Do not use a screwdriver or similar tool in place
of oil pan cutter.
15) Remove oil strainer.
16) Remove baffle plate.
B: INSTALLATION
CAUTION:
Before installing oil pan, clean sealant from oil
pan and engine block.
1) Install baffle plate.
Tightening torque:
6.4 N·m (0.65 kgf-m, 4.7 ft-lb)
2) Install oil strainer onto baffle plate.
CAUTION:
Replace O-ring with a new one.
Tightening torque:
10 N·m (1.0 kgf-m, 7 ft-lb)
3) Apply fluid gasket to mating surfaces and install
oil pan.
Fluid gasket:
Part No. 004403007
THREE BOND 1215 or equivalent
LU-00051
LU-00032
LU-00033
LU-00033
LU-00032
LU-00034
LU(H4SO)-16
LUBRICATION
OIL PAN AND STRAINER
Tightening torque:
5 N·m (0.5 kgf-m, 3.6 ft-lb)
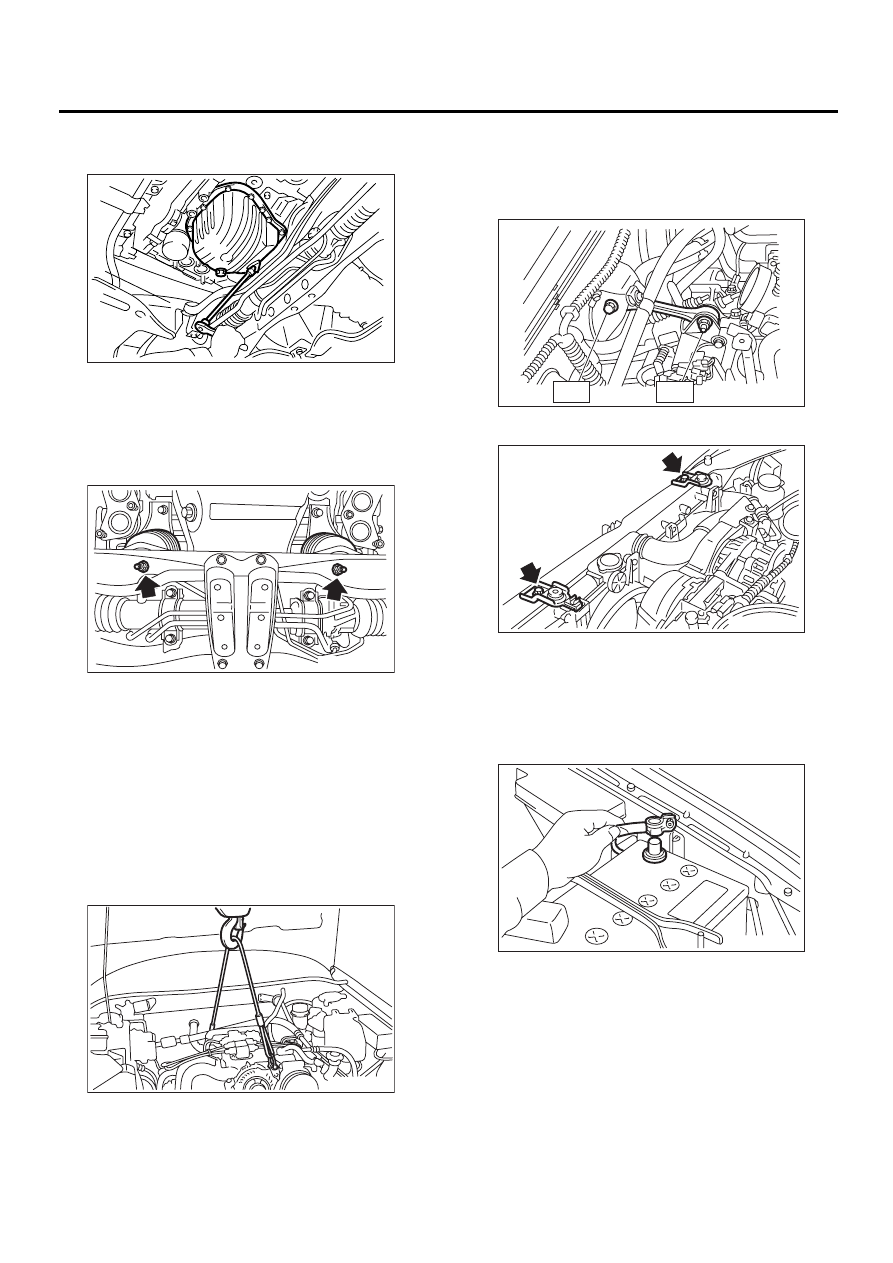
4) Lower engine onto front crossmember.
5) Tighten nuts which secure front cushion rubber
onto front crossmember.
Tightening torque:
69 N·m (7.0 kgf-m, 51 ft-lb)
6) Install front and center exhaust pipes.
<Ref. to EX(H4SO)-6, INSTALLATION, Front Ex-
haust Pipe.> or <Ref. to EX(H4SOw/oOBD)-10, IN-
STALLATION, Front Exhaust Pipe.>
7) Install under cover. <Ref. to EI-13, INSTALLA-
TION, Front Under Cover.>
8) Lower the vehicle.
CAUTION:
When lowering vehicle, wire rope must be re-
leased at the same time.
9) Remove lifting device and steel cables.
10) Install pitching stopper.
Tightening torque:
T1: 50 N·m (5.1 kgf-m, 37 ft-lb)
T2: 58 N·m (5.9 kgf-m, 43 ft-lb)
11) Install radiator upper brackets.
12) Install air intake duct and air cleaner case.
<Ref. to IN(H4SO)-7, INSTALLATION, Air Intake
Duct.> and <Ref. to IN(H4SO)-6, INSTALLATION,
Air Cleaner Case.>
13) Install front wheels.
14) Connect battery ground cable.
15) Fill engine oil. <Ref. to LU(H4SO)-8, INSPEC-
TION, Engine Oil.>
C: INSPECTION
By visual check make sure oil pan, oil strainer, oil
strainer stay and baffle plate are not damaged.
LU-00051
LU-00030
LU-00028
ME-00218
T2
T1
LU-00097
FU-00009
LU(H4SO)-17
LUBRICATION
OIL PRESSURE SWITCH
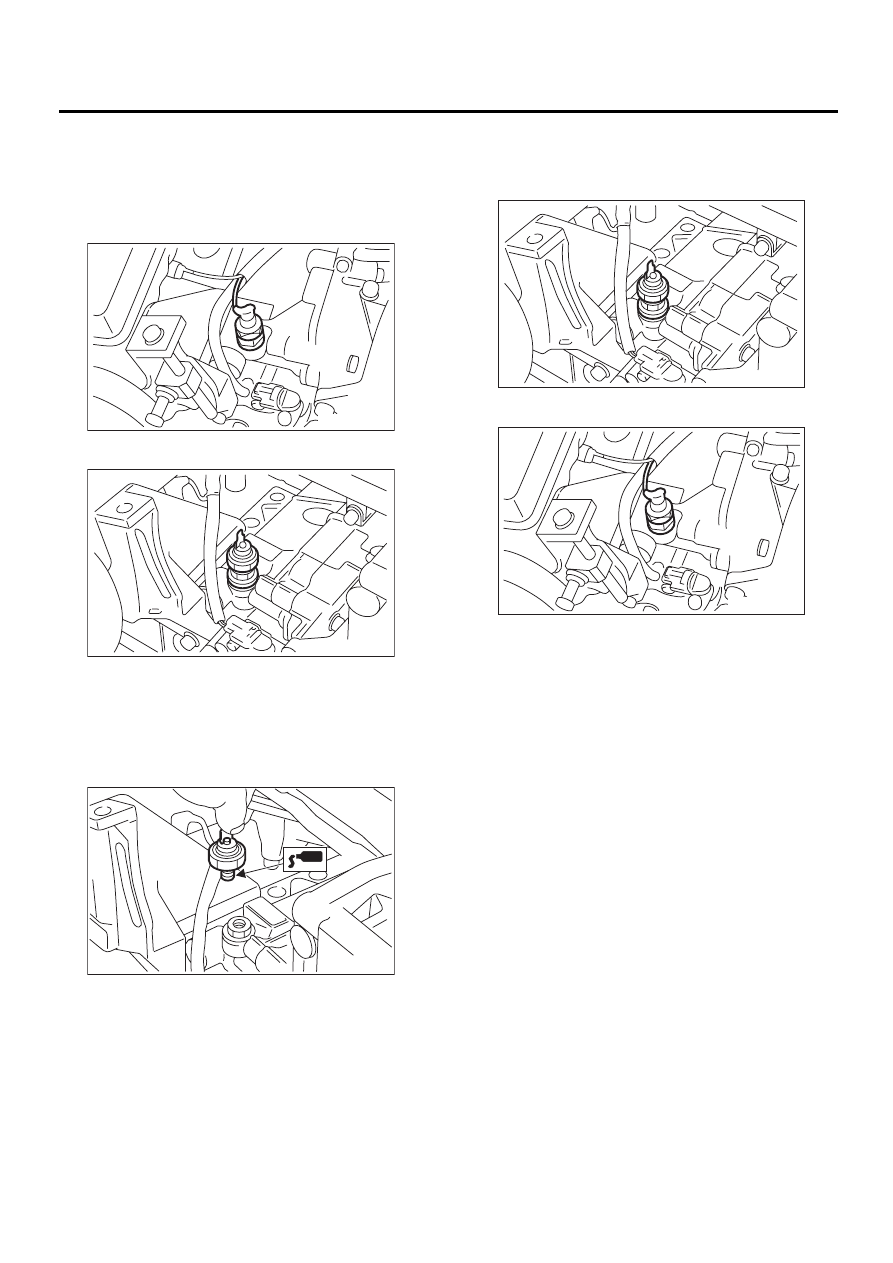
6. Oil Pressure Switch
A: REMOVAL
1) Remove generator from bracket. <Ref. to
SC(H4SO)-14, REMOVAL, Generator.>
2) Disconnect terminal from oil pressure switch.
3) Remove oil pressure switch.
B: INSTALLATION
1) Apply fluid gasket to oil pressure switch threads.
Fluid gasket:
Part No. 004403042
THREE BOND 1324 or equivalent
2) Install oil pressure switch onto engine block.
Tightening torque:
25 N·m (2.5 kgf-m, 18.1 ft-lb)
3) Connect terminal of oil pressure switch.
4) Install generator on bracket. <Ref. to
SC(H4SO)-14, INSTALLATION, Generator.>
C: INSPECTION
Make sure oil does not leak or seep from where the
oil pressure switch is installed.
LU-00036
LU-00037
LU-00038
LU-00037
LU-00036
Нет комментариевНе стесняйтесь поделиться с нами вашим ценным мнением.
Текст